
Related Manuals for microSHIFT ADVENT 1 Series

Summary of Contents for microSHIFT ADVENT 1 Series
- Page 1 ADVENT 1x Rear Derailleur Installation RD001-005 © 2019 microSHIFT | AD-II Engineering Inc. www.microSHIFT.com...
- Page 2 REMINDER Before installing the products, please read and understand the installation procedures. Improper installation can lead to premature product failures or even injuries. If you have any questions on how to install, please contact us or consult with a professional bicycle mechanic.
- Page 3 1. Torque wrench 2. 4mm & 5mm Hex bits 3. Screwdriver 4. Chain breaker 5. Cable cutter 6. Tape measurer...
- Page 4 Part I Attach rear derailleur to the bike. Make sure the B-tension washer above the derailleur dropout and engages correctly with the B-tension adjustment screw.
- Page 5 Part II Tighten the rear derailleur fixing bolt to 8-10 Nm with a 5mm hex bit torque wrench. Check to make sure that the derailleur can rotate freely. 8-10 Nm...
- Page 6 Using a screwdriver, adjust the high-limit screw until the guide pulley aligns with the outer edge of the smallest cog.
- Page 7 Part I Every frame manufacturer has different cable routing guidelines, so make sure you consult those before cutting the housing. ADVENT works best when there is not too much of a curve in the housing, and not too little slack either.
- Page 8 Part II...
- Page 9 Part I Before installing the cable, use the index trigger lever to shift to the highest gear.
- Page 10 Part II Route the cable through the shifter, housing, and rear derailleur.
- Page 11 Part III the cable Route underneath the cable fixing bolt and washer. Make sure the cable is resting in the groove under the washer. Tighten to 5-7 Nm.
- Page 12 Part IV cable end. Cut the cable and attach the...
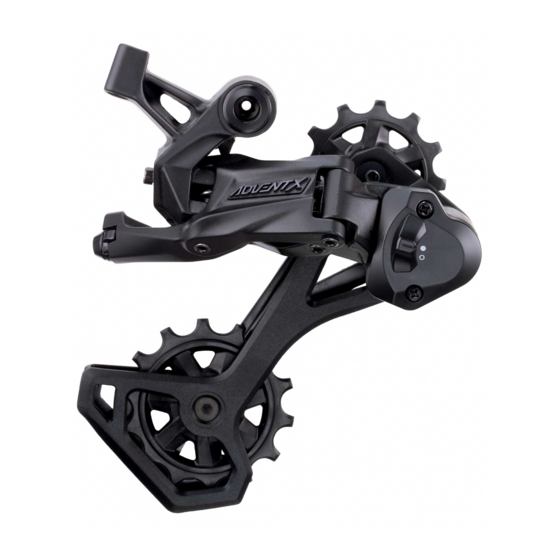
- Page 13 Clutch Rear Derailleur Only Disable the clutch by moving the switch on the side of the derailleur to the open circle position...
- Page 14 Part I Full Suspension Bike Only To properly size the chain on a full suspension bike, release air from the rear shock or remove the shock completely.
- Page 15 Part II Full Suspension Bike Only Move the rear axle up and down as you measure the distance between bottom bracket the rear axle. Find the position where they are furthest apart and perform the next step at this position.
- Page 16 Part III Wrap the chain around the chainring and the largest cassette cog without routing through the rear derailleur. From the spot where the chain first overlaps, add two full inner links of length and cut the chain there. For chains WITH quick connectors OVERLAP...
- Page 17 Part IV For chains without a quick connector: From the chain first overlaps, add two full inner links one empty outer plate cut the chain there. For chains WITHOUT quick connectors OVERLAP...
- Page 18 Part V Cut the chain using a chain breaker.
- Page 19 the chain behind Route over the smallest cog, in front of the guide pulley, the derailment prevention plate, and behind the tension pulley. Wrap the chain around the chainring and connect the chain according to the chain manufacturer’s instruction manual.
- Page 20 Part I Clutch Rear Derailleur Only Before adjusting the shifting, enable the clutch by moving the switch on the side of the derailleur to the closed circle position.
- Page 21 Part II Shift from the smallest cog to the 2nd smallest cog by pressing the lower thumb trigger lever on the shifter. If the chain doesn’t move, turn the barrel adjuster on the shifter counter-clockwise. Repeat until the derailleur shifts to the 2nd smallest cog.
- Page 22 Part III Now make several shifts up and down the cassette. If shifting is slow to move to a larger cog, turn the barrel adjuster counter-clockwise. If the shifting is slow to move to a smaller cog, turn the barrel adjuster clockwise.
- Page 23 Part I Shift to the largest cog on the cassette. Using your hand, try to push the rear derailleur past the largest cog. If the derailleur can move past the cog, adjust the low limit screw. PUSH...
- Page 24 Part II Tighten the low limit screw until you can’t move the derailleur past the largest cog. Shift down and back up to the largest cog. If it is slow to shift to the largest cog, loosen the low limit screw.
- Page 25 Part I With the chain in the largest cog, adjust the B-tension screw until there is 5-7mm of distance between the guide pulley and the tallest teeth of the largest cog.
- Page 26 Part II Repeat shifting adjustment if necessary...
- Page 27 International North America service@microSHIFT.com.tw service@microSHIFT.com...
Need help?
Do you have a question about the ADVENT 1 Series and is the answer not in the manual?
Questions and answers