Advertisement
Advertisement
Table of Contents

Subscribe to Our Youtube Channel
Related Manuals for homgeek NY-8608MC

Summary of Contents for homgeek NY-8608MC
- Page 1 High Speed Blender Instruction Manual Model: NY- 8608MC AC120V, 50/60Hz, 1450W...
-
Page 3: Table Of Contents
[ IMPORTANT ] Please feel free to check out our website www.homgeek.com for more information. Most customer has useful discover there, you probably will, too. [ CONTENT ] Important Safeguards Parts and Features Control Panel Operational Area Features Use Your Blender Using Variable Speed Dial Cleaning &... -
Page 4: Important Safeguards
10. Do not operate any blender with a damaged cord or plug or after the blender malfunctions, or is dropped or damaged in any manner. Email support@homgeek.com at once for information on examina- tion, repair, or adjustment. - Page 5 18. The use of attachments, including canning jars, not expressly authorized or sold by homgeek for use with this blender, including container, may cause fire, electric shock, or injury.
- Page 6 44. DO NOT attempt to sharpen blades. 45. DO NOT expose container to extreme temperature changes. 46. Appliance accessories are not intended to be used in the microwave. Do not place the container or the lid in the microwave as it may result in damage to the accessories. 47.
-
Page 7: Parts And Features
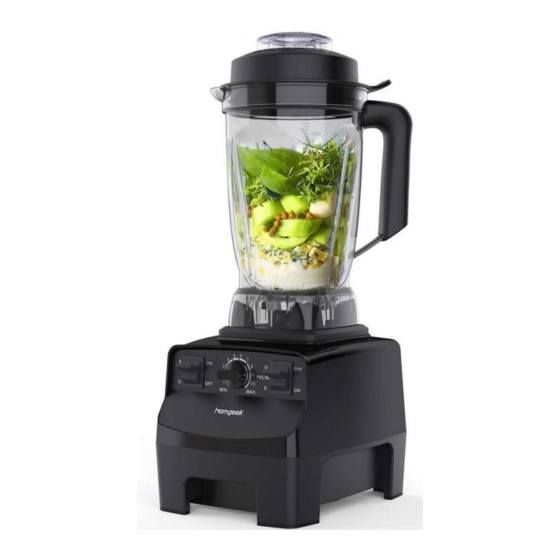
Specifications Product Voltage Frequency Power Capacity Max. Speed Model NY-8608MC AC120V 50Hz/60Hz 1450W 2.0L 30000RPM PARTS & FEATURES Lid Plug 2-Part Lid Tamper 2.0L Container Blades Centering Pad Slip Resistant Feet Control Panel Motor Base Power Cord Slip Resistant Feet... -
Page 8: Control Panel
2-Part Lid:The 2-part Lid is easy to put on and take off and easy to clean. Always use the complete 2-part lid when blending, especially when blending hot ingredients (unless the tamper is inserted through the lid plug opening). Never operate the blender without the lid securely latched during operation. -
Page 9: Operational Area Features
a. On/Off key: This key controls power to the machine. Push up to turn on the machine. Push down to turn off. b. High/Variable Switch: High: The High function can be used when a smart program is selected and when you are using Variable Speed Dial. -
Page 10: Use Your Blender
WARNING Electrical Shock Hazard Use grounded outlet only. DO NOT use an adapter. DO NOT use an extension cord. DO NOT remove ground. Always unplug before cleaning or when not in use. Do not put the motor base in water or any other liquids or let any form of liquid enter the motor. - Page 11 Tips: How to load your container Ice & Frozen Ingredients according to your recipe? Fruit & Veggies We suggest, liquids first, then Leafy Greens dry goods, leafy greens, fruit & veggies and finally ice & frozen Dry Goods ingredients. Liquids 4.
- Page 12 6. Check up the Variable Speed Dial. Make sure the High/Variable Switch is switched to Variable position and the marker on Variable Speed Dial is pointing to “0” before powering on. When the unit is connected to power and the container is correctly put onto the motor base, the unit will work at once under the set speed that the marker on Variable Speed Dial is pointing if the marker on Variable Speed Dial is not at “0”.
-
Page 13: Using Variable Speed Dial
USING VARIABLE SPEED DIAL 1. Make sure the marker on Variable Speed dial is at “0” position. 2. Push the On/Off Switch up to On position, then slowly increase to the desired speed between 1 and 10during the blending cycle. 3. -
Page 14: Cleaning & Maintenance
WARNING: IF THE TAMPER TOUCHES THE BLADES AT ANY ANGLE, DO NOT USE THE TAMPER WITH YOUR CONTAINER. 3. How to use the tamper? IMPORTANT! The splash disk (near the top of the tamper) and lid prevent the tamper from hitting the blades when the lid is secured properly in the locked position. - Page 15 the On/Off Switch up to On position. b. Slowly increase the variable speed to Variable 8. c. Run the machine for 30 to 60 seconds. For best results, using short “High” several times. d. Rotate the Variable Speed dial back to Variable 0 and turn off the machine. e.
-
Page 16: Troubleshooting
This Warranty does not apply to products for commercial, rental or re-sale purposes. homgeek warranty guarantees owner that if this blender fails within 1 year form the date of purchase due to defects in materials and workmanship under normal household conditions, homgeek will in homgeek’s sole discretion, elect to either(A)replace the Blender free of charge or(B) refund the owner, unless homgeek receives prior written notice of the owner’s preference. - Page 17 This warranty does not cover damages or wear resulting from accident, misuse, abuse, commercial use, or unauthorized adjustment and/or repair by homgeek. homgeek shall not be liable for loss of use or any other incidental, consequential or indirect costs, expenses or damages. There are no express warranties except as listed under the terms of this Limited Warranty.
Need help?
Do you have a question about the NY-8608MC and is the answer not in the manual?
Questions and answers