
Related Manuals for Spectrum Brands Pfister TX9-0001


Summary of Contents for Spectrum Brands Pfister TX9-0001
- Page 1 ■ TX9-0001 ■ THERMOSTATIC TUB & SHOWER CARTRIDGE THERMOSTATIC CARTUCHO PARA BAÑERIA Y DUCHA THERMOSTATIC CARTOUCHE POUR BAIN ET DOUCHE 50389-0200 Copyright © 2017 , Pfister Inc. 11925-03 Aug 3, 2017...
- Page 2 Thank you for purchasing this Pfister product. All Pfister products are carefully engineered, and factory tested to provide long trou- ble-free use under normal conditions. This product is easy to install using basic tools and our easy to follow illustrated instructions. If you have any questions regarding your product installation call 1-800-Pfaucet (1-800-732-8238).
- Page 3 Reference A Reference B Referencia A Referencia B Référence A Référence B " - 3 " " - 3 " Verify your rough-in dimensions to insure trim will fit properly. Compruebe que las dimensiones de su asiento para asegurar que el ajuste encaje correctamente. Vérifiez vos dimensions difficiles pour assurer que les garnitures s'adaptent correctement.
- Page 4 5: VALVE BODY CLEANING Clean out the Valve Body Inner Surface Area (5A) thoroughly. Remove any existing material such as sediment and debris. Use provided emery cloth to clean and to smooth out any sharp edges on the Grooves (5B) inside the Valve Body.
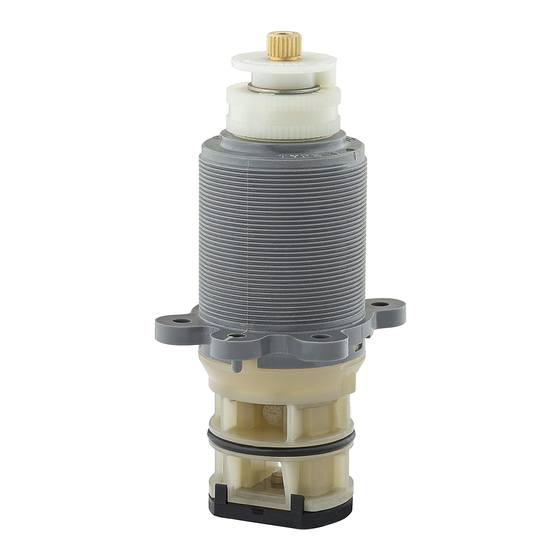
- Page 5 6: INSTALLATION OF NEW CARTRIDGE Lubricate the Cartridge O-Rings (6A) using provided Lubricant (6B). Assemble Cartridge Assembly (6C) and Backup Plate (6D) into Valve Body (6E). Be sure that Notch (6F) from the Bonnet (6G) is pointing down. WARNING: When reassembling unit, be sure that Tabs (6H) from the Cartridge Assemly (6C) are set properly on the Valve Body groves (6J).
- Page 6 7: UNIT START UP Turn on water supplies, and check all connections for leaks. Turn Stem (7A) counterclockwise to full on position and check all connections for leaks. Rotate Stem (7A) clockwise to turn off. 7: ACTIVACIÓN DE LA UNIDAD Gire los abastecimientos de agua, y compruebe todas las conexiones para saber si hay escapes.
- Page 7 8: LIMPIEZA DEL CARTUCHO Si la temperatura o el flujo no se mantiene constante, se debe limpiar el conjunto del cartucho (8A). Cierre el suministro de agua. Retire el conjunto de la moldura (no se muestra). Quite los tornillos (8C), la placa de respaldo (8B) y el conjunto del cartucho (8A).
Need help?
Do you have a question about the Pfister TX9-0001 and is the answer not in the manual?
Questions and answers