Table of Contents
Advertisement
Available languages
Available languages
Quick Links
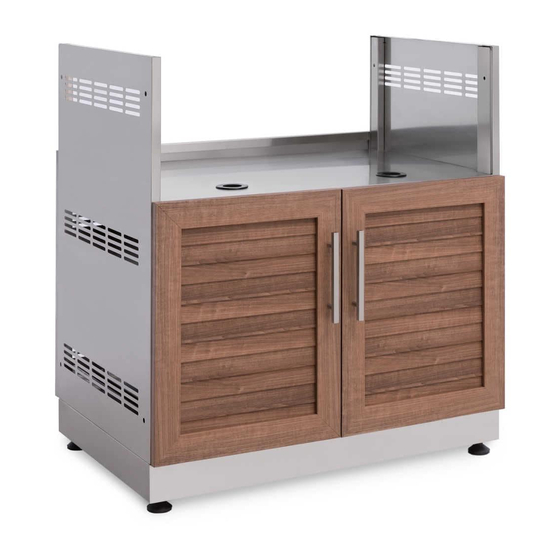
OUTDOOR KITCHEN 33"BBQ Cabinet
Aluminum Coastal Gray
Use two or more people to move, assemble or install cabinets and locker to avoid back injury.
Do not leave children unattended near cabinets. High risk of tipping if cabinets are installed
incorrectly: securely attach cabinets to the wall to avoid serious injury.
For assistance, call 1.877.306.8930; for UK 0800.031.4069; e-mail at info@newageproducts.com
STOP
Warning: Excessive weight
hazard!
Use two or more people to move, assemble, or
install cabinets to avoid back injury. Do not
leave children unattended near cabinets. High
risk of tipping if cabinets are installed
incorrectly: securely attach cabinets to the
wall to avoid serious injury. For assistance, call
1.877.306.8930; for U.K 0800.031.4069: e-mail at
info@newageproducts.com.
ATTENTION
Need help or spare parts? For fastest service,
contact NewAge Products at 1-877-306-8930;
or support@newageproducts.com.
Do not return to the retailer.
: Is your cabinet damaged?
65404-INSTL-01-Rev.01
Advertisement
Table of Contents

Related Manuals for Newage OUTDOOR KITCHEN 33" BBQ Cabinet

Summary of Contents for Newage OUTDOOR KITCHEN 33" BBQ Cabinet
- Page 1 For assistance, call 1.877.306.8930; for U.K 0800.031.4069: e-mail at info@newageproducts.com. ATTENTION : Is your cabinet damaged? STOP Need help or spare parts? For fastest service, contact NewAge Products at 1-877-306-8930; or support@newageproducts.com. Do not return to the retailer. 65404-INSTL-01-Rev.01...
-
Page 2: Weight Capacity
Weight Capacity lbs. lbs. lbs. 33” - BBQ SS Max 515 lbs. -
Page 3: Parts Supplied
Unpacking • Begin by placing the package on a protected fl at surface. • Remove all cardboard, foam packaging material and clear plastic bags. • Dispose / recycle all packaging materials. • Verify all the contents in the box and gather the required tools. See “Parts” and “Tools Needed” in the list below. Parts Supplied Cabinet Height-Adjustable Levelers... - Page 4 Customer must pay for shipping costs associated with any replacement product or parts. This limited warranty is limited to product replacement only. In no event will NewAge be liable for special, indirect, or consequential damages. This limited warranty is available to the initial purchaser only and is not transferable. Proof of purchase and additional information regarding the defect may be required at NewAge’s discretion.
-
Page 5: Tools Needed
UV stable. The 304 stainless steel material used in the construction of NewAge Outdoor Kitchen Cabinets is highly rust resistant, however, chlorine in the air from swimming pools or the salt from sea air may cause surface rust to appear and even create some pitting corrosion if left on the product. -
Page 6: Installing The Handles
Installing the Handles Align handle to holes on doors Parts Needed. or drawers. Handle Handle Bolt M4 x 25mm Screw in bolts. - Page 7 Adjusting The Levelers Flip over Cabinet to reveal bottom Parts Needed. 4 x Height-Adjustable Levelers Rotate leveler clockwise to lower Align levelers with nuts in corner height / tighten. Rotate leveler counter brackets. clockwise to raise height / loosen. Raise Height Lower Height Level Cabinet and repeat steps Flip over Cabinet to Check for Level...
-
Page 8: Installing Casters
Installing Casters Parts Needed. 16 X 1/4" x 1/2" Hex Bolts 2 X Fixed 2 X Swivel Casters Locking Casters Remove 8 - M4 x 25 bolts in locations with Remove Kick and store with hardware for phillips screw driver accessed through future configuration considerations. - Page 9 Note: Fastening Cabinets All shelves and drawers must be removed prior to fastening cabinets together. Remove plastic caps from cabinets. Parts Needed. 4 X Hex 4 X Hex Bolt (M6) (M6 x 50mm) Align bolts, tighten lightly. Level cabinets and tighten all bolts.
- Page 10 Installing the BBQ You may or may not need the adapter brackets depending on Parts Needed. the model BBQ you choose. 2 X Adapter Brackets Place BBQ so that the rails touch the Brackets. Lift up edges of BBQ Place the propane tank in the ring and Dab a little silicone on the rails of the tank tray.
- Page 11 Installing the Filler Brackets 6 X Filler Brackets You can adjust the size of the select 2 similar spacing by installing the bracket on Parts Needed. for application the outside or inside of the upright Filler Bracket Filler Bracket 1” Filler 2”...
- Page 12 Installing the NewAge 33" Grill Place grill onto the cabinet. Secure grill to cabinet by inserting four through mounting holes that line up with insert nuts on the side of the grill fire box. To add an additional cabinet, 60 mm bolts need to travel through mounting holes on both cabinets.
-
Page 13: Adjusting The Door Hinges
To adjust the gap between the doors and frame, turn the screw (B) clockwise or counterclockwise. Thank you for purchasing a NewAge Product! Please give us a call or visit online if you have any questions. Call 1.877.306.8930; for UK 0800.031.4069; e-mail at info@newageproducts.com... - Page 14 Care and Maintenance of your Aluminum and Glass Cabinets Perform Regular Maintenance ber cloth. After washing rinse in clean water and wipe the surface dry with your cloth remembering to dry months. Coastal areas or next to a chlorine pool more frequently every 2 weeks. Do not use abrasive cleaners or a scouring pad of any type as they will cause excessive wear and nish.
- Page 15 R.-U., composer le 0800.031.4069; ou envoyer un courriel à l’adresse.l’adresse info@newageproducts.com. ATTENTION ARRÊT Si votre armoire est endommagée? Si vous avez besoin d’aide ou de pièces de rechange? Contactez NewAge Products a 1-877-306-8930; ou support@newageproducts. com. Ne pas retourner au détaillant. 65404-INSTL-01-Rev.01...
-
Page 16: Poids Maximum
Poids maximum lbs. lbs. lbs. 33” - BBQ SS Max 515 lbs. -
Page 17: Pièces Fournies
Déballage • Pour commencer, posez l’emballage sur une surface plane protégée. • Enlevez tous les matériaux d’emballage en carton et en mousse, ainsi que les sacs de plastique transparent. • Jetez ou recyclez tous les matériaux d’emballage. • Vérifié que tout le contenu de la boîte soit présent et rassemblez tous les outils requis pour l'installation. Voir les sections "Pièces fournies"... - Page 18 Sous réserve des limitations et des exclusions énoncées ci-dessous ou dans la documentation d’un autre produit, NewAge garantit à l’acheteur initial que (1) les surfaces du produit seront exemptes de défaut pendant trois ans après la date d’achat, (2) les glissières de tiroir seront exemptes de défaut pendant deux ans après la date d’achat, et (3) l’intégrité...
-
Page 19: Outils Requis
NewAge sont conçues pour résister aux intempéries et être stables aux UV. Le matériau d’acier inoxydable 304 qui est utilisé dans la fabrication des armoires de cuisine extérieure NewAge est très résistant à la rouille, mais le chlore de piscine qui est présent dans l’air ou le sel présent dans l’air marin peut faire rouiller la surface;... - Page 20 Installation des poignées Aligner la poignée avec les trous de la porte ou du tiroir. Pièces requises. Boulons M4 poignée x 25mm Serrer la vis.
- Page 21 Nivellement de l’amoire Faites basculer pour accéder Pièces requises 4 x Niveau Ajuster Tournez dans le sens horaire pour Aligner les niveleurs avec les soulever le niveleur. Tournez dans le écrous dans les cornières. sens horaire pour hauteur du niveleur Raise Height Lower Height Faites basculer pour accéder...
-
Page 22: Installation Des Roulettes
Installation des roulettes Pièces requises. 16 X 1/4" x 1/2" boulon hexagonal 2 X Roulettes 2 X Roulettes Fixe de verrouillage pivotantes Retirez les boulons (8) - M4 x 25 dans les Enleve le coup de pied et mettre en stockage. endroits numérotés avec un tournevis Phillips accédé... - Page 23 Remarque: Fixation des armoires Toutes les étagères et les tiroirs doivent être retiré (les unes aux autres) avant de fixer les armoires ensemble. Enlevez les bouchons en plastique Pièces requises 4 X Écrous 4 X boulon hexagonal (M6) hex (M6 x 50mm) Alignez les boulons, puis serrez-les légèrement.
- Page 24 Installation du Barbecue Vous pouvez ou pas besoin de la supports adaptateurs en fonction sur le modèle que vous choisissez Pièces requises 2 X supports adaptateurs Placez BBQ de sorte que les rails touchent les supports. Soulever les bords Placez le bonbonne dans l'anneau de BBQ et Tampon-nez un peu de silicone du tiroir pour le bonbonne.
- Page 25 Installation des supports de remplissage Vous pouvez ajuster la taille de X supports de l'espacement en installant les remplissage. Sélection Pieces requises supports à l'extérieur ou à deux pièces identiques l'intérieur Supports de Supports de 2” Support 1 1/2”” Support 1”...
- Page 26 Installation du Barbecue 33 po de NewAge Placez le barbecue dans l'armoire. Fixez le barbecue à l'armoire en insérant quatre boulons de 60 mm dans les trous de montage qui s'alignent avec les écrous insérés sur le côté de la boîte à feu du barbecue.
- Page 27 Pour ajuster l'écart entre les portes et le cadre, tourner la vis (B) dans le sens des aiguilles d’une montre ou dans le sens inverse des aiguilles d’une montre. Merci d’avoir acheté un produit NewAge! Veuillez nous appeler ou consulter notre site Web si vous avez la moindre question.
- Page 28 Entretien et maintenance de votre aluminium et armoires Entretien régulier Laver régulièrement avec de l’eau fraîche et propre , un détergent doux et un on en micr bres . Après lavage rinçage à l’eau propre et sécher la surface avec votre souvenir en tissu pour sécher le verre et la surface en aluminium .
Need help?
Do you have a question about the OUTDOOR KITCHEN 33" BBQ Cabinet and is the answer not in the manual?
Questions and answers