Advertisement
INSTRUCTIONS
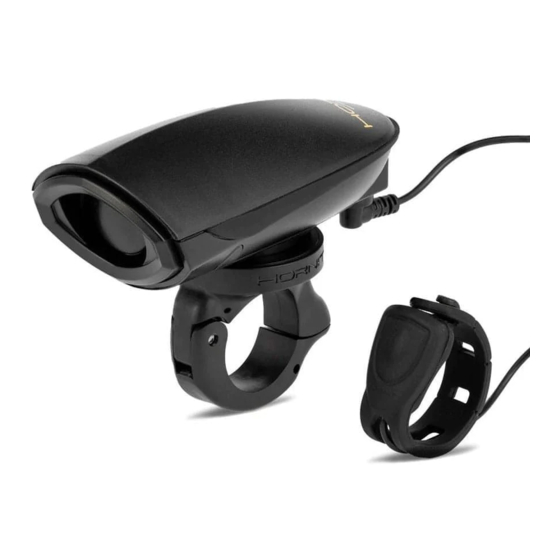
1 - Attach the handlebar mount to the handlebars using the
rubber strap, ensuring that it Is securely fastened .
2 - Attach the trigger on the handlebars in a position where it
can be pressed while operating the brake at the same time (see
diagrams above for suggested set ups)
3 - Wind the excess connecting wire around the handlebars. For
best results on a road bike run the connecting wire under the
handlebar tape.
4 - Attach the Hornit dB140 by sliding it into the mount. Remove
it by pinching the release catches and sliding the Hornit dB140
out.
5 - Insert the connecting plug fully and firmly into the socket
6 - To operate press the trigger
7 - To change the sound press the sound selection button at the
rear of the unit.
FITTING AND REPLACING BATTERIES
The Hornit dB140 uses 2 x AAA 1.5V
batteries. Unscrew the screws and lift the
battery cover. Replace the old batteries with
two new AAA batteries, ensuring correct
polarity. Replace the battery cover and
tighten screws.
IMPORTANT
Do not recharge non-rechargeable batteries.
Remove rechargeable batteries from product before recharging.
Only charge rechargeable batteries under adult supervision.
Do not mix different types of batteries or new and used batteries
Only batteries of the same or equivalent type are to be used.
Batteries are to be inserted with the correct polarity.
Remove exhausted batteries from the toy.
Do not short circuit the supply terminals.
Remove batteries if the product is not used for some time.
Used batteries and broken electrical and electronic products must
be disposed of at an approved collection
www.minihornit.com
Advertisement
Table of Contents

Related Manuals for HORNIT dB140

Summary of Contents for HORNIT dB140
- Page 1 3 - Wind the excess connecting wire around the handlebars. For best results on a road bike run the connecting wire under the handlebar tape. 4 - Attach the Hornit dB140 by sliding it into the mount. Remove it by pinching the release catches and sliding the Hornit dB140 out.
- Page 2 The Hornit dB140 has an Ingress Protection rating (IP) rating of IP44. This means it is will work normally in extreme wet weather conditions. Do not submerge. The Hornit dB140 is designed for emergency use to prevent accidents and to be heard by drivers of other vehicles.
Need help?
Do you have a question about the dB140 and is the answer not in the manual?
Questions and answers