Table of Contents
Advertisement
Quick Links
Advertisement
Table of Contents

Related Manuals for Pop-A-Shot PRO DUAL SHOT


Summary of Contents for Pop-A-Shot PRO DUAL SHOT
- Page 2 PARTS LIST Rear Vertical Tube, Top Rear Vertical Tube, Middle Rear Vertical Tube, Bottom Front Vertical Tube, Top Front Vertical Tube, Middle Front Vertical Tube, Bottom Horizontal Tube Upper Side Tube, Rear Upper Side Tube, Front Lower Side Tube, Rear Lower Side Tube, Front Lean Bar Braces...
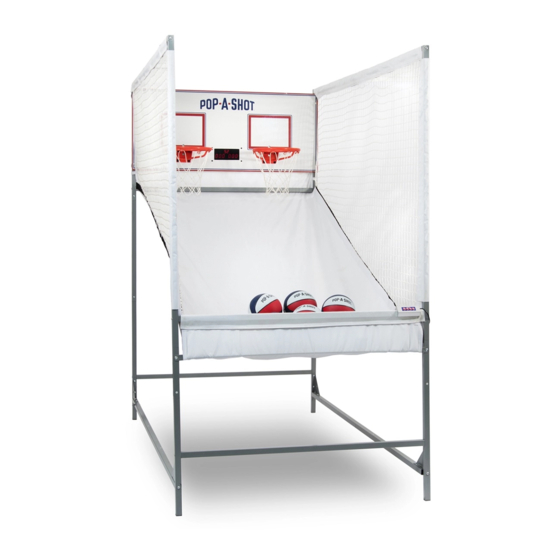
- Page 3 POP-A-SHOT PRO DUAL ® FRAME ASSEMBLY...
- Page 4 Connect a Front Vertical Tube, Top (#4) to a STEP 1 Front Vertical Tube, Middle (#5) and tighten with a Short Screw (#23) and Washer (#25) (Fig 1A). Connect the other end of the Front Vertical Tube, Middle (#5) to the Front Vertical Tube, Bottom (#6) and tighten with a Short Screw (#23) and Washer (#25)(Fig 1A).
- Page 5 Connect an Upper Side Tube, Rear (#8) to an STEP 3 Upper Side Tube, Front (#9) and tighten with a Short Screw (#23) and Washer (#25). Repeat with the other 8 and 9 tubes. Connect the Lower Side Tube, Rear (#10) to the STEP 4 Lower Side Tube, Front (#11) and tighten with a Short Screw (#23) and Washer (#25).
- Page 6 Attach an Upper Side Tube, Rear (#8) to a STEP 5 Rear Vertical Tube, Top (#1) using a Long Screw (#24) and Washer (#25). Repeat with the other 8 and 1 tubes. Opposite side view Attach an Upper Side Tube, Front (#9) to a STEP 6 Front Vertical Tube, Top (#4) using a Long Screw (#24) and Washer (#25).
- Page 7 Attach a Lower Side Tube, Front (#11) to a STEP 7 Front Vertical Tube, Bottom (#6) using a Long Screw (#24) and a Washer (#25). Repeat with the other 11 and 6 tubes. Attach a Lower Side Tube, Rear (#10) to a STEP 8 Rear Vertical Tube, Bottom (#3) using a Long Screw (#24) and Washer (#25).
- Page 8 Attach a Horizontal Tube (#7) to both Front Vertical Tubes, Middle (#5) STEP 9 using Long Screws (#24) and Washers (#25). Attach another Horizontal Tube (#7) to both Front Vertical Tubes, Bottom (#6) using Long Screws (#24) and Washers (#25). Attach a Horizontal Tube (#7) to both Rear Vertical Tubes, STEP 10 Bottom (#3) using Long Screws (#24) and Washers (#25).
- Page 9 Attach the Braces (#13) to the four bottom corners using STEP 11 Short Screws (#23) and Washers (#25). Loop the Rim Nets (#33) through the Net Hooks on the Rims (#16). STEP 12 Make sure the longer strands are on top and go through the net hooks. Attach the Rims (#16) to the Backboard (#14) using a Rim Bolt (#27) and a Rim Washer (#28) on the front and a Back Plate (#15), Rim Washer (#28) and Rim Nut (#29) on the back.
- Page 10 Attach the Scoring Unit (#18) to the Backboard (#14) with a Scoring Bolt STEP 13 (#30) through the front of the Backboard and the Scoring Unit and secure with a Scoring Nut (#31) in the back. Attach the Sensors (#17) using the Screws (#32). Make sure the Sensors are level when attached.
- Page 11 Tip: If you can, grab a helper for this part. STEP 14 Attach the Backboard (#14) to the Rear Vertical Tubes, Top (#1) using Long Screws (#24) and Washers (#25).
- Page 12 Attach the Lean Bar (#12) to the Front Vertical Tubes, STEP 15 Bottom (#6) using Short Screws (#23) and Washers (#25). Take the Ball Return Ramp (#20) and attach the Velcro sleeves STEP 16 around the Top Side Tubes (#8) & (#9). Pull the Velcro under the Lean Bar (#12) and wrap around Horizontal Bar (#7).
- Page 13 STEP 17 Snap the Control Panel (#21) onto the Horizontal Bar (#7) (Fig 17a). Thread the Control Panel wire through the hole of the laminated Game Operations “Cheat Sheet” until the Cheat Sheet is next to the Control Panel. Take the Control Panel wire and weave it through the side netting towards the back of the backboard.
- Page 16 • Make sure the nets are correctly attached to the rims (incorrect placement can block the sensors). The net’s longer loops should go through the hooks of the rim (Step 12). Please visit www.pop-a-shot.net/support for more troubleshooting tips and hacks.
Need help?
Do you have a question about the PRO DUAL SHOT and is the answer not in the manual?
Questions and answers