Table of Contents
Advertisement
Advertisement
Table of Contents

Subscribe to Our Youtube Channel
Related Manuals for Magnaflux D-2000 Series


Summary of Contents for Magnaflux D-2000 Series
- Page 1 D-200 0 0 S RIES D-200 00 Series Revised N November 201 Page | 1-...
- Page 2 TABLE OF CONTE NERAL SAF ETY INSTR RUCTIONS ....................1 CTION 1 - EQ QUIPMENT SPECIFICA ATIONS ................. 1 Scope of f this Manua al ......................1 Purpose of the Equip pment ..
- Page 3 GENE ERAL SAF FETY INST TRUCTION This manual pro ovides inform mation on how w to install, operate, and d maintain y your Magnaf lux magnetic c particle inspe ection mach hine. Read d these inst tructions ca arefully bef ore operati ng or servic cing your m...
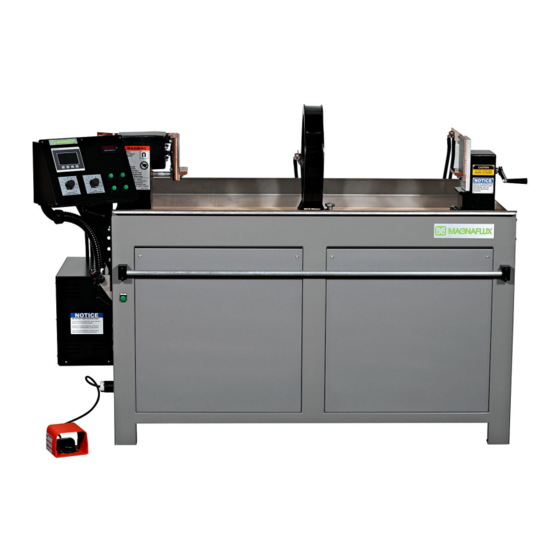
- Page 4 SECTION N 1: EQUIP PMENT SP PECIFICAT TIONS OPE OF TH HIS MANUA This manual pro ovides esse ntial informa ation require ed for install lation, opera ation, and m maintenance e of standard naflux D-200 00 Series St tationary Ma agnetic Parti cle Inspectio on Machines...
- Page 5 M Magnaflux D Data Plate, located on th he headstoc ck end of the e unit. UIPMENT S SPECIFICA ATIONS...
- Page 6 ble 1-2. Mag gnetization and Demag gnetization Output aximum Cu urrent (Amp peres)* Model Current Mode emag Series Control Aver rage (DC) Contac 6000 12” Co 4600 16” Co 4400 Continuously versing D-2060 20” Co 4200 Variable Decay ying DC 25”...
- Page 7 mensions a nd Capaci ties ble 1-4. Par rt Weight Ca apacity Maximum L Load Desc cription ounds Kilograms Usin ng contact pa ad mounted v -blocks to sup pport part Usin ng contact pa ad mounted v -blocks to sup pport part (wi th rotating he eads)
- Page 8 Tabl le 1-8. Ove rall Dimens sions Descript D-2*** D-2* ***L D-2***XL D-2100X D-2100XL5 Basic c Unit (No Ho ood) ngth 84½ (215cm 280½(712 2½cm) 7½(806½cm 132½(3 336cm) 6½(448cm) 41(104cm 41(104c 41(104cm) 41(104 4cm) 41(104cm) ight 60¼(153cm 60¼(15 53cm) 0¼(153cm) 60¼(153 3cm) 60¼...
-
Page 9: Section 2: Installation And Storage
Consider the following requirements before selecting a permanent location for the inspection unit: 1. A power source of the proper voltage, frequency and phase (as designated on the Magnaflux Data Plate located on headstock end of inspection unit) capable of providing current per the nameplate. - Page 10 The inspection unit as supplied is internally wired for operation from a power source as designated on the Magnaflux Data Plate (located on headstock end of inspection unit). When connecting the unit all local codes should be followed. External wiring directions for operation on the designated voltage are as follows: 1.
- Page 11 Multiplication Factors for Resistance Welders (NPFA National Electric Code 2011). Some areas refer to 2 phase instead of 1 phase. The incoming power goes directly to an isolation transformer so the unit will operate identically on 1 or 2 phase power. D-2000 Series Revised November 2015 Page | 2-3...
- Page 12 After the tank is filled with oil or water bath, and the proper amount of magnetic particles, plug the pump in to the outlet located on the operator’s end of machine. Figures 2-7 below shows the pump as it is shipped and D-2000 Series Revised November 2015...
- Page 13 3. In a separate box the hood fan and white light are located. 4. Figure 2-9 below shows the separate fan and white light assembly. Figure 2-10 shows the hood assembly. Figure 2-10 Figure 2-9 D-2000 Series Revised November 2015 Page | 2-5...
- Page 14 Figure 2-11 Place the Magnaflux machine on a solid surface and secure it based on Section 1 of this manual. Figure 2-11 above shows the unit. Once it is secure, remove the accessory boxes containing the foot switch and black lights, and set aside in a safe place.
- Page 15 18. Place the shoulder bolt through the hole in the stationary part of the frame. 19. With one washer on the inside and outside, tighten the nut to secure the frames together as shown in Figures 2-17 through 2-20. D-2000 Series Revised November 2015 Page | 2-7...
- Page 16 20. Now open the hood and stretch out the top curtain as show in Figure 2-21 and Figure 2-22 below. Figure 2-21 Figure 2-22 21. Locate the four (4) mounting bolts on the stationary frame as shown in Figures 2-23 through 2-26. NOTE: Two (2) are under the curtain. D-2000 Series Revised November 2015 Page | 2-8...
- Page 17 23. In Figure 7-18 above, locate the four (4) mounting holes on the fan and place the bolts in it. NOTE: Orientation of the fan should be with the light closest to the headstock. 24. Carefully ensure the white light clears the frames as shown in Figure 2-27 below. Figure 2-27 D-2000 Series Revised November 2015 Page | 2-9...
- Page 18 29. Plug into the twist lock marked for the hood as shown in Figure 2-30 above. 30. If power is available on the unit, the white light and fan operation can be tested by selecting these buttons on the main control panel, as shown in Figure 2-31. D-2000 Series Revised November 2015 Page | 2-10...
- Page 19 33. Locate the front curtain and hang it from the front track with hooks as shown in Figure 2-34 below. Once the front curtain is installed, pull down the curtain with “Magnaflux” on it to block white light from entering the inspection booth.
- Page 20 Figure 2-38 2. Orient the transformer so the light cord comes out towards the front of the unit. Then, slide the ballast transformer into the slots provided. This is shown in Figure 2-39. D-2000 Series Revised November 2015 Page | 2-12...
- Page 21 (optional) installed, connect the foot switch to the foot switch receptacle or the optional Dual Palm to the Dual Palm receptacle on the left side of unit. Refer to Figure 2-41 to locate both receptacles. Dual Palm Receptacle Foot Switch Receptacle Figure 2-40 D-2000 Series Revised November 2015 Page | 2-13...
- Page 22 2. Unlock and position tailstock where the digital test meter kit shunt can be supported by the tailstock and headstock shelves. Lock tailstock. 3. Position the digital test meter kit shunt (Magnaflux Accessory Part #622350) as shown in Figures 2-42 and 2-43, and specified in Table 4-5, between the headstock and tailstock.
- Page 23 2. Agitation system is checked for leaks prior to shipment with light oil. If using water bath, carefully clean the entire system with liquid detergent solution and re-circulate, followed by a thorough water rinse. If using oil bath, flush system with light oil (Specification MIL-L-15016) such as Magnaflux Carrier II.
-
Page 24: Preparation For Storage Or Shipment
3. Using the spray nozzle, fill the centrifuge tube with agitated solution to 100 ml. 4. Place the centrifuge tube in its stand (Magnaflux Accessory Part #1837A), and allow the suspension to settle for thirty minutes (water baths) or sixty minutes (oil baths) in a vibration-free location. - Page 25 Classification Rules that will ensure safe transportation to the point of delivery. Estimated shipping dimensions and weight are listed in Tables 1-7 and 1-8. Mark the crate(s) clearly to identify the contents and denote which side is to be up. D-2000 Series Revised November 2015 Page | 2-17...
-
Page 26: Section 3: Operating Instructions
NOTE: Adjustment of the pressure regulator for higher or lower pressures will also result in higher or lower clamping forces. Proper adjustment assures proper clamping force without distorting the test part. Too low of pressure can cause arcing on the part at high amperage. D-2000 Series Revised September 2015 Page | 3-1... - Page 27 2) Select Item 17 in Figure 2-10 to desired shot time. The range is from 0.5 to 2 seconds. A shot timer (Magnaflux Accessory Part #622646) should be used to provide the actual shot time that has been set. Figure 3-2...
- Page 28 Item 23: Contacts Select Button Item 11: DC Waveform (Only provided when Item 24: Mag Select Button AC option is selected) Item 12: Auto-Bath Selector (Optional) Item 25: HMI Display Screen Item 13: Main screen D-2000 Series Revised September 2015 Page | 3-3...
- Page 29 10. Push Bar: Enables/Disables the Push Bar • With PUSHBAR switch “on” (light on), pressing Push Bar (2) from any position, activates the mag shot. With PUSHBAR switch “off”, Push Bar (2) is inoperable. D-2000 Series Revised September 2015 Page | 3-4...
- Page 30 0.50 and 2.00 seconds. 18. Digital Ammeter: Displays the amount of current passed through the circuit. a. A reading of 3.25 equals 3250 amperes. b. A reading of 0.95 equals 950 amperes. D-2000 Series Revised September 2015 Page | 3-5...
- Page 31 8. Speed Control Needle Valve: Controls speed of clamping air cylinder in headstock. Has no effect on clamping force. a. Slower clamping speed allows operator greater flexibility in positioning large, heavy or awk- wardly shaped parts. b. Faster clamping speed improves productivity for simple, repetitive parts. D-2000 Series Revised September 2015 Page | 3-6...
- Page 32 5. Allow black light to warn up for approximately 5 minutes. 6. Check UV output of lamp using Magnaflux black light meter. Measure intensity 15" from the lens; clean lens or replace bulb if reading is less than 1000µW/cm². WARNING: Lens on the black light may be extremely hot.
- Page 33 16. If equipped with Auto-Mag, check as follows: a. Toggle Auto-Mag to “on” by pressing and releasing Auto-Mag button. b. Place part between contacts and press foot switch. Part will be clamped. D-2000 Series Revised September 2015 Page | 3-8...
- Page 34 For remote operation, turn off bath applicator ball valve and Auto-bath button, clamp contact block between headstock and tailstock; then connect remote cables. Use Optional clamps, prods or cable wraps to magnetize parts for inspection. D-2000 Series Revised September 2015 Page | 3-9...
- Page 35 Figure 3-7 Central Conductor using a wet horizontal Magnaflux machine Central Conductor Set-up If parts are hollow, tubular, ring-like, or have holes, it is generally better to magnetize them using a central conductor rather than passing current directly through them. This method also reveals defects on the inside diameter of the part.
- Page 36 4. Press and release DEMAG Push button to start demagnetization cycle. DEMAG light will remain lit during complete cycle. NOTE: If AC (MOD AC Optional) is selected, DEMAG will be AC demagnetization. 5. After demagnetization of part is complete, DEMAG light will go out. D-2000 Series Revised September 2015 Page | 3-11...
-
Page 37: Emergency Shutdown
4. Disconnect power from unit by turning external disconnect switch to OFF. EMERGENCY SHUTDOWN To shut off the machine in an emergency, disconnect the power by turning OFF the external disconnect switch. Lock Out unit as required. D-2000 Series Revised September 2015 Page | 3-12... - Page 38 PAGE LEFT BLANK INTENTIONALLY D-2000 Series Revised September 2015 Page | 3-13...
-
Page 39: Section 4: Maintenance
Report problems to the designated authority. Do not remove any cover panels. Inspections or maintenance requiring removal of cover panels are to be performed by a qualified technician. A list of Authorized Magnaflux Service Centers is located at www.magnaflux.com DAILY OPERATOR MAINTENANCE Table 4-1. - Page 40 Table 4-4. Periodic Checks Item Action Rectifier stack Blow accumulated dirt from rectifier heat sinks and fan blades. Do not use cleaning solvents. Use dry air on PCB. D-2000 Series Revised September 2015 Page | 4-2...
- Page 41 NOTE: Due to the nature of the material used in Magnetic Particle Inspection, periodic maintenance is required on the pump seal. Replacement is recommended every 3 months, based on using Magnaflux materials for an 8 hour day, 5 days a week work schedule. It is recommended to maintain a back-up pump that can be switched out when the seal needs to be changed in order to decrease the amount of downtime on the machine.
-
Page 42: Initial Setup
Table 4-5. Test Equipment Recommended Test Equipment Tektronix TDS 2012B Two Channel Digital Storage Oscilloscope, 100 MHz, 1 GS/s Magnaflux 622350 Digital Test Meter Kit with Matching Shunt Steel Test Bar (1" diameter, 12"-18" long, 4140 H.T.) INITIAL SET-UP WARNING: Turn off and lock-out the external disconnect switch before opening the rear panel. Failure to disconnect incoming power could result in severe electrical shock or death. - Page 43 9. Continue repeating this procedure while increasing the CURRENT CONTROL to the next division after each “shot.” At all settings, both ammeters should agree within ± 10% or 50 amps of the machine rating. D-2000 Series Revised September 2015 Page | 4-5...
- Page 44 (contact) and longitudinal (coil) demagnetization check performing only those steps not previously accomplished. If no further testing is to be done, disconnect the digital test meter and return it to its carrying case D-2000 Series Revised September 2015 Page | 4-6...
- Page 45 PAGE LEFT BLANK INTENTIONALLY D-2000 Series Revised September 2015 Page | 4-7...
-
Page 46: Section 5: Troubleshooting
2. Check that red “INHIBIT” LED is glowing. Push MAG button, red LED should go out for duration of mag shot. If not, check thermal overload protectors, which connect J5-4 to J5-6. Check current command voltage between J5-8 and J5-10. It should read approximately 1.6VDC at minimum output current D-2000 Series Revised September 2015 Page | 5-1... - Page 47 2. Check that control voltage (Wire 310 to Wire 311) decreases gradually over DEMAG cycle. If not, check Capacitor 1Cap. on subpanel. 3. If demag passes these steps, then re-do demag adjustment. D-2000 Series Revised September 2015 Page | 5-2...
- Page 48 1. Thermo shutdown. Contacts, Coil. 1. Call Authorized Service Center. Continuous mag shot 1. Shorted SCR. on coil and/or contact. 1. Call Authorized Service Center. Main fuse to unit 1. Shorted SCR blown. D-2000 Series Revised September 2015 Page | 5-3...
- Page 49 2. Check harnesses and repair/replace as necessary. 3. Wrong voltage range on 3. Adjust per instructions above in trouble shooting current controls stack. 4. Shorted SCR. 4. Contact Authorized Magnaflux Service Center D-2000 Series Revised September 2015 Page | 5-4...
- Page 50 3. Check cables for worn indication. Replace meter if necessary. MOD AC not firing. 1. Inhibit lamp on AC firing 1. AC relay not energizing. AC switch not ON. AC board not OFF during mag firing board bad. shot. D-2000 Series Revised September 2015 Page | 5-5...
- Page 51 PAGE LEFT BLANK INTENTIONALLY D-2000 Series Revised September 2015 Page | 5-6...
-
Page 52: Description Column
PART NUMBER COLUMN On the first sheet of each drawing is a bill of material located in the lower right corner. Magnaflux part numbers are used to identify all parts except common commercial hardware. Commercial hardware is identified with a full identification in the DESCRIPTION column. -
Page 53: Spare Parts List
Firing board only for Rectifier Stack 521095 SCR only for Rectifier Stack 624715 Maintained Assembly Pushbuttons 624927 Harness for 624715 624717 Momentary Assembly Pushbuttons 624928 Harness for 624717 114184 Braided Lead Contact Pad D-2000 Series Revised September 2015 Page | 6-2... - Page 54 PAGE LEFT BLANK INTENTIONALLY D-2000 Series Revised September 2015 Page | 6-3...
- Page 55 155 Harlem Avenue, Glenview, Illinois 60025 USA Telephone: (847) 657-5300 Fax: (847) 657-5388 Web: www.magnaflux.com E-mail: cs@magnaflux.com D-2000 Series Revised September 2015 Page | 6-4...
Need help?
Do you have a question about the D-2000 Series and is the answer not in the manual?
Questions and answers