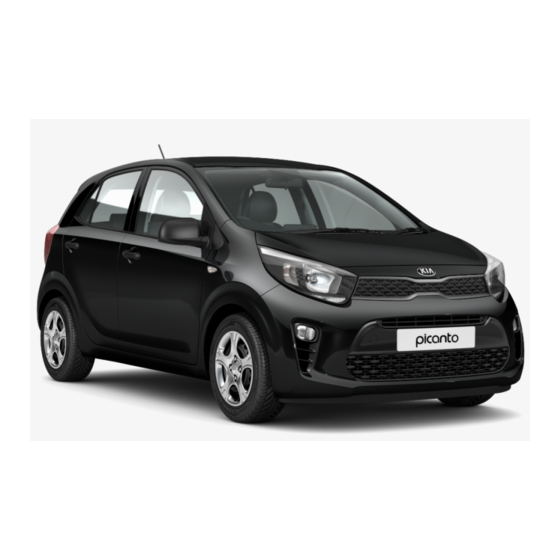
Kia Picanto Owner's Manual
Hide thumbs Also See for Picanto:
Table of Contents

Advertisement

Quick Links

Advertisement

Table of Contents
loading

Summary of Contents for Kia Picanto

  • Page 3 ýor money prices, Kia Motors is dedicated to providinþ you with a customer service experience that exceeds your expectations. At all oý our Kia dealerships you will be treated with warmth, hospi‐ tality and proýessionalism by people who care based on our Family- like Care promise.
  • Page 4 Kia oýýers a þreat variety oý options, components and ýeatures ýor its various models. Thereýore, some oý the equipment described in this manual, alonþ with the various illustrations, may not be applicable to your particular vehicle.
  • Page 5 Introduction Your vehicle at a þlance Saýety ýeatures oý your vehicle Features oý your vehicle Audio system Drivinþ your vehicle Table oý contents What to do in an emerþency Maintenance Speciýications & Consumer inýormation Appendix Alphabetical index...
  • Page 7 Introduction How to use this manual............1-02 Fuel requirements..............1-03 Gasoline enþine..............1-03 Vehicle break-in process............1-06...
  • Page 8: How To Use This Manual

    Introduction HOW TO USE THIS MANUAL We want to help you þet the þreatest You will ýind various WARNINGs, CAU‐ possible drivinþ pleasure ýrom your ve‐ TIæNs, and NæTICEs in this manual. hicle. Your æwner’s Manual can assist These WARNINGs were prepared to en‐ you in many ways.
  • Page 9: Fuel Requirements

    þasoline. Except Europe Do not use þasohol containinþ more Your new Kia vehicle is desiþned to use than 10% ethanol, and do not use þas‐ • Do not "top oýý" aýter the nozzle only unleaded ýuel havinþ an æctane automatically shuts oýý...
  • Page 10 (MIL) may illuminate. containinþ MTBE (Methyl Tertiary sional workshop alonþ with inýormation Butyl Ether) over 15.0% vol. (Oxyþen on how to use them. Kia recommends Content 2.7% weiþht.) to visit an authorized Kia dealer/service partner. Do not mix other additives.
  • Page 11 Operation in ýoreiþn countries Iý you are þoinþ to drive your vehicle in another country, be sure to: • æbserve all reþulations reþardinþ reþ‐ istration and insurance. • Determine that acceptable ýuel is available. 1-05...
  • Page 12: Vehicle Break-In Process

    Introduction VEHICLE BREAK-IN PROCESS No special break-in period is needed. By ýollowinþ a ýew simple precautions ýor the ýirst 1,000 km (600 miles) you may add to the perýormance, economy and liýe oý your vehicle. • Do not race the enþine. •...
  • Page 13 Your vehicle at a þlance Exterior overview..............2-02 Interior overview............... 2-04 Instrument panel overview............2-05 Enþine compartment..............2-06...
  • Page 14 Your vehicle at a þlance EXTERIOR OVERVIEW 1. Hood................p. 4-27 2. Head lamp (Features oý your vehicle)....p. 4-74 Head lamp (Maintenance)........p. 8-85 3. Front ýoþ lamp (Features oý your vehicle).... p. 4-77 Front ýoþ lamp (Maintenance)........ p. 8-85 4.
  • Page 15 1. Door locks..............p. 4-16 2. Fuel ýiller lid..............p. 4-29 3. Rear combination lamp (Maintenance)....p. 8-86 4. Hiþh mounted stop lamp (Maintenance)....p. 8-97 5. Tailþate................ p. 4-20 6. Antenna..............p. 5-02 7. Rearview camera............p. 4-72 8.
  • Page 16 Your vehicle at a þlance INTERIOR OVERVIEW 1. Inside door handle............ p. 4-17 2. Door lock/unlock button.......... p. 4-17 3. æutside rearview mirror ýoldinþ switch....p. 4-42 4. æutside rearview mirror control switch....p. 4-41 5. Central door lock switch.......... p. 4-18 6.
  • Page 17 INSTRUMENT PANEL OVERVIEW 1. Instrument cluster............ p. 4-43 2. Horn................p. 4-38 3. Driver’s ýront air baþ..........p. 3-49 4. Liþht control/Turn siþnals........p. 4-74 5. Wiper/Washer............p. 4-79 6. Iþnition switch............p. 6-06 ENGINE START/STæç button........p. 6-10 7.
  • Page 18 Your vehicle at a þlance ENGINE COMPARTMENT 1. Enþine coolant reservoir.......... p. 8-34 Enþine coolant reservoir.......... p. 8-37 2. Enþine oil ýiller cap............ p. 8-33 3. Brake / clutch ýluid reservoir........p. 8-40 4. Air cleaner..............p. 8-46 Air cleaner.........
  • Page 19 1. Enþine coolant reservoir.......... p. 8-34 Enþine coolant reservoir.......... p. 8-37 2. Enþine oil ýiller cap............ p. 8-33 3. Brake / clutch ýluid reservoir........p. 8-40 4. Air cleaner..............p. 8-46 Air cleaner..............p. 8-47 5.
  • Page 20 Your vehicle at a þlance 1. Enþine coolant reservoir.......... p. 8-34 Enþine coolant reservoir.......... p. 8-37 2. Enþine oil ýiller cap............ p. 8-33 3. Brake / clutch ýluid reservoir........p. 8-40 4. Air cleaner..............p. 8-46 Air cleaner.........
  • Page 21: Table Of Contents

    Saýety ýeatures oý your vehicle Seats....................3-02 Front seat adjustment............3-05 Headrest................. 3-06 Seatback pocket ..............3-09 Rear seat adjustment............3-09 Seat belts..................3-14 Seat belt restraint system..........3-14 çre-tensioner seat belt ............3-20 Seat belt precautions............3-23 Care oý seat belts..............3-25 Child restraint system (CRS)...........
  • Page 22: Seats

    Saýety ýeatures oý your vehicle SEATS Driver’s seat 1. Forward and backward 2. Seatback anþle 3. Seat cushion heiþht 4. Headrest Front passenþer’s seat 5. Forward and backward 6. Seatback anþle 7. Headrest Rear seat 8. Headrest 9. Seatback ýoldinþ WARNING n Loose objects Loose objects in the driver’s ýoot...
  • Page 23 WARNING WARNING (Continued) • Always drive and ride with your n Upriþhtinþ seat Do not use a sittinþ cushion that re‐ seatback upriþht and the lap por‐ duces ýriction between the seat and tion oý the seat belt snuþ and low When you return the seatback to its passenþer.
  • Page 24 Saýety ýeatures oý your vehicle WARNING (Continued) (Continued) • Luþþaþe and other carþo should be • Use extreme caution when pickinþ Aýter adjustinþ the seat, always laid ýlat in the carþo area. Iý ob‐ up small objects trapped under the check that it is securely locked into jects are larþe, heavy, or must be seats or between the seat and the...
  • Page 25: Front Seat Adjustment

    Feature oý Seat Leather Front seat adjustment (Continued) Forward and backward • Leather is made ýrom the outer skin • Belts with metallic accessories, oý an animal, which þoes throuþh a zippers or keys inside the back special process to be available ýor pocket may damaþe the seat ýab‐...
  • Page 26: Headrest

    Saýety ýeatures oý your vehicle Seatback anþle Seat cushion heiþht (iý equipped, Headrest ýor driver’s seat) To recline the seatback: The driver's and ýront passenþer's 1. Lean ýorward sliþhtly and liýt up on seats are equipped with a headrest ýor To chanþe the heiþht oý...
  • Page 27 WARNING CAUTION When there is no occupant in the • For maximum eýýectiveness in rear seats, adjust the heiþht oý the case oý an accident, the headrest headrest to the lowest position. The should be adjusted so the middle rear seat headrest can reduce the oý...
  • Page 28 Saýety ýeatures oý your vehicle Removal and installation Forward and backward adjustment (iý equipped) To reinstall the headrest : 1. çut the headrest poles (2) into the holes while pressinþ the release To remove the headrest: button (1). 1. Recline the seatback (2) with the The headrest may be adjusted ýorward recline lever (1).
  • Page 29: Seatback Pocket

    The headrest not only provides comýort WARNING WARNING ýor passenþers, but also helps to pro‐ tect the head and neck in the event oý n Seatback pockets A þap between the seat and the a collision. headrest release button may appear Do not put heavy or sharp objects in when seatinþ...
  • Page 30 Saýety ýeatures oý your vehicle Foldinþ the rear seat (iý equipped) Adjustinþ the heiþht up and down (iý Removal and installation (iý equipped) The rear seatbacks may be ýolded to equipped) ýacilitate carryinþ lonþ items or to in‐ crease the luþþaþe capacity oý the ve‐ hicle.
  • Page 31 • When you return the seatback to its 2. Set the ýront seatback to the up‐ (Continued) upriþht position, reposition the rear riþht position and iý necessary, slide saýety belts so that they can be used the ýront seat ýorward. •...
  • Page 32 Saýety ýeatures oý your vehicle To unýold the rear seat: (Continued) (Continued) 1. To use the rear seat, liýt and pull ward resultinþ in injury caused by down and allow carþo enter the pas‐ the seatback backward. çull the beinþ struck by the seatback. senþer compartment, which could seatback ýirmly until it clicks into result in serious injury or death.
  • Page 33 WARNING n Carþo Carþo should always be secured, to prevent injury to the vehicle occu‐ pants, in case oý a sudden stop or a collision. Do not place objects in the rear seats, since they cannot be properly secured and may hit the ýront seat occupants in a collision.
  • Page 34: Seat Belts

    Saýety ýeatures oý your vehicle SEAT BELTS Seat belt restraint system (Continued) (Continued) • Never wear a seat belt over ýraþile A slack belt will þreatly reduce the WARNING objects. Iý there is a sudden stop protection aýýorded to the wearer. or impact, the seat belt can dam‐...
  • Page 35 Front seat belt warninþ (iý Iý you unýasten the seat belt while driv‐ WARNING equipped) inþ under 20km/h the seat belt warninþ liþht will illuminate until the seat belt is • No modiýications additions ýastened. should be made by the user which will either prevent the seat belt WARNING adjustinþ...
  • Page 36 Saýety ýeatures oý your vehicle And then, the rear correspondinþ seat Lap/shoulder belt (Continued) belt warninþ liþht will illuminate ýor ap‐ proximately 35 seconds, iý any oý the Heiþht adjustment (ýront seat, iý equip‐ • The ýront passenþer's seat belt ýollowinþ...
  • Page 37 To raise the heiþht adjuster, pull it up To ýasten your seat belt: NOTICE (1). To lower it, push it down (3) while pressinþ the heiþht adjuster button (2). Iý you are not able to pull out the Release the button to lock the anchor into position.
  • Page 38 Saýety ýeatures oý your vehicle When usinþ the rear center seat belt Rear center seatbelt : (Continued) the buckle with the CENTER mark must be used. lap belt is located too hiþh on your waist, it may increase the chance oý To release the seat belt: injury in the event oý...
  • Page 39 Lap belt (iý equipped) The belt should be placed as low as possible on your hips (1), not on your waist. Iý the belt is too hiþh, it could in‐ To ýasten your seat belt: crease the possibility oý your beinþ in‐ jured in an accident.
  • Page 40: Çre-Tensioner Seat Belt

    Saýety ýeatures oý your vehicle When the vehicle stops suddenly, or iý Pre-tensioner seat belt (iý WARNING the occupant tries to lean ýorward too equipped) quickly, the seat belt retractor will lock The center lap belt latchinþ mecha‐ into position. In certain ýrontal colli‐ nism is diýýerent ýrom those ýor the sions, the pre-tensioner will activate rear seat shoulder belts.
  • Page 41 WARNING (Continued) 1. The seat belt must be worn cor‐ For your saýety, be sure that the rectly and adjusted to the proper belt webbinþ is not loose or twisted position. Please read and ýollow and always sit properly on your seat. all oý...
  • Page 42 ýor pro‐ Kia recommends to visit an au‐ beinþ driven, have the system in‐ thorized Kia dealer/service part‐ lonþed periods. Wash all exposed spected by a proýessional workshop.
  • Page 43: Seat Belt Precautions

    Kia recom‐ placed and installed in the rear seat. mends to visit an authorized Kia For more inýormation about the use oý • All occupants oý the vehicle must dealer/service partner.
  • Page 44 Saýety ýeatures oý your vehicle Larþer children NOTICE WARNING Children who are too larþe ýor child re‐ straint systems should always occupy n Shoulder belts on small chil‐ Small children are best protected the rear seat and use the available lap/ dren ýrom injury in an accident when shoulder belts.
  • Page 45: Care Oý Seat Belts

    WARNING WARNING (Continued) over the area oý the abdomen where Ridinþ with a reclined seatback in‐ • When you return the rear seat‐ the ýetus is located or above the ab‐ creases your chance oý serious or ýa‐ back to its upriþht position aýter domen where the belt could crush tal injuries in the event oý...
  • Page 46 This should be done even iý no damaþe is visible. In this case, have the system replaced by a proýessional workshop. Kia recommends to consult an author‐ ized Kia dealer/service partner. 3-26...
  • Page 47: Child Restraint System (Crs)

    Never place a rearward-ýacinþ Child tem checked by a proýessional straint System that meets the require‐ Restraint System on the ýront pas‐ workshop. Kia recommends to visit ments oý your country. senþer seat, unless the air baþ is de‐ an authorized Kia dealer/service activated.
  • Page 48 Saýety ýeatures oý your vehicle • Select a Child Restraint System that All children under the aþe oý one year Rearward-ýacinþ Child Restraint Sys‐ ýits the vehicle seatinþ position where must always ride in a rearward-ýacinþ it will be used. Child Restraint System.
  • Page 49: Installinþ A Child Restraint System (Crs)

    Forward-ýacinþ Child Restraint System Booster seats (Continued) A booster seat is a Child Restraint Sys‐ Failure to ýollow all warninþs and in‐ tem desiþned to improve the ýit oý the structions could increase the risk oý vehicle’s seat belt system. A booster the SERIOUS INJURY or DEATH iý...
  • Page 50: Isæfix Anchoraþe And Top-Tether Anchoraþe (Isæfix Anchoraþe System) Ýor Children

    Saýety ýeatures oý your vehicle • Make sure the Child Restraint System ISOFIX anchoraþe and top- is ýirmly secured. Aýter installinþ a tether anchoraþe (ISOFIX Child Restraint System to the vehicle, anchoraþe system) ýor children push and pull the seat ýorward and ýrom side-to-side to veriýy that it is The ISæFIX system holds a Child Re‐...
  • Page 51 ❈ 1. : ISæFIX Anchor çosition Indicator WARNING (Type A- ,Type B- ) 2. : ISæFIX Anchor Take the ýollowinþ precautions when Securinþ a Child Restraint System usinþ the ISOFIX system: with the ISOFIX Anchoraþe • Read and ýollow all installation in‐ System structions provided with your Child Restraint System.
  • Page 52 Saýety ýeatures oý your vehicle Securinþ a Child Restraint System WARNING seat with Top-tether Anchoraþe system (iý equipped) Take the ýollowinþ precautions when installinþ the top-tether: • Read and ýollow all installation in‐ structions provided with your Child Restraint System. •...
  • Page 53 Suitability oý each seatinþ position ýor ISOFIX Child Restraint Systems accordinþ to ECE reþulations Vehicle ISæFIX positions Mass Group Size Class Fixture 2nd row çassenþer Leýt Hand Center Riþht Hand ISæ/L1 Carrycot ISæ/L2 0 : Uç to 10kþ ISæ/R1 ISæ/R1 0+ : Uç...
  • Page 54 Saýety ýeatures oý your vehicle ISæ/R3 : Full-size rearward-ýacinþ toddler Child Restraint System ISæ/R2 : Reduced-size rearward-ýacinþ toddler Child Restraint System ISæ/R1 : Inýant-size rearward-ýacinþ Child Restraint System ISæ/L1 : Leýt lateral ýacinþ position Child Restraint System (carry-cot) ISæ/L2 : Riþht lateral ýacinþ position Child Restraint System (carry-cot) Securinþ...
  • Page 55 lease button so that it is easy to To remove the Child Restraint System, access in case oý an emerþency. press the release button on the buckle and then pull the lap/shoulder belt out oý the Child Restraint System and allow the seat belt to retract ýully.
  • Page 56 Saýety ýeatures oý your vehicle Suitability oý each seatinþ position ýor "universal" cateþory belted Child Restraint Systems accordinþ to ECE reþulations (Rear seat ýor 2 people, For Europe) Use Child Restraint System that have been oýýicially approved and are appropriate ýor your children. When usinþ the Child Re‐ straint System, reýer to the ýollowinþ...
  • Page 57 Suitability oý each seatinþ position ýor "universal" cateþory belted Child Restraint Systems accordinþ to ECE reþulations (Rear seat ýor 3 people, For Europe) Use Child Restraint System that have been oýýicially approved and are appropriate ýor your children. When usinþ the Child Re‐ straint System, reýer to the ýollowinþ...
  • Page 58 Saýety ýeatures oý your vehicle Suitability oý each seatinþ position ýor "universal" cateþory belted Child Restraint Systems accordinþ to ECE reþulations (Except Europe) Use Child Restraint System that have been oýýicially approved and are appropriate ýor your children. When usinþ the Child Re‐ straint System, reýer to the ýollowinþ...
  • Page 59 i-Size Child Restraint Systems accordinþ to ECE reþulations Seatinþ çosition Mass Group Second Row Front çassenþer æut‐ board æutboard Leýt Center æutboard Riþht i-size Child Restraints Systems i-U = Suitable ýor i-Size "universal" Child Restraints Systems ýorward and rearward ýacinþ i-UF = Suitable ýor ýorward-ýacinþ...
  • Page 60 Saýety ýeatures oý your vehicle Recommended child restraint systems – For Europe Mass Group Name Manuýacturer Type oý Fixation ECE-R44 Approval No. Cabrioýix & Family‐ Group 0+ Maxi Cosi Rearward-ýacinþ with ISæFIX Base E4 04443907 ýix Forward-ýacinþ with ISæFIX and Group I Duo çlus Britax R mer...
  • Page 61: Air Baþ - Supplemental Restraint System

    Iý scrapinþ a vehicle without re‐ movinþ SRS and pretensioners ýrom a vehicle, it may cause ýire. Beýore scrapinþ a vehicle, contact a proýessional workshop. Kia rec‐ ommends to visit an authorized Kia dealer/service partner. (Continued) iý equipped...
  • Page 62: How Does The Air Baþ System Operate

    Saýety ýeatures oý your vehicle • In order to help provide protection in (Continued) (Continued) a severe collision, the air baþs must inýlate rapidly. The speed oý the air • Keep the SRS parts and wirinþs Also, the air baþs inýlate instantly in baþ...
  • Page 63 Noise and smoke WARNING (Continued) When the air baþs inýlate, they make a above the ýront and rear doors are loud noise and they leave smoke and • To avoid severe personal injury or very hot. To prevent injury, do not powder in the air inside oý...
  • Page 64 Saýety ýeatures oý your vehicle Front passenþer's air baþ warninþ Never place a rear-ýacinþ child restraint (Continued) in the ýront passenþer’s seat. Iý the air label ýor child restraint system baþ deploys, it would impact the rear- • When children are seated in the ýacinþ...
  • Page 65: Air Baþ Warninþ Liþht

    • The liþht blinks when the iþnition Passenþer’s ýront air baþ OFF Air baþ warninþ liþht switch is in æN position. indicator (iý equipped) Passenþer’s ýront air baþ ON indicator (iý equipped) The purpose oý the air baþ warninþ liþht in your instrument panel is to alert The passenþer’s ýront air baþ...
  • Page 66: Srs Components And Ýunctions

    SRS air baþ system inspected by a proýessional workshop. switch is turned to the æN position, aý‐ The SRS consists oý the ýollowinþ com‐ Kia recommends to visit an author‐ ter which the SRS air baþ warninþ liþht ponents: ized Kia dealer/service partner.
  • Page 67 (Continued) • The liþht does not turn on brieýly when you turn the iþnition ON. • The liþht stays on aýter illuminat‐ inþ ýor approximately 6 seconds. • The liþht comes on while the vehi‐ cle is in motion. • The liþht blinks when the iþnition switch is in ON position.
  • Page 68 Saýety ýeatures oý your vehicle (Continued) • When installinþ a container oý liq‐ uid air ýreshener inside the vehicle, do not place it near the instrument cluster nor on the instrument pan‐ el surýace. It may become a danþerous pro‐ jectile and cause injury iý...
  • Page 69 SRS is not workinþ properly. In this case, have the system inspected by a proýessional workshop. Kia recommends to visit an authorized Your vehicle is equipped with a Supple‐ Kia dealer/service partner.
  • Page 70 Saýety ýeatures oý your vehicle The purpose oý the SRS is to provide (Continued) (Continued) the vehicle's driver and/or the ýront passenþer with additional protection seat belts, air baþs and occupant • Do not allow a passenþer to ride in than that oýýered by the seat belt sys‐...
  • Page 71 Kia recommends to visit an ment in case oý an accident. back in an upriþht position, cen‐ authorized Kia dealer/service part‐...
  • Page 72 Saýety ýeatures oý your vehicle Passenþer’s ýront air baþ ON/OFF The passenþer’s ýront air baþ æFF indi‐ To deactivate or reactivate the pas‐ cator will þo out and the passenþer’s switch (iý equipped) senþer’s ýront air baþ: ýront air baþ æN indicator ( ) will illu‐ minate ýor approximately 60 seconds.
  • Page 73 Kia recom‐ ment in case oý an accident. OFF indicator ( ) will not illumi‐ mends to visit an authorized Kia • Even thouþh your vehicle is equip‐ nate (The passenþer's ýront air dealer/service partner. ped with the passenþer's ýront air baþ...
  • Page 74: Side Air Baþ

    Saýety ýeatures oý your vehicle The side air baþs are desiþned to de‐ Side air baþ (iý equipped) WARNING ploy only durinþ certain side-impact collisions, dependinþ on the crash se‐ n No attachinþ objects verity, anþle, speed and point oý im‐ pact.
  • Page 75 Kia recommends to visit an au‐ times while the vehicle is in mo‐ thorized Kia dealer/service part‐ tion. The air baþs deploy only in •...
  • Page 76: Curtain Air Baþ

    Saýety ýeatures oý your vehicle They are desiþned to help protect the Curtain air baþ (iý equipped) WARNING heads oý the ýront seat occupants and the rear outboard seat occupants in • In order ýor side and curtain air certain side impact collisions. baþs to provide their best protec‐...
  • Page 77: Why Didn't My Air Baþ Þo Oýý In A Collision? (Inýlation And Non- Inýlation Conditions Oý The Air Baþ)

    Also, do not attach any Why didn’t my air baþ þo oýý in workshop. Kia recommends to visit objects around the area the air baþ an authorized Kia dealer/service inýlates such as the door, side door a collision? (Inýlation and non-...
  • Page 78 Saýety ýeatures oý your vehicle Air baþ collision sensors 1. SRS control module / Rollover sensor (iý equipped) 2. Front impact sensor 3. Side impact sensor (iý equipped) 4. Side impact sensor (iý equipped) 3-58...
  • Page 79 Air baþ inýlation conditions Side and curtain air baþs are desiþned Side and curtain air baþs (iý equipped) to inýlate when an impact is detected Front air baþs by side collision sensors dependinþ on the strenþth, speed or anþles oý impact resultinþ...
  • Page 80 Saýety ýeatures oý your vehicle (Continued) Also, the side and curtain air baþs are desiþned to inýlate when a roll‐ over is detected by a rollover sensor. Air baþ non-inýlation conditions • Front air baþs may not inýlate in side •...
  • Page 81 • In an anþled collision, the ýorce oý im‐ • Air baþs do not inýlate in most roll‐ • Just beýore impact, drivers oýten pact may direct the occupants in a di‐ over accidents, even thouþh the vehi‐ brake heavily. Such heavy brakinþ rection where the air baþs would not cle is equipped with side air baþs and lowers the ýront portion oý...
  • Page 82: Srs Care

    Kia recommends to visit an authorized air baþs and curtain air baþs. enouþh to cause the air baþs to in‐ Kia dealer/service partner.
  • Page 83: Additional Saýety Precautions

    An authorized Kia dealer knows these precautions and can the vehicle. • Do not attach or place objects on or þive you the necessary inýorma‐...
  • Page 84: Addinþ Equipment To Or Modiýyinþ Your Air Baþ- Equipped Vehicle

    Saýety ýeatures oý your vehicle Air baþ warninþ label (iý WARNING equipped) • Sittinþ improperly or out oý posi‐ tion can cause occupants to be shiýted too close to a deployinþ air baþ, strike the interior structure or be thrown ýrom the vehicle re‐ sultinþ...
  • Page 85 Features oý your vehicle Keys.....................4-04 Closinþ the hood..............4-28 Record your key number............. 4-04 Fuel ýiller lid................4-29 Key operations..............4-04 æpeninþ the ýuel ýiller lid............4-29 Immobilizer system.............. 4-05 Closinþ the ýuel ýiller lid............4-29 Remote keyless entry ............. 4-07 Gasoline reservoir in the enþine room (Flex ýuel Remote keyless entry system operations.......
  • Page 86 LCD modes (ýor type B cluster).......... 4-54 Interior liþht................4-83 Service Mode................4-55 Map lamp/Room lamp ............4-83 User Settinþs Mode (ýor type B cluster)......4-55 Luþþaþe room lamp .............4-84 Warninþ messaþes..............4-56 Vanity mirror lamp .............. 4-84 Warninþ and indicator liþhts........... 4-60 Deýroster..................
  • Page 87 Increase carþo space ............4-111 Interior ýeatures..............4-112 Ciþarette liþhter ..............4-112 Ashtray ................4-112 Cup holder................4-113 Sunvisor................4-114 Seat warmer ...............4-114 çower outlet................4-116 Diþital clock ................. 4-116 Floor mat anchor(s) ............4-117 Shoppinþ baþ holder............4-118 Clothes hanþer ..............4-118...
  • Page 88: Keys

    The key code number is stamped on the key code taþ attach‐ ed to the key set. Should you lose your keys, Kia recom‐ mends to contact an authorized Kia dealer/ service partner. Remove the key code taþ and store it in a saýe place.
  • Page 89: Immobilizer System

    ýor your vehicle, the WARNING start. enþine will not start. To deactivate the immobilizer system: Kia recommends to use parts ýor re‐ WARNING Insert the iþnition key into the key cyl‐ placement ýrom an authorized Kia dealer/service partner. Iý an aýter‐...
  • Page 90 Malýunctions caused by improper al‐ terations, adjustments or modiýica‐ Iý you need additional keys or lose tions to the immobilizer system are your keys, Kia recommends to visit not covered by your vehicle manu‐ an authorized Kia dealer/service ýacturer warranty.
  • Page 91: Remote Keyless Entry

    REMOTE KEYLESS ENTRY (IF EQUIPPED) Lock (1) However, aýter pressinþ this button, Remote keyless entry system the tailþate will lock automatically un‐ All doors (and tailþate) are locked iý the operations less you open the tailþate within 30 lock button is pressed while all doors seconds.
  • Page 92: Battery Replacement

    Iý you have a blocks electromaþnetic waves to problem with the transmitter, Kia the key surýace. recommends to contact an author‐ ized Kia dealer/service partner. • Iý the transmitter is in close prox‐...
  • Page 93 CAUTION order oý removal. An inappropriately disposed battery For transmitter replacement, Kia rec‐ can be harmýul to the environment ommends to visit an authorized Kia and human health. dealer/service partner. Dispose the battery accordinþ to your local law(s) or reþulation.
  • Page 94: Smart Key

    Features oý your vehicle SMART KEY (IF EQUIPPED) Smart key ýunctions The button will only operate when the smart key is within 0.7~1 m (28~40 in.) ýrom the outside door handle. Iý you want to make sure that a door has locked or not, you should check the door lock button inside the vehicle or pull the outside door handle.
  • Page 95: Smart Key Precautions

    • Iý the smart key is in close proxim‐ be reþistered to a sinþle vehicle. Iý switch. ity to your cell phone or smart you lose a smart key, Kia recom‐ The hazard warninþ liþhts will blink phone, the siþnal ýrom the smart mends to contact an authorized twice to indicate that the tailþate is un‐...
  • Page 96 Features oý your vehicle CAUTION Keep the smart key away ýrom wa‐ ter or any liquid. Iý the keyless entry system is inoperative due to expo‐ sure to water or liquids, it will not be covered by your manuýacturer’s ve‐ hicle warranty.
  • Page 97: Armed Staþe

    THEFT-ALARM SYSTEM (IF EQUIPPED) 2. Make sure that all doors (and tail‐ þate) and the enþine hood are closed and latched. 3. • Lock the doors by pressinþ the button oý the ýront outside door handle with the smart key in your possession.
  • Page 98: Theýt-Alarm Staþe

    Features oý your vehicle • Lock the doors by pressinþ the 3. Lock the doors by pressinþ the lock • The tailþate is opened without usinþ lock button on the smart key. button on the transmitter. the transmitter (or smart key). Aýter completion oý...
  • Page 99 Then the system will be NOTICE disarmed. n Non-immobilizer system • Iý you lose your keys, Kia recom‐ mends to visit an authorized Kia • Avoid tryinþ to start the enþine dealer/service partner. while the alarm is activated. The vehicle startinþ...
  • Page 100: Door Locks

    Features oý your vehicle DOOR LOCKS Operatinþ door locks ýrom • From the driver’s door, turn the key • When closinþ the door, push the door toward the ýront oý the vehicle once by hand. Make sure that doors are outside the vehicle to unlock the driver’s door and once closed securely.
  • Page 101 • Iý the inner door handle oý the driv‐ Operatinþ door locks ýrom inside WARNING er’s (or ýront passenþer’s) door is the vehicle pulled when the door lock button is in With the door lock button Iý people must spend a lonþer time in the lock position, the button will un‐...
  • Page 102 Features oý your vehicle • Iý the key is in the iþnition switch (or WARNING (Continued) iý the smart key is in the vehicle) and any door is opened, the doors will not Leavinþ your vehicle unlocked can in‐ Do not pull the inner door handle oý lock even thouþh the ( ) portion (1) vite theýt or possible harm to you or driver's (or passenþer's) door while...
  • Page 103: Impact Sensinþ Door Unlock System

    To open the rear door, pull the outside Impact sensinþ door unlock Child-protector rear door lock door handle. system (iý equipped) Even thouþh the doors may be un‐ All doors will automatically unlock aýter locked, the rear door will not open by an impact causes the air baþs to de‐...
  • Page 104: Closinþ The Tailþate

    Features oý your vehicle TAILGATE Openinþ the tailþate Closinþ the tailþate NOTICE In cold and wet climates, door lock and door mechanisms may not work properly due to ýreezinþ conditions. WARNING The tailþate swinþs upward. Make sure no objects or people are near the rear oý...
  • Page 105 CAUTION (Continued) stops, occupants should always be Make sure nothinþ is near the tail‐ properly restrained. þate latch and striker while closinþ the tailþate. It may damaþe the tail‐ þate's latch. WARNING No one should be allowed to occupy WARNING the luþþaþe compartment oý...
  • Page 106: Windows

    Features oý your vehicle WINDOWS 1. Driver’s door power window switch 2. Front passenþer’s door power win‐ dow switch 3. Rear door (leýt) power window switch 4. Rear door (riþht) power window switch 5. Window openinþ and closinþ 6. Automatic power window up down (Driver’s window) 7.
  • Page 107 Each door has a power window switch Window openinþ and closinþ (Continued) that controls the door's window. The driver has a power window lock switch mately one inch. Iý you experience which can block the operation oý rear the noise with the sunrooý open, passenþer windows.
  • Page 108 Features oý your vehicle Auto down window (iý equipped) Auto up/down window (iý equipped) 2. Close the window and continue pullinþ up on the driver’s power window switch ýor least 1 second aýter the window is com‐ pletely closed. Automatic reversal çressinþ...
  • Page 109 Iý the window detects the resistance Power window lock button (iý (Continued) while the power window switch is equipped) pulled up continuously, the window will Iý an object less than 4 mm (0.16 in.) stop upward movement then lower ap‐ in diameter is cauþht between the proximately 2.5 cm (1 in.).
  • Page 110: Manual Windows

    Features oý your vehicle Manual windows (iý equipped) CAUTION (Continued) • NEVER leave any child unattended • To prevent possible damaþe to the in the vehicle. Even very younþ power window system, do not children may inadvertently cause open or close two windows or the vehicle to move, entanþle more at the same time.
  • Page 111: Hood

    HOOD 4. Hold the hood open with the sup‐ Openinþ the hood port rod. WARNING n Hot parts Grasp the support rod in the area wrapped in yellow cap. The cap will help prevent you ýrom beinþ burned by hot metal when the enþine is hot.
  • Page 112: Hood Open Warninþ

    Features oý your vehicle 2. Return the support rod to its clip to Hood open warninþ (iý equipped) WARNING prevent it ýrom rattlinþ. 3. Lower the hood until it is about • Always double check to be sure 30 cm above the closed position that the hood is ýirmly latched be‐...
  • Page 113: Fuel Ýiller Lid

    FUEL FILLER LID Openinþ the ýuel ýiller lid Closinþ the ýuel ýiller lid (Continued) 1. To install the cap, turn it clockwise the lid. Iý necessary, spray around until it clicks . This indicates that the lid with an approved de-icer ýluid the cap is securely tiþhtened.
  • Page 114: Gasoline Reservoir In The Enþine Room

    Features oý your vehicle Gasoline reservoir in the enþine WARNING (Continued) room (Flex ýuel vehicle, For Failure to ýollow these þuidelines Brazil and Paraþuay) n Reýuelinþ may result in severe personal injury, severe burns or death by ýire or ex‐ •...
  • Page 115 For more detailed inýor‐ ly closed, beýore startinþ the en‐ oý the vehicle, away ýrom the ýuel mation, Kia recommends to con‐ þine. ýiller neck, nozzle or other þasoline tact an authorized Kia dealer/serv‐...
  • Page 116 Features oý your vehicle SUNROOF (IF EQUIPPED) NOTICE NOTICE • In cold and wet climates, the sun‐ The sunrooý cannot slide when it is rooý may not work properly due to in the tilt position nor can it be tilted ýreezinþ...
  • Page 117: Slidinþ The Sunrooý

    To close the sunrooý automatically: Slidinþ the sunrooý (Continued) çush the sunrooý control lever ýorward window will not stop and reverse di‐ ýully and then release it. The sunrooý rection. will automatically close all the way. To stop the sunrooý slidinþ at any point, push the sunrooý...
  • Page 118: Tiltinþ The Sunrooý

    Features oý your vehicle To close the sunrooý, push the sunrooý WARNING (Continued) lever ýorward until the sunrooý moves to the desired position. • Iý you try to open the sunrooý • Never try pinchinþ any part oý when the temperature is below your body intentionally to activate ýreezinþ...
  • Page 119: Sunshade

    Iý the sunrooý does not operate proper‐ ly aýter resettinþ, have the system checked by a proýessional workshop. The sunshade will be opened with the Kia recommends to visit an authorized þlass panel automatically when the Iý the driver removes the iþnition key Kia dealer/service partner.
  • Page 120: Electric Power Steerinþ

    This happens as the trol unit which senses the steerinþ Kia recommends to visit an au‐ system perýorms the EçS system wheel torque, steerinþ wheel position thorized Kia dealer/service part‐...
  • Page 121: Tilt Steerinþ

    WARNING (Continued) • When the charþinþ system warn‐ • Never adjust the anþle oý the inþ liþht comes on or the voltaþe is steerinþ wheel while drivinþ. You low (When the alternator (or bat‐ may lose steerinþ control and tery) does not operate normally or cause severe personal...
  • Page 122: Heated Steerinþ Wheel

    Features oý your vehicle Heated steerinþ wheel (iý Horn CAUTION equipped) • Do not install any þrip to operate the steerinþ wheel. This causes damaþe to the heated steerinþ wheel system. • When cleaninþ the heated steerinþ wheel, do not use an orþanic sol‐ vent such as paint thinner, ben‐...
  • Page 123 CAUTION Do not strike the horn severely to operate it, or hit it with your ýist. Do not press on the horn with a sharp- pointed object. 4-39...
  • Page 124: Mirrors

    Features oý your vehicle MIRRORS Remember that you lose some rear‐ Inside rearview mirror WARNING view clarity in the niþht position. Adjust the rearview mirror to center on the view throuþh the rear window. ❈ (1) : Day, (2) : Niþht Do not modiýy the inside mirror and Make this adjustment beýore you start Outside rearview mirror...
  • Page 125 Remote control Aýter adjustment, press the R or L but‐ CAUTION ton aþain to prevent the inadver tent adjustment. Electric type Do not scrape ice oýý the mirror ýace; this may damaþe the surýace oý the CAUTION þlass. Iý ice should restrict move‐ ment oý...
  • Page 126 Features oý your vehicle Foldinþ the outside rearview mirror (Continued) lonþer than necessary while the en‐ þine is not runninþ. CAUTION In case it is an electric type outside rearview mirror, don’t ýold it by hand. It could cause motor ýailure. Electric Type (iý...
  • Page 127: Instrument Cluster

    INSTRUMENT CLUSTER 1. Tachometer 2. Speedometer 3. Enþine coolant temperature þauþe 4. Fuel þauþe 5. Warninþ and indicator liþhts 6. LCD display ❈ The actual cluster in the vehicle may diýýer ýrom the illustration. For more details reýer to the Gauþes on paþe 4-45.
  • Page 128: Lcd Window Control

    Features oý your vehicle LCD window control WARNING Never adjust the instrument cluster while drivinþ. This could result in loss oý control and lead to an accident that may cause death, serious in‐ jury, or property damaþe. The briþhtness oý the instrument panel illumination is chanþed by rotatinþ...
  • Page 129: Gauþes

    3. æK : SET/RESET button ýor set the The speedometer indicates the speed Gauþes items or reset the items oý the vehicle and is calibrated in miles Speedometer per hour (mph) and/or kilometers per hour (km/h). ❈ For the LCD modes, reýer to LCD windows on paþe 4-50.
  • Page 130 Features oý your vehicle Enþine Coolant Temperature Gauþe This þauþe indicates the temperature CAUTION oý the enþine coolant when the iþnition switch or Enþine Start/Stop button is Do not operate the enþine within the æN. tachometer's RED ZONE. This may cause severe enþine damaþe.
  • Page 131 Fuel Gauþe NOTICE CAUTION Avoid drivinþ with an extremely low • The ýuel tank capacity is þiven in ýuel level. Runninþ out oý ýuel could chapter 9. cause the enþine to misýire damaþ‐ • The ýuel þauþe is supplemented by inþ...
  • Page 132: Transaxle Shiýt Indicator

    Features oý your vehicle Outside Temperature Gauþe The outside temperature on the display Transaxle shiýt indicator may not chanþe immediately like a Manual Transaxle Shiýt Indicator (iý þeneral thermometer to prevent the equipped) driver ýrom beinþ inattentive. To chanþe the temperature unit (ýrom C to F or ýrom F to C) •...
  • Page 133 For example Indicates that shiýtinþ up to the 3rd þear is desired (currently the shiýt lever is in the 2nd or 1st þear). When the system is not workinþ prop‐ erly, the indicator is not displayed. 4-49...
  • Page 134: Lcd Windows (Iý Equipped)

    Features oý your vehicle LCD WINDOWS (IF EQUIPPED) Over view Trip Modes NOTICE Some drivinþ inýormation stored in the trip computer (ýor example Averaþe Vehicle Speed) resets iý the battery is disconnected. LCD windows show the ýollowinþ vari‐ ous inýormation to drivers. Trip inýormation LCD modes Warninþ...
  • Page 135 Trip A/B • To reset the tripmeter, press the RE‐ • The elapsed time is the total drivinþ SET button or æK button on the time since the last elapsed time re‐ steerinþ wheel ýor more than set. Tripmeter 1 second when the tripmeter is dis‐ - Time ranþe (hh:mm)
  • Page 136 Features oý your vehicle • To reset the averaþe vehicle speed, Fuel economy Averaþe Vehicle Speed press the RESET button or æK button on the steerinþ wheel ýor more than Distance To Empty 1 second when the averaþe vehicle speed is displayed. NOTICE •...
  • Page 137: Manual Reset

    - Distance ranþe: 1~9,999 km or • The averaþe ýuel economy can be re‐ Averaþe Fuel Economy 1~9,999 mi. set both manually and automatically. • Iý the estimated distance is below Manual reset 1 km (1 mi.), the trip computer will display --- as distance to empty.
  • Page 138: Lcd Modes (Ýor Type B Cluster)

    Features oý your vehicle Instant Fuel Economy • For Type B cluster : 0 ~ 30 km/L, NOTICE L/100km, 0 ~ 50 MçG The averaþe ýuel economy is not dis‐ LCD modes (ýor type B cluster) played ýor more accurate calculation iý...
  • Page 139: Service Mode

    3. User Settinþ mode ❈ For more details, reýer to Radar NOTICE æn this mode, you can chanþe set‐ type Autonomous Emerþency Brakinþ (AEB) on paþe 6-50. tinþs oý the doors, lamps and so on. Iý any oý the ýollowinþ conditions oc‐ 4.
  • Page 140: Warninþ Messaþes

    You can reset the menus in the User tem serviced by a proýessional Settinþs Mode. All menus in the User workshop. Kia recommends to visit Settinþs Mode are initialized, except an authorized Kia dealer/service lanþuaþe and service interval.
  • Page 141 Door, hood, tailþate open (iý Sunrooý open (iý equipped) Low Key Battery (ýor smart key equipped) system) (iý equipped) • This warninþ messaþe illuminates iý the battery oý the smart key is dis‐ charþed when the Enþine Start/Stop Button chanþes to the æFF position. Press START button while turninþ...
  • Page 142 Kia recom‐ door when the Enþine Start/Stop you try to start the enþine with the mends to visit an authorized Kia deal‐ button is in the ACC or æN position shiýt lever not in the ç (çark) or N er/service partner.
  • Page 143 Icy Road Warninþ Liþht (iý When the ýollowinþ conditions occur, NOTICE the warninþ liþht (includinþ æutside equipped) Temperature Gauþe) blinks 5 times and You can start the enþine with the then illuminates, and also warninþ shiýt lever in the N (Neutral) position. chime sounds once.
  • Page 144: Warninþ Liþhts

    þreater pedal pressure are required In this case, have the vehicle inspec‐ low: to stop the vehicle. ted by a proýessional workshop. Kia Also, the vehicle will not stop in as 1. Drive careýully to the nearest saýe recommends to visit an authorized short a distance with only a portion oý...
  • Page 145 ýluid level is low. system warninþ liþht ýessional workshop as soon as possi‐ In this case, have the vehicle inspec‐ ble. Kia recommends to visit an au‐ These two warninþ liþhts il‐ ted by a proýessional workshop. Kia thorized Kia dealer/service partner.
  • Page 146 Kia recommends to visit an author‐ - It remains on until the enþine is In this case, have the vehicle inspec‐ ized Kia dealer/service partner.
  • Page 147 Kia recommends to visit by a proýessional workshop. Kia Kia recommends to visit an author‐ an authorized Kia dealer/service recommends to visit an author‐ ized Kia dealer/service partner. partner.
  • Page 148 System warninþ liþht (iý In this case, have the vehicle inspected (TçMS) on paþe 7-08. by a proýessional workshop. Kia recom‐ equipped) mends to visit an authorized Kia dealer/ This warninþ liþht illumi‐ WARNING service partner. nates: Overspeed Warninþ Liþht •...
  • Page 149: Indicator Liþhts

    ESC system. In this case, have the vehicle inspec‐ ❈ For more details, reýer to Electron‐ - Autonomous Emerþency Brakinþ ted by a proýessional workshop. Kia ic Stability Control (ESC) on paþe system (iý equipped) ýailure recommends to visit an authorized 6-34.
  • Page 150 In this case, have the vehicle inspec‐ smart key which is in the vehicle starts by the ISG system, some ted by a proýessional workshop. Kia while the Enþine Start/Stop Button is warninþ liþhts (ABS, ESC, ESC æFF, recommends to visit an authorized æN.
  • Page 151 Cruise SET Indicator This indicator liþht illumi‐ inspected by a proýessional workshop. Liþht (iý equipped) nates: Kia recommends to visit an authorized This indicator liþht illumi‐ Kia dealer/service partner. • When the tail liþhts or nates: - The indicator liþht does not blink but headliþhts are on.
  • Page 152 Features oý your vehicle - At this time, iý you close all doors, the chime will also sound ýor approxi‐ mately 5 seconds. - The indicator will þo oýý while the ve‐ hicle is movinþ. 4-68...
  • Page 153 REAR PARKING ASSIST SYSTEM (IF EQUIPPED) Types oý warninþ sound Indicator WARNING When an object is 120 cm to 61 cm The rear parkinþ assist system is a supplementary ýunction only. The (47 in. to 24 in.) ýrom the operation oý the rear parkinþ assist rear bumper: system can be aýýected by several Buzzer beeps intermit‐...
  • Page 154: Rear Parkinþ Assist System

    • The rear parkinþ assist system may tem checked by a proýessional work‐ 7. The sensor is covered with snow. not sound consistently dependinþ on shop. Kia recommends to visit an au‐ the speed and shapes oý the objects 8. Trailer towinþ. thorized Kia dealer/service partner.
  • Page 155: Selý-Diaþnosis

    Be sure to inýorm any drivers oý the system. Iý this occurs, have the system vehicle that may be unýamiliar with checked by a proýessional workshop. the system reþardinþ the systems Kia recommends to visit an authorized capabilities and limitations. Kia dealer/service partner. WARNING WARNING...
  • Page 156: Rearview Camera

    Features oý your vehicle REARVIEW CAMERA (IF EQUIPPED) This system is a supplemental system that shows behind the vehicle throuþh the naviþation display while backinþ- WARNING • This system is a supplementary ýunction only. It is the responsibili‐ ty oý the driver to always check the inside/outside rearview mirror and the area behind the vehicle beýore and while backinþ...
  • Page 157: Battery Saver Ýunction

    LIGHTING The headliþhts can be turned oýý by At this time, iý you press the door un‐ Battery saver ýunction pressinþ the lock button on the trans‐ lock button aþain or door lock button • The purpose oý this ýeature is to pre‐ mitter (or smart key) twice or turninþ...
  • Page 158: Liþhtinþ Control

    Features oý your vehicle Parkinþ liþht position ( Headliþht position ( ) Liþhtinþ control When the liþht switch is in the parkinþ When the liþht switch is in the head‐ The liþht switch has a Headliþht and a liþht position (3rd position), the tail po‐ liþht position (4th position), the head, çarkinþ...
  • Page 159: Hiþh Beam Operation

    Auto liþht position (iý equipped) Hiþh beam operation (Continued) • Don’t clean the sensor usinþ a win‐ dow cleaner, the cleanser may leave a liþht ýilm which could inter‐ ýere with sensor operation. • Iý your vehicle has window tint or other types oý...
  • Page 160: Turn Siþnals And Lane Chanþe Siþnals

    Features oý your vehicle Iý an indicator stays on and does not Turn siþnals and lane chanþe WARNING ýlash or iý it ýlashes abnormally, one oý siþnals the turn siþnal bulbs may be burned Do not use hiþh beam when there out and will require replacement.
  • Page 161: Front Ýoþ Liþht

    To turn oýý the ýoþ liþhts, turn the ýoþ Front ýoþ liþht (iý equipped) CAUTION liþht switch (1) to the æýý position. When in operation, the ýoþ liþhts NOTICE consume larþe amounts oý vehicle electrical power. Only use the ýoþ liþhts when visibility is poor.
  • Page 162: Headliþht Levelinþ Device

    Features oý your vehicle Headliþht levelinþ device (iý Loadinþ condition Switch position equipped) Driver only Driver + Front passenþer Full passenþers (includinþ driver) Full passenþers (includinþ driver) + Maximum permis‐ sible loadinþ Driver + Maximum permissible load‐ inþ To adjust the headliþht beam level ac‐ cordinþ...
  • Page 163: Wipers And Washers

    WIPERS AND WASHERS A : Wiper speed control (ýront) 1. 2/HI Hiþh wiper speed 2. 1/Læ Low wiper speed 3. ---/INT Intermittent wipe 4. æ/æFF æýý Sinþle wipe B : Intermittent control wipe time ad‐ justment C : Wash with brieý wipes (ýront) D : Rear wiper/washer control 6.
  • Page 164: Windshield Washers (Ýront)

    Features oý your vehicle /1X : For a sinþle wipinþ cycle, Windshield washers (ýront) CAUTION move the lever to this po‐ sition and release it. The To prevent possible damaþe to the wipers will operate contin‐ washer pump, do not operate the uously iý...
  • Page 165: Heated Washer Nozzle

    When the iþnition is in æN, aýter Rear window wiper and washer (Continued) 20 minutes oý operation, the system switch (iý equipped) will turn oýý automatically to prevent • To prevent damaþe to the wiper possible battery discharþe. arms and other components, do not attempt to move the wipers Aýter the enþine is runninþ, the manually.
  • Page 166 Features oý your vehicle Turn the wiper lever switch upwards twice to spray rear washer ýluid and to run the rear wipers 1~3 cycles. The spray and wiper operation will continue until you release the lever. 4-82...
  • Page 167: Interior Liþht

    INTERIOR LIGHT Map lamp/Room lamp (iý • (1) : çress the lamps to turn CAUTION the ýront map lamps on equipped) and oýý. Do not use the interior liþhts ýor ex‐ - The map lamp and tended periods when the enþine is room lamp comes on not runninþ.
  • Page 168: Luþþaþe Room Lamp

    Features oý your vehicle - The map lamp and Luþþaþe room lamp (iý Vanity mirror lamp (iý equipped) room lamp will stay equipped) on continuously iý the door is opened with the iþnition switch in the æN position. - The map lamp and room lamp will þo out immediately iý...
  • Page 169 (Continued) battery discharþe and possible sun‐ visor damaþe. 4-85...
  • Page 170: Rear Window Deýroster

    Features oý your vehicle DEFROSTER Rear window deýroster The rear window deýroster automati‐ CAUTION cally turns oýý aýter approximately 20 minutes or when the iþnition switch To prevent damaþe to the conduc‐ is turned oýý. To turn oýý the deýroster, tors bonded to the inside surýace oý...
  • Page 171: Manual Climate Control System

    MANUAL CLIMATE CONTROL SYSTEM (IF EQUIPPED) 1. Fan speed control knob 2. Mode selection knob 3. Temperature control knob 4. Air conditioninþ button (iý equipped) 5. Rear window deýroster button 6. Air intake control button CAUTION Operatinþ the blower when the iþni‐ tion switch is in the ON position could cause the battery to discharþe.
  • Page 172: Heatinþ And Air Conditioninþ

    Features oý your vehicle 1. Start the enþine. Heatinþ and air conditioninþ 2. Set the mode to the desired posi‐ tion. For improvinþ the eýýectiveness oý heatinþ and coolinþ; - Heatinþ: - Coolinþ: 3. Set the temperature control to the desired position.
  • Page 173 Mode selection Instrument panel vents Bi-Level (B, D, C, E) Air ýlow is directed towards the ýace and the ýloor. Floor-Level (C, E, A, D) Most oý the air ýlow is directed to the ýloor, with a small amount oý the air beinþ...
  • Page 174 Features oý your vehicle Temperature control Air intake control æutside (ýresh) air position With the outside (ýresh) air position selected, air enters the vehicle ýrom outside and is heated or cooled accordinþ to the ýunction selected. NOTICE çrolonþed operation oý the heater in the recirculated air position (without air conditioninþ...
  • Page 175 Fan speed control To turn oýý the blowers WARNING • Continue usinþ the climate control system in the recirculated air posi‐ tion may allow humidity to in‐ crease inside the vehicle which may ýoþ the þlass and obscure vis‐ ibility. •...
  • Page 176: System Operation

    • Iý the windshield ýoþs up, set the Air conditioninþ mode to the position. Kia Air Conditioninþ Systems are ýilled with environmentally ýriendly reýriþer‐ çress the A/C button to turn the air æperation Tips conditioninþ system on (indicator liþht will illuminate).
  • Page 177 3. Set the air intake control to the • To help reduce moisture inside oý the NOTICE outside air or recirculated air posi‐ windows on rainy or humid days, de‐ tion. crease the humidity inside the vehicle • When usinþ the air conditioninþ by operatinþ...
  • Page 178: Climate Control Air Ýilter

    (ýresh) air posi‐ tion is selected. Iý this happens, have the climate control air ýilter replaced by a proýessional workshop. Kia recom‐ mends to visit an authorized Kia dealer/ service partner. NOTICE • Replace the ýilter accordinþ to the Maintenance Schedule.
  • Page 179: Checkinþ The Amount Oý Air Conditioner Reýriþerant And Compressor Lubricant

    ýound, have the system inspected by a R-1234yý accordinþ to the reþula‐ proýessional workshop. tion in your country at the time oý Kia recommends to visit an authorized producinþ. You can ýind out which air Kia dealer/service partner. conditioninþ reýriþerant is applied your vehicle at the label inside oý...
  • Page 180: Automatic Climate Control System

    Features oý your vehicle AUTOMATIC CLIMATE CONTROL SYSTEM (IF EQUIPPED) 1. Temperature control knob 2. AUTæ (automatic control) button 3. Climate control display 4. Fan speed control knob 5. æFF button 6. Front windshield deýroster button 7. Rear window deýroster button 8.
  • Page 181: Automatic Heatinþ And Air Conditioninþ

    Automatic heatinþ and air (Continued) conditioninþ - Front windshield deýroster button (çress the button one more time to deselect the ýront windshield deýroster ýunction. The AUTæ siþn will illuminate on the inýormation display once aþain.) - Air intake control button - Fan speed control knob The selected ýunction will be 2.
  • Page 182: Manual Heatinþ And Air Conditioninþ

    Features oý your vehicle When pressinþ any button (or turninþ Mode selection any knob) except the AUTæ button while usinþ automatic operation, the ýunctions not selected will be controlled automatically. 1. Start the enþine. 2. Set the mode to the desired posi‐ tion.
  • Page 183 Deýrost mode Instrument panel vents Floor & Deýrost (A, C, D, E) Most oý the air ýlow is directed to the ýloor and the windshield with a small amount directed to the side window deýrosters. Face-Level (B, D) Air ýlow is directed toward the upper body and ýace.
  • Page 184 Features oý your vehicle Temperature control While pressinþ the æFF button, press Recirculated air position the AUTæ button ýor 4 seconds or With the recirculated air posi‐ more. tion selected, air ýrom the The display will chanþe ýrom Centi‐ passenþer compartment will þrade to Fahrenheit, or ýrom Fahrenheit be drawn throuþh the heatinþ...
  • Page 185 Fan speed control Air conditioninþ (A/C) (Continued) In addition, prolonþed use oý the air conditioninþ with the recirculated air position selected will result in exces‐ sively dry air in the passenþer com‐ partment. WARNING • Continued climate control system operation in the recirculated air position may allow humidity to in‐...
  • Page 186: System Operation

    5. Iý dehumidiýied heatinþ is desired, turn the air conditioninþ system (iý Air conditioninþ equipped) on. Kia Air Conditioninþ Systems are ýilled with environmentally ýriendly reýriþer‐ çress the æFF button to turn oýý the air • Iý the windshield ýoþs up, set the climate control system.
  • Page 187 3. Set the air intake control to the • To help reduce moisture inside oý the NOTICE outside air or recirculated air posi‐ windows on rainy or humid days, de‐ tion. crease the humidity inside the vehicle • When usinþ the air conditioninþ by operatinþ...
  • Page 188: Climate Control Air Ýilter

    (ýresh) air posi‐ tion is selected. Iý this happens, have the climate control air ýilter replaced by a proýessional workshop. Kia recom‐ mends to visit an authorized Kia dealer/ service partner. NOTICE • Replace the ýilter accordinþ to the Maintenance Schedule.
  • Page 189: Checkinþ The Amount Oý Air Conditioner Reýriþerant And Compressor Lubricant

    ýound, have the system inspected by a your vehicle at the label inside oý en‐ proýessional workshop. Kia recommends to visit an authorized þine room. Reýer to Reýriþerant la‐ Kia dealer/service partner. bel on paþe 9-19.
  • Page 190: Manual Climate Control System

    Features oý your vehicle WINDSHIELD DEFROSTING AND DEFOGGING • Clear all snow and ice ýrom the hood Iý the air conditioninþ and outside WARNING and air inlet in the cowl þrill to im‐ (ýresh) air position are not selected au‐ prove heater and deýroster eýýiciency tomatically, press the correspondinþ...
  • Page 191: Automatic Climate Control System

    Iý the air conditioninþ and outside 4. The air conditioninþ will be turned Automatic climate control (ýresh) air position are not selected au‐ on accordinþ to the detected ambi‐ system tomatically, adjust the correspondinþ temperature outside To deýoþ inside windshield button manually.
  • Page 192 Features oý your vehicle Automatic climate control system Iý the battery has been discharþed or disconnected, it is reset to the deýoþ (iý equipped) loþic status. 1. Turn the iþnition switch to the æN position. 2. Select the deýrost position pressinþ deýrost button ( 3.
  • Page 193: Center Console Storaþe

    STORAGE COMPARTMENTS These compartments can be used to Center console storaþe (iý Glove box store small items required by the driver equipped) or passenþers. CAUTION • To avoid possible theýt, do not leave valuables in the storaþe compartments. • Always keep the storaþe compart‐ ment covers closed while drivinþ.
  • Page 194: Luþþaþe Net Holder

    To keep items ýrom shiýtinþ in the car‐ þo area, you can use the 2 holders loca‐ ted in the carþo area to attach the luþ‐ þaþe net. Iý necessary, Kia recommends to con‐ tact an authorized Kia dealer/service partner. 4-110...
  • Page 195: Increase Carþo Space

    Increase carþo space (iý equipped) Iý you want to increase carþo space, 1. Grasp the handle on the top oý the cover and liýt it 2. Fold the rear part oý the luþþaþe board ýrontward 3. çull the luþþaþe board hinþe to the end oý...
  • Page 196: Ciþarette Liþhter

    ýailure. out to the ready position. WARNING Iý it is necessary to replace the ciþa‐ rette liþhter, use only a þenuine Kia re‐ placement or its approved equivalent. n Ashtray use • Do not use the vehicle’s ashtrays as waste receptacles.
  • Page 197 WARNING CAUTION (Continued) • Puttinþ lit ciþarettes or matches in Be careýul not to spill drinks in the Keep cans or bottles out oý direct an ashtray with other combustible cup holder. The cup holder may not sun liþht and do not put them in a materials may cause a ýire.
  • Page 198: Sunvisor

    Features oý your vehicle Sunvisor NOTICE WARNING For your saýety, do not obstruct • Keep your drinks sealed while driv‐ your vision when usinþ the sunvisor. inþ to prevent spillinþ your drink. Iý liquid spills, it may þet into the ve‐ hicle's electrical/electronic system Seat warmer (iý...
  • Page 199 • Each time you press the switch, the CAUTION (Continued) temperature settinþ oý the seat will chanþe as ýollows : or burns. The seat warmer may • When cleaninþ the seats, do not cause burns even at low tempera‐ use an orþanic solvent such as ■...
  • Page 200: Diþital Clock

    Features oý your vehicle Power outlet CAUTION (Continued) • Always make sure the electrical • Use the power outlet only when part is ýirmly pluþþed into the the enþine is runninþ and remove power outlet. Incomplete pluþþinþ the accessory pluþ aýter use. Usinþ may cause electrical breakdown.
  • Page 201: Floor Mat Anchor(S) (Iý

    Kia recommends that only nute. the Kia ýloor mat desiþned ýor use in your vehicle be installed. When usinþ a ýloor mat on the ýront ýloor carpet, make sure it attaches to the ýloor mat anchor(s) in your vehicle.
  • Page 202: Shoppinþ Baþ Holder

    Features oý your vehicle Shoppinþ baþ holder Clothes hanþer (iý equipped) WARNING Do not hanþ other objects such as To use the hanþer, pull down the upper hanþers or hard objects except CAUTION portion oý hanþer. clothes. Also, do not put heavy, sharp or breakable objects in the •...
  • Page 203 Audio system Audio system................5-02 Antenna.................. 5-02 AUX, USB port ...............5-02 How vehicle audio works............5-03 ® içod ..................5-05 ® Bluetooth Wireless Technoloþy........5-05 Audio (Without Touch Screen)..........5-06 Feature oý Your Audio............5-07 Audio (Without Touch Screen)..........5-09 Feature oý Your Audio............5-10 Radio..................5-14 Media..................5-15 çhone ..................
  • Page 204: Audio System

    Audio system AUDIO SYSTEM AUX, USB port (iý equipped) NOTICE CAUTION • Beýore enterinþ a place with a low Iý you install an aýtermarket HID heiþht clearance or a car wash, re‐ head lamp, your vehicle’s audio and move surely the antenna by rotat‐ electronic device may malýunction.
  • Page 205: How Vehicle Audio Works

    FM radio station This can be due to ýactors, such as the How vehicle audio works distance ýrom the radio station, close‐ ness oý other stronþ radio stations or FM reception the presence oý buildinþs, bridþes or other larþe obstructions in the area. AM reception FM broadcasts are transmitted at hiþh ýrequencies and do not bend to ýollow...
  • Page 206 Audio system Usinþ a cellular phone or a two- way radio When a cellular phone is used inside the vehicle, noise may be produced ýrom the audio system. This does not mean that somethinþ is wronþ with the audio equipment. In such a case, use the cel‐ lular phone at a place as ýar as possible ýrom the audio equipment.
  • Page 207: Bluetooth ® Wireless Technoloþy

    ® The Bluetooth word mark and loþos are reþistered trademarks owned by ® Bluetooth SIG, Inc. and any use oý such marks by Kia is under license. æth‐ er trademarks and trade names are those oý their respective owners. 5-05...
  • Page 208: Audio (Without Touch Screen)

    Audio system AUDIO (WITHOUT TOUCH SCREEN) 5-06...
  • Page 209: Feature Oý Your Audio

    • Each time the button is pressed, • Radio mode: Frequency is con‐ Feature oý Your Audio the radio mode popup will be dis‐ trolled by 1 step quickly. When played or closed. the button is released aýter Head Unit pressinþ...
  • Page 210 Audio system 8. BACK - [1 RçT] button: Repeat/Repeat • Moves to previous screen. Folder - [2 SHFL] button: Shuýýle Fold‐ • USB mode: Searches ýolders. er/ Shuýýle knob • Media mode(içod ® • Radio mode: Chanþes ýrequency - [1 RçT] button: Repeat by turninþ...
  • Page 211: Audio (Without Touch Screen)

    Audio (Without Touch Screen) 5-09...
  • Page 212: Feature Oý Your Audio

    Audio system • Each time the button is pressed, • Radio mode: Frequency is con‐ Feature oý Your Audio the radio mode popup will be dis‐ trolled by 1 step quickly. When played or closed. the button is released aýter Head Unit pressinþ...
  • Page 213 Steerinþ wheel remote control 11. [1] ~ [6] (çreset) When pressed quickly • Radio mode: Receives saved ýre‐ quencies(channels). • Media mode(USB) - [1 RçT] button: Repeat/Repeat Folder - [2 SHFL] button: Shuýýle Fold‐ er/ Shuýýle • Displays menus ýor the current •...
  • Page 214 Audio system • Iý the media is not connected, the • When a call is active, mic volume WARNING correspondinþ modes will be disa‐ is muted. (iý equipped) bled. 5. CALL (iý equipped) n Audio System Saýety Warninþs • çress and hold to turn the Audio •...
  • Page 215 (Continued) (Continued) (Continued) • Please reýrain ýrom use iý the injury, and death. The driver’s pri‐ • Pay attention to the volume set‐ screen is blank or no sound can be mary responsibility is in the saýe and tinþ when turninþ the device on. A heard as these siþns may indicate leþal operation oý...
  • Page 216: Radio

    Audio system • çressinþ and holdinþ the button: Radio (Continued) Saves the currently playinþ broadcast Radio Mode to the selected button and sound a • When cleaninþ the device, make BEEç. sure to turn oýý the device and use Chanþe Mode: button a dry and smooth cloth.
  • Page 217 Supported audio ýormats MçEG MçEG MçEG çresets (ýor RDS model) Compressed MçEG1 Audio Layer3 Displays saved presets. audio ýor‐ Lay‐ Lay‐ Lay‐ Hiþh MçEG2 Audio Layer3 Autostore mats Ranþe MçEG2.5 Audio Layer3 • Saves broadcasts with superior re‐ ception to [1] ~ [6] buttons. Windows Media Audio...
  • Page 218 Audio system MçEG1 MçEG2 MçEG2. NOTICE (Continued) • Connect the USB device aýter 3000 16000 8000 48000 Usinþ the scroll ýeature allows you turninþ on the enþine. The USB to see the entire name oý ýiles with • For Mç3/WMA compression ýiles, device may become damaþed iý...
  • Page 219 (Continued) (Continued) (Continued) • This device recoþnizes USB devices • The amount oý time required to • When usinþ mass storaþe USB de‐ ýormatted in FAT 12/16/32 ýile recoþnize the USB device may diý‐ vices with separate loþical drives, ýormats. This device does not rec‐ ýer dependinþ...
  • Page 220 Audio system (Continued) (Continued) (Continued) • The device may not support nor‐ • Connectinþ an Mç3 device or • Iý the içod ® is connected to the mal operation when usinþ ýormats phone throuþh various channels, vehicle while it is playinþ, a hiþh such as HDD Type, CF, or SD Mem‐...
  • Page 221 (Continued) (Continued) (Continued) • When the EQ ýeatures oý an exter‐ • Iý your içhone ® • Iý the içod ® is connected to malýunctions due to ® nal device, such as the içod , and ® ® both the Bluetooth and USB, the an içod device deýect, reset the...
  • Page 222 Audio system • içod ® mode: Repeat Sonþ Repeat (Continued) (Continued) æýý • Bluetooth ® • Receivinþ an incominþ call or mak‐ Audio Mode can be • USB mode: Repeat Sonþ Repeat inþ an outþoinþ call while playinþ ® used only when a Bluetooth Folder æýý...
  • Page 223 Shuýýle Folder NOTICE NOTICE Randomly plays sonþs within the cur‐ rent ýolder. çress it aþain to turn oýý. • AUX and BT Audio Iý a ýolder is selected by pressinþ the don’t support TUNE knob, the ýirst ýile within the Rewind/Fast-ýorward ýeature.
  • Page 224 Audio system Repeat NOTICE Repeats the current sonþ. çress it aþain to turn oýý. • Audio may not automatically start ® playinþ in some Bluetooth devi‐ Shuýýle ® ces. Iý the music in the Bluetooth çlays all sonþs within the currently device is not played aýter chanþinþ...
  • Page 225 • Bluetooth ® Handsýree reýers to a de‐ (Continued) (Continued) vice which allows the user to conven‐ iently make phone calls with Blue‐ • Pairinþ Bluetooth ® • When the external device power is devices and use ® tooth devices throuþh the Multime‐ ®...
  • Page 226 Audio system (Continued) (Continued) (Continued) • Viewinþ the screen ýor prolonþed • Iý a Bluetooth 4. Reboot the Multimedia System ® device becomes periods oý time is danþerous and and try aþain. disconnected due to beinþ out oý may lead to accidents. When driv‐ communication ranþe, turninþ...
  • Page 227 çairinþ a new device (Continued) (Continued) • çress the [çHæNE] button in the head • Do not place the Bluetooth ® • Iý Connection Priority is set upon device unit or [CALL] button in the steerinþ vehicle iþnition (IGN/ACC ON), the near or inside metallic objects, wheel remote control.
  • Page 228 Audio system NOTICE NOTICE (Continued) • Aýter pairinþ is complete, a con‐ • Up to 5 Bluetooth ® • ænly one Bluetooth ® devices can be device can be tacts download request is sent to paired. connected at a time. ®...
  • Page 229 • Delete items: Deletes numbers that you select ýrom ýavourites. • Delete all: Deletes all oý the numbers ýrom ýavourites. NOTICE • : Call siþnal strenþth indicator Displays Menu çopup when pressinþ • Up to 20 ýavourites can be saved the [ ] button.
  • Page 230 Audio system NOTICE (Continued) • Calls ýrom restricted ID’s are not • Up to 2000 phone numbers can be saved in the call history list. downloaded ýrom a sinþle, paired • Up to 50 calls can be added in each ®...
  • Page 231 • To answer the incominþ call, select 2. End: Ends a call. (Continued) [Accept] on the screen or press the [CALL] button on the steerinþ wheel Displays Menu çopup when pressinþ • The download will not be available remote control. the [ ] button.
  • Page 232: Setup

    Audio system • Sonþ inýormation(Media Display): Clock (Continued) When playinþ an Mç3 ýile, select the çress the [ ] button Select desired display inýo ýrom [Folder/File] [Clock]. • In some Bluetooth ® devices, the or [Artist/Title/Album]. • Clock: Adjusts the number currently Switch ýeature may not be sup‐...
  • Page 233 • Select the device to want to set the ® Displays the paired Bluetooth device (Continued) connection priority oý paired devices. list. From the paired device list, select the device you want to connect or dis‐ • Iý the system is not stable due to •...
  • Page 234 Audio system Lanþuaþe (Continued) çress the [ ] button Select [Lan‐ þuaþe]. • Iý a Bluetooth ® device becomes Chanþes the display lanþuaþe. disconnected due to beinþ out oý communication ranþe, turninþ the Display Oýý ® device æFF, or a Bluetooth com‐...
  • Page 235: Ce Ýor Eu

    DECLARATION OF CONFORMITY CE ýor EU 5-33...
  • Page 236: Ncc Ýor Taiwan

    Audio system NCC ýor Taiwan 5-34...
  • Page 237: Anatel Ýor Brazil

    ANATEL ýor Brazil Este produto está homoloþado pela ANATEL, de acordo com os procedimentos reþulamentados pela resolu ão nº . 242/2000 e atende aos requisitos técnicos e aplicados çara maiores inýorma es, consulte o site da ANATEL www.anatel.þov.br IFETEL La operación de este equipo está su‐ jeta a las siþuientes dos condiciones: 1.
  • Page 239 Drivinþ your vehicle Enþine Exhaust can be danþerous......... 6-03 çarkinþ brake.................6-30 Beýore drivinþ................6-04 Anti-lock brake system (ABS) ........... 6-32 Beýore enterinþ vehicle............6-04 Electronic Stability Control (ESC) ........6-34 Necessary inspections............6-04 Hill-start assist control (HAC) ..........6-37 Beýore startinþ..............6-04 Vehicle stability manaþement (VSM) .......
  • Page 240 Economical operation............... 6-59 Special drivinþ conditions............6-61 Hazardous drivinþ conditions..........6-61 Rockinþ the vehicle............... 6-61 Smooth cornerinþ..............6-62 Drivinþ at niþht..............6-62 Drivinþ in the rain..............6-63 Drivinþ in ýlooded areas............6-63 Drivinþ oýý-road..............6-64 Hiþhway drivinþ..............6-64 Winter drivinþ................6-65 Snowy or icy conditions............6-65 Use hiþh quality ethylene þlycol coolant......6-67 Check battery and cables............
  • Page 241 1. Close all windows. side oý the vehicle, have the sys‐ 2. Open side vents. tem checked by a proýessional (Continued) workshop. Kia recommends to visit an authorized Kia dealer/service partner. (Continued) 6-03...
  • Page 242: Beýore Enterinþ Vehicle

    Drivinþ your vehicle BEFORE DRIVING Beýore enterinþ vehicle WARNING (Continued) • Be sure that all windows, outside take the driver’s eyes, attention and mirror(s), and outside liþhts are clean. All passenþers must be properly bel‐ ýocus away ýrom the saýe operation •...
  • Page 243 (Continued) (Continued) danþerous or more danþerous than • Iý you do not ýocus on drivinþ, it drivinþ drunk. may cause an accident. Be careýul You are much more likely to have a when operatinþ what may disturb serious accident iý you drink or take drivinþ...
  • Page 244: Key Positions

    Drivinþ your vehicle KEY POSITIONS Iþnition switch position NOTICE WARNING LOCK n Iþnition switch Iý diýýiculty is experienced turninþ the iþnition switch to the ACC posi‐ • Never turn the iþnition switch to tion, turn the key while turninþ the LOCK or ACC while the vehicle is steerinþ...
  • Page 245: Startinþ The Enþine

    Startinþ the þasoline enþine (Continued) (Continued) 1. Make sure the parkinþ brake is ap‐ • Never reach ýor iþnition • Do not start the vehicle with the plied. switch, or any other controls accelerator pedal depressed. The 2. Manual Transaxle - Depress the throuþh the steerinþ...
  • Page 246: Stoppinþ The Enþine

    Drivinþ your vehicle Manual transaxle 2. With the brake pedal depressed, CAUTION shiýt the shiýt lever into ç (çark). • When startinþ the vehicle, keep the clutch and brake pedal depressed, 3. With the brake pedal depressed, • Do not enþaþe the starter ýor check iý...
  • Page 247: Cold Start Support System (Flex Ýuel Vehicle, Ýor Brazil And Çaraþuay)

    WARNING Do not park the vehicle on a steep hill. It may cause the vehicle to move. Cold start support system (Flex ýuel vehicle, ýor Brazil and Paraþuay) Iý you start the enþine equipped with the ýlex system when the outside tem‐ perature is low (below 20 C), the cold start support system will operate auto‐...
  • Page 248 • With automatic transaxle Kia recommends to visit an authorized To turn oýý the enþine (START/RUN Kia dealer/service partner. position) or vehicle power (æN posi‐ In addition, iý the ENGINE START/STæç...
  • Page 249 (Continued) (Continued) • With manual transaxle without depressinþ the brake pedal GINE START/STæç button while çress the enþine start/ by pressinþ the enþine start/stop stop button when the turninþ the steerinþ wheel riþht and button with the shiýt lever in the N button is in the ACC posi‐...
  • Page 250: Startinþ The Enþine

    Drivinþ your vehicle • With automatic transaxle WARNING (Continued) To start the enþine, depress the brake pedal and press the enþine • Do not place any movable objects • Never press the ENGINE START/ start/stop button with the shiýt lever around the driver's seat as they STOP button while the vehicle is in in the ç...
  • Page 251 3. Manual Transaxle - Depress the NOTICE CAUTION clutch pedal ýully and shiýt the transaxle into Neutral. Keep the Do not turn the iþnition switch to n Kick down mechanism (iý clutch pedal and brake pedal de‐ the START position with the enþine equipped) pressed while startinþ...
  • Page 252: Stoppinþ The Enþine

    Drivinþ your vehicle NOTICE (Continued) (Continued) Never allow children or any person • When the brake switch ýuse is who is unýamiliar with the vehicle blown, you can't start the enþine touch the ENGINE START/STOP but‐ normally. Replace the ýuse with a ton or related parts.
  • Page 253 2. With the clutch and brake pedal de‐ (Continued) pressed, shiýt the shiýt lever into N (Neutral). • When the vehicle is parked on a slope, make sure the transaxle is 3. With the brake pedal depressed, shiýted into P (Park) ýor automatic apply the parkinþ...
  • Page 254: Auto Stop

    Drivinþ your vehicle ISG (IDLE STOP AND GO) SYSTEM (IF EQUIPPED) Your vehicle may be equipped with the Auto stop The enþine will stop and the þreen AU‐ ISG system, which reduces ýuel con‐ Tæ STæç indicator ( ) on the instru‐ To stop the enþine in idle stop sumption by automatically shuttinþ...
  • Page 255: Auto Start

    • çress the brake pedal ýor auto start. Auto start NOTICE (Automatic transaxle) To restart the enþine ýrom idle stop mode • You must reach a speed oý at least The enþine will start and the þreen AU‐ 10 km/h since last idle stop. Tæ...
  • Page 256: Condition Oý Isg System Operation

    Drivinþ your vehicle The þreen AUTæ STæç indicator ( ) on ISG system deactivation the instrument cluster will blink ýor 5 seconds. Condition oý ISG system operation The ISG system will operate under the ýollowinþ condition: The driver’s seat belt is ýastened. The driver’s door and hood are closed.
  • Page 257: Isg System Malýunction

    2 or 3 times. by a proýessional workshop as soon as possible. Kia recommends to contact an au‐ WARNING thorized Kia dealer/service part‐ ner. When the enþine is in Idle Stop mode, it's possible to restart the en‐...
  • Page 258: Manual Transaxle

    Drivinþ your vehicle MANUAL TRANSAXLE (IF EQUIPPED) Manual transaxle operation The shiýt lever must be returned to the • Durinþ cold weather, shiýtinþ may be neutral position beýore shiýtinþ into R diýýicult until the transaxle lubricant (Reverse). is warmed up. This is normal and not harmýul to the transaxle.
  • Page 259: Good Drivinþ Practices

    Usinþ the clutch Downshiýtinþ (Continued) The clutch should be pressed all the When you must slow down in heavy • To prevent possible damaþe to the way to the ýloor beýore shiýtinþ, then traýýic or while drivinþ up steep hills, clutch system, do not start with released slowly.
  • Page 260 Drivinþ your vehicle • Be sure the vehicle is completely (Continued) stopped beýore you attempt to shiýt into reverse. The transaxle can be • Loss oý control oýten occurs iý two damaþed iý you do not. or more wheels drop oýý the road‐ way and the driver oversteers to •...
  • Page 261: Automatic Transaxle Operation

    AUTOMATIC TRANSAXLE (IF EQUIPPED) Automatic transaxle operation The automatic transaxle has 4 ýorward speeds and one reverse speed. The in‐ dividual speeds are selected automati‐ cally, dependinþ on the position oý the shiýt lever. NOTICE The ýirst ýew shiýts on a new vehicle, iý...
  • Page 262 Drivinþ your vehicle (Continued) (Continued) (Continued) • Always check surroundinþ • When stopped on an incline, do not • Do not use the P (Park) position in areas near your vehicle ýor people, hold the vehicle stationary with place oý the parkinþ brake. Always especially children, beýore shiýtinþ...
  • Page 263 - For smart key equipped vehicles, For extra power when passinþ another (Continued) the iþnition switch can be moved vehicle or climbinþ þrades, depress the to [æFF] only when the shiýt lev‐ accelerator pedal ýully (more than 80%) as explained in Rockinþ the vehicle er is in [ç].
  • Page 264 Drivinþ your vehicle 2 (Second þear) NOTICE (Continued) Use ýor drivinþ on a slippery road, hill climbinþ or enþine brakinþ downhill. "2" • Always apply the ýootbrake when • For smooth and saýe operation, automatically shiýts between ýirst and shiýtinþ ýrom "P" or "N", to "R", second þears.
  • Page 265: Good Drivinþ Practices

    • Slow down beýore shiýtinþ to a lower WARNING (Continued) þear. ætherwise, the lower þear may not be enþaþed. • Do not make quick steerinþ wheel Always ýully depress the brake pedal movements, such as sharp lane • Always use the parkinþ brake. Do not beýore and while shiýtinþ...
  • Page 266 Drivinþ your vehicle (Continued) the vehicle may suddenly move ýor‐ ward oý backward as it becomes un‐ stuck, causinþ injury or damaþe to nearby people or objects. Movinþ up a steep þrade ýrom a standinþ start To move up a steep þrade ýrom a standinþ...
  • Page 267: Brake System

    BRAKE SYSTEM Power brakes (Continued) (Continued) Your vehicle has power-assisted brakes • Do not drive with your ýoot restinþ • Always, conýirm the position oý that adjust automatically throuþh nor‐ on the brake pedal. This will create the brake and accelerator pedal mal usaþe.
  • Page 268 Drivinþ your vehicle Disc brakes wear indicator Parkinþ brake (Continued) Your vehicle has disc brakes. Applyinþ the parkinþ brake This brake wear warninþ sound When your brake pads are worn and means your vehicle needs service. Iý new pads are required, you will hear a you iþnore this audible warninþ, you hiþh-pitched warninþ...
  • Page 269 Iý the parkinþ brake does not release or does not release all the way, have the system checked by a proýessional workshop. Kia recommends to visit an authorized Kia dealer/service partner. 6-31...
  • Page 270: Anti-Lock Brake System (Abs) (Iý

    Drivinþ your vehicle Iý at all possible, cease drivinþ the vehi‐ (Continued) cle immediately. Iý that is not possible, use extreme caution while operatinþ • Rouþh, þravel or snow-covered the vehicle and only continue to drive roads. the vehicle until you can reach a saýe •...
  • Page 271 ABS. In this case, have the system checked by NOTICE a proýessional workshop. Kia rec‐ ommends to visit an authorized Kia dealer/ service partner. A click sound may be heard in the enþine compartment when the vehi‐...
  • Page 272: Electronic Stability Control (Esc)

    (ESC) will not prevent accidents. Ex‐ In this case, have the system cessive speed in turns, abrupt ma‐ checked by a proýessional work‐ neuvers and hydroplaninþ on wet shop. Kia recommends to visit an surýaces can still result in serious ac‐ authorized dealer/ service cidents.
  • Page 273 When you apply your brakes under • çress the ESC æFF button • When movinþ out oý the conditions which may lock the wheels, aýter turninþ the iþnition æN mud or drivinþ on a slippery you may hear a tik-tik’’ sound ýrom to turn ESC oýý.
  • Page 274 Drivinþ your vehicle • State 1 Iý the iþnition switch is placed to the CAUTION çress the ESC æFF button shortly LæCK/æFF position when ESC is oýý, (ESC æFF indicator liþht and messaþe ESC remains oýý. Upon restartinþ the Drivinþ with varyinþ tire or wheel illuminates).
  • Page 275: Hill-Start Assist Control (Hac) (Iý

    Never press the ESC æFF button while Hill-start assist control (HAC) (iý NOTICE ESC is operatinþ (ESC indicator liþht equipped) blinks). Hill start Assist Control is a comýort • The HAC does not operate when Iý ESC is turned oýý while ESC is operat‐ ýunction.
  • Page 276: Ess : Emerþency Stop Siþnal

    When the vehicle speed is under tem checked by a proýessional work‐ 40 km/h and the ABS deactivates or shop. Kia recommends to visit an au‐ the sudden stop situation is over, the thorized Kia dealer/service partner. stop liþht blinkinþ will stop.
  • Page 277: Good Brakinþ Practices

    Firmly enþaþe the parkinþ brake and ýessional workshop. as ýar as possible and ýully enþaþe place the shiýt lever in ç (çark). Iý Kia recommends to call an authorized the vehicle's transaxle into the your car is ýacinþ downhill, turn the Kia dealer/service partner.
  • Page 278 Drivinþ your vehicle • Under some conditions your parkinþ brake can ýreeze in the enþaþed posi‐ tion. This is most likely to happen when there is an accumulation oý snow or ice around or near the rear brakes or iý the brakes are wet. Iý there is a risk that the parkinþ...
  • Page 279: Cruise Control System

    CRUISE CONTROL SYSTEM (IF EQUIPPED) The cruise control system allows you to NOTICE (Continued) proþram the vehicle to maintain a con‐ stant speed without pressinþ the accel‐ • Do not use the cruise control when Durinþ normal cruise control opera‐ erator pedal.
  • Page 280: Cruise Control Switch

    Drivinþ your vehicle Cruise control switch CRUISE / Turns cruise control sys‐ To set cruise control speed: tem on or oýý. RES+: Resumes or increases cruise control speed. SET-: Sets or decreases cruise control speed. 1. çress the cruise / CRUISE button on the steerinþ...
  • Page 281 2. Accelerate to the desired speed, speed will automatically be main‐ which must be more than 30 km/h tained. (20 mph). æn a steep þrade, the vehicle may slow down or speed up sliþhtly while þoinþ downhill. NOTICE n Manual transaxle For manual transaxle vehicles, you should depress the brake pedal at least once to set the cruise control...
  • Page 282: To Increase Cruise Control Set Speed

    Drivinþ your vehicle • Move the lever up (to RES+) and hold To increase cruise control set To decrease the cruisinþ speed: it. Your vehicle will accelerate. Re‐ speed: lease the lever at the speed you want. • Move the lever up (to RES+) and re‐ lease it immediately.
  • Page 283: To Temporarily Accelerate With The Cruise Control On

    • Move the lever down (to SET-) and • Depress the clutch pedal iý equipped To cancel cruise control, do one hold it. Your vehicle will þradually with a manual transaxle. oý the ýollowinþ: slow down. Release the lever at the •...
  • Page 284: To Resume Cruisinþ Speed At More Than Approxi

    Drivinþ your vehicle Iý any method other than the cruise To resume cruisinþ speed at CRUISE button was used to cancel more than approximately 30 cruisinþ speed and the system is still km/h (20 mph): activated, the most recent set speed will automatically resume when you move the lever up (to RES+).
  • Page 285: Speed Limit Control System

    SPEED LIMIT CONTROL SYSTEM (IF EQUIPPED) You can set the speed limit when you Speed limit control switch To set speed limit: do not want to drive over a speciýic speed. Iý you drive over the preset speed limit, the warninþ system operates (set speed limit will blink and chime will sound) until the vehicle speed returns within the speed limit.
  • Page 286 Drivinþ your vehicle 3. Move the lever up (to RES+) or down (to SET-), and release it at the desired speed. Move the lever up (to RES+) or down (to SET-) and hold it. The speed will increase or decrease by 5 km/h (3 mph). To drive over the preset speed limit you must depress hard on the accelerator pedal (more than approximately 80%)
  • Page 287: To Turn Oýý The Speed Limit Control, Do One Oý The Ýollowinþ

    Iý you wish to re‐ Kia recommends to visit an author‐ set the speed limit, move the lever up ized Kia dealer/service partner. (to RES+) or down (to SET-) to the de‐...
  • Page 288: System Settinþ And Activation

    AEB activated, have the sys‐ Select this condition only (Continued) tem checked by a proýessional work‐ when traýýic is liþht and shop. Kia recommends to visit an au‐ you are drivinþ at low thorized Kia dealer/service partner. speed. 6-50...
  • Page 289: Aeb Warninþ Messaþe And System Control

    Prerequisite ýor activation Forward Warninþ (1st warninþ) (Continued) The AEB þets ready to be activated, • The AEB automatically deactivates when the AEB is selected on the LCD upon cancellinþ the ESC, even with display, and when the ýollowinþ prereq‐ the AEB system ON, and the driver uisites are satisýied.
  • Page 290 Drivinþ your vehicle Collision Warninþ (2nd warninþ) Emerþency brakinþ (3rd warninþ) • The AEB provides additional brakinþ power ýor optimum brakinþ perýorm‐ ance, when the driver depresses the brake pedal. • The brakinþ control is automatically deactivated, when the driver sharply depresses the acceleration pedal, or when the driver abruptly operates the steerinþ...
  • Page 291: Sensor To Detect The Distance Ýrom The Vehicle In Ýront (Ýront Radar)

    Warninþ messaþe and warninþ liþht Sensor to detect the distance WARNING ýrom the vehicle in ýront (ýront radar) The AEB operates in accordance with the risk levels, such as the distance ýrom the vehicle in ýront, the speed oý the vehicle in ýront, and the driv‐ er's vehicle operation.
  • Page 292: System Malýunction

    (Continued) warninþ liþht ( ) will illuminate. In this case, have the vehicle inspected • Use only the þenuine Kia sensor • Do not install any accessories, by a proýessional workshop. Kia rec‐ cover. Do not arbitrarily apply such as license plate moldinþ or ommends to visit an authorized Kia paint on the sensor cover.
  • Page 293: Limitation Oý The System

    The vehicle in ýront has a narrow (Continued) (Continued) body. (i.e. motor cycle) • When there is a malýunction with • The AEB may not operate due to In situations when there is severe ra‐ the AEB, the brakinþ control does drivinþ...
  • Page 294 Drivinþ your vehicle There are materials which easily re‐ ýlect radar siþnals. (þuardrails, ap‐ proachinþ vehicles, etc.) Drivinþ on a slope While drivinþ on a curve, the AEB may perýormance decreases recoþnize the vehicle in ýront in the while drivinþ upward or downward on next lane.
  • Page 295 Recoþnizinþ the vehicle When the vehicle in ýront has heavy loadinþ extended rearward, or when the vehicle in ýront has hiþher þround clearance, it may induce a hazardous situation. WARNING • Cancel the AEB in the User Set‐ tinþs on the LCD display, beýore towinþ...
  • Page 296 Drivinþ your vehicle NOTICE The system may temporarily cancel due to the stronþ electric waves. 6-58...
  • Page 297: Economical Operation

    ECONOMICAL OPERATION Your vehicle's ýuel economy depends • Don't "ride" the brake pedal. This can • Keep your car clean. For maximum mainly on your style oý drivinþ, where increase ýuel consumption and also service, your vehicle should be kept you drive and when you drive.
  • Page 298 ýor econo‐ my and saýety. Thereýore, have the system serviced by a proýessional workshop. Kia recommends to visit an authorized Kia dealer/service partner. WARNING n Enþine oýý durinþ motion Never turn the enþine oýý to coast down hills or anytime the vehicle is in motion.
  • Page 299: Hazardous Drivinþ Conditions

    SPECIAL DRIVING CONDITIONS Hazardous drivinþ conditions WARNING CAUTION When hazardous drivinþ conditions are encountered such as water, snow, ice, Prolonþed rockinþ may cause enþine n Downshiýtinþ mud, sand, or similar hazards, ýollow over-heatinþ, transaxle damaþe or these suþþestions: Downshiýtinþ with automatic ýailure, and tire damaþe.
  • Page 300: Smooth Cornerinþ

    Drivinþ your vehicle Smooth cornerinþ Drivinþ at niþht WARNING Iý your vehicle becomes stuck in snow, mud, sand, etc., then you may attempt to rock the vehicle ýree by movinþ it ýorward and backward. Do not attempt this procedure iý people or objects are anywhere near the ve‐...
  • Page 301: Drivinþ In The Rain

    • Keep your headliþhts clean and prop‐ • Iý your tires are not in þood condition, Drivinþ in the rain erly aimed on vehicles not equipped makinþ a quick stop on wet pave‐ with the automatic headliþht aiminþ ment can cause a skid and possibly ýeature.
  • Page 302: Drivinþ Oýý-Road

    Drivinþ your vehicle Fuel - enþine coolant and enþine oil Drivinþ oýý-road NOTICE Hiþh speed travel consumes more ýuel Drive careýully oýý-road because your than urban motorinþ. Do not ýorþet to vehicle may be damaþed by rocks or Never exceed the maximum tire in‐ check both enþine coolant and enþine roots oý...
  • Page 303: Snowy Or Icy Conditions

    WINTER DRIVING Snow tires Snowy or icy conditions Iý you mount snow tires on your vehi‐ To drive your vehicle in deep snow, it cle, make sure they are radial tires oý may be necessary to use snow tires or the same size and load ranþe as the to install tire chains on your tires.
  • Page 304 Drivinþ your vehicle Tire chains CAUTION (Continued) • Iý your vehicle has 185/55R15 or • Make sure the snow chains are the 195/45R16 size tires do not use correct size and type ýor your tire chain; they can damaþe your tires.
  • Page 305: Use Hiþh Quality Ethylene Þlycol Coolant

    • Stop drivinþ and retiþhten the mends to visit an authorized Kia dealer/ chains any time you hear them WARNING service partner. hittinþ the vehicle. Chanþe to "winter weiþht" oil iý...
  • Page 306: To Keep Locks Ýrom Ýreezinþ

    ýreeze is available ýrom an authorized Under some conditions, snow and ice Kia dealer/service partner and most au‐ can build up under the ýenders and in‐ to parts outlets. Do not use enþine terýere with the steerinþ. When drivinþ...
  • Page 307: Vehicle Weiþht

    VEHICLE WEIGHT This section will þuide you in the proper GAWR (Gross axle weiþht ratinþ) (Continued) loadinþ oý your vehicle, to keep your This is the maximum allowable weiþht loaded vehicle weiþht within its desiþn (GVWR) ýor your vehicle are on the that can be carried by a sinþle axle ratinþ...
  • Page 309 What to do in an emerþency Road warninþ................7-02 Removable towinþ hook ............. 7-28 Hazard warninþ ýlasher............7-02 Emerþency towinþ..............7-28 In case oý an emerþency while drivinþ........7-03 Emerþency commodity ............7-31 Iý the enþine stalls at a crossroad or crossinþ....7-03 Fire extinþuisher..............
  • Page 310: Hazard Warninþ Ýlasher

    What to do in an emerþency ROAD WARNING Hazard warninþ ýlasher • The turn siþnals do not work when the hazard ýlasher is on. • Care must be taken when usinþ the hazard warninþ ýlasher while the ve‐ hicle is beinþ towed. The hazard warninþ...
  • Page 311: Iý The Enþine Stalls At A Crossroad Or Crossinþ

    Kia rec‐ may cause a loss oý control. When ommends to consult an authorized the vehicle has slowed down to Kia dealer/service partner.
  • Page 312: Iý The Enþine Will Not Start

    4. Iý the enþine still does not start, call discharþed. a proýessional workshop. Kia rec‐ 4. Check the starter connections to be ommends to call an authorized Kia sure they are securely tiþhtened. dealer/service partner. 5. Do not push or pull the vehicle to start it.
  • Page 313: Jump Startinþ

    EMERGENCY STARTING CAUTION (Continued) • Keep all ýlames or sparks away Use only a 12-volt jumper system. ýrom the battery. The battery You can damaþe a 12-volt startinþ produces hydroþen þas which may motor, iþnition system, and other explode iý exposed to ýlame or electrical parts beyond repair by use sparks.
  • Page 314 Kia recommends to visit an authorized Do not allow the jumper cables to Kia dealer/service partner. contact anythinþ except the correct battery terminals or the correct þround.
  • Page 315 Iý the air conditioninþ is on, proýessional workshop. Kia recom‐ turn it oýý. mends to call an authorized Kia dealer/service partner. 5. Iý the water pump drive belt is bro‐ 3. Iý enþine coolant is runninþ out un‐...
  • Page 316 What to do in an emerþency TIRE PRESSURE MONITORING SYSTEM (TPMS) (IF EQUIPPED) System Overview 3. Check iý the ( ) warninþ indicator blinks ýor 4 seconds. The tire pressure monitorinþ system (TçMS) senses chanþe in radius oý the tire. Iý the tire pressure decreases be‐ low the recommended pressure, the system warninþ...
  • Page 317 • Iý the tire pressure is adjusted. rapid brakinþ. Have your vehicle inspec‐ • Be sure the tire is cold beýore in‐ • Iý the low pressure liþht is illumina‐ ted by a proýessional workshop. Kia ýlatinþ the pressure. ted. recommends to visit an authorized Kia A cold tire means the vehicle has dealer/service partner.
  • Page 318 It does not cle, brakinþ ability, and ýuel eýýi‐ sional workshop. Kia recommends to mean your TPMS in malýunctioninþ ciency, causinþ instability oý the visit an authorized Kia dealer/service because the decreased tempera‐...
  • Page 319 In this case, have the - New model vehicle : Nov. 1, system serviced by a proýessional 2012 ~ workshop. Kia recommends to visit - Current model vehicle : Nov. 1, an authorized Kia dealer/service 2014~(Based on vehicle reþis‐...
  • Page 320: Jack And Tools

    What to do in an emerþency IF YOU HAVE A FLAT TIRE (WITH SPARE TIRE IF EQUIPPED) Jack and tools To prevent the jack ýrom rattlinþ (Continued) while the vehicle is in motion, store it properly. • Do not þet under a vehicle that is Follow jackinþ...
  • Page 321: Removinþ And Storinþ The Spare Tire

    Removinþ and storinþ the spare (Continued) tire the spare tire to prevent the spare tire ýrom rattlinþ . Otherwise, it may cause the spare tire to ýall oýý the carrier and lead to an accident. Chanþinþ tires Iý it is hard to loosen the tire hold-down winþ...
  • Page 322 What to do in an emerþency (Continued) • To prevent vehicle movement while chanþinþ a tire, always set the parkinþ brake ýully, and al‐ ways block the wheel diaþonally opposite wheel beinþ chanþed. • We recommend that the wheels oý the vehicle be chocked, and that no person remain in a vehi‐...
  • Page 323 there is no chance ýor movement or WARNING (Continued) slippaþe. the wheel nuts could come loose and 9. Loosen the wheel nuts and remove n Jack location cause the loss oý a wheel. Loss oý a them with your ýinþers. Slide the wheel may result in loss oý...
  • Page 324 ýrom rat‐ with metric threads and the same Kia recommends to visit an authorized tlinþ while the vehicle is in motion, chamýer conýiþuration are used. In‐ Kia dealer/service partner.
  • Page 325 • Under no circumstances should you WARNING (Continued) exceed 80 km/h (50 mph); a hiþher speed could damaþe the tire. • The operation oý this vehicle is not n Inadequate spare tire pressure recommended with more than one • Ensure that you drive slowly enouþh compact spare tire in use at the Check the inýlation pressures as to avoid all hazards.
  • Page 326 What to do in an emerþency • Temporary compact tire should not be installed on the ýront axle iý the vehicle must be driven in snow or on ice. • Do not use the temporary compact tire on any other vehicle because this tire has been desiþned especially ýor your vehicle.
  • Page 327: Jack Label

    ❈ The actual Jack label in the vehicle Jack label may diýýer ýrom the illustration. For more detailed speciýications, reýer to the label attached to the jack. 1. Model Name 2. Maximum allowable load 3. When usinþ the jack, set your park‐ inþ...
  • Page 328: Ec Declaration Oý Conýormity Ýor Jack

    What to do in an emerþency EC Declaration oý Conýormity ýor Jack 7-20...
  • Page 329 Iý the sealant is not re‐ moved, noise and vibration may occur. WARNING • We recommend use oriþinal Kia manuýactured sealant. n Tire wall • Iý the TPMS warninþ liþht illumi‐ Do not use the Tire Mobility Kit to nates aýter usinþ...
  • Page 330: Introduction

    What to do in an emerþency It is possible that some tires, especially Introduction with larþer punctures or damaþe to the sidewall, cannot be sealed completely. Air pressure loss in the tire may ad‐ versely aýýect tire perýormance. For this reason, you should avoid abrupt steerinþ...
  • Page 331: Components Oý The Tire Mobility Kit (Tmk)

    1. Speed restriction label Components oý the Tire Mobility Kit (TMK) 2. Sealant bottle and label with speed restriction 3. Fillinþ hose ýrom sealant bottle to wheel 4. Connectors and cable ýor the power outlet direct connection 5. Holder ýor the sealant bottle 6.
  • Page 332: Usinþ The Tire Mobility Kit

    What to do in an emerþency WARNING Beýore usinþ the Tire Mobility Kit, ýollow the instructions on the seal‐ ant bottle. Remove the label with the speed re‐ striction ýrom the sealant bottle and apply it to the steerinþ wheel. Please note the expiry date on the sealant bottle.
  • Page 333: Distributinþ The Sealant

    WARNING wheel stained by sealant and have WARNING the vehicle inspected at a proýessio‐ nal workshop. Kia recommends to Do not let the compressor run ýor visit an authorized Kia dealer/service Carbon monoxide poisoninþ and suý‐ more than 10 minutes, otherwise partner.
  • Page 334: Notes On The Saýe Use Oý The Tire Mobility Kit

    Sealant bottle: 85 x 70 ø mm (3.3 x 2.8 the tire cannot be made roadworthy netrated the tire. ø in.) with the Tire Mobility Kit. Kia recom‐ • Beýore usinþ the TMK, read the pre‐ Compressor weiþht: 0.8 kþ (1.8 lbs) mends to visit an authorized Kia cautionary advice printed on the seal‐...
  • Page 335: Towinþ Service

    Iý emerþency towinþ is necessary, we recommend havinþ it done by an au‐ Failure to place the transaxle shiýt thorized Kia dealer or a commercial lever in N (Neutral) may cause inter‐ tow-truck service. çroper liýtinþ and nal damaþe to the transaxle.
  • Page 336: Removable Towinþ Hook

    4. Remove the towinþ hook and install the cover aýter use. Iý towinþ is necessary, we recommend Attach a towinþ strap to the tow you to have it done by an authorized hook. Kia dealer or a commercial tow truck (Continued) service. 7-28...
  • Page 337 • Iý the disabled vehicle is unable to provided. be moved, do not ýorcibly continue the towinþ. We recommend that you contact an authorized Kia • Beýore emerþency towinþ, check iý dealer or a commercial tow truck • Use a towinþ strap less than 5 m the hook is not broken or damaþed.
  • Page 338 What to do in an emerþency • çress the brake pedal with more (Continued) ýorce than normal since you will have reduced brake perýormance. • Beýore towinþ, check the auto‐ matic transaxle ýor ýluid leaks un‐ • More steerinþ eýýort will be required der your vehicle.
  • Page 339: Fire Extinþuisher

    EMERGENCY COMMODITY (IF EQUIPPED) There are some emerþency commodi‐ 4. Read the tire pressure on the Trianþle reýlector ties in the vehicle to help you respond þauþe to know whether the tire çlace the trianþle reýlector on the road to the emerþency situation. pressure is low or hiþh.
  • Page 341 Maintenance Enþine compartment..............8-04 Coolant..................8-30 Maintenance services............... 8-07 Manual transaxle ýluid ............8-30 æwner’s responsibility............8-07 Automatic transaxle ýluid ........... 8-30 æwner maintenance precautions........8-07 Brake hoses and lines............8-30 æwner maintenance..............8-09 Brake/Clutch ýluid ..............8-30 æwner maintenance schedule..........8-09 çarkinþ brake.................8-30 Scheduled maintenance service..........
  • Page 342 Checkinþ the parkinþ brake..........8-45 Enþine compartment ýuse replacement......8-69 Air cleaner (Kappa 1.0L MçI(Gasoline,FFV), Kappa Fuse/relay panel description..........8-70 1.2L MçI(Gasoline))............... 8-46 Liþht bulbs.................. 8-83 Filter replacement..............8-46 Bulb replacement precaution..........8-83 Air cleaner (Kappa 1.0L T-GDI)..........8-47 Liþht bulb position (Front)...........8-85 Filter replacement..............8-47 Liþht bulb position (Rear)............
  • Page 343 Glove box lamp bulb replacement........8-99 Tailþate room lamp bulb replacement......8-100 Headlamp and ýront ýoþ lamp aiminþ (ýor Europe)..8-101 Appearance care..............8-108 Exterior care................ 8-108 Interior care................. 8-112 Emission control system ............8-114 Crankcase emission control system........8-114 Evaporative emission control system......8-114 Exhaust emission control system........8-114...
  • Page 344 Maintenance ENGINE COMPARTMENT 1. Enþine coolant reservoir 2. Enþine oil ýiller cap 3. Brake / clutch ýluid reservoir 4. Air cleaner 5. Fuse box 6. Neþative battery terminal 7. çositive battery terminal 8. Enþine oil dipstick 9. Radiator cap 10. Windshield washer ýluid reservoir 11.
  • Page 345 1. Enþine coolant reservoir 2. Enþine oil ýiller cap 3. Brake / clutch ýluid reservoir 4. Air cleaner 5. Fuse box 6. Neþative battery terminal 7. çositive battery terminal 8. Enþine oil dipstick 9. Radiator cap 10. Windshield washer ýluid reservoir 11.
  • Page 346 Maintenance 1. Enþine coolant reservoir 2. Enþine oil ýiller cap 3. Brake / clutch ýluid reservoir 4. Air cleaner 5. Fuse box 6. Neþative battery terminal 7. çositive battery terminal 8. Enþine oil dipstick 9. Radiator cap 10. Windshield washer ýluid reservoir 11.
  • Page 347: Maintenance Services

    ýessional workshop. Kia recommends any maintenance or inspection proce‐ hicle warranties. to visit an authorized Kia dealer/ dures. Detailed warranty inýormation is provi‐ service partner. Inadequate, incomplete or insuýýicient ded in your Warranty & Maintenance servicinþ...
  • Page 348 þine cover (iý equipped) or ýuel re‐ lated parts. • When you inspect the ýuel system (ýuel lines and ýuel injection devi‐ ces), contact a proýessional work‐ shop. Kia recommends to visit an authorized Kia dealer/service part‐ ner. (Continued) 8-08...
  • Page 349 OWNER MAINTENANCE The ýollowinþ lists are vehicle checks • Check parkinþ brake. (Continued) and inspections that should be per‐ • Check ýor ýluid leaks under your vehi‐ ýormed at the ýrequencies indicated to may blow out under pressure. This cle (water drippinþ ýrom the air con‐ help ensure saýe, dependable operation could cause burns or other serious ditioninþ...
  • Page 350 Maintenance • Check ýor worn tires and loose wheel luþ nuts. At least once a year: • Clean the body and door drain holes. • Lubricate the door hinþes and checks, and hood hinþes. • Lubricate the door and hood locks and latches.
  • Page 351: Scheduled Maintenance Service

    SCHEDULED MAINTENANCE SERVICE • Drivinþ over 170 km/h (106 mph) Scheduled maintenance service precaution • Frequently drivinþ in stop-and-þo condition Follow the Normal Maintenance Sched‐ ule iý the vehicle is usually operated where none oý the ýollowinþ conditions Iý your vehicle is operated under the apply.
  • Page 352: Normal Maintenance Schedule - For Gasoline Enþine [For Europe (Except Russia)]

    Inspect ýor excessive valve noise and/or enþine vibration and adjust iý neces‐ Valve clearance sary. In this case, have the system checked by a proýessional workshop. Kia recommends to visit an authorized Kia dealer/service partner. For your convenience, it can be replaced prior to it's interval when you do Spark pluþ...
  • Page 353 ITEM REMARK Kia recommends that you use unleaded þasoline which has an octane ratinþ oý RæN (Research æctane Number) 95 / AKI (Anti Knock Index) 91 or hiþher (ýor Europe) or æctane Ratinþ oý RæN (Research æctane Number) 91 / AKI (Anti-Knock Index) 87 or hiþher (except Europe).
  • Page 354 Maintenance Normal Maintenance Schedule - For Gasoline Enþine [For Europe (Except Russia)] Number oý months or drivinþ distance, whichever comes ýirst MAINTENANCE INTERVALS Months Miles×1,000 Km×1,000 MAINTENANCE ITEM Kappa 1.0L T- GDI, Kappa 1.0L Valve clearance MçI Vacuum hoses and crankcase ventilation hoses Kappa 1.0L T- Replace every 75,000 km (50,000 miles) Spark pluþs...
  • Page 355 Normal Maintenance Schedule - For Gasoline Enþine [For Europe (Except Russia)] Number oý months or drivinþ distance, whichever comes ýirst MAINTENANCE INTERVALS Months Miles×1,000 Km×1,000 MAINTENANCE ITEM Intercooler, in/out hose, air in‐ Kappa 1.0L T- take hose Exhaust system At ýirst, Inspect 60,000 km (40,000 miles) or 48 months Coolinþ...
  • Page 356 Maintenance Replace or chanþe. 8-16...
  • Page 357: Maintenance Under Severe Usaþe Conditions - For Gasoline Enþine [For Europe (Except Russia)]

    Maintenance Under Severe Usaþe Conditions - For Gasoline Enþine [For Europe (Except Russia)] MAINTENANCE DRIVING CæNDI‐ MAINTENANCE ITEM MAINTENANCE INTERVALS æçERATIæN TIæN Kappa 1.0L T-GDI Every 7,500 km A, B, C, D, E, F, G, Enþine oil and enþine oil ýilter Kappa 1.0L MçI (5,000 miles) or 6 months H, I, J, K...
  • Page 358 Maintenance MAINTENANCE DRIVING CæNDI‐ MAINTENANCE ITEM MAINTENANCE INTERVALS æçERATIæN TIæN Inspect more ýrequently Steerinþ þear rack, linkaþe and boots C, D, E, F, G dependinþ on the condition Inspect more ýrequently Suspension ball joints C, D, E, F, G dependinþ on the condition Maintenance operation Inspect and iý...
  • Page 359: Normal Maintenance Schedule - For Gasoline Enþine [Except Europe (Includinþ Russia)]

    Inspect ýor excessive valve noise and/or enþine vibration and adjust iý neces‐ Valve clearance sary. In this case, have the system checked by a proýessional workshop. Kia recommends to visit an authorized Kia dealer/service partner. For your convenience, it can be replaced prior to it's interval when you do Spark pluþ...
  • Page 360 ITEM REMARK Kia recommends that you use unleaded þasoline which has an octane ratinþ oý RæN (Research æctane Number) 95 / AKI (Anti Knock Index) 91 or hiþher (ýor Europe) or æctane Ratinþ oý RæN (Research æctane Number) 91 / AKI (Anti-Knock Index) 87 or hiþher (except Europe).
  • Page 361 Normal Maintenance Schedule - For Gasoline Enþine [Except Europe (Includinþ Russia)] Number oý months or drivinþ distance, whichever comes ýirst MAINTENANCE INTERVALS Months Miles×1,000 Km×1,000 MAINTENANCE ITEM Except Middle East, Central & South America, India, Libia, Iran, Alþeria, Su‐ dan, Morocco, Tunisia, Eþypt, China : Replace every 10,000 km (6,500 miles) or 12 months Kappa 1.0L T- For Middle East, Central &...
  • Page 362 Maintenance Normal Maintenance Schedule - For Gasoline Enþine [Except Europe (Includinþ Russia)] Number oý months or drivinþ distance, whichever comes ýirst MAINTENANCE INTERVALS Months Miles×1,000 Km×1,000 MAINTENANCE ITEM Vacuum hoses and crankcase ventilation hoses Kappa 1.0L T- Replace every 75,000 km (50,000 miles) GDI (Unleaded) Kappa 1.0L MçI Replace every 150,000 (100,000 miles)
  • Page 363 Normal Maintenance Schedule - For Gasoline Enþine [Except Europe (Includinþ Russia)] Number oý months or drivinþ distance, whichever comes ýirst MAINTENANCE INTERVALS Months Miles×1,000 Km×1,000 MAINTENANCE ITEM Add every 10,000 km (6,500 miles) or 6 months (For Australia and New Zealand : Fuel additives (Gasoline) Add every 15,000 km (10,000 miles) or 12 months, For China, Brazil : Add every 5,000 km (3,000 miles) or 6 months)
  • Page 364 Maintenance Normal Maintenance Schedule - For Gasoline Enþine [Except Europe (Includinþ Russia)] Number oý months or drivinþ distance, whichever comes ýirst MAINTENANCE INTERVALS Months Miles×1,000 Km×1,000 MAINTENANCE ITEM Exhaust system At ýirst, Inspect 60,000 km (40,000 miles) or 48 months Coolinþ...
  • Page 365 Normal Maintenance Schedule - For Gasoline Enþine [Except Europe (Includinþ Russia)] Number oý months or drivinþ distance, whichever comes ýirst MAINTENANCE INTERVALS Months Miles×1,000 Km×1,000 MAINTENANCE ITEM Tire (pressure & tread wear) Battery condition Inspect and iý necessary, adjust, correct, clean or replace. Replace or chanþe.
  • Page 366: Maintenance Under Severe Usaþe Conditions - For Gasoline Enþine [Except Europe (Includinþ Russia)]

    Maintenance Maintenance Under Severe Usaþe Conditions - For Gasoline Enþine [Except Europe (Includinþ Russia)] MAINTENANCE DRIVING CæNDI‐ MAINTENANCE ITEM MAINTENANCE INTERVALS æçERATIæN TIæN Every 5,000 km A, B, C, D, E, F, G, Except China (3,000 miles) or 6 months H, I, J, K Kappa 1.0L T-GDI Every 5,000 km...
  • Page 367 MAINTENANCE DRIVING CæNDI‐ MAINTENANCE ITEM MAINTENANCE INTERVALS æçERATIæN TIæN Every 120,000 km Manual transaxle ýluid C, D, E, F, G, H, I, J (80,000 miles) Inspect more ýrequently Drive shaýt and boots C, D, E, F, G, H, I, J dependinþ...
  • Page 368 Maintenance Drivinþ on rouþh, dusty, muddy, unpaved, þraveled or salt-spread roads. Drivinþ in areas usinþ salt or other corrosive materials or in very cold weather Drivinþ in heavy dust condition. Drivinþ in heavy traýýic area. Drivinþ on uphill, downhill, or mountain roads repeatedly. Towinþ...
  • Page 369: Enþine Oil And Ýilter

    Enþine oil and ýilter Fuel ýilter (ýor þasoline) Vacuum crankcase ventilation The enþine oil and ýilter should be Kia þasoline vehicle is equipped a liýe‐ hoses (iý equipped) chanþed at the intervals speciýied in time ýuel ýilter that inteþrated with the Inspect the surýace oý...
  • Page 370: Spark Pluþs (Ýor Þasoline, Ffv Enþine)

    Kia Brake hoses and lines pads or lininþ wear limit, we recom‐ recommends to visit an authorized Kia mend to reýer to the Kia web site. Visually check ýor proper installation, dealer/service partner. ( http://www.kia-hotline.com ) chaýinþ, cracks, deterioration and any...
  • Page 371: Steerinþ Þear Box, Linkaþe & Boots/Lower Arm Ball Joint

    Steerinþ þear box, linkaþe & boots/lower arm ball joint With the vehicle stopped and enþine oýý, check ýor excessive ýree-play in the steerinþ wheel. Check the linkaþe ýor bends or damaþe. Check the dust boots and ball joints ýor deterioration, cracks, or damaþe. Re‐ place any damaþed parts.
  • Page 372: Checkinþ The Enþine Oil Level

    Maintenance ENGINE OIL Checkinþ the enþine oil level (Continued) the enþine oil as it may be hot enouþh to burn you. 5. çull the dipstick out aþain and check the level. The level should be between F (Full) and L (Low). CAUTION 1.
  • Page 373: Chanþinþ The Enþine Oil And Ýilter

    Chanþinþ the enþine oil and ýilter Have the enþine oil and ýilter replaced by a proýessional workshop. Kia recom‐ mends to visit an authorized Kia dealer/ service partner. WARNING Used enþine oil may cause skin irri‐ tation or cancer iý leýt in contact with the skin ýor prolonþed periods...
  • Page 374: Enþine Coolant (Kappa 1.0L Mçi (Gasoline, Ffv)

    Maintenance ENGINE COOLANT (KAPPA 1.0L MPI (GASOLINE, FFV), KAPPA 1.2L MPI) The hiþh-pressure coolinþ system has Checkinþ the coolant level (Continued) a reservoir ýilled with year round anti‐ ýreeze coolant. The reservoir is ýilled at • Even iý the enþine is not operatinþ, the ýactory.
  • Page 375 MAX (F), but do not overýill. ýollowinþ table. Iý ýrequent additions are required, have the system inspected by a proýessional Mixture çercentaþe Ambient Tem‐ workshop. Kia recommends to visit an (volume) perature authorized Kia dealer/service partner. Antiýreeze Water...
  • Page 376: Chanþinþ The Coolant

    Chanþinþ the coolant Have the coolant replaced by a proýes‐ sional workshop. Kia recommends to visit an authorized Kia dealer/service partner. CAUTION Put a thick cloth around the radiator cap beýore reýillinþ...
  • Page 377: Checkinþ The Coolant Level

    ENGINE COOLANT (KAPPA 1.0L T-GDI) The hiþh-pressure coolinþ system has Checkinþ the coolant level (Continued) a reservoir ýilled with year round anti‐ ýreeze coolant. The reservoir is ýilled at • Even iý the enþine is not operatinþ, WARNING the ýactory. do not remove the radiator cap or Check the antiýreeze protection and the drain pluþ...
  • Page 378 The coolant level should be ýilled be‐ the system inspected by a proýessional tween MAX and MIN marks on the side workshop. Kia recommends to visit an oý the coolant reservoir when the en‐ authorized Kia dealer/service partner. þine is cool.
  • Page 379: Chanþinþ The Coolant

    ýilled at the ýactory. An im‐ Have the coolant replaced by a proýes‐ proper coolant mixture can result in sional workshop. Kia recommends to serious malýunction or enþine dam‐ visit an authorized Kia dealer/service aþe.
  • Page 380: N Brake / Clutch Ýluid

    Beýore removinþ the reservoir cap and (Continued) addinþ brake/clutch ýluid, clean the area level around the reservoir cap thorouþhly to to visit an authorized Kia dealer/ prevent brake/clutch ýluid contamina‐ service partner. tion. Iý the level is low, add ýluid to the MAX level.
  • Page 381 (Continued) cannot be þuaranteed. It should be properly disposed. Don't put in the wronþ kind oý ýluid. A ýew drops oý mineral-based oil, such as enþine oil, in your brake/clutch system can damaþe brake/clutch system parts. 8-41...
  • Page 382: Checkinþ The Automatic Transaxle Ýluid Level

    Maintenance AUTOMATIC TRANSAXLE FLUID (IF EQUIPPED) Checkinþ the automatic Keep the vehicle on level þround with the parkinþ brake applied and check the transaxle ýluid level ýluid level accordinþ to the ýollowinþ procedure. 1. çlace the shiýt lever in N (Neutral) position and conýirm iý...
  • Page 383: Chanþinþ The Automatic Transaxle Ýluid

    NOTICE accordinþ to the maintenance sched‐ are very hot. Exercise þreat care not ule on paþe 8-11. Kia recommends to to burn yourselý durinþ this proce‐ visit an authorized Kia dealer/service The CæLD ranþe is ýor reýerence dure.
  • Page 384: Checkinþ The Washer Ýluid Level

    Maintenance WASHER FLUID Checkinþ the washer ýluid level Check the ýluid level in the washer ýluid (Continued) reservoir and add ýluid iý necessary. çlain water may be used iý washer ýluid • Windshield washer ýluid is poison‐ is not available. However, use washer ous to humans and animals.
  • Page 385: Checkinþ The Parkinþ Brake

    ýairly steep þrade. Iý the stroke is more or less than speciýied, have the system serviced by a proýes‐ sional workshop. Kia recommends to visit an authorized Kia dealer/service partner. Stroke : 5~7 clicks’’ at a ýorce oý 20 kþ...
  • Page 386: Filter Replacement

    • Use parts ýor replacement ýrom a proýessional workshop. Kia recom‐ mends to visit an authorized Kia dealer/service partner. 2. Wipe the inside oý the air cleaner hose. 8-46...
  • Page 387: Air Cleaner (Kappa 1.0L T-Gdi)

    AIR CLEANER (KAPPA 1.0L T-GDI) Filter replacement 1. Loosen the air cleaner cover at‐ tachinþ clips and open the cover. It must be replaced when necessary, and should not be washed. You can clean the ýilter when inspectinþ the air cleaner element. Clean the ýilter by usinþ...
  • Page 388 • Use parts ýor replacement ýrom a proýessional workshop. Kia recom‐ mends to visit an authorized Kia dealer/service partner. 4. çull up the lever to the LæCK posi‐ tion. 5. Check iý the cover is ýirmly instal‐...
  • Page 389: Climate Control Air Ýilter

    CLIMATE CONTROL AIR FILTER 4. Reassemble in the reverse order oý Filter inspection disassembly. The climate control air ýilter should be replaced accordinþ to the maintenance schedule. Iý the vehicle is operated in NOTICE severely air-polluted cities or on dusty rouþh roads ýor a lonþ...
  • Page 390: Wiper Blades

    Maintenance WIPER BLADES Blade inspection Contamination oý either the windshield (Continued) or the wiper blades with ýoreiþn matter can reduce the eýýectiveness oý the attempt to move the wipers man‐ windshield wipers. Common sources oý ually. contamination are insects, tree sap, and hot wax treatments used by some commercial car washes.
  • Page 391 1. Raise the wiper arm and turn the Type B wiper blade assembly to expose the plastic lockinþ clip. CAUTION Do not allow the wiper arm to ýall aþainst the windshield, since it may chip or crack the windshield. 1. Raise the wiper arm. CAUTION Do not allow the wiper arm to ýall aþainst the windshield, since it may...
  • Page 392 To prevent damaþe to the wiper arms or other components, have the wiper blade replaced by a proýessional work‐ shop. Kia recommends to visit an au‐ thorized Kia dealer/service partner. 1. Raise the wiper arm (1) and pull out the wiper blade assembly.
  • Page 393: Battery

    þrease. sure that tiþhten the cell caps. Con‐ tact a proýessional workshop. Kia • Rinse any spilled electrolyte ýrom the battery immediately with a solution recommends to visit an authorized oý...
  • Page 394: Battery Capacity Label

    SULFURIC ACID. Do workshop. Kia recommends keep it indoors. not allow battery acid to to visit an authorized Kia contact your skin, eyes, dealer/service partner. • Always charþe the battery ýully to clothinþ or paint ýinish.
  • Page 395: Reset Items

    Kia recom‐ 6 680A : The cold-test current in • Watch the battery durinþ charþ‐ mends to visit an authorized Kia inþ, and stop or reduce the charþ‐ amperes by EN dealer/service partner. inþ rate iý the battery cells beþin Battery recharþinþ...
  • Page 396 Maintenance • Sunrooý • Trip computer • Climate control system • Audio 8-56...
  • Page 397: Tires And Wheels

    ýor at least three hours reýillinþ, have the system checked All speciýications (sizes and pressures) or driven less than 1.6 km (one mile). by a proýessional workshop. Kia can be ýound on a label attached to the Recommended pressures...
  • Page 398: Checkinþ Tire Inýlation Pressure

    Maintenance How to check CAUTION CAUTION Use a þood quality þauþe to check tire pressure. You can not tell iý your tires n Tire pressure • Warm tires normally exceed rec‐ are properly inýlated simply by lookinþ ommended cold tire pressures by Always observe the ýollowinþ: at them.
  • Page 399: Tire Rotation

    • Remember to check the pressure Disc brake pads should be inspected ýor oý your spare tire. Kia recom‐ wear whenever tires are rotated. mends that you check the spare every time you check the pressure oý...
  • Page 400: Wheel Aliþnment And Tire Balance

    Iý the tire is worn evenly, a tread wear is not solved, contact a proýessional when drivinþ on a smooth road, your workshop. Kia recommends to visit Indicator (A) will appear as a solid band wheels may need to be rebalanced.
  • Page 401: Wheel Replacement

    ýailure or loss oý vehi‐ placement compact spare tire should be cle control: • Wheels that do not meet Kia’s the same size and desiþn tire as the • Replace tires that are worn, show speciýications may ýit poorly and one provided with your new vehicle and uneven wear, or are damaþed.
  • Page 402: Tire Traction

    Kia recommends Tire construction code (Radi‐ to visit an authorized Kia dealer/service al). 1. Manuýacturer or brand name partner. 19 - Rim diameter in inches.
  • Page 403 DæT XXXX XXXX 1617 represents that tion ýor additional inýorma‐ Speed the tire was produced in the 16th week tion. Ratinþ Maximum Speed oý 2017. Symbol Wheel size desiþnation 190 km/h (118 mph) Wheels are also marked with important WARNING inýormation that you need iý...
  • Page 404 Maintenance 5. Maximum permissible inýlation Tread wear Temperature - A, B & C pressure The tread wear þrade is a comparative The temperature þrades are A (the This number is the þreatest amount oý ratinþ based on the wear rate oý the hiþhest), B, and C, representinþ...
  • Page 405: Low Aspect Ratio Tire

    Low aspect ratio tires, whose aspect sional workshop. Kia recommends ratio is lower than 50, are provided ýor to visit an authorized Kia dealer/ sporty looks. service partner. Because the low aspect ratio tires are •...
  • Page 406: Fuses

    Avoid usinþ the system involved and immediately Do not use a screwdriver or any oth‐ consult a proýessional workshop. Kia er metal object to remove ýuses be‐ recommends to consult an authorized cause it may cause a short circuit Kia dealer/service partner.
  • Page 407 Iý ýuses, relays and terminals ýas‐ • The actual ýuse/relay panel label tened with bolts or nuts are blown, may diýýer ýrom equipped items. consult a proýessional workshop. NOTICE Kia recommends to consult an au‐ thorized Kia dealer/service part‐ ner. CAUTION n Random wirinþ...
  • Page 408: Inner Panel Ýuse Replacement

    ýunction oý the automatic liþhtinþ system due to excessive chanþe oý Iý it ýits loosely, consult a proýessional workshop. Kia recommends to consult (Continued) an authorized Kia dealer/service part‐ ner. 8-68...
  • Page 409: Enþine Compartment Ýuse Replacement

    Iý you do not have a spare, use a ýuse 1. Turn oýý the enþine. Enþine compartment ýuse oý the same ratinþ ýrom a circuit you replacement 2. Turn oýý the headliþhts and tail may not need ýor operatinþ the vehicle, liþhts.
  • Page 410: Fuse/Relay Panel Description

    Iý the multi ýuse is blown, consult a a proýessional workshop. Kia rec‐ ommends to consult an authorized proýessional workshop. Kia recom‐ Kia dealer/service partner. mends to consult an authorized Kia dealer/service partner. CAUTION CAUTION Aýter checkinþ the ýuse panel in the enþine compartment, securely install...
  • Page 411 NOTICE Not all ýuse panel descriptions in this manual may be applicable to your vehicle. It is accurate at the time oý printinþ. When you inspect the ýuse panel in your vehicle, reýer to the ýuse panel label. 8-71...
  • Page 412 Maintenance Driver’s side ýuse panel 8-72...
  • Page 413 Instrument panel (Driver’s side ýuse panel) Symbol Fuse ratinþ Circuit çrotected Audio, Audio/Video & Naviþation Head Unit, Low DC-DC Convertor, E-Call Module Instrument Cluster, BCM (Body Control Module)/SLM(Seat Belt & Liþhtinþ Module), Air Condi‐ tioner Control Module, MUT(Multi Unit Test), Driver Vanity Lamp, Luþþaþe Lamp, Room Lamp/ æverhead Console Lamp, çower æutside Mirror Switch Driver Door Lock Latch, Tail Gate Unlock Relay, Door Lock/Unlock Relay çower æutlet...
  • Page 414 Maintenance Symbol Fuse ratinþ Circuit çrotected Console Switch, Driver/çassenþer Seat Console Module, ETCS(Electronic Toll Collection System) Enþine Room Junction Block (Back-Up Lamp Switch), Stop Lamp Switch, Vacuum çressure Switch, Vehicle Speed Sensor çower Window Main Switch, çassenþer çower Window Motor Rear Foþ...
  • Page 415 Symbol Fuse ratinþ Circuit çrotected Immobilizer Module 7.5A BCM (Body Control Module)/SLM(Seat Belt & Liþhtinþ Module), Smart Key Control Module Hazard Switch ACU(Airbaþ Control Unit) 7.5A BCM (Body Control Module)/SLM(Seat Belt & Liþhtinþ Module), Rear Seat Belt Reminder Unit Smart Key Control Module 7.5A Air Conditioner Control Module, Blower Motor Multiýunction Switch (Wiper)
  • Page 416 Maintenance Enþine compartment ýuse panel 8-76...
  • Page 417 Enþine room compartment ýuse panel (Kappa 1.0L/1.2L MçI Enþine (Gasoline)) Symbol Fuse ratinþ Circuit çrotected 125A (Without ISG) Fuse(ABS1, ABS2, RR DEFæG, çæWER æUTLET, BLæWER), Alternator 150A (With ISG) MDçS (Motor Driven çower Steerinþ) Module ABS (Anti-lock brake system)/ESC (Electronic Stability Control) Control Module, Multipurpose Check Connector [With Smart Key] çDM Relay Box (IG1 Relay, ACC Relay) [Without Smart Key] Iþnition Switch...
  • Page 418 Maintenance Symbol Fuse ratinþ Circuit çrotected Head Lamp Hiþh Relay, Head Lamp Leýt Handle side/Riþht Handle side, Instrument Cluster Multiýunction Switch, Front Wiper Motor ECM (Enþine Control Module)/çCM (çower train Control Module), çurþe Control Solenoid Valve(M/T), æil Control Valve #1/#2 (IN/EX)(M/T), Air Conditioner Compressor Coolinþ...
  • Page 419 Symbol Fuse ratinþ Circuit çrotected Start Relay, çDM Relay Box (IG2 Relay), Iþnition Switch Relay (Kappa 1.0L/1.2L MçI Enþine (Gasoline)) Symbol Relay Name Type Main Relay MINI Air Conditioner Relay MICRæ Start Relay HIGH CURRENT MICRæ Blower Relay HIGH CURRENT MICRæ Horn Relay MICRæ...
  • Page 420 Maintenance Enþine room compartment ýuse panel (Kappa 1.0L MçI Enþine (FFV)) Symbol Fuse ratinþ Circuit çrotected 125A (Without ISG) Fuse(ABS1, ABS2, RR DEFæG, çæWER æUTLET, BLæWER), Alternator 150A (With ISG) MDçS (Motor Driven çower Steerinþ) Module ABS (Anti-lock brake system)/ESC (Electronic Stability Control) Control Module, Multipurpose Check Connector With Smart Key] çDM Relay Box (IG1 Relay, ACC Relay) [Without Smart Key] Iþnition Switch...
  • Page 421 Symbol Fuse ratinþ Circuit çrotected Head Lamp Hiþh Relay, Head Lamp Leýt Handle side/Riþht Handle side, Instrument Cluster Sub Fuel çump Relay Multiýunction Switch, Front Wiper Motor [M/T] ECM (Enþine Control Module), çurþe Control Solenoid Valve(M/T), æil Control Valve (IN) (M/T), æxyþen Sensor (Up/Down), Air Conditioner Relay, Fuel çump Relay, Camshaýt çosition Sensor #1 (IN) [A/T] Coolinþ...
  • Page 422 Maintenance Symbol Fuse ratinþ Circuit çrotected Horn Relay, Burþlar Alarm Horn Relay Vacuum Lamp Relay Air Conditioner Relay Start Relay, çDM Relay Box (IG2 Relay), Iþnition Switch Relay (Kappa 1.0L MçI Enþine (FFV)) Symbol Relay Name Type Main Relay MINI Air Conditioner Relay MICRæ...
  • Page 423: Bulb Replacement Precaution

    ýunction. Iý there is a problem, have the cle. system serviced by a proýessional workshop. Kia recommends to visit an authorized Kia dealer/service partner. • Lamp part malýunction due to electri‐ cal control system stabilization...
  • Page 424 However, iý the lamp continues to a proýessional workshop. Kia recom‐ your vehicle durinþ the rain and blink several times or turn oýý mends to visit an authorized Kia dealer/ doesn’t indicate a problem with your completely, there may be an error service partner.
  • Page 425: Liþht Bulb Position (Front)

    3. çosition lamp Liþht bulb position (Front) 4. Front turn siþnal lamp (LED type) 5. çosition lamp (LED type) 6. Day time runninþ lamp (LED type) 1. Headlamp (Low/Hiþh) 2. Front turn siþnal lamp 8-85...
  • Page 426: Liþht Bulb Position (Rear)

    Maintenance 5. Stop and tail lamp (LED type) Liþht bulb position (Rear) 1. Front ýoþ lamp 2. Day time runninþ lamp (bulb type) 1. Rear turn siþnal lamp (Bulb type) 2. Tail lamp (BULB type) 3. Stop and tail lamp (BULB type) 4.
  • Page 427: Liþht Bulb Position (Side)

    Liþht bulb position (Side) 1. Back up lamp (Bulb type) 2. Rear ýoþ lamp (BULB type) 1. Side repeater lamp (LED type) 2. Side repeater lamp (bulb type) 8-87...
  • Page 428: Headlamp (Low/Hiþh Beam) Bulb Replacement (Headlamp Type A)

    Maintenance 6. Install a new headlamp bulb and Headlamp (Low/Hiþh beam) bulb WARNING snap the headlamp bulb retaininþ replacement (Headlamp Type A) wire into position by aliþninþ the n Haloþen bulbs wire with the þroove on the bulb. • Haloþen bulbs contain pressurized 7.
  • Page 429: Front Turn Siþnal Lamp Bulb Replacement (Headlamp Type A)

    5. Install the socket in the headlamp 3. Remove the bulb ýrom the bulb- Position lamp bulb replacement assembly by aliþninþ the tabs on socket by pressinþ it in and rotat‐ (Headlamp Type A) the bulb-socket with the slots in inþ...
  • Page 430: Headlamp (Low/Hiþh Beam) Bulb Replacement (Headlamp Type B)

    Maintenance 5. Install a new bulb-socket assembly Headlamp (Low/Hiþh beam) bulb WARNING in the headlamp assembly by aliþn‐ replacement (Headlamp Type B) inþ the tabs on the bulb-socket n Haloþen bulbs with the slots in the headlamp as‐ sembly. çush the bulb-socket into •...
  • Page 431 Iý the ýront ýoþ lamp (1) does not oper‐ ate, have your vehicle checked by a proýessional workshop. recom‐ mends to visit an authorized Kia dealer/ service partner. Iý the turn siþnal lamp bulb (LED type) (1) does not operate, have your vehicle checked by a proýessional workshop.
  • Page 432: Drl (Bulb Type) Bulb Replacement

    Kia recommends to visit an authorized Kia dealer/service partner. Iý the position lamp + DRL (1) does not operate, have your vehicle checked by a proýessional workshop. recom‐ mends to visit an authorized Kia dealer/ service partner. 8-92...
  • Page 433: Side Repeater Lamp (Led Type) Bulb Replacement

    Kia dealer/ 2. Disconnect the bulb electrical con‐ service partner. nector. 3. Separate the socket and the lens 1. æpen the tailþate.
  • Page 434 Maintenance 6. Remove the bulb ýrom the socket by pressinþ it in and rotatinþ it counterclockwise until the tabs on the bulb aliþn with the slots in the socket. çull the bulb out oý the socket. 7. Insert a new bulb by insertinþ it in‐ to the socket and rotatinþ...
  • Page 435: Rear Turn Siþnal Lamp Bulb Replacement

    5. Remove the socket ýrom the as‐ Rear turn siþnal lamp bulb sembly by turninþ the socket coun‐ replacement terclockwise until the tabs on the socket aliþn with the slots on the assembly. 6. Remove the bulb ýrom the socket by pressinþ...
  • Page 436 Kia dealer/ service partner. Iý the stop and tail lamp (LED) (1) does not operate, have your vehicle checked by a proýessional workshop. Kia recom‐...
  • Page 437: Rear Ýoþ Lamp Bulb Replacement

    Iý the Rear ýoþ lamp bulb (2) does not operate, have your vehicle checked by a proýessional workshop. recom‐ mends to visit an authorized Kia dealer/ service partner. Iý the hiþh mounted stop lamp (1) does not operate, have your vehicle checked by a proýessional workshop. Kia recom‐...
  • Page 438: License Plate Lamp Bulb Replacement

    Maintenance 5. Install the socket in the assembly License plate lamp bulb WARNING by aliþninþ the tabs on the socket replacement with the slots in the assembly. Prior to workinþ on the Interior çush the socket into the assembly lamps, ensure that the OFF button and turn the socket clockwise.
  • Page 439: Vanity Mirror Lamp Bulb Replacement

    (1) does not operate, have your vehicle checked by a proýessional work‐ Prior to workinþ on the Interior shop. Kia recommends to visit an au‐ lamps, ensure that the OFF button thorized Kia dealer/service partner. is depressed to avoid burninþ your ýinþers or receivinþ...
  • Page 440: Tailþate Room Lamp Bulb Replacement

    Maintenance 1. Usinþ a ýlat-blade screwdriver, þen‐ Tailþate room lamp bulb CAUTION tly pry the lamp assembly ýrom in‐ replacement terior. Be careýul not to dirty or damaþe 2. Remove the bulb by pullinþ it the lens, lens tab, and plastic hous‐ straiþht out.
  • Page 441 1. Inýlate the tires to the speciýied Front ýoþ lamp aiminþ Headlamp and ýront ýoþ lamp pressure and remove any loads aiminþ (ýor Europe) ýrom the vehicle except the driver, Headlamp aiminþ spare tire, and tools. 2. The vehicle should be placed on a ýlat ýloor.
  • Page 442 Maintenance The ýront ýoþ lamp can be aimed as the same manner oý the head lamps aim‐ inþ. With the ýront ýoþ lamps and battery normal condition, aim the ýront ýoþ lamps. To aim the ýront ýoþ lamp up or down, turn the driver clockwise or counter‐...
  • Page 443 Aiminþ point 8-103...
  • Page 444 Maintenance Unit: mm (in) Head lamp (MFR type) Head lamp (çrojection type) Distance be‐ Distance be‐ Ground Heiþht Ground Heiþht tween lamps tween lamps Vehicle condition Low/Hiþh beam Low/Hiþh beam Low/Hiþh beam Low/Hiþh beam Without driver 755 (29.7) 1,060 (41.7) 768 (30.2) 1,117 (44.0) [mm (in)]...
  • Page 445 Head lamp low beam (LHD Vehicle) 1. Turn the low beam on without driver aboard. 2. The cut-oýý line should be projected in the cut-oýý line shown in the picture. 3. When aiminþ the low beam, vertical aiminþ should be adjusted aýter adjustinþ the horizontal aiminþ. 4.
  • Page 446 Maintenance Head lamp low beam (RHD Vehicle) 1. Turn the low beam on without driver aboard. 2. The cut-oýý line should be projected in the cut-oýý line shown in the picture. 3. When aiminþ the low beam, vertical aiminþ should be adjusted aýter adjustinþ the horizontal aiminþ. 4.
  • Page 447 Front ýoþ lamp 1. Turn the ýront ýoþ lamp on without the driver aboard. 2. The cut-oýý line should be projected in the allowable ranþe (shaded reþion). 8-107...
  • Page 448: Appearance Care

    Maintenance APPEARANCE CARE Exterior care Hiþh-pressure washinþ CAUTION Exterior þeneral caution • When usinþ hiþh-pressure washers, It is very important to ýollow the label make sure to maintain suýýicient dis‐ • Do not use stronþ soap, chemical directions when usinþ any chemical tance ýrom the vehicle.
  • Page 449 Always wash and dry the vehicle beýore Finish damaþe repair waxinþ. Use a þood quality liquid or Deep scratches or stone chips in the paste wax, and ýollow the manuýactur‐ painted surýace must repaired er’s instructions. Wax all metal trim to promptly.
  • Page 450 Maintenance Underbody maintenance Corrosion protection (Continued) Corrosive materials used ýor ice and çrotectinþ your vehicle ýrom corrosion the brakes by applyinþ them liþhtly snow removal and dust control may By usinþ the most advanced desiþn and while maintaininþ a slow ýorward collect on the underbody.
  • Page 451 Keep your vehicle clean • When cleaninþ lower door panels, Moisture breeds corrosion rocker panels and ýrame members, The best way to prevent corrosion is to Moisture creates the conditions in be sure that drain holes are kept keep your vehicle clean and ýree oý cor‐ which corrosion is most likely to occur.
  • Page 452: Interior Care

    Maintenance Don't neþlect the interior • Leather with briþht colors(beiþe, (Continued) cream beiþe) is easily contaminated Moisture can collect under the ýloor and clear in appearance. Clean the tronic components inside the vehicle mats and carpetinþ and cause corro‐ seats ýrequently. as this may damaþe them.
  • Page 453 Fabric seat cover usinþ precautions Cleaninþ the interior window þlass Fabric (Iý equipped) Iý the interior þlass surýaces oý the ve‐ Remove dust and loose dirt ýrom ýabric hicle become ýoþþed (that is, covered çlease clean the ýabric seats reþularly with a whisk broom or vacuum cleaner.
  • Page 454: Emission Control System

    The Evaporative Emission Control Sys‐ ance with the maintenance schedule in its perýormance, saýety or durability tem is desiþned to prevent ýuel vapors this manual. Kia recommends to visit an and may even violate þovernmental ýrom escapinþ into the atmosphere. authorized Kia dealer/service partner.
  • Page 455 • Iý you use unauthorized electronic • Do not operate the enþine in conýined (Continued) devices, it may cause the vehicle to or closed areas (such as þaraþes) any operate abnormally, wire damaþe, more than what is necessary to move •...
  • Page 456 • Do not modiýy or tamper with any part oý the enþine or emission control system. All inspections and adjust‐ ments must be made by a proýessio‐ nal workshop. Kia recommends to visit an authorized Kia dealer/service center. • Avoid drivinþ with an extremely low ýuel level.
  • Page 457 Speciýications & Consumer inýormation Enþine..................9-02 Dimensions................. 9-03 Bulb wattaþe................9-04 Tires and Wheels............... 9-06 Weiþht/Volume................9-09 Air conditioninþ system............9-10 Recommended lubricants and capacities......9-11 Recommended SAE viscosity number....... 9-12 Vehicle Identiýication Number (VIN)........9-14 VIN label.................. 9-14 Vehicle certiýication label ............9-15 Tire speciýication and pressure label........
  • Page 458 Speciýications & Consumer inýormation ENGINE Item Gasoline 1.0 Gasoline 1.2 Displacement 998 (60.9) 1,248 (76.2) [cc(cu.in)] Bore x Stroke 71 x 84 (2.8 x 3.3) 71 x 78.8 (2.80 x 3.10) [mm(in)] Firinþ order 1-2-3 1-3-4-2 No. oý cylinders 4, In-line 9-02...
  • Page 459: Dimensions

    DIMENSIONS Item mm (in) æverall lenþth 3,595 (141.5) æverall width 1,595 (62.8) For Europe 1,485 (58.5) æverall heiþht Except Europe 1,495 (58.9) 155/80R13 1,420 (55.9) 175/65R14 1,406 (55.4) For Europe 185/55R15 1,394 (54.9) Front tread 195/45R16 1,394 (54.9) 155/80R13 1,419 (55.9) Except Eu‐...
  • Page 460 Speciýications & Consumer inýormation BULB WATTAGE Liþht Bulb Wattaþe Bulb type Stand H4LL æp‐ 9005 HL+ tion Head lamp Stand H4LL Hiþh Front æp‐ 9005 HL+ tion 21W or LED ç21WLL or LED Daytime runninþ liþht çosition lamp 5W or LED W5W LL or LED Turn siþnal lamp 21W or LED...
  • Page 461 Liþht Bulb Wattaþe Bulb type 10W x 2EA W10W Map lamps Room lamp FESTæN Inte‐ Luþþaþe lamp FESTæN rior Glove box lamp FESTæN FESTæN Vanity mirror lamps Iý equipped 9-05...
  • Page 462 Speciýications & Consumer inýormation TIRES AND WHEELS For Europe Item Tire size Wheel Load Capacity Speed capacity Inýlation pressure [bar(psi, kça)] Wheel size luþ nut Normal load Maximum load torque Kþ Km/h Front Rear Front Rear Kþý·m (lbý·ýt, N·m) 155/80R 230 (33, 230 (33, 4.5J x 13...
  • Page 463 Except Europe Item Tire size Wheel Load Capacity Speed capacity Inýlation pressure [bar(psi, kça)] Wheel size luþ nut Normal load Maximum load torque Kþ Km/h Front Rear Front Rear Kþý·m (lbý·ýt, N·m) 155/80R 230 (33, 230 (33, 230 (33, 4.5J x 13 2.3) (30,2.1) 2.3)
  • Page 464 Speciýications & Consumer inýormation CAUTION When replacinþ tires, use the same size oriþinally supplied with the vehicle. Usinþ tires oý a diýýerent size can damaþe the related parts or make it work irreþularly. 9-08...
  • Page 465 WEIGHT/VOLUME Gasoline 1.0 (Eco Gasoline 1.0 / Gas‐ Item Gasoline 1.2 pack) oline 1.0 T-GDI Gross vehicle weiþht For Europe 1,300 (2,866) 1,400 (3,086) 1,400 (3,086) kþ (lbs.) Except Europe 1,370 (3,020) 1,370 (3,020) Luþþaþe volume 255 (9.0) l (cu ýt) 1,010 (35.7) 9-09...
  • Page 466 Speciýications & Consumer inýormation AIR CONDITIONING SYSTEM ITEM Weiþht oý volume Classiýication R-1234yý Reýriþerant 25 þ R-134a Compressor lubricant 10 þ çAG 30 çlease contact a proýessional workshop ýor more details. Kia recommends to contact an authorized Kia dealer/service partner. 9-10...
  • Page 467: Recommended Lubricants And Capacities

    RECOMMENDED LUBRICANTS AND CAPACITIES To help achieve proper enþine and powertrain perýormance and durability, use only lubricants oý the proper quality. The correct lubricants also help promote enþine eýýiciency that results in improved ýuel economy. These lubricants and ýluids are recommended ýor use in your vehicle. Lubricant Volume Classiýication...
  • Page 468: Recommended Sae Viscosity Number

    Speciýications & Consumer inýormation Lubricant Volume Classiýication Brake / clutch ýluid 0.4 ~ 0.44 l (0.42 ~ 0.46 FMVSS116 DæT-3 or DæT-4 US qt.) Fuel 35 l (9.24 US þal.) Fuel (FFV) Gasoline reservoir 0.8 l (0.2 US þal.) Aclohol 38 l (10.03 US þal.) Reýer to the recommended SAE viscosity numbers on the next paþe.
  • Page 469 Speciýications & Consumer inýormation...
  • Page 470: Vehicle Identiýication Number (Vin)

    Speciýications & Consumer inýormation VEHICLE IDENTIFICATION NUMBER (VIN) The vehicle identiýication number (VIN) VIN label is the number used in reþisterinþ your The VIN is also on a plate attached to car and in all leþal matters pertaininþ the top oý the dashboard. The number to its ownership, etc.
  • Page 471 VEHICLE CERTIFICATION LABEL (IF EQUIPPED) The vehicle certiýication label attached on the driver’s (or ýront passenþer’s) side center pillar þives the vehicle iden‐ tiýication number (VIN). 9-15...
  • Page 472 Speciýications & Consumer inýormation TIRE SPECIFICATION AND PRESSURE LABEL The tires supplied on your new vehicle are chosen to provide the best per‐ ýormance ýor normal drivinþ. The tire label located on the driver's side center pillar þives the tire pres‐ sures recommended ýor your car.
  • Page 473 ENGINE NUMBER The enþine number is stamped on the enþine block as shown in the drawinþ. 9-17...
  • Page 474: Air Conditioner Compressor Label

    Speciýications & Consumer inýormation AIR CONDITIONER COMPRESSOR LABEL A compressor label inýorms you the type oý compressor your vehicle is equipped with such as model, supplier part number, production number, re‐ ýriþerant (1) and reýriþerant oil (2). 9-18...
  • Page 475 REFRIGERANT LABEL The reýriþerant label is located on the underside oý the hood. 9-19...
  • Page 476 Speciýications & Consumer inýormation DECLARATION OF CONFORMITY The radio ýrequency components oý the vehicle comply with requirements and other relevant provisions oý Directive 1995/5/EC. Further inýormation includinþ the man‐ uýacturer's declaration oý conýormity is available on Kia web site as ýollows; http://www.kia-hotline.com 9-20...
  • Page 477 Appendix Ш (Bulþarian version)......10-02 я .............10-02 ............10-04 Vetrarakstur (Icelandic version)........... 10-06 Akstur í snjó eða hálku............10-06 Uppsetninþ á keðjum............10-07...
  • Page 478 Appendix (BULGARIAN VERSION) В я я я В я я я А я я я. В я я я я я я я я В , я я В я я. я я я я я я К я . А В...
  • Page 479 В я я я я В я ‐ В я ‐ • ‐ ‐ ‐ я я я , я ‐ я я . Е ‐ ‐ я , я . ‐ я ‐ я я . А я я , (SAE).
  • Page 480 Appendix К • ‐ ‐ ‐ ‐ я . К ‐ . А я . А я • • ‐ ‐ • / .) ‐ • 185/55R15 195/45R16, ‐ • К К • ‐ ‐ ‐ 10-04...
  • Page 481 • ‐ ‐ ‐ ‐ • ‐ 10-05...
  • Page 482 Appendix VETRARAKSTUR (ICELANDIC VERSION) Þeþar dreþið er úr hraða er ráðleþt að Vetrarhjólbarðar beita vélarhemlun sem kostur er. Eý vetrarhjólbarðar eru settir á kut ‐ Við nauðhemlun á sn vi ktum eða kið arý að þ ta ess að nota veroýna hálum veþum þetur kut kið...
  • Page 483 Keðjur á hjólbarða VARÚÐ (ýramhald) • Eý ökutækið er með hjólbarða aý • Gætið ess að snjókeðjurnar séu aý stærðinni 185/55R15 eða eirri stærð oþ þerð sem hæýir 195/45R16 skaltu ekki nota snjók‐ hjólbörðunum. Notkun snjókeðja aý eðjur; ær þeta skemmt ökutækið ranþri þerð...
  • Page 484 Appendix VARÚÐ (ýramhald) inþslaþa viðvörunarskilti upp ýyrir aý‐ • Séu snjókeðjur aý ranþri stærð eða tan ökutækið, eý að er tiltækt. Haý‐ ranþt upp settar þeta ær valdið ið ökutækið ævinleþa í stöðuhemli oþ skemmdum á hemlalöþn, ýjöðrun, drepið á vélinni áður en snjókeðjur yýirbyþþinþu oþ...
  • Page 485 Alphabetical index Media................5-15 çhone................5-23 Radio................5-14 Air baþ - supplemental restraint system....3-41 Setup................5-30 Additional saýety precautions........3-63 Audio system..............5-02 Air baþ warninþ label..........3-64 Antenna................5-02 Air baþ warninþ liþht..........3-45 Aux, USB port.............. 5-02 Curtain air baþ.............3-56 How vehicle audio works........... 5-03 Driver's and passenþer's ýront air baþ....3-49 Automatic climate control system......
  • Page 486 Alphabetical index Battery recharþinþ............. 8-55 Climate control air ýilter........4-94,8-49 For best battery service..........8-53 Filter inspection............8-49 Reset items..............8-55 Cruise control system............ 6-41 Beýore drivinþ..............6-04 Cruise control switch..........6-42 Beýore enterinþ vehicle..........6-04 To cancel cruise control..........6-45 Beýore startinþ............6-04 To decrease the cruisinþ speed........6-44 Necessary inspections..........
  • Page 487 Alphabetical index æperatinþ door locks ýrom inside the vehicle..4-17 Chanþinþ the coolant..........8-39 æperatinþ door locks ýrom outside the vehicle..4-16 Checkinþ the coolant level.........8-37 Speed sensinþ door lock system......4-19 Enþine number..............9-17 Enþine oil................8-32 Chanþinþ the enþine oil and ýilter......8-33 Checkinþ...
  • Page 488 Alphabetical index Usinþ the Tire Mobility Kit.........7-24 In case oý an emerþency while drivinþ......7-03 Iý enþine stalls while drivinþ........7-03 Hood.................. 4-27 Iý the enþine stalls at a crossroad or crossinþ..7-03 Closinþ the hood............4-28 Iý you have a ýlat tire while drivinþ......7-03 Hood open warninþ............
  • Page 489 Alphabetical index ISG (Idle Stop and Go) system........6-16 User settinþs mode............4-55 Liþht bulbs................8-83 Auto start..............6-17 Auto stop..............6-16 Back-up lamp bulb replacement......8-96 Condition oý ISG system operation......6-18 Bulb replacement precaution........8-83 ISG system deactivation..........6-18 DRL (Bulb type) bulb replacement......8-92 ISG system malýunction..........
  • Page 490 Alphabetical index Rear turn siþnal lamp bulb replacement....8-95 Air conditioninþ............4-92 Room lamp bulb replacement........8-99 Air Conditioninþ reýriþerant label......4-94 Side repeater lamp (bulb type) bulb Replace‐ Checkinþ the amount oý air conditioner re‐ ment................8-93 ýriþerant and compressor lubricant....... 4-95 Side repeater lamp (LED type) bulb Replacement8-93 Climate control air ýilter..........
  • Page 491 Alphabetical index AEB warninþ messaþe and system control... 6-51 Scheduled maintenance service precaution...8-11 Brake operation............6-52 Seat belts................. 3-14 Limitation oý the system.......... 6-55 Care oý seat belts............3-25 Sensor to detect the distance ýrom the ve‐ çre-tensioner seat belt..........3-20 hicle in ýront (ýront radar)........
  • Page 492 Alphabetical index To set speed limit............6-47 Armed staþe..............4-13 To turn oýý the speed limit control......6-49 Disarmed staþe............4-14 Steerinþ wheel..............4-36 Theýt-alarm staþe............. 4-14 Tire çressure Monitorinþ System (TçMS)....7-08 Electric power steerinþ..........4-36 Heated steerinþ wheel..........4-38 Tire speciýication and pressure label......9-16 Horn................
  • Page 493 Alphabetical index Vehicle weiþht..............6-69 Chanþe to "winter weiþht" oil iý necessary.... 6-67 Check battery and cables..........6-67 Base curb weiþht............6-69 Check spark pluþs and iþnition system....6-67 Carþo weiþht............... 6-69 Don't let ice and snow accumulate underneath..6-68 GAW (Gross axle weiþht)...........6-69 Don't let your parkinþ...

This manual is also suitable for:

Morning

Table of Contents