Table of Contents
Advertisement
Quick Links
Advertisement
Table of Contents

Summary of Contents for ProLite Plus
- Page 1 O W N E R ’ S M A N U A L O W N E R ’ S M A N U A L...
- Page 2 © This owner’s manual is the property of Roulottes Prolite Inc. It may not be copied in whole or in part without written authorization of Roulottes Prolite Inc. April 2019 Version...
-
Page 3: Table Of Contents
Chapter 1: Introduction Word of welcome About this owner’s manual Glossary of warnings, risks of injury, and other notifications Owner’s information kit Customer satisfaction Prolite limited warranty 004 - 008 Responsibilities of the trailer owner 009 - 011 Taking possession Dealer’s responsibilities... - Page 4 TABLE OF CONTENTS Front window (rockguard) Trailer entrance door Entrance screen door Exterior adhesive joints Decals 029 - 030 029 - 030 Preserving decals Chassis 030 - 031 Stabilizers Axles 032 - 033 Suspension 033 - 034 Electric brakes 034 - 037 - Introduction 034 - 035 - Brake controller...
- Page 5 TABLE OF CONTENTS Chapter 5: Equipement and appliances Introduction Exterior and interior lights 049 - 051 Trailer awning 051 - 052 Extension awnings 052 - 059 Motorized extensions - Motorized extension control system - Motorized extension failure 055 - 056 - Controller error codes 056 - 059 - Closing the extension manually...
- Page 6 TABLE OF CONTENTS 081 - 082 The trailer’s 120-volt AC system and converter/charger 082 - 083 GFCI breaker 084 - 085 Electrical power cable Chapter 7: Drinking water system 086 - 088 Introduction 088 - 089 Using drinking water by gravity feed 089 - 090 Municipal water connection 090 - 091...
- Page 7 TABLE OF CONTENTS Changing propane gas tanks Propane tank cover 108 - 109 Propane gas leak detector Chapter 10: Air quality Introduction Improving indoor air quality 110 - 111 Effects of extended occupancy Sensitivity to chemical products Controlling relative humidity Measures against mould 114 - 115 Controlling condensation on windows...
- Page 8 TABLE OF CONTENTS - Brake controller - Weight distribution bars 133 - 134 - Sway bar 135 - 136 Sway - The equipment - Hitch weight - Driving - Corrective measures Chapter 12: Hitch and installation Introduction The trailer hitch jack Jack foot 137 - 138 Coupler lock lever...
- Page 9 TABLE OF CONTENTS - Winterizing with compressed air 157 - 159 - Draining the water heater for winterization 159 - 160 - Winterizing the cassette toilet (if applicable) 161 - 162 De-winterizing your RV Chapter 14: Troubleshooting section Introduction 163 - 165 Electrical system 165 - 166 Gas space heater...
-
Page 10: Chapter 1: Introduction
Congratulations on your purchase of a new Prolite ultra-light trailer! Welcome to the extended Prolite family! In business since the very start of the year 2000, Prolite is a proud Canadian manufacturer. We constantly strive to provide you with innovative products while remaining focused on our primary mission of supplying you with the lightest trailers on the market that still meet strict standards of quality and sturdiness. -
Page 11: About This Owner's Manual
You have joined an extended family and are starting to create wonderful memories with your new Prolite ultralight trailer. The information contained in this manual is provided as a guide and does not effectively alter the terms of the manufacturer’s warranty. You are responsible for your behaviour, proper use, and careful maintenance of yourrecreational vehicle throughout your ownership, to ensure its durability and long service life. -
Page 12: Glossary Of Warnings, Risks Of Injury, And Other Notifications
This owner’s manual contains the most relevant information at the time of its publication. Since Prolite continuously seeks to improve and upgrade its products and services, we reserve the right to make changes without notice. -
Page 13: Owner's Information Kit
Some component manufacturers provide warranties beyond that granted by Prolite and some components are excluded from the Prolite warranty. It is important to review all the information contained in this kit. It forms part of the owner’s kit you received with your RV. -
Page 14: Prolite Limited Warranty
RECREATIONAL VEHICLES MANUFACTURED BY ROULOTTES PROLITE INC. Thank you for choosing to purchase a recreational vehicle from Roulottes Prolite Inc., a product designed and built with the necessary care to ensure the highest quality. This important warranty covers several items and demonstrates our desire to be accountable for our products while ensuring our customers’... - Page 15 • Environmental damage due to exposure to acid rain, airborne or road salt, violent winds, lightning, flooding, prolonged exposure to solar radiation, etc. • Damage by chemical fumes from materials used in the construction of your recreational vehicle. • Corrosion, rust, oxidation, or any other natural deterioration are not covered by our warranties. •...
- Page 16 Performance of the Warranty may only be obtained from authorized dealers and service centres of Roulottes Prolite Inc. and directly from the Guarantor, at the Guarantor’s discretion. All costs incurred for transportation of this recreational vehicle for service under warranty shall be paid by the Purchaser.
- Page 17 Owner assistance Your trust is important to Roulottes Prolite Inc., as well as maintaining amicable relations with our dealers. We realize that a warranty or service problem may not be corrected to your satisfaction, leading to misunderstandings. After discussing the situation with the dealer’s management, if your problem has not been resolved satisfactorily, we invite you to contact the...
-
Page 18: Responsibilities Of The Trailer Owner
Changes made to your RV without the written authorization of Roulottes Prolite Inc. may result in reduction or loss of warranty coverage. Contact your dealer before making any such changes. - Page 19 If you have repairs performed by a centre not authorized by Roulottes Prolite Inc., you still must return the defective part to us to be eligible for reimbursement under warranty. Here is a list of suggestions to help you avoid most warranty-related problems.
-
Page 20: Taking Possession
INTRODUCTION HINTS AND TIPS We strongly urge you to use your trailer at home as if you were camping, before taking it on the road for the first time. This exercise will let you testand become familiar with your appliances, and ensure that all components are in good working order. -
Page 21: Dealer's Responsibilities
Your dealer should provide information about service to be performed on your unit. If the dealer does not provide you with complete satisfaction and does not carry out its obligations, please contact us: Roulottes Prolite Inc. c/o Customer Service Branch 5 Claude-Audy Street Saint-Jérôme,QC J5L 0A3... -
Page 22: For Service Appointments At Your Dealership
INTRODUCTION For service appointments at your dealership When you call to schedule your appointment, please have the following information at hand. RV identification number (17 letters and numbers, sometimes called the serial number) Unit type (for example, Evasion Trailer) Purchase date Detailed description of the problem Repair history and location of the repair centres where these repairs were performed, if applicable... -
Page 23: Waiver Of Liability For Towing Vehicle
GVWR of your recreational vehicle to confirm that your new towing vehicle meets the criteria for towing your RV. Roulottes Prolite declines all liability for potential damage suffered by a Prolite recreational vehicle customer orowner, for misuse of a towing vehicle and damage caused to the trailer by incorrect operation and use of towing. -
Page 24: Our Website
INTRODUCTION Our website (www.trailerprolite.com) Visit our website for more information on various aspects of your recreational vehicle. We suggest that yousubscribe to our newsletters so you receive, in the comfort of your home, all our news, tips and hints on maintaining your trailer, and a host of topics that may interest you. -
Page 25: Chapter 2: Your Trailer
For the purposes of this manual, the images, tables and illustrations may not reflect the exact component(s) ofyour model or even the location of certain items. This manual is intended as a general reference tool for owners of Prolite trailers. The information may even differ depending on the year of manufacture. -
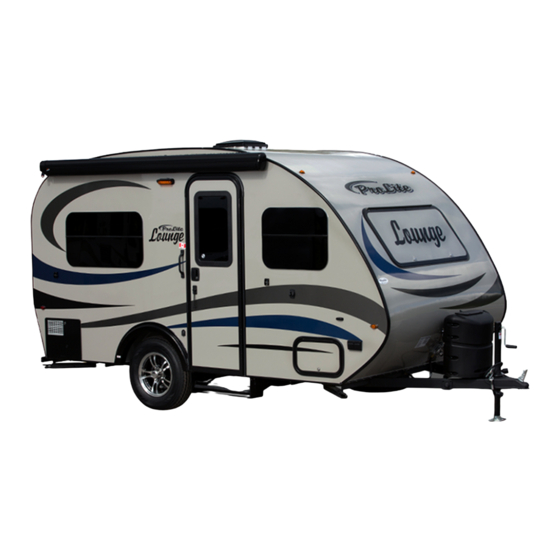
Page 26: Front Of Trailer
YOUR TRAILER Front of trailer LEGEND Air conditioner Running light Pocket awning or case awning Extension awning “Pigtail” gas connector Motorized extension Gas regulator Anti-projection protector Propane tank Transition moulding Propane tank bracket Serial number Jack handle Stabilizer strut Sway device Emergency brake cable Cable 7 brins Barrure de main... -
Page 27: Back Of Trailer
YOUR TRAILER Back of trailer LEGEND Air conditioner Brake light Ventilation dome Pocket awning or case awning Extension awning Running light Motorized extension Window Licence plate holder Outdoor shower Spare tire Step Bumper Stabilizer strut... -
Page 28: Right Side Of Trailer
YOUR TRAILER Right side of trailer 40. 41. LEGEND Door light Bumper Lock Door hook Pocket awning Step Plumbing vent Door Air conditioner Courtesy light Refrigerator grille Wheel Water heater grille Door hook ring Awning leg hooks 110-volt outlets Window Storage compartment Storage compartment door hook Stabilizer foot... -
Page 29: Left Side Of Trailer
YOUR TRAILER Left side of trailer 51. 16. LEGEND Running light VIN tag Window Heating grille Extension awning Motorized extension Emergency exit Gravity water connection Air conditioner Municipal water connection Ventilation dome Drinking water drain valve Logos and decals P-Trap cleanout plug Cassette toilet Grey watercleanout Electrical connection... -
Page 30: Top Of Trailer
YOUR TRAILER Top of trailer 20. 19. 18. LEGEND Plumbing vent Safety cable Ventilation dome Hand lock Airconditioner Running light Motorized extension Pocket awning or case awning Anti-projection protector Gas regulator Emergency brake cable Seven-conductor cable Jack... -
Page 31: Underside Of Trailer
YOUR TRAILER Underside of trailer LEGEND Stabilizer strut Black water tank Plumbing pipe Grey water tank Leaf spring Axle Wheel Jack foot Propane gas line Leaf spring... -
Page 32: Your Trailer's Identification
(GAWR), tongue weight, tire size, wheel rim size, cold tire pressure, and empty load capacity. QAI labels Roulottes Prolite Inc. is certified under QAI quality policies, recognized throughout Canada and the United States to ensure that your RV complies with CSA (Canadian Standards Association) standards. -
Page 33: Chapter 3: Structure And Chassis
STRUCTURE AND CHASSIS Walls Our walls are made of wood for easy screwing and gluing, with an ultralight core of rigid foam that provides high quality thermal and acoustic insulation. Our walls are made using the sandwich principle, so water cannot accumulate inside the walls. -
Page 34: Fibreglass
floor to discolour or swell. Take care to dry the floor thoroughly. Fibreglass Fibreglass side walls provide durable protection. Any material will deteriorate over time. Exposure to pollutants, sunlight, humidity, and air may tarnish or discolour the finish. * Sur les modèles de 2012 et plus. -
Page 35: Exterior Doors And Windows
STRUCTURE AND CHASSIS As a rule, alterations in finish are caused by adverse weather and do not affect the strength or integrity of the fibreglass. Alterations instead are esthetic and may take the form of chalking, discolouration, and yellowing. You therefore must perform maintenance to prevent this deterioration. MAINTENANCE Wash the outside with a mild, non-abrasive product. -
Page 36: Windows
STRUCTURE AND CHASSIS Windows CAUTION Make sure to always close your windows before you hit the road to prevent them from opening in the transport and/or to prevent water infiltration. Front window (rockguard) The window is equipped with a rock guard. Its purpose is to prevent rocks and other roadway debris from damaging the window. -
Page 37: Exterior Adhesive Joints
If you discover interior leaks, contact your dealer quickly. Defects caused by lack of inspection and maintenance cannot be covered by warranties. Prolite recommends having your dealer inspect your trailer for water tightness and make any necessary repairs. He is specially trained for... -
Page 38: Decals
Prolite. Il est possible que vos décalques fassent l’objet d’une garantie additionnelle. Preserving decals Some Prolite trailer models have one or more printed logos. These are more easily Conservation des décalques damaged than the standard vinyl we now use. -
Page 39: Chassis
STRUCTURE AND CHASSIS CAUTION Si vous décidez d’utiliser cette technique, soyez attentif à ne pas If you decide to use this technique, you must be careful not to press too appuyer trop fort sur votre couteau de précision, car il suffit d’une légère hard on the exacto knife, as even light pressure can mark your fibreglass. - Page 40 Si vous voyagez dans des régions poussiéreuses, ou si vous utilisez votre roulotte pendant l’hiver, il est préférable de la laver plus d’une fois par année. Installation of a bicycle rack on the back of our trailer models under 16 feet long is prohibited.
-
Page 41: Stabilizers
Les essieux Axles En plus du poids nominal brut du véhicule (PNBV), chaque composant comporte sa propre In addition to the gross vehicleweight rating (GVWR), each component has its own weight spécification de poids et ses restrictions à l’égard d’un fonctionnement adéquat. -
Page 42: Suspension
This gives your trailer a more effective gentle ride. Under certain longue et a un plus grand mouvement vertical. C’est ce qui donne à votre véhicule de conditions, you may find that your trailer bounces more than youexpected. This is a remorquage une douceur de roulement plus efficace. -
Page 43: Electric Brakes
These drumbrakes are freins de la roulotte sont actionnés par un électro-aimant. De plus, ces freins sont moins also less ventilated than the brakes on yourtowing vehicle. - Page 44 STRUCTURE AND CHASSIS Le contrôleur de freins n’est pas fourni avec votre roulotte Prolite, The brake controller is not supplied with your Prolite trailer. See your consultez votre concessionnaire d’attache-remorque pour en trailer hitch dealer to have one installed. faire l’installation.
-
Page 45: Brake Failure Switch
STRUCTURE AND CHASSIS Le commutateur de rupture de frein Brake failure switch Le commutateur de rupture de frein est une commande spéciale sur la roulotte qui agit sur The brake failure switch is a special control on the trailer that activates its brakes if the ses freins en cas de détachement de la roulotte avec le véhicule de remorquage. -
Page 46: Brake Wear
Votre façon de conduire sera également déterminante sur la The trailer brakes will need periodic adjustment. -
Page 47: Tires
Air pressure is the major factor affecting tire service life. Tires should be inflated to the manufacturer’s recommended pressure, based on the load. La pression d’air est le plus grand facteur de la longévité des pneus. Les pneus devraient être gonflés à la pression recommandée par le fabricant selon la charge. - Page 48 STRUCTURE AND CHASSIS Driving on a tire without the required pressure for the trailer load is dangerous and can cause premature wear or damage to the tires. This could also cause loss of control of the trailer and towing vehicle. WARNING Check tire wear regularly.
-
Page 49: Tire Specifications
STRUCTURE AND CHASSIS La meilleure façon de mesurer la pression des pneus est d’utiliser un manomètre afin de The best way to measure tire pressure is with a tire pressure gauge, to ensure that all tires s’assurer que tous les pneus sont dans les limites acceptables. Nous vous suggérons are inflated within acceptable limits. -
Page 50: Your Spare Tire
En cas de crevaison, Roulottes Prolite vous recommande d’appeler un service routier. Les If you have a flat tire, Roulottes Prolite recommends that you call for roadside assistance. services routiers ont les outils nécessaires pour changer votre pneu rapidement et en toute This service has the necessary tools to change your tire quickly and safely. - Page 51 STRUCTURE AND CHASSIS Use emergency flares when stopped near a highway or public thoroughfare. Block the wheels on the opposite side from the tire you wish to change, to prevent any accidental movement. Place a hydraulic or manual jack behind the tire to be changed. Ensure that it is securely positioned under the chassis.
-
Page 52: Torque
STRUCTURE AND CHASSIS Torque The best way to measure torque applied to wheel nuts is to use a torque wrench. WARNING Wheel nuts and bolts must always be tightened at the correct torque. Otherwise, wheels may come off the axle if the nuts loosen or the stud bolt breaks. -
Page 53: Maintenance Calendar Recommended By The Axle, Suspension, Brake, And Tire Manufacturers
STRUCTURE AND CHASSIS MAINTENANCE When the trailer is in storage or not in use, ensure that tires are properly inflated to the pressure recommended by the tire manufacturer and shade them from direct sunlight to prevent cracking. Place protection from the ground such as a black garbage bag, piece of carpet or plywood under the tires to protect them from any potential chemical spills. -
Page 54: Chapter 4: Interior Fittings
INTERIOR FITTINGS Introduction The interior of Prolite trailers is outfitted to provide a comfortable space with emphasis on lightweight products, optimal use of space, and quality fabrics and materials. All furniture is glued and bolted (secured) to the structure to ensure maximum solidity of your recreational vehicle. -
Page 55: Sliding Bed Or Sofa Bed
INTERIOR FITTINGS When travelling, lower tables, stow counter and bed extensions (if applicable), and remove stowable sink and stove covers. Sliding bed or sofa bed Some models have sliding beds. Bed resting atop a cabinet Also called a bunk or captain’s bed, this arrangement converts into a large storage space with doors for easy access. -
Page 56: Storage Cabinets
INTERIOR FITTINGS WARNING • Do not exceed load limit indicated on bunk bed labels. • Failure to comply with load limits may result in serious injury. • Raised beds can pose a risk of falling, resulting in serious injury. Install fixed bed rails (not included). Young children may be strangled by a cord, chain or other mechanism that may be used with curtains. - Page 57 INTERIOR FITTINGS MAINTENANCE Interior cabinets are made of maple and require little maintenance. Clean them with a solution of hot water and mild soap, then dry them with a soft, dry cloth. Do not use soap containing citrus or petroleum-based products, to avoid damaging the finish or applied decals.
-
Page 58: Introduction
Trailer awning A patio awning is a popular accessory on recreational vehicles and Prolite offers this feature on all its trailer models. The smallest models have a pocket awning, while the remainder... - Page 59 EQUIPMENT AND APPLIANCES The best way to extend the life of your awningis to keep it clean, use it correctly, and especially, protect it from foul weather (rain, wind, downpours, storms, etc.). At some point, most campers have had to obtain spare parts (legs, centre arm, awning fabric, etc.) when they suffered damage by Mother Nature withan awning left open, poorly secured, not inclined, etc.
-
Page 60: Extension Awnings
Refer to your awning manufacturer’s instruction sheet for information on operation and maintenance. Extension awnings All Prolite trailer models with motorized extensions have an extension awning to preserve the extension and retraction mechanism by protecting it from dust, leaves, water, orany other debris likely to fall onto your extension box. -
Page 61: Motorized Extensions
EQUIPMENT AND APPLIANCES Motorized extensions Before using a motorized extension, ensure that the trailer is level and stable. If the trailer is not level, the motorized extension box or its mechanism may be damaged. To open your extension, simply press the «... - Page 62 EQUIPMENT AND APPLIANCES When you close your extension on a rainy day, the water on top of the extension box may leak into the interior of the trailer. This water should be wiped up. WARNING Do not place anything on top of the extension box when it is closed, to avoid causing damage when opening it.
- Page 63 EQUIPMENT AND APPLIANCES WARNING Never move the trailer with the motorized extension open, as this could cause serious damage. MAINTENANCE Check the area behind the seals for any possible debris. Pull on the edge of the seal and clean it if necessary. When the extension is open, visually inspect the rails inside for excessive accumulation of dust or other materials and clean out all accumulated debris.
-
Page 64: Motorized Extension Control System
EQUIPMENT AND APPLIANCES Motorized extension control system Each extension uses electric motors and gear systems activated by an electronic control unit. Motorized extension failure If your motorized extension fails to retract, here is an emergency procedure so you can leave safely, until the situation is corrected by a qualified technician. First perform the following checks. -
Page 65: Closing The Extension Manually
EQUIPMENT AND APPLIANCES For motor defects, a green light will flash once for motor 1 and twice for motor 2. The red light will flash two to nine times to indicate the following error codes. 2 times. Dead battery: Battery power is less than 6 volts. 3 times. - Page 66 EQUIPMENT AND APPLIANCES • Press the button six times. • Hold the button down on the seventh time until the controller lights are flashing. • Go to the extension opening switch and choose the operation to be performed on it (retract or extend).
- Page 67 EQUIPMENT AND APPLIANCES • Lift up the motor located inside the extension. If you feel resistance when you try to lift up the motor, ensure that the motor connection is not located immediately above the motor. Move it gently without disconnecting it and try again to lift it up.
-
Page 68: Exterior Compartments
EQUIPMENT AND APPLIANCES • Apply equal firm pressure to both sides to retract the extension. WARNING Once the motorized extensionis in place, you must find a way to firmly secure, block or attach the extension so it cannot open while in motion. Proceed to a shop specializing in RV repairs. -
Page 69: Roof Ventilators
EQUIPMENT AND APPLIANCES Do not place valuable items in your compartments, as most compartment door manufacturers have only a single key pattern for their doors. The same key therefore may open compartments on many campers. Roof ventilators Roof ventilators are located in enclosed spaces and in the bathroom to provide circulation of fresh air, venting of heat, smoke, odours and water vapour from cooking, showering, etc. -
Page 70: Air Conditioner
EQUIPMENT AND APPLIANCES HINTS AND TIPS Purchase of a ventilation cover lets you leave the roof vents or variable-speed ventilator open when the trailer is parked. Air conditioner The air conditioner operates when the trailer is connected to 120-volt AC current. For best performance, it is best to park your trailer in the shade, keep the curtains closed, and close all doors and windows during... -
Page 71: Variable-Speed Ventilator
EQUIPMENT AND APPLIANCES Variable-speed ventilator The electrical ventilator runs on 12-volt current and is operated by a control switch. We suggest that you read the manual for this accessory to learn about its operation and maintenance. Microwave oven The microwave oven operates on 120-volt AC current only. HINTS AND TIPS Save the packaging for the glass microwave tray, to use when on the road, to avoid breaking the tray. -
Page 72: Refrigerator
EQUIPMENT AND APPLIANCES Refrigerator The refrigerator operates on propane gas and electricity: 120-volt AC current, propane gas, or 12-volt DC current, depending on the model. It has an absorption cooling system and requires that the recreational vehicle be level for efficient operation. - Page 73 EQUIPMENT AND APPLIANCES MAINTENANCE Exterior Refrigerator ventilation is essential. Ensure that the vent grilles are unobstructed. Also check for insects orrodents, spider webs or any other debris that might obstruct ventilation of the refrigerator. MAINTENANCE Interior Regularly clean the elements at the back of the refrigerator with a soft-bristled brush.
-
Page 74: Cookstove
EQUIPMENT AND APPLIANCES Cookstove If your trailer is equipped with a cookstove, it operates on propane gas. WARNING If your cookstove is equipped with a tempered glass cover, wait until it has cooled down before closing the cover again. It is unsafe to use the cookstove or oven to heat the inside of the recreational vehicle. -
Page 75: Toilet
EQUIPMENT AND APPLIANCES Toilet If applicable, your trailer is equipped with a marine-type toilet that operates with water from a drinking water tank or external water supply connected to a municipal water system. The water pump must be activated when you are not connected to a municipal water system. Lever Button How to operate the toilet... - Page 76 EQUIPMENT AND APPLIANCES HINTS AND TIPS We recommend that you use biodegradable toilet paper as well as a deodorant for the RV septic tank to avoid blockages and unpleasant odours. WARNING When removing the container from the cassette tank, if you feel resistance, do not force the cassette as you may damage the toilet tank.
-
Page 77: Shower
EQUIPMENT AND APPLIANCES Shower If applicable, your shower has water-resistant vinyl panels. Flow controller To prevent mould and exhaust humidity caused by water vapour, wipe down the walls of your shower and ventilate your trailer after each use. Pay close attention to check that shower wall panels and base joints are not cracked or perforated. -
Page 78: Exterior Shower
EQUIPMENT AND APPLIANCES Exterior shower Some of our trailers are equipped with exterior showers. There is a cold water faucet and (if applicable) a hot water faucet and a shower head flow regulator. When you are not connected to running water, you must turn on the water pump inside your trailer in order to use it. - Page 79 EQUIPMENT AND APPLIANCES HINTS AND TIPS Before going camping for the first time, let the space heater operate for two hours while you are at home to burn off the protective coating used on the new metal, which causes smoke and an unpleasant odour. Open the windows and roof vents to disperse the odours.
-
Page 80: Chapter 6: Electrical System
ELECTRICAL SYSTEM Introduction The electrical system in your Prolite trailer is a combination of 12-volt DC current and 120-volt AC current. Each facet of the electrical system has been carefully installed to meet quality approved (QAI) standards. To explain the difference between the two electrical systems, 12 volts is what an automobile uses and 120 volts is the current used in your home. -
Page 81: The Trailer's 12-Volt Dc System
(if applicable to your model.) This cable also supplies a 12-volt charge from the towing vehicle’s alternator to the trailer’s battery. The 12-volt battery is not supplied with your Prolite trailer, so you must purchase one or more batteries separately. However, most Prolite dealers sell marine batteries specially designed for recreational vehicles. -
Page 82: Trailer Battery And Converter/Charger
ELECTRICAL SYSTEM Trailer battery and converter/charger The battery and charging system form the heart of your Prolite trailer’s 12-volt DC system. You must understand its correct operation to avoid many problems. When the trailer is not connected to an electrical outlet, the energy needs are supplied by the battery or batteries. - Page 83 ELECTRICAL SYSTEM A battery with a low charge or in poor condition is the most frequent cause of inadequate operation of motorized extensions, appliances, and other components connected to the 12-volt DC electrical system. Excessively low voltage can also cause appliances running on 12 volts, such as the space heater, refrigerator, water pump, etc., to shut down.
-
Page 84: Battery Installation
ELECTRICAL SYSTEM Battery installation Correct installation of batteriesin yourtraileris crucial, to avoid risk of serious injury. If you connect more than one 12-volt battery, they must always be connected in parallel. Do not connect the batteries in series, because this will produce 24-volt current that will damage the equipment designed to run on 12 volts. - Page 85 ELECTRICAL SYSTEM WARNING Do not smoke or bring open flame or sparks close to batteries that are charged or have recently been charged. Possible gas emissions from the battery could cause an explosion. Apply the safety rules issued by your battery’s manufacturer. Check the condition of your batteries regularly.
-
Page 86: Recharging Batteries
ELECTRICAL SYSTEM Recharging batteries Your battery recharges in two ways. • When driving or when your towing vehicle’s engineis running, the battery will be charged by the vehicle’s alternator through the seven-conductor cable connection from your car to the trailer. •... - Page 87 ELECTRICAL SYSTEM If the battery is discharged In some instances, yourbatteriesmay be completely discharged. In this case, proceed as follows. Reduce demand on the battery by turning off all lights, fans or other equipment operating on 12 volts that is not absolutely necessary. Ensure that your refrigerator is not in 12V mode.
-
Page 88: Seven-Conductor Power Cable
ELECTRICAL SYSTEM Seven-conductor power cable The power cable circuits are protected by automatic breakers mounted on a panel in the converter/charger compartment at the front of the trailer. The seven-conductor power cable is protected by a fuse in your towing vehicle and another fuse in your trailer’s converter panel. -
Page 89: Electrical Draw By Components
ELECTRICAL SYSTEM Electrical draw by components The maximum power available for your recreational vehicle depends on both the electrical service you connect and the capacity of the converter/charger installed in the trailer. The table below shows the typical electrical consumption for many appliances found in a trailer, so you can determine the amperage you may draw at a given time. -
Page 90: The Trailer's 120-Volt Ac System And Converter/Charger
ELECTRICAL SYSTEM ELECTRICAL APPLIANCES CONSUMPTION(AMPERES) AC (120 V) DC (12 V) Clothes iron Toaster (2 slice) Coffee maker (1) The carbon monoxide/propane sensor drains the batteryin two weeks if the trailer is not connected to a 120-volt feed. You therefore should disconnect the F6 fuse for the batteryin the converter (green fuse) to avoid triggering the alarm signal. -
Page 91: Gfci Breaker
ELECTRICAL SYSTEM The 120-volt AC current is fed to the main breakers in the distribution panel before it is sent to the other circuits by the individual breakers. The breakers trip if the current exceeds the specified level. If you replace a breaker, never install a breaker with a higher rating than that of the original breaker. - Page 92 ELECTRICAL SYSTEM If your bathroom, exterior outlets, etc. are not working, check the breaker and reset it if necessary. If the breaker continues to trip, contact a qualified electrician. Test the GFCI every year when you are connected to 120-volt AC current, by performing the following steps.
-
Page 93: Electrical Power Cable
ELECTRICAL SYSTEM Electrical power cable Your trailer is equipped with a power cable to connect to an external 120-volt electrical outlet (source) with 15 or 30 amps. You must not alter or cut the cablefor any reason, nor remove components from the connector (plug). - Page 94 ELECTRICAL SYSTEM CAUTION Some camp sites only have 15-amp outlets. Ensure that you always have a 15-30 adaptor. Our trailers have a 25-foot electrical power cable. You may need an extension cord, depending on your campsite location. WARNING Never use a two-conductor extension cord or any cable that does not maintain a proper ground connection.
-
Page 95: Introduction
DRINKING WATER SYSTEM Introduction Most of our trailers are equipped with a fresh or drinking water system fed from a separate tank and water pump. Connecting to a municipal water system at a campground provides external pressure. Vent opening Clean water is stored in a plastic tank. The tank is vented so it can be filled completely and properly. - Page 96 DRINKING WATER SYSTEM CAUTION Ensure that you always store your drinking water hose in a clean location away from sources of contamination. It must be used only to fill your drinking water tank or connect to municipal water. Before filling the tank, ensure that the water supply is of good quality, drinkable and free of contaminants.
-
Page 97: Using Drinking Water By Gravity Feed
DRINKING WATER SYSTEM WARNING Drinking water is considered an additional load. Your load capacity therefore is reduced by the weight of the water you are carrying, calculated at about 8.3 lbs. per gallon. Fill your drinking water tank as close as possible to your destination. Using drinking water by gravity feed When you are not connected to a municipal water supply, you must activate the water pump, which operates on 12 volts or 120-volt AC current, when connected. -
Page 98: Municipal Water Connection
DRINKING WATER SYSTEM WARNING Never leave the water pump running when the drinking water tank is empty or when travelling with your towing vehicle, as this can damage the pump or circuit. HINTS AND TIPS When municipal water pressure is low at your campsite, you can activate the water pump to boost the flow. -
Page 99: Disinfecting The Drinking Water Tank
DRINKING WATER SYSTEM Connect the other end of your water supply hose to your trailer. Open the municipal water supply. WARNING Do not leave your trailer unattended for an extended period with municipal water connected and pressurized. Turn it off when the trailer is left unattended. -
Page 100: Routine Maintenance For Disinfecting The Water Tank
DRINKING WATER SYSTEM If water becomes contaminated, follow the procedure for emptying your water heater, described in the “Simple water heater drainage (without winterization)” section at the end of this chapter. Routine maintenance for disinfecting the water tank Empty the water tank and then fill it halfway with drinking water. Mixing 60 ml (2 ounces) of regular chlorine bleach for every 15 gallons of tank Connecter l’autre extrémité... - Page 101 DRINKING WATER SYSTEM Drain the plumbing system completely by opening the tank drain valve and the taps, to accelerate the process. Also remove the hot water tank drain plug and drain the tank. WARNING Always pull on the pressure valve before removing the drain plug, to avoid spraying scalding water, which can cause serious injury.
-
Page 102: Shock Maintenance On Your Water Tank
DRINKING WATER SYSTEM Fill the tank with drinking water. Open all the taps and run water until the tank is empty, then refill it. (Be sure to use the water pump, not water directly from the municipal system.) If you detect a very strong chlorine smell, you can rinse the tank and taps again. Shock maintenance on your water tank You may have to perform a shock treatment for the first use after an extended period of no use, or if the system has been contaminated. -
Page 103: Electric Or Gas Water Heater
DRINKING WATER SYSTEM Electric or gas water heater The water heater runs on gas with an electronic igniter powered by the 12 volts. It is supplied with water by the water system ; either by the city water inlet or by the pump. Exterior panel Interior device The water heater has two switches;... -
Page 104: Draining The Water Heater
DRINKING WATER SYSTEM Draining the water heater If the trailer must be stored over winter, the water heater must be drained to avoid damage from freezing. See the “Storage” section for more details. You may also have to drain your water heater when you have connected to a source of non-potable and/or contaminated water. -
Page 105: Introduction
WASTE WATER SYSTEM Introduction The waste water system consists of the kitchen sink, shower, toilet, plumbing cleanout, and vent stack lines. Waste water from the kitchen sinkand shower drains into a “grey water” tank. Waste from the toilet drains into a separate “black water” tank. There is a cleanout valve for each of the two tanks and these must be emptied based on their capacity or before heading out on the road. - Page 106 WASTE WATER SYSTEM Some of our trailer models are equipped with a removable plastic container for black water, commonly called a cassette toilet. WARNING If you feel resistance when you try to remove the cassette container, do not force it as this might damage the toilet tank. Check inside that the toilet flush lever is properly closed.
-
Page 107: Waste Water Drainage Tanks
WASTE WATER SYSTEM Waste water drainage tanks The grey and black water drainage tanks provide flexibility and convenience for total short-term independence. The tanks are located under the trailer. A cleanout valve is located on the left side of your trailer to empty your RV. Grey water valve Protective cap Black water valve... - Page 108 WASTE WATER SYSTEM Ensure that you do not spill sewage on the public roadway as you may be ticketed. Whenever possible, empty the tanks before travelling. Waste water and sewage in the holding tanks reduces the trailer’s load capacity. Empty the waste water tanks only when they are 75 percent full. If they have not reached this level, fill the tanks with water up to 75 percent before emptying them.
-
Page 109: To Empty Your Tanks
WASTE WATER SYSTEM WARNING Do not use the drinking water hose to rinse a sewage tank. Noxious or toxic matter might come into contact withthe drinking water hose and contaminate the drinking water in your supply system, tank and plumbing. Always use a different hose to rinse components in the sewage system. -
Page 110: Blockage In The Waste Water Drainage Pipe
WASTE WATER SYSTEM Always empty black water before grey water, so the latter cleans the waste water hose. Blockage in the waste water drainage pipe The waste water plumbing system is made of durable black plastic. The movable connectors are designed for hand tightening. Do not use tools to tighten the connectors. The tanks need a bit of water to prevent odours from entering the trailer, as well as aseptic tank deodorant product. - Page 111 You may add a septic tank deodorant product designed for this purpose once you have finished. If a problem persists, contact your authorized Prolite dealer. To facilitate rinsing the tanks, we suggest that you buy a tank spray extension for the end of the water hose, which creates a...
-
Page 112: Introduction
PROPANE GAS SYSTEM Introduction When handled properly, liquefied petroleum gas (LPG) is a clean, reliable fuel for operating all propane gas appliances. Propane gas burns easily and releases a large amount of energy. Under good conditions and with careful handling, it is safe and economical. Familiarize yourself with its use. Safety must be uppermost at all times when using a propane gas system. -
Page 113: Propane Gas Regulator
PROPANE GAS SYSTEM Propane gas regulator Propane tanks contain a liquid under high pressure that vaporizes into gas and moves through a regulator to reduce the pressure. The regulator is the heart of the propane gas system. It redistributes the fuel through the piping system to operate the propane gas appliances. -
Page 114: Propane Gas Regulator Maintenance
PROPANE GAS SYSTEM WARNING The propane gas regulator must always be installed with the evacuator membrane facing down. Regulators not in compartments are equipped with a protective cover. Check that the evacuator is facing down and that the cover is held in place to minimize obstruction of ventilation, which might result in excess propane gas... -
Page 115: Propane Gas Line
PROPANE GAS SYSTEM Propane gas line If a tank is totally empty, air may have filtered into the gas line. If this occurs, youwill probably have trouble lighting your appliances. To purge air from the line more easily, try to light the stove or water heaterusing the indoor switch. -
Page 116: Changing Propane Gas Tanks
PROPANE GAS SYSTEM Changing propane gas tanks Prolite trailers are equipped with one or two propane gas tanks at the front of your recreational vehicle, connected to the regulatorby an excess flow pipe, commonly called a "Pigtail." This is noticeable for the large rotating nylon nut attached to the exit from the tank valve. -
Page 117: Propane Tank Cover
PROPANE GAS SYSTEM Propane tank cover Most of our trailers are equipped with propane tank covers. To remove, you must unscrew the propane tank cover lid and remove the tanks pigtail. You will then have complete access to your propane tank to fill it. - Page 118 PROPANE GAS SYSTEM This safety device is powered by 12-volt DC current and is permanently mounted near the floor, because the gases detected are heavier than air and thus concentrate at floor level. The detector continues to operate as long as electrical power is available. If the power supply is interrupted, the detector will not function.
-
Page 119: Introduction
AIR QUALITY Introduction Good indoor air qualityis essential, you must pay close attention to ventilation of your recreational vehicle, keep it clean and avoid unnecessary pollutants. There are common sources of pollution such as mould, pollen, animal hair, cleaning products, secondary smoke, burning of propane gas and other fuels. - Page 120 AIR QUALITY 2. Mould control • Repair any water leak or infiltration. • Clean away all visible mould with a solution of one cup of chlorine bleach in one gallon of water. • Dry damp surfaces, especially in the kitchen and bathroom. •...
-
Page 121: Effects Of Extended Occupancy
AIR QUALITY Effects of extended occupancy Your Prolite trailer has been manufactured primarily for recreational use and short-term occupancy. If you expect to occupy your recreational vehicle for an extended period, you may encounter especially humid living conditions as well as condensation. -
Page 122: Sensitivity To Chemical Products
AIR QUALITY Sensitivity to chemical products After purchasing your new recreational vehicle, you may notice a strong chemical odour, especially after it has been stored for an extended period. This is not a manufacturing defect of your recreational vehicle. Some construction products such as particle board, fibreboard and hardwood plywood are manufactured with an adhesive that contains urea formaldehyde. -
Page 123: Controlling Relative Humidity
AIR QUALITY Controlling relative humidity Checking and controlling relative humidity in a recreational vehicleis important to minimize the risks and damages linked to humidity. Ideally, relative humidityshould be 60 percent or less. In a cold climate, a rate of less than 35 percent is acceptable. High humidity promotes the growth of mould. -
Page 124: Controlling Condensation On Windows
AIR QUALITY The information provided here is simply a general guide to help you control mould. If you think there is mould in your recreational vehicle, you should consult a qualified expert who can advise you on the appropriate measures for your situation. Controlling condensation on windows Minor condensation problems are not uncommon, especially in recreational vehicles used in cold climates. -
Page 125: Effects Of Using Combustion Equipmenton Humidity
AIR QUALITY Effects of using combustion equipmenton humidity Unvented combustion appliances such as a propane stove are a source of humidity in a recreational vehicle. For each gallon of fuel burned, about a gallon of water vapour is evaporated into the air. You should turn on the vent fan when using these appliances in the trailer. -
Page 126: Chapter 11: Safety
SAFETY Introduction Your safety and that of other occupants is the top priority for your new recreational vehicle. This includes the safety of all passengers, efficient use of your trailer, strict maintenance and safe operation. Your trailer complies with the applicable codes and regulations as well as the safety standards in force at the time it was manufactured. -
Page 127: Your Occupants' Safety
SAFETY Your occupants’ safety Carrying passengers or animals in your trailer while you are driving is dangerous and against the law in most provinces and states. If an emergency manoeuvre becomes necessary and would cause the trailer to detach from the towing vehicle, you could seriously injure or even kill your occupants. -
Page 128: Precautions Against Carbon Monoxide
SAFETY Precautions against carbon monoxide Carbon monoxide (CO) is a colourless, odourless, and tasteless gas. The generator (if installed), space heater, water heater, propane refrigeratorand stove constantly produce carbon monoxide gas when operating. Carbon monoxide is a fatal gas! To protect you from carbon monoxide poisoning, your trailer is equipped with a carbon monoxide detector. -
Page 129: Carbon Monoxide Detector
SAFETY Carbon monoxide detector All Prolite trailers are equipped with a carbon monoxide (CO) and propane gas detector located near the floor. Your information kit includes a manual from the manufacturer of this detector that provides more details on its operation and the applicable procedures. - Page 130 SAFETY WARNING Never spray paint or chemical products, such as cleaners, deodorants, hair products, insecticides, etc., near the carbon monoxide (CO) or propane gas detector. These products damage the detectors, which will then have to be replaced. Keep flames or other sources of intense heat away from the detector.
-
Page 131: Fire Safety
SAFETY Fire safety Safety precautions and advice to prevent fires Your recreational vehicle is a complex product made of many materials, some of which are inflammable. You must remain vigilant to minimize the dangers and risks of fire. It is very important that all trailer occupants know the procedure in case of fire, as well as the location and use of extinguishers. - Page 132 SAFETY Keep cooking surfaces clean and free of debris. Never allow garbage and trash to accumulate. Never clean anything with an inflammable substance. Spray fabrics once a year with a fire retardant. WARNING Some upholstered items, such as mattresses, rugs, and insulation, are made with urethane foam.
-
Page 133: Extinguisher
Prolite. WARNING Never disable the smoke detector, even if it sounds a false alarm due to cooking or another problem. Never disconnect or remove the battery from the detector. -
Page 134: Emergency Exit Window
SAFETY Emergency exit window Each of our trailers is equippedwith an emergency exit window. Find where yours is located. It is usually on the side wall opposite your entrance door. Two window types are available, depending on your trailer’s year or model. - Page 135 SAFETY Alternative window model The emergency exit window can be opened like a normal window without breaking the safety seal by following these directions. Swing the lever out until it is perpendicular to the window, then push it out to open the window.
-
Page 136: Safety On The Road
SAFETY CAUTION Remember that the emergency exit window is at greater risk of breaking if improperly used. It is better to use the other windows to ventilate your trailer, to avoid the risks of damage and premature wear to the emergency exit window. If you have opened the emergency exit window, ensure that you close it again before going on the road, so it does not fall out while in transit. -
Page 137: Towing Weight Limit And Distribution
SAFETY Towing weight limit and distribution Determining the vehicle load limits requires more than simple understanding of tire load limits. A federal identification tag on the trailer indicates the gross vehicle weight rating (GVWR). This is the maximum weight of the vehicle fully loaded. The gross axle weight rating (GAWR) is the maximum weight for a specific axle. -
Page 138: Load Capacity
SAFETY Load capacity The vehicle may be loaded up to the maximum weight specified on the plate. The combined load weight is shown by a single number. Remember: The total weight of a fully loaded vehicle must not exceed the GVWR indicated. Remember to factor in the weight of water and propane. - Page 139 SAFETY Equal load distribution is absolutely essential for safe towing. Before your first trip, load your vehicle with proper weight distribution (front to back, side to side) of all the personal items, equipment, food, water, etc. you consider necessary and weigh the recreational vehicle.
-
Page 140: How To Determine Your Gvwr
SAFETY How to determine your GVWR Position the trailer with only the trailer axles on the scale and note the axle weight. Unhitch the trailer while it is on the scale to obtain the total trailer weight. To determine the hitch weight, subtract the axle weight from the total weight. GROSS AXLE WEIGHT RATING TOTAL WEIGHT Your trailer must always be level when weighed. -
Page 141: Hitch Safety
The hitch must be calculated from the GVWR and trailer hitch weight. It must be installed by a qualified company. Prolite does not provide the hitch for the towing vehicle, weight distribution bars or stabilizers. Your dealer can help you select the right hitch for your towing vehicle. -
Page 142: Weight Distribution Bars
When correctly installed, they control vertical oscillations of the hitch while towing. They do not control balancing. Prolite Trailers recommends weight distribution bars for safe towing of certain models. (Consult your dealer for the suggested models.) Sway bar Sway is sideways rocking of a trailer caused by external forces orpoor load distribution within the trailer. - Page 143 SAFETY The lever must be pointing toward the trailer, not the towing vehicle, otherwise you may damage the towing vehicle. Prolite Trailers strongly recommends a sway device on each of its models. HINTS AND TIPS Before driving long distances with your trailer, practise near home, on streets, boulevards, and highways you know well.
-
Page 144: Sway
SAFETY Sway Sway is the trailer’s rocking motion under the effect of external forces. The main causes of sway are strong wind, side wind (when the trailer passes or is passed by a semi-trailer, for example) or driving on steep downgrade. WARNING Excessive rocking or sway of your recreational vehicle can result in flipping of the trailer and towing vehicle, leading to serious injury or... -
Page 145: Driving
SAFETY Driving This is the most important factor. Trailer sway increases with speed. You therefore must obey all speed limits and reduce your speed in poor weather or high wind. Corrective measures If sway occurs, the following techniques must be used. Slow down immediately by removing your foot from the accelerator. -
Page 146: Introduction
HITCH AND INSTALLATION Introduction This chapter provides information about levelling, stabilization and the necessary equipment for installing your trailer at home or at a campsite. The trailer hitch jack JACK COUPLER LOCK LEVER JACK FOOT The tongue jack is used to position the trailer at the correct height for the hitch and to disconnect it from the towing vehicle. - Page 147 HITCH AND INSTALLATION A padlock for the coupler lock costs only a few dollars and may be required by insurance companies. It may also be mandatory in some provinces or states. Check with the appropriate authorities. HINTS AND TIPS We strongly suggest that you buy a set of padlocks to secure: DRAWBAR COUPLER COUPLER SOCKET...
-
Page 148: Hitch Ball
HITCH AND INSTALLATION Hitch ball The hitch ball connects the trailer to your towing vehicle. MAINTENANCE The hitch ball must be lightly greased, preferably with silicone (less messy) so it swivels smoothly in the socket. It is essential to correctly insert the hitch ball into the trailer tongue. Otherwise, the trailer might disconnect from the towing vehicle and cause an accident and serious injury or even death. -
Page 149: Safety Cables (Or Chains)
HITCH AND INSTALLATION Safety cables (or chains) Safety cables (or chains) are mandatory safety devices to connect the trailerto the towing vehicle. SECURING EYES EMERGENCY BRAKE SAFETY FAIL CABLE CABLE Your trailer’s hitch Your trailer’s hitch is vital for your safety and that of others. The towing vehicle must be able to bear the weight of the loaded trailer’s tongue without a major change. - Page 150 HITCH AND INSTALLATION The lever must always point toward the trailer, not the towing vehicle, otherwise you could damage the towing vehicle. WARNING Never attach the safety chains to the hitch ball or any removable part of the hitch.
- Page 151 Before hitching your trailer, you must read the instructions provided by the hitch manufacturer. All Prolite trailers accept a two-inch-diameter ball. The following instructions apply in most cases but if they differ from those provided by the hitch manufacturer, follow...
- Page 152 HITCH AND INSTALLATION Place wheel chocks behind or in front of the trailer tires, depending on the slope of the ground. To ensure the ball on the towing vehicle can move beneath the hitch, turn the jack handle to raise the tongue to a sufficient height. Back the towing vehicle up until the hitch ball is under the hitch socket, then set the parking brake on yourcar.
-
Page 153: Before You Leave
HITCH AND INSTALLATION Ensure that the notch between the male and female connectors on your seven-conductor cable is firmly engaged so it doesn’t work loose and drag on the ground. Check the stop lights, signal lights, running lights and electric brakes before starting. Remove and stow the tire chocks. -
Page 154: Checks Inside The Trailer
HITCH AND INSTALLATION Checks inside the trailer • That cabinets, doors, refrigerator door and drawers are securely closed. • That locks and sliding doors are in place. • Raise and secure window blinds so they do not swing and cause damage. •... -
Page 155: Exterior Checks
HITCH AND INSTALLATION Exterior checks • Retract and lock the awning. • Disconnect all electrical, water and waste connections. Stow all cables and hoses. • Close and lock all exterior compartments. • Remove all obstacles under the trailer. • Retract the stabilizers and stow all blocks. •... -
Page 156: Unhitching And Levelling The Trailer
HITCH AND INSTALLATION WARNING Do not attempt to raise or place the full weight of the traileron the stabilizers, as this could damage them or cause your unit to shift. The axles are the proper components to support the weight. WARNING Do not use the stabilizers for any purpose other than to stabilize the trailer. - Page 157 HITCH AND INSTALLATION WARNING Never use the emergency brake to secure your trailer. This will not only drain your trailer’s battery very quickly but might also cause a fire in the brake switch. Unplug the seven-conductor electrical connector from the towing vehicle. Use a level to check the trailer, both transversally and longitudinally, on the trailer floor.
-
Page 158: Interior Installation Of The Trailer
HITCH AND INSTALLATION WARNING Also ensure that you position your trailer on a level site. Levelling is essential to ensure proper operation of your appliances, especially the refrigerator. Interior installation of the trailer Here are a few tips once your trailer is perfectly level and safely installed. •... - Page 159 HITCH AND INSTALLATION Here is a list of practical tips when you are leaving a site, so you don’t forget anything important. Conduct the same checks as you do before driving off (described above). • Empty black and grey water in an approved facility. •...
-
Page 160: Introduction
Ideally, you should store your trailer in a facility with indoor storage. Storage tips Exterior of trailer As the owner of a Prolite trailer, youcan help maintain your decals by following one of these three simple tips in winter. 1. Sweep the roof. - Page 161 STORAGE 2. Cover the front with a tarpaulin. Alternatively, if you don’t want to have to sweep the roof regularly, you can install a tarpaulin over the front of your trailer. It is very important to cover only the front and not the entire trailer.
-
Page 162: Interior Of The Trailer
HINTS AND TIPS If you have problems or questions about your decals, we suggest that you call us, and have your Prolite trailer’s serial number at hand. Your decals may be covered by an additional warranty. Interior of the trailer Close and lock all the doors and windows. -
Page 163: Winterizing The Water System
We recommend that you buy a smart battery charger, which you can leave connected to your battery. It will charge the battery automatically as required. Winterizing the water system You absolutely must protect your plumbing system from freezing in cold weather. Damage from foul weather is not covered by Prolite’s warranties. - Page 164 STORAGE HINTS AND TIPS Many recreational vehicle owners have tried to winterize their trailer themselves. At some point, most have had to deal with a major problem. They were not equipped to properly blow out the plumbing pipes with the correct pressure, or water remained in the water heater. The damage did not appear until the spring thaw, and then it was already too late.
-
Page 165: Winterizing With Compressed Air
STORAGE WARNING Never use automotive antifreeze in your drinking water system, as it is toxic and cannot be used in water systems for human consumption. Winterizing with compressed air (with derivation assembly installed) Buy two gallons of nontoxic RV antifreeze. Empty the fresh water tank and waste water holding tanks. -
Page 166: Draining The Water Heater For Winterization
STORAGE Empty the water heater for winterization. WARNING To avoid injury, ensure that no hot water remains before proceeding to drain your water heater. Turn off the water heater switch and open the hot water tap until the running water is no longer hot. WARNING Always pull on the pressure valve before removing the drain plug. - Page 167 STORAGE WARNING Six gallons of water will always remain in your trailer’s water heater unless you have winterized it, so proper drainage is important when you have been connected to a non-potable water supply. Connect an air hose with an adaptor (burst plug) for the municipal water connection. Set the pressure at 30 lbs.
-
Page 168: Winterizing The Cassette Toilet (If Applicable)
STORAGE Leave the water heater’s drain plug out for the winter season. Reclose the waste water traps. Do not start the water heater or use the plumbing system after winterization. The system must always be de-winterized before it can be used again. Winterizing the cassette toilet (if applicable) To winterize your cassette toilet with a water tank, you must: Empty the black water from the cassette;... - Page 169 STORAGE Reconnect the hose once it is empty; Add antifreeze to the plumbing in the tank (approximately three cups); Activate the toilet pump and allow one cup of antifreeze to run.
-
Page 170: De-Winterizing Your Rv
STORAGE De-winterizing your RV Do not attempt to turn on the water heater or use the plumbing system after it has been prepared for winter. De-winterize the system, and rinse and disinfect the water system before using it. Reinsert the water heater drain plug and ensure that the pressure valve is closed. Place the water heater in Bypass mode. - Page 171 STORAGE WARNING Ensure that the bypass valve is in fact in normal camping mode, otherwise this could cause serious damage to your water heater.
-
Page 172: Chapter 14: Troubleshooting Section
TROUBLESHOOTING SECTION Introduction To help you resolve certain problems with your Prolite trailer, this troubleshooting section provides several tips for finding quick solutions to correct the problems you may encounter. To learn about other troubleshooting solutions for certain equipment or appliances in your trailer, read the owner’s manuals for these accessories included in your starter kit. - Page 173 TROUBLESHOOTING SECTION • Check that the indoor GFCI outlet in your trailer has not tripped. Reset it as required. • If the problem persists, contact a dealer ora qualified technician. Your 12-volt and/or USB outlet has no power. • Ensure that you are connected to the 120-volt current for your site or that your trailer’s battery is fully charged.
-
Page 174: Gas Space Heater
TROUBLESHOOTING SECTION You can hear your converter’s fan. Occasionally: • This is normal, the converter needs to be cooled in hot weather. Constantly: • This is normal if the converter is charging the battery. If it continues for more than 12 hours, consult a specialist;... -
Page 175: Propane Stove
TROUBLESHOOTING SECTION • Consult an RV specialist if the problem persists. Propane stove The stove’s flames are low even when at the maximum setting. • Check that the burners are clean and the holes are not blocked. Clean them as required. •... - Page 176 TROUBLESHOOTING SECTION WARNING All propane connections must be periodically checked because vibrations in transit can loosen connections. WARNING Working with propane can be dangerous. Always ask a certified technician to perform all repairs to your propane gas system. The propane and carbon monoxide gas detector sounds at intervals with no smell of propane.
-
Page 177: Refrigerator
TROUBLESHOOTING SECTION Refrigerator Control panel lights are not lit. Site without electricity • Check your battery’s charge and recharge it as required. • Check the fuses in your converter and change them as required. • Checkthe 30-amp fusefor your trailer’s battery and change it as required. Site with electricity •... -
Page 178: Roof Air Conditioner
TROUBLESHOOTING SECTION For any code on your refrigerator’s display panel, please refer to your manufacturer’s manual and follow its instructions. WARNING If you have the 12-volt option for your refrigerator, use this function only while travelling and connect the trailer to your vehicle with a seven-conductor cable. -
Page 179: Motorized Extension
TROUBLESHOOTING SECTION HINTS AND TIPS On very hot days, close the windows, blinds, and doors. Avoid traffic in and out of the trailer to maintain the cool indoor temperature. Avoid using appliances that generate heat. WARNING Working with electrical appliances can be extremely dangerous. Always use the services of a certified professional to perform all repairs on your air conditioner. -
Page 180: Water System
TROUBLESHOOTING SECTION The extension does not work. • Check the extension fuse in your converter and change it as required. • Check the battery status. Recharge it if necessary or connect to a 120-volt supply. • If the extension still will not close, refer to the “Motorized Extensions” section of the “Your trailer’s equipment and appliances”... - Page 181 TROUBLESHOOTING SECTION The pump may be obstructed by some debris. Consult a specialist to clean it as required. The water pump does not shut off even when the tap is closed. • Check that there is enough water in your drinking water tank. •...
-
Page 182: Water Heater
TROUBLESHOOTING SECTION Water heater The water heater does not work after three ignition attempts. • The propane gas may be turned off or empty; check that the main valve is open. • Light a burner on the stove to release air that may be trapped in the gas system. •... -
Page 183: Emptying Black Water
TROUBLESHOOTING SECTION At the start of the season, there is no water in the water heater. Open the hot water until water begins to run. • The battery may be low. Charge it as required. • Light a burner on the stove to purge any air that might be in the gas line. •... -
Page 184: Trailer Lights
TROUBLESHOOTING SECTION Trailer lights Your trailer’s interior or exterior lights are dim or do night light (except running lights). • Check that you have 12-volt or 120-volt power, as appropriate. • Check the breakers for yourtrailerand the site. • Check the converter fuses. •... -
Page 185: Chapter 15: Maintenance
MAINTENANCE Introduction Your Prolite trailer will provide you with many years of satisfaction. Follow a maintenance plan, which will give you an excellent return on your investment and help you extend the life of your recreational vehicle. This section gives you a general overview of the maintenance necessary for proper operation of your trailer. -
Page 186: Propane Appliances And Equipment
MAINTENANCE Propane appliances and equipment You must follow the instructions and warnings provided in the owner’s manual for propane gas-fired equipment as well as those listed below. • Annual maintenance of propane appliances and equipment should be performed by an approved reseller or a repair centre. •... -
Page 187: Table Of Required Maintenance
MAINTENANCE Table of required maintenance The table below provides Prolite trailer owners with a calendar indicating the minimum inspection or maintenance procedures to be performed under normal use to keep their trailerin good condition for many years. Always keep evidence of your preventive maintenance as well as work done on your trailer. - Page 188 MAINTENANCE Table of required maintenance The letter “T” indicates each trip while the letter “S” indicates before and after each storage/winter storage period. CALENDAR (BY MONTH) PROCEDURES AND MAINTENANCE 6 12 S ROOF Inspect joints for openings or cracks and apply sealant as required. Clean the roof.
- Page 189 MAINTENANCE CALENDAR (BY MONTH) PROCEDURES AND MAINTENANCE 6 12 S MOTORIZED EXTENSION Check the roof and sides for debris and clean them. Inspect joints for openings or cracks and apply sealant as required. Inspect, clean, and lubricate extension mechanisms (rails). EQUIPMENT AND ACCESSORIES Check operation based on manufacturers’...
-
Page 190: Calendar Of Maintenance Recommended By The Manufacturer Of The Axles, Suspension, Brakes And Tires
MAINTENANCE Calendar of maintenance recommended by the manufacturer of the axles, suspension, brakes and tires Consult the calendar below and follow all the manufacturer’s recommendations. Each 3 months 6 months 12 months Parts Actions required week 4500km 9000km 18000km Check for rust, clean and grease (100 g per wheel). Bearings and Readjust bearing nut. - Page 191 © 2018 Roulottes Prolite Inc. All rights reserved. The information contained in this manual was as accurate as possible at time of publication. Prolite reserves the right to make changes without notice.
Need help?
Do you have a question about the Plus and is the answer not in the manual?
Questions and answers
how to replace ceiling light led in Prolite Evasion.