Advertisement
12V PSU for Hub/Hub Plus/ReX User
Manual
Updated May 4, 2020
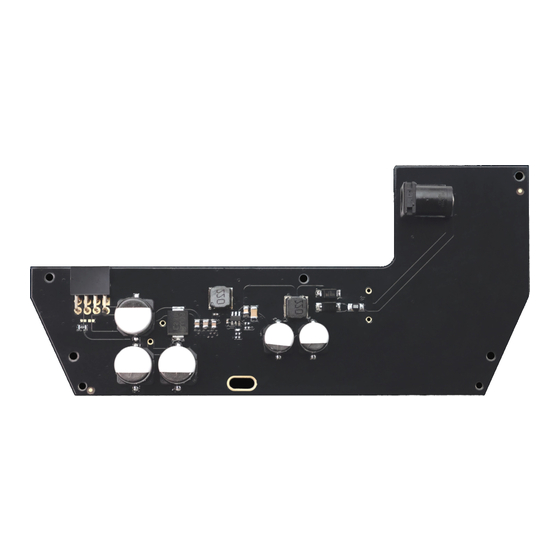
12V PSU for Hub/Hub Plus/ReX is a power supply unit, connecting the Hub/Hub
Plus control panels as well as the ReX radio signal extender to 12 volt DC
sources. This is an electronic board, replacing the standard 110/230 V power
supply unit in the body of the device.
Installing
12V PSU for Hub/Hub Plus/ReX should be installed by a quali ed electrician only.
Before installing the power supply, make sure that the device is disconnected
from the mains.
When installing the 12V PSU for Hub/Hub Plus/ReX, follow the general electrical
safety rules, as well as the requirements of electrical safety regulatory acts.
Never disassemble the device while it is under voltage!
Installation process:
1. Remove the screws and take off the device from the SmartBracket
mounting panel, shifting it down with force.
Advertisement
Table of Contents

Related Manuals for AJAX 12V PSU for Hub/Hub Plus/ReX


Summary of Contents for AJAX 12V PSU for Hub/Hub Plus/ReX
- Page 1 This is an electronic board, replacing the standard 110/230 V power supply unit in the body of the device. Installing 12V PSU for Hub/Hub Plus/ReX should be installed by a quali ed electrician only. Before installing the power supply, make sure that the device is disconnected from the mains.
- Page 2 2. Switch off the device holding the power button for 2 seconds. 3. Disconnect power and Ethernet cables. Wait 5 minutes for the capacitors to discharge. 4. Remove four screws of the back lid and take it off.
- Page 3 5. Remove the screws attaching the boards to the device body. 6. Carefully remove both boards, keeping them in the same plane and not disconnecting them. There is a connector between boards: do not break it.
- Page 4 7. Disconnect the power supply unit (smaller board) from the mainboard. 8. Connect 12V PSU for Hub/Hub Plus/ReX to the mainboard using the eight- pin connector between them. Do not warp or bend the antennas while replacing the board: this can cause the device to malfunction.
- Page 5 Switch on the device, wait until loading, and check the external power status in the Ajax app. If there is no power, and you are using a terminal adapter, check the polarity of the connected wires. If there is no power even after reconnecting, please contact the Support Service.
- Page 6 2. Terminal adapter 3. Quick start guide Warranty Warranty for the AJAX SYSTEMS MANUFACTURING Limited Liability Company products is valid for 2 years after the purchase and does not extend to the bundled battery. If the device does not function correctly, please contact the Support Service rst.
Need help?
Do you have a question about the 12V PSU for Hub/Hub Plus/ReX and is the answer not in the manual?
Questions and answers