Advertisement
Available languages
Available languages
Quick Links
Highly valued customer,
we would like to thank you for purchasing our professional
popcorn maker. Now you can create tasty popcorn from the
comfort of your home - just like the professionals.
Please read this manual attentively and follow the
instructions and tips, because this will enable you to make
optimal use of your professional popcorn maker.
Contents
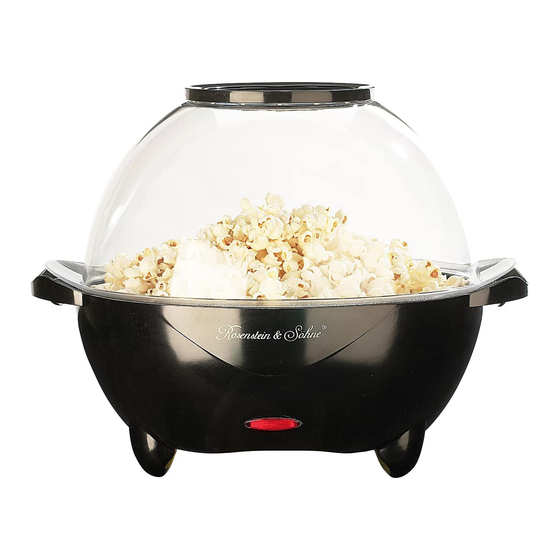
Popcorn maker
Instruction manual
Product details
1. Measuring cup / Cover disc
2. Butter compartment
3. Lid
4. Rotator
5. Heat-resistant bottom
6. Screw
7. Nonstick surface
8. On/Off switch
Preparation for use
Clean the popcorn maker as described in "Cleaning and
maintenance", before using it for the first time.
Making popcorn
Install the popcorn maker on a flat, level and solid
surface.The heat-resistant bottom of the popcorn maker will
prevent damages to the area.
The following chart shows the quantities for the ingredients
which you will need to produce the respective number
Kundenservice: 07631 / 360 – 350
Importiert von:
PEARL.GmbH | PEARL-Straße 1–3 | D-79426 Buggingen
Professional Popcorn Maker at home
of servings. The specification "cup" denotes a normal coffee
cup that can hold about 125 ml.
Vegetable
Servings
Oil
Corn
2
1 Tbsp.
1/3
4
2 Tbsp.
2/3
Cup
6
3 Tbsp.
1 Cup
ADVICE:
Do not use more ingredients than the capacity of
the popcorn maker will allow.
Step-by-step instructions
1. Insert the appropriate amount of vegetable oil and corn into the
popcorn maker. Distribute the corn evenly over the non-stick
surface. Only use vegetable oil. Please do not use butter,
margarine or similar products - these ingredients will burn.
2. Place the lid on the popcorn maker and make sure that the
handles of the lid fall into the appropriate slots.
If you wish to produce buttered popcorn, split the appropriate
amount of chilled butter in 8 equal pieces and place one piece in
each of the holes in the butter compartment of the appliance. If
you are using butter at room temperature, add it when the first
corn kernel has popped.
Place the cover disc over the butter compartment when the corn
has popped.
If you wish to produce unbuttered popcorn, do not add butter.
Place the cover disc when the corn has popped.
3. Connect the popcorn maker to a power supply and activate it
by flipping the switch to the ON position. The rotator will move for
as long as the appliance is activated.
The popcorn will be ready after 4 to 6 minutes, depending on the
amount of corn.
The heat supply will turn off automatically. When this happens,
deactivate the popcornmaker by flipping the switch to the OFF
position and removing the popcorn maker from the power supply.
Instruction manual – Page 1
4. In case the butter has not melted completely you can use
a pastry brush to sweep the remaining butter through the
holes.
5. Place the cover disc on the butter compartment. This disc
must be placed on the lid before the popcorn maker is inverted.
Make sure that the handles of the lid fall into the appropriate
Butter/Margarine
slots on the popcorn maker. Take hold of the handles with both
1 Tbsp.
hands and turn the appliance upside down, while moving it away
from you. Now lift the bottom of the appliance up from the lid.
2 Tbsp.
Be mindful of any escaping vapour. Warning, risk of injury!
6. The popcorn is ready to be served. Before you serve it, you
3 Tbsp.
can season the popcorn to taste. You can use salt, sugar, or
other ingredients.
7. If you want to prepare more servings, move the popcorn from
the lid into another bowl and start again with step 1.
Cleaning and maintenance
Clean the popcorn maker after each use.
Let the appliance cool down completely, before you start
cleaning it.
Do not use any aggressive solvents or abrasives. Do not use
abrasive sponges or scouring powder.
WARNING:
Never plunge components or the power cord
of the appliance into water or other liquids,
this will prevent injury and short-circuiting.
ADVICE:
The components of the popcorn maker are not
intended for cleaning in the dishwasher.
Cleaning the lid
Clean the lid and the cover disc in hot, soapy water with a
washcloth or a sponge. Take care to wipe the components dry
afterwards.
Cleaning the rotator
Remove the rotator from the bottom by turning the screw in the
middle in a counter-clockwise motion. Clean the rotator in hot,
soapy water with a washcloth or a sponge.Take care to wipe
the rotator dry afterwards.
© REV2 – 10.03.2016 – SL/PM/Ex : JaW//SK
PE-4885-675
Advertisement

Related Manuals for Rosenstein & Söhne PE-4885-675


Summary of Contents for Rosenstein & Söhne PE-4885-675
- Page 1 Professional Popcorn Maker at home PE-4885-675 of servings. The specification "cup" denotes a normal coffee Highly valued customer, 4. In case the butter has not melted completely you can use cup that can hold about 125 ml. a pastry brush to sweep the remaining butter through the we would like to thank you for purchasing our professional holes.
- Page 2 Professional Popcorn Maker at home PE-4885-675 Replace the rotator after you have cleaned the non-stick bottom Pour the mixture evenly over the popcorn. Turn over the Smothered popcorn and tighten the screw again. popcorn every now and then, so it is evenly covered with the Ingredients: mixture.
- Page 3 Professional Popcorn Maker at home PE-4885-675 Important information regarding disposal Place the appliance in such a way, that there is ample space This device is not meant to be operated by persons on all sides. Make sure you place it on a solid, dry and level...
- Page 4 Machine à pop-corn PE-4885-675 Chère cliente, cher client, Mise en marche Instructions pas à pas Nous vous remercions pour le choix de cette machine à pop- Avant la première utilisation de la machine à pop-corn, nettoyez- 1. Placez les quantités de maïs et d'huile végétale appropriées corn.
- Page 5 Machine à pop-corn PE-4885-675 Répartissez alors le mélange sur le pop-corn de manière Nettoyage et entretien Recettes homogène. Retournez les grains de pop-corn, de manière à ce qu'ils soient parfaitement recouverts du mélange. Nettoyez la machine à pop-corn après chaque utilisation.
- Page 6 Machine à pop-corn PE-4885-675 physiques, sensorielles ou mentales sont réduites, ou des Ne branchez l'appareil qu'à une prise électrique murale Consignes de sécurité personnes dénuées d'expérience ou de connaissance, sauf reliée à la terre et correctement installée. La prise électrique Ce mode d'emploi vous permet de vous familiariser avec le doit être accessible en permanence une fois l'appareil...
Need help?
Do you have a question about the PE-4885-675 and is the answer not in the manual?
Questions and answers