
Related Manuals for Maximum 054-7556-8


Summary of Contents for Maximum 054-7556-8
- Page 1 Model No. 054-7556-8 IMPORTANT: INSTRUCTION Please read this manual carefully before MANUAL using this product, and save it for reference.
-
Page 3: Table Of Contents
TABLE OF CONTENTS Technical Specifications Safety Guidelines Key Parts Diagram Important information Operating Instructions Maintenance Troubleshooting Parts List Warranty NOTE: If any parts are missing or damaged, or if you have any questions, please call our toll-free helpline at 1-888-670-6682. SAVE THESE INSTRUCTIONS •... -
Page 4: Technical Specifications
054-7556-8 | contact us 1-888-670-6682 TECHNICAL SPECIFICATIONS Rated Input 120V, 60 Hz, 3A No-load Speed 0–13,000 OPM Orbital Diameter 7/64" (2.7 mm) Pad Size 5" (12.7 cm) Hook and loop fastening system with Pad Type 8 holes Weight (with dust canister) -
Page 5: Safety Guidelines
SAFETY GUIDELINES WARNING! Safety symbols in this instruction manual are used to flag possible dangers. The safety symbols and their explanations require your full understanding. The safety warnings do not, by themselves, eliminate any danger, nor are they substitutes for proper accident prevention measures. - Page 6 054-7556-8 | contact us 1-888-670-6682 ELECTRICAL SAFETY • Power tool plugs must match the outlet. Never modify the plug in any way. Do not use any adapter plugs with earthed (grounded) power tools. Unmodified plugs and matching outlets will reduce risk of electric shock.
- Page 7 POWER TOOL USE AND CARE • Do not force the power tool. Use the correct power tool for your application. The correct power tool will do the job better and more safely at the rate for which it was designed. •...
- Page 8 054-7556-8 | contact us 1-888-670-6682 • Empty the dust canister frequently and after completion of sanding. Be extremely careful of dust disposal; materials in fine particle form may be explosive. Do not throw sanding dust on an open fire. Spontaneous combustion may, in time, result from the mixture of oil or water with dust particles.
-
Page 9: Key Parts Diagram
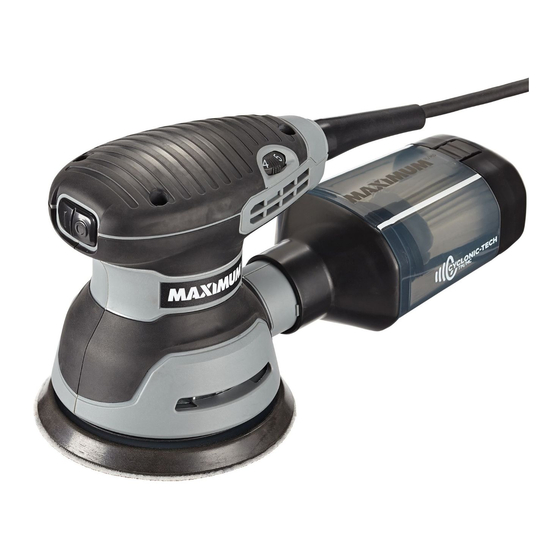
PACKAGE CONTENTS Corded random orbit sander, dust canister, 2-in-1 vacuum adaptor, sandpaper discs (x3), nylon tote, and instruction manual. KEY PARTS DIAGRAM PART PART Switch Dust-canister body Variable-speed dial Microfilter Dust canister 2-in-1 vacuum adaptor Sanding pad WARNING! • Remove the corded random orbit sander from the package and examine it carefully. -
Page 10: Important Information
054-7556-8 | contact us 1-888-670-6682 IMPORTANT INFORMATION Before attempting to use this tool, become familiar with all of its operating features and safety requirements. For optimum performance and safety, read the following operating instructions carefully before using. -
Page 11: Operating Instructions
OPERATION INSTRUCTIONS ATTACHING SANDPAPER fig 1 DISCS (fig 1) 1. Disconnect the sander from the power source. 2. Place the sander upside down on a flat surface. 3. Remove any dust or debris from the sanding pad. 4. Align the holes of the sandpaper disc with the holes in the sanding pad and firmly press the sandpaper disc against the sanding pad to ensure a good attachment. - Page 12 054-7556-8 | contact us 1-888-670-6682 DUST CANISTER (fig 2) fig 2 Y our sander is supplied with a dust canister to help you keep the working area clean. The dust canister is ideal for smaller jobs. For maximum efficiency, the dust canister should be emptied frequently during operation.
- Page 13 ATTACHING VACUUM HOSE (fig 4) fig 4 1 1/4" (3.2 cm) hose 1 7/8" (4.8 cm) hose 2 1/2" (6.4 cm) hose 1 7/8 and 2 1/2" (4.8 and 6.4 cm) 2-in-1 vacuum adaptor When the dust canister is removed from the tool, a vacuum hose accessory (available separately) can be attached to the dust port.
- Page 14 054-7556-8 | contact us 1-888-670-6682 VARIABLE-SPEED DIAL (fig 6) fig 6 Variable-speed dial The variable-speed feature on this sander allows you to match the proper speed to the material being sanded. 1. The variable-speed dial is used to adjust the speed of the application tool.
-
Page 15: Maintenance
MAINTENANCE The tool may be cleaned most effectively with compressed dry air. Always wear safety goggles when cleaning tools with compressed air. Before each use: • Inspect the corded random orbit sander, the switch, and the pad. • Check for damaged, missing, or worn parts. •... -
Page 16: Troubleshooting
054-7556-8 | contact us 1-888-670-6682 TROUBLESHOOTING PROBLEMS POSSIBLE CAUSES SOLUTIONS The sander does not Not connected to power Plug the sander into a start. source. power source. The sandpaper disc is Replace with a new worn. sandpaper disc. -
Page 17: Parts List
EXPLODED VIEW... - Page 18 054-7556-8 | contact us 1-888-670-6682 No. Part No. Description Part No. Description 5610248000 Tapping Screw 3700577000 Fixing Board 3322245000 Upper Housing 4900248000 Speed Adjuster 2740436000 Stator 4930004000 Connecter 2825408000 Rotor Set 5610024000 Tapping Screw Cord 5650043000 Plain Washer...
-
Page 19: Warranty
(with the same model, or one of equal value or specification), at the sole discretion of the Maximum Canada authorised repair centre (“Service Provider”). We will bear the cost of any repair or replacement and any costs of labour relating thereto. - Page 20 This warranty applies for a period of 5 years from the date of original retail purchase, as indicated on the bill of sale. Neither the retailer, Maximum Canada, nor the manufacturer shall be liable for any other expense, loss or damage, including, without limitation, any indirect, incidental, consequential or exemplary damages arising in connection with the sale, use or inability to use this product.
- Page 21 In addition to the 5-Year Limited Warranty, this MAXIMUM product is covered by our: 1-Year Repair Warranty...
Need help?
Do you have a question about the 054-7556-8 and is the answer not in the manual?
Questions and answers
The vacuumed adapter is stuck to the sander. I can’t get it off to put on the filter. I’m worried I’ll break something if I try any harder to twist it. Is the a latch or somewhere to pry it loose?
I just purchased your sander, (054-7556-8) and it arrived with the vacuum adaptor connected to the unit. I’ve tried pressing the release pin but it won’t release the adaptor What can I do next, without breaking the release pin, as it’s not warranted?