Table of Contents
Advertisement
Advertisement
Table of Contents

Related Manuals for Teka ECO-Cube


Summary of Contents for Teka ECO-Cube
- Page 1 Operating instructions (Translation of the original operating instructions) Filter device type ECO-Cube TEKA Absaug- und Entsorgungs- technologie GmbH Industriestraße 13 D-46342 Velen Postfach 1137 D-46334 Velen Tel.: +49 (0) 2863 9282-0 Fax: +49 (0) 2863 9282-72 E-Mail: sales@teka.eu www.teka.eu...
-
Page 2: Table Of Contents
Changing the filter mat of the control housing Operating the system Dismantling/disposal 10 Diagnostics and troubleshooting 11 Technical data 12 Spare part list 13 Versions of the ECO-Cube unit 13.1 Version "preparation for CO2-extinguishing installation" 13.1.1 Replacing the filter door 13.1.2 Mounting and connecting the particle sensor 13.1.3... - Page 3 16.2.2 Visual inspection of the pipelines for dust deposits 16.2.3 Visual inspection of the pneumatic pipes 16.2.4 Functional test of the unit 16.2.5 Electrical test of the electrical lines and earthing connections BA_ECO-Cube_190815_EN.docx 15.08.2019...
-
Page 4: Partlist / Description Of The System Elements
Partlist / Description of the system elements 1.1 Parts list of supplied parts Check whether the filter system has been fully supplied before starting assembly. ISO 7380, M6x12 ISO 7380, M8x20 Sealing shim DIN 1587, M8 DIN 125, A8,4 ISO 7380, M8x16 L=200 mm DIN 934, M8 DIN 7504, 3,5x13... -
Page 5: Drawing / Description Of The System Elements
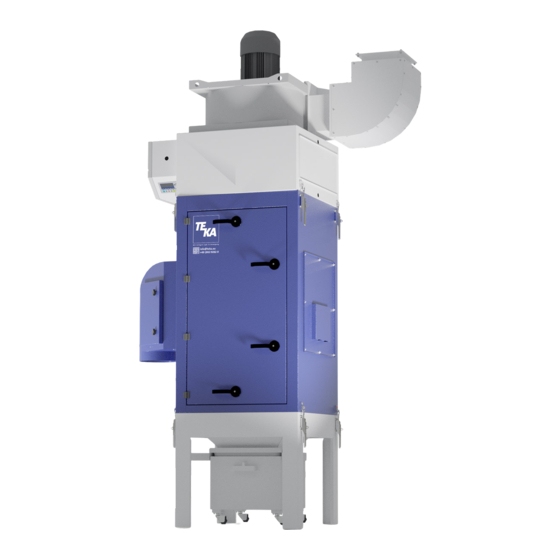
1.2 Drawing / Description of the system elements (Z.Nr. 16291705) Pos. 1 Pos.11 Discharge orifice with grille Pos. 2 Cleaning device housing (with com- Pos.12 Toggle closure of the dust collector pressed air tank inside) Pos.13 Display control Pos. 3 Filter housing Pos.14 Main switch... -
Page 6: System Extensions / Distinctions Between Versions
This manual covers the basic version of the filter unit and the differences between versions in the required sections. Please refer to chapter 13 "Versions of the ECO-Cube unit" to find out if the present filter unit dif- fers from the basic version. -
Page 7: Intended Use
Intended use The filter system is mainly used for the extraction and filtering of dust and fumes. A lot of dust types as for example welding fume and cutting particles may burn when sources of ig- nition are supplied. The operator must take appropriate measures to avoid these specific risks. Improper use of the equipment can lead to damage to individual parts and endan- ger life and limb! The system must not be used for the extraction of oil containing welding smoke, explo-... -
Page 8: Safety Instructions / Foreseeable Misuse
Safety instructions / foreseeable misuse The filter system is constructed according to the state of the art and the recognised safety regula- tions. Nevertheless, during use threats to life and limb of the user or other persons may arise. The impairment of the machine or other property are also possible. -
Page 9: Storage, Transport And Installation Of The System
Storage, Transport and installation of the system Overturning or not permanently fixed equipment may represent a danger to life and limb. The system must be secured against overturning and sliding during the storage and transport. Do not stand under or next to the load when lifting and lowering. Lift trucks or forklift trucks or transport cranes must have sufficient minimum loading. -
Page 10: Installation Of The System
5.1 Installation of the system The “ECO-Cube” filter system is delivered as a modular kit in separate system parts. These are as- sembled on site. The following should be noted: The final position of the filter system is determined with the setting up of the dust collector hous- •... - Page 11 1x left , 1x right . It is mounted at the upper and lower toggle levers ("G"). For this 2 screws M6x12 per toggle lever briefly have to be solved, then screw again including the mounting brackets. Fig.: dust collector housing Fig.: connecting the housings Fig.: filter housing BA_ECO-Cube_190815_EN.docx...
- Page 12 Fig.: cleaning device housing with fan Fig.: Installation of the curved silencer Fig.: Installation of the steel cable Fig.: Installation of the mounting brackets for supply lines BA_ECO-Cube_190815_EN.docx 15.08.2019...
-
Page 13: Commissioning
Commissioning Improper work on the system and on electrical voltage components represent considerable danger to life and limb in the event of improper handling. The operator is responsible for ensuring that all work is carried out by authorised and qualified personnel. The operator must ensure that their authorised personnel are fa- miliar with all the safety indications in this manual in advance. -
Page 14: Electrical Connection Of The Filter System
6.2 Electrical connection of the filter system Work on electrical voltage components and attaching the power cable entails the risk of electric shock. Work on electrical components can lead to serious dangers to life and limb. The operator is responsible for ensuring that all work on electric components is carried out by authorised and qualified personnel. -
Page 15: Compressed Air Supply Connection
6.3 Compressed air supply connection The filter cartridges of the system are automatically cleaned. Cleaning is carried out pneumatically via a built-in compressed air tank in the cleaning device housing (pos.2).The contents of the com- pressed air tank are sufficient for a cleaning process. A check valve inside the cleaning device housing ensures that the compressed air also remains in the compressed air container when separated from the compressed air supply. -
Page 16: Maintenance
Maintenance Work on the open system entails the risk of electrical shock or accidental re- start the system. Both pose a danger to life and limb. The operator is responsible for ensuring that all work is carried out by authorised and qualified personnel. -
Page 17: Cleaning The Filter Cartridges
7.1 Cleaning the filter cartridges Filter cleaning can be carried out in various ways. Please refer to the separately enclosed operat- ing instructions for the system control. Without compressed air supply the filter cartridges will become dirty very quick- ly. The service life of the filter cartridge depends strongly on the particular conditions of use. -
Page 18: Draining Of The Condensate
• Remove the dust collector container gently from under the dust collector housing (pos.5) to avoid disturbing the dust. Ensure a dust free approach when transporting or disposing. • Remove the dust collection bag with the accumulated welding dust. Before removing the bag must be closed using, for example, cable ties or similar. -
Page 19: Changing The Filter Cartridges
7.5 Changing the filter cartridges If the suction capacity is no longer sufficient for your purposes, you must check for causes of error (see chapter 10 „Diagnostics and troubleshooting“). Otherwise it is possible that the filter cartridges are saturated so that a replacement of the filter car- tridges is necessary. - Page 20 • Unhook the cartridge holder from the cartridge guide (pos. E) and remove from the unit to- gether with the filter cartridge and the waste bag. • Loosen the cylinder nut (pos. F) outside on the cartridge base. The cylinder nut is not to be gripped directly with hands, but from the outside through the bag.
-
Page 21: Changing The Filter Mat Of The Control Housing
7.6 Changing the filter mat of the control housing The filter mat of the control housing (pos. 8) must be regularly inspected and changed if necessary. This check depends on the level of pollution. The filter mat is in the air grating. We recommend promptly stocking up on filter mats (see spare part list). -
Page 22: Diagnostics And Troubleshooting
A recommissioning of the device must only occur if it is ensured that the filter system is functionally equivalent to the original state. Repairs may only be carried out by TEKA personnel or, after con- sultation with TEKA, by the personnel authorised by the operator. - Page 23 Suction power too low Filter elements are saturated. Filterpaket austauschen, Altfil- (smoke hardly extract- ter ordnungsgemäß entsorgen! Filter elements are saturated because Connect compressed air. no compressed air is connected. Damage at the capturing elements. Replace the capturing ele- ments. The motor rotates in the wrong Contact our service depart- direction.
-
Page 24: Technical Data
11 Technical data Filter device ECO-Cube Engine power 3800 (2237) 4200 (2472) 8140 (4792) Air volume flow (possible operating point) m³/h (cfm) 3250 (0,47) 3800 (0,55) 2700 (0,39) Under pressure (possible operating point) Pa (psi) Mains voltage 400 / 480... -
Page 25: Spare Part List
12 Spare part list Description: Article n°.: Filter cartridge, “non-precoat”, 25,3m² (269ft²) L = 1200mm (47in) 1000501420250 Plastic bag for disposal of filter cartridges L = 1200mm (47in), 4 pieces 10030251702 Plastic bag for insertion into dust collector, 10 pieces 100302501 Filter-mat for control-housing, 10 pieces 200421120007079... -
Page 26: Versions Of The Eco-Cube Unit
13 Versions of the ECO-Cube unit In addition to the basic version, the filter unit "ECO-Cube" can be ordered in an extended or modified version by adding different functionalities: Version "preparation for CO2-extinguishing installation" • 13.1 Version "preparation for CO2-extinguishing installation"... -
Page 27: Replacing The Filter Door
13.1.1 Replacing the filter door The filter door for the CO2-extinguishing installation is not factory-mounted, but must be mount- ed at the point of destination. It is possible, that the service door still has been mounted by factory. This can be seen in the fact that the door is equipped with viewing windows and a connecting hose. -
Page 28: Mounting And Connecting The Particle Sensor
13.1.2 Mounting and connecting the particle sensor Mount the particle sensor in the cleaning device housing (pos. 2). A plug-in connection is locat- ed there. Open the service door (pos. 16). • Disassemble the protective plate (pos. A) by loosening the wing nut (pos. •... -
Page 29: Declaration Of Conformity For "Eco-Cube
This declaration loses its validity if any modifications are carried out on the suction and filter system without the written agreement of the manufacturer. Authorised representative for technical documentation: TEKA GmbH, Technical department (Jürgen Kemper, Manager) Velen, on 3rd January 2018 BA_ECO-Cube_190815_EN.docx... -
Page 30: Training Protocol For System Users
15 Training protocol for system users (This form can be used by the operator to document the training of the employees. Training should be per- formed by authorized personnel only. Refer to the instructions in Chapter 4, "Safety Instructions") The signature of the employee instructed confirms that they have been instructed on the following points: Introduction completed... -
Page 31: Maintenance Intervals
16 Maintenance intervals 16.1 Usage-related maintenance The described maintenances become necessary through the demands of the system operations. The maintenance intervals are recommendations. Depending on the application (multi-shift opera- tion, dust generation, ...) it may make sense for the operator to change the maintenance intervals. Maintenance work must always be documented by means of a protocol. -
Page 32: Visual Inspection Of The Filter Unit
16.2.1 Visual inspection of the filter unit Visual inspection: Make sure that there are no visible safety-related defects. Disconnect the filter unit from the power supply and secure it against unauthorised switching on (see chapter 7.2). The following steps must be carried out in the course of the visual inspection: Check the unit for completeness and damages. - Page 33 16.2.3 Visual inspection of the pneumatic pipes Visual inspection: Observe if there are no visible safety-related defects. Disconnect the filter unit from the power supply and secure it against unauthorised switching on (see chapter 7.2). The following steps must be carried out in the course of the visual inspection: Open the service door (fig.
- Page 34 16.2.5 Electrical test of the electrical lines and earthing connections Working on electrical voltage components and attaching the power cable entails the risk of electric shock. Working on electrical components can lead to serious dangers to life and limb. The operator is responsible for ensuring that all work on electric components is carried out by authorised and qualified personnel.
Need help?
Do you have a question about the ECO-Cube and is the answer not in the manual?
Questions and answers