Table of Contents
Advertisement
Advertisement
Table of Contents

Related Manuals for HIKVISION DS-AT1000S Series


Summary of Contents for HIKVISION DS-AT1000S Series
- Page 1 DS-AT1000S Series Storage System Quick Start Guide...
-
Page 2: Table Of Contents
DS-AT1000S Series Storage System Quick Start Guide TABLE OF CONTENTS Chapter 1 Working Environment and Installation ................ 5 1.1 Environment of Equipment Room .................... 5 1.1.1 Power Supply System ...................... 5 1.1.2 Temperature and Humidity of Equipment Room ............5 1.2 Installation and Initial Power-on .................... - Page 3 DS-AT1000S Series Storage System Quick Start Guide Quick Start Guide About this Manual This Manual is applicable to Storage System. The Manual includes instructions for using and managing the product. Pictures, charts, images and all other information hereinafter are for description and explanation only. The information contained in the Manual is subject to change, without notice, due to firmware updates or other reasons.
- Page 4 DS-AT1000S Series Storage System Quick Start Guide Regulatory Information FCC Information FCC compliance: This equipment has been tested and found to comply with the limits for a Class A digital device, pursuant to part 15 of the FCC Rules. These limits are designed to provide reasonable protection against harmful interference when the equipment is operated in a commercial environment.
- Page 5 DS-AT1000S Series Storage System Quick Start Guide Applicable Models This manual is applicable to the models listed in the following table. Series Model DS-AT1000S/224 DS-AT1000S DS-AT1000S/336 Symbol Conventions The symbols that may be found in this document are defined as follows.
-
Page 6: Chapter 1 Working Environment And Installation
DS-AT1000S Series Storage System Quick Start Guide Chapter 1 Working Environment and Installation Devices described in this manual should be installed in the standard equipment room. 1.1 Environment of Equipment Room 1.1.1 Power Supply System The storage system is sensitive to the change of a voltage, and an excessively high or low voltage, or a sudden change of the voltage may delete the data in the memory or even cause the damage of the components. - Page 7 DS-AT1000S Series Storage System Quick Start Guide expansion. And the ground can bear product loading. The rooting facilities should be well designed and ready. Air conditioner Install an air conditioner which supports power off restart function in the machine room. The installation position of air conditioning should ensure no air will blow to the equipment directly.
-
Page 8: Installation And Initial Power-On
DS-AT1000S Series Storage System Quick Start Guide 1.2 Installation and Initial Power-on The device shall be placed on the fixed flat surface. Tilting surface is not allowed. You can use the standard plate in the industrial cabinet or use the guide rail (not provided) to install the device to the rack. -
Page 9: Chapter 2 Appearance And Installation
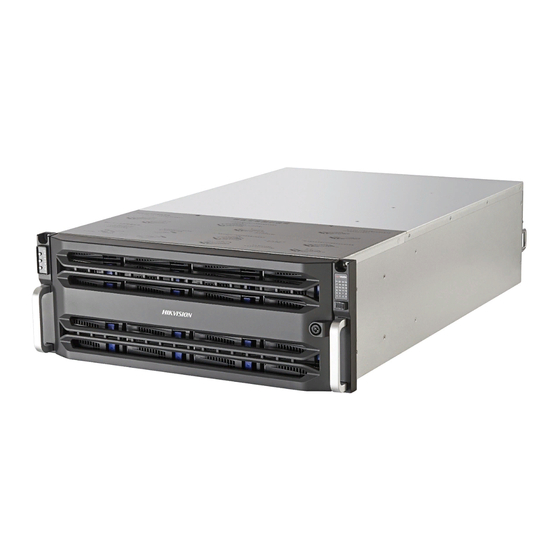
DS-AT1000S Series Storage System Quick Start Guide Chapter 2 Appearance and Installation 2.1 Device Appearance The system adopts rack-mounted chassis which provides LED indicators for the system status. 2.1.1 Chassis Appearance Figure 2-1 DS-AT1000S/336 Overall View Figure 2-2 DS-AT1000S/224 Overall View 2.1.2 Front Panel... -
Page 10: Description Of Buttons In Front Panel
DS-AT1000S Series Storage System Quick Start Guide Figure 2-3 DS-AT1000S/336 Front Panel Figure 2-4 DS-AT1000S/224 Front Panel 2.1.3 Description of Buttons in Front Panel DS-AT1000S/336 Figure 2-5 Front Panel Buttons Figure 2-6 Button Description Button Name Description Power switch and indicator When the system is off, press the button to turn on it. - Page 11 DS-AT1000S Series Storage System Quick Start Guide system. The indicator shows green when the system is running. Positioning button and Press this button or click Positioning on GUI to indicator trigger locating function. Press the button again to disable locating function.
-
Page 12: Rear Panel
DS-AT1000S Series Storage System Quick Start Guide Power switch and indicator When the system is off, press the button to turn on it. When the system is running, hold the button for at least 4s and not more than 15s to turn off the system. - Page 13 DS-AT1000S Series Storage System Quick Start Guide Table 2-1 Description Name Name Power module 1 SAS interface COM interface Data network interface 3 Management network Two USB interfaces interface Two USB interfaces Power module 2 Data network interface 1 IPMI...
-
Page 14: Install Accessories
DS-AT1000S Series Storage System Quick Start Guide Table 2-2 Description Name Name Power module 1 HDMI interface 2 HDMI interface 1 USB interface 2 USB interface 1 Data LAN 2 Data LAN 1 Management LAN Data LAN 3 EXP interface 2... -
Page 15: Install Hdd
DS-AT1000S Series Storage System Quick Start Guide 2.2.2 Install HDD Selecting HDD Model It is recommended to adopt the certificated professional HDD models so as to ensure the stable running of the system and the reliable data storage. You are recommended to use the HDD in recommended HDD list. - Page 16 DS-AT1000S Series Storage System Quick Start Guide Figure 2-12 Splitting HDD Plate Figure 2-13 Secure HDD Step 5 Insert the HDD bracket (with the PCB side towards the left of the chassis) to the chassis and push it along the guide apparatus to the bottom. Then, press the securing handle to ensure the bracket has been seated into position and lock it.
-
Page 17: Startup
DS-AT1000S Series Storage System Quick Start Guide Figure 2-14 Indicators in Dummy HDD Precautions during HDD Installation When you plug or unplug the hard disks, please take the following precautions: When the HDD is running, the maximum vibration can suffer is 0.25 Gs. While when it is idle, the maximum vibration is 3.0 Gs. -
Page 18: Shutdown
DS-AT1000S Series Storage System Quick Start Guide If device cannot start up normally, check the connection between components. Do not press the power button after startup, or the device will be forced to shut down and may course data loss. -
Page 19: Chapter 3 Network
DS-AT1000S Series Storage System Quick Start Guide Chapter 3 Network You are recommended to connect all the network interfaces to the Internet. 3.1 Activate Storage System Purpose For the first-time access, you need to activate the storage system by setting an admin password. - Page 20 DS-AT1000S Series Storage System Quick Start Guide Figure 3-1 Modify Network Step 2 You can view binding network information and modify binding parameters. Figure 3-2 Modify Network DS-AT1000S/336 series storage system contains 5 network interfaces. By default, network interface 1 and 4 are bonded as a data network interface (bond network interface 1) and bonding mode is XOR.
-
Page 21: Modify Ip Address Of Bond Network Interface
DS-AT1000S Series Storage System Quick Start Guide If you forget the IP address of data network interface, you can log in storage system via management network interface to view the IP address. Default IP address of management network interface is 10.254.254.254. -
Page 22: Chapter 4 System Configuration
DS-AT1000S Series Storage System Quick Start Guide Chapter 4 System Configuration 4.1 One-Key Configuration Before you start one-key configuration, ensure the number of HDD meets the following requirement. DS-AT1000S/336 series storage system requires at least 22 HDDs. DS-AT1000S/224 series storage system requires at least 14 HDDs. -
Page 23: Format Storage Space
DS-AT1000S Series Storage System Quick Start Guide Figure 4-2 Prompt 4.2 Format Storage Space 4.2.1 Activate Hybrid SAN Sub-System Purpose You can only use Internet Explorer 8.0 and above to visit Hybrid SAN sub-system. Step 1 Visit http://IP address of bond network interface 1 in web browser to access Hybrid SAN sub-system. -
Page 24: Chapter 5 Basic Configuration
DS-AT1000S Series Storage System Quick Start Guide Chapter 5 Basic Configuration Log in to Hybrid SAN sub-system and follow the steps to configure basic parameters. 5.1 Camera Management Step 1 Log in to Hybrid SAN sub-system. For details, refer to 4.2.1 Activate Hybrid SAN Sub-System. -
Page 25: Configure Recording Schedule
DS-AT1000S Series Storage System Quick Start Guide 2) Enter network camera information. The information must be the same with the information of network camera to add. Click OK. Quick Add: Add network cameras of the same password and in the same network segment the storage system. -
Page 26: Live View
DS-AT1000S Series Storage System Quick Start Guide 5.3 Live View Go to Live View. You can preview live images, start manual recording, capture pictures, turn on live view audio, etc. Figure 5-4 Live View 5.4 Playback Go to Playback. You can play back, search, download recorded videos. - Page 27 UD14832N...
Need help?
Do you have a question about the DS-AT1000S Series and is the answer not in the manual?
Questions and answers