Table of Contents
Advertisement
Quick Links
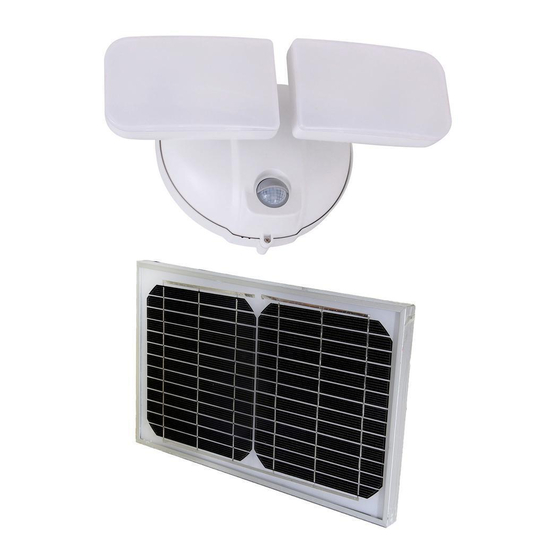
SMART Solar Light ... Built with Dual Ultra-Bright LED Head
IMPORTANT ....
Read this User Manual Before Installing...!!!
Included in this package:
1 – eLEDing Solar Light Body
1 – Wall Mounting Plate w/hardware
Initial Installation Set-up (
Built in replaceable battery is pre-charged and connected with the system before shipping
The light is ready for use. For initial check of the light unit and battery, please turn the switch to ON (Smart) position, the light will turn on within 5
seconds, then turn the switch back to OFF position for installation (refer Fig. 1). For most cases no pre-charge before use is needed.
Mounting the Light Body by use the mounting back plate (refer Fig 1-1 to 4)
1. The light body must only be mounted in a vertical position and it should be mounted at least 6 to 10 feet high above the ground
2. Choose a flat, secured and safe mounting surface. Mark the screw positions through the mounting plate screw holes onto the mounting surface.
Use 2 or 4 hole to mount (Fig. 1-2)
3. For wood/vinyl/metal surfaces, mount the back plate directly with provided or your standard screws. Drill clearance holes using a 3/16"
masonry bit for surface of concrete, brick or stucco. Insert the anchors (provided) with screws, then position the mounting plate and fasten the
screws securely
4. Attach the light body in position to complete the installation:
Band and remove the little tap at the back plate, turn the main switch to ON (SMART), insert the solar cable and plug it into the back
compartment, then put the whole light body onto the wall mount back plate (from top to buttom, with the light body "hinged" to the mounting plate).
Secure the unit with the small securing screw on the bottom of the light body (Fig. 1-1 to 4)
5. With the light body firmly secured, the Pan & Tilt feature allows users to adjust the direction of the LED light heads. By horizontally positioning
two light heads with a degree of 180
coverage. A separate facing direction will give users a dual direction illumination with flexibility (Fig. 1-7 to 8). The facing direction of the motion
detector is fixed to horizontal, but the angle and the coverage can be selected up to 120
direction only by turning the motion head's plastic cover to either side (Fig. 2).
User Tips of Setting up the Solar Panel
The solar panel must be mounted in a non-obstructed position where can receive at least 4 hours direct sunlight on average all year round. It
should be mounted with a angle of 35°- 80° above the ground and face to the sky (Fig 1-5). A sturdy mounting location includes wall, roof, on
top of patio, under the eaves, secure pole, or floor/ground base. Make sure the solar panel is installed firmly for all weather conditions.
For Northern hemisphere installations, the solar panel should be mounted with South-facing position; For Southern hemisphere installation,
the solar panel should face to the North (Australia, South Africa, South America e. g.)
Attach the hardware mounting bracket to the solar panel. The cord is 10'-long and extension cable (model # EE-SPEC-15F) is available as
additional accessory. Estimate how long the cord is needed to reach the light body, and tie the unused part of the cord behind the solar panel
with the provided plastic zip-tie
Then mark the screw holes through the mounting bracket and secure the solar panel in position with the provided hardware
Firmly insert the solar panel cord into the light's back compartment, make sure the cord connector is completely plugged into the light body as
the picture shows (Fig. 1-3).
1
1.
5
Fig. 1 – Main Switch & Setup Reference
Just "One Step" to Begin Using the Light
After the light fixture and solar panel are mounted, you may
immediately begin using the light by just moving the main switch
to the ON (SMART) position. Using the factory pre-set default
profile is recommended (Fig.2). Note: NO FURTHER
ADJUSTMENTS ARE NECESSARY
eLEDing Solar Lights are SMART lights embedded with intelligent microprocessor
control chip. The light has two selectable operating modes, SMART-ON MODE (as
factory default) and AUTO MODE (Fig. 1-6). Both are SMART modes of operation
and utilize stored energy capacity for the most optimum lighting efficiency.
The settings for Sensitivity/Range of motion, length of illuminating time with AUTO
Mode or levels of brightness in dimming control with ON/SMART Mode are set and
controlled with adjustable dials (Fig. 2)
The family of eLEDing SMART solar lights use an exclusive Intelligent Power
Management (IPM) embedded feature for managing and optimizing the Lithium
based battery for a full range of operation. This optimizes the battery's life cycle to
adapt to most environmental conditions allowing both the battery and light to
perform for many years.
®
Model EE828WDC User Manual
1 – Rechargeable Li-Poly Battery 1 – Tempered Glass Solar Panel
2 – Hardware Package with Screws and Anchors
Refer to Fig. 1)
o
, the light can served as single head light and provide high-power illumination with wide up & down
6
o
for wide angle coverage, and can also be set for one
2
3.
Set as single head
7.
Fig. 2 – Functions Setting by Turning the Cover
Or
3
Set as dual heads
9
7
Full Coverage as Default Setting
Rev. EE828WDC 10102017 Page 1
4
8
Advertisement
Table of Contents

Related Manuals for eLEDing EE828WDC


Summary of Contents for eLEDing EE828WDC
- Page 1 Mode or levels of brightness in dimming control with ON/SMART Mode are set and controlled with adjustable dials (Fig. 2) The family of eLEDing SMART solar lights use an exclusive Intelligent Power Management (IPM) embedded feature for managing and optimizing the Lithium based battery for a full range of operation.
- Page 2 Set-up/Walk Test Procedure and Adjustments 1. To set up eLEDing for your applications, the unit comes with a Set-up/Walk Test mode to ensure proper installation and optimize performance. To activate this mode, move the main switch from OFF to ON position. This Set-up/ Walk Test mode can be reactivated at anytime to adjust your settings for your application by turn the switch to OFF then ON in any condition day or night.
Need help?
Do you have a question about the EE828WDC and is the answer not in the manual?
Questions and answers