
Related Manuals for FAZLEY DDK-100


Summary of Contents for FAZLEY DDK-100
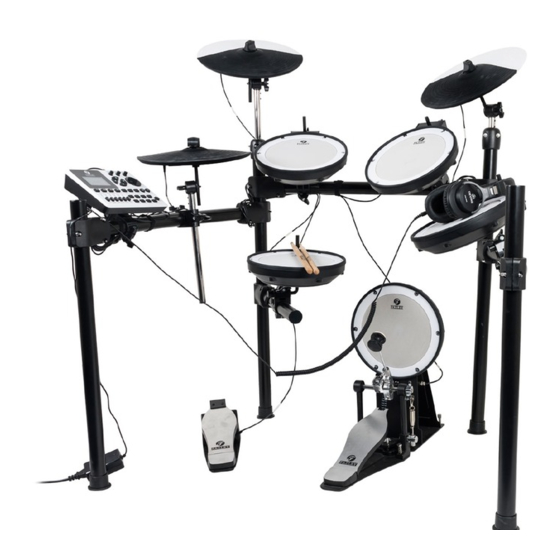
- Page 1 DDK-100 electronic drum kit user manual All information and illustrations shown in this user manual are subject to change without further notice. User manual version: 1.0 Creation date + author initials: 05-05-2015 RV Revision date + author initials:...
- Page 2 Please be sure to check that all of the parts and accessories listed below under 'box contents' are included in the package. In the event that the DDK-100 does not function properly, or if you have any issues while operating it, please remove the plug from the power socket and contact your dealer for assistance.
-
Page 3: Safety Instructions
Safety instructions WARNING! Keep this device away from moisture, water and rain to avoid the chance of electric shocks. Everyone involved with the installation, operation and maintenance of this device must: - Be qualified - Be skilled - Have read the instructions in this user manual - Be sure that neither the device nor the included accessories are damaged. - Page 4 - Should the device not be used in the manner described in this user manual, damages or even injuries could occur. Fazley cannot be held responsible for any injuries or damages that occur as a result of improper use of this product.
- Page 5 Overview of the drum module The DDK-100 drum module is the central nervous system of this digital drum kit. It is equipped with all the sounds that can be played on the pads or mesh heads, but it also has functions on board that you can adjust as desired.
- Page 6 The cursor buttons allow you to select certain fields/values on the display, which can then be changed using the rotary knobs or '+' / '-' buttons. 3. Rotary knob The large rotary knob is used to change the values of certain parameters, but it can also be used to change the presets in large steps.
- Page 7 Connecting the drum module 1. Phone Headphone output equipped with a TRS jack plug connector 2. L/mono main output Main output, suitable for connecting an active speaker, mixer or audio interface. Equipped with a TRS jack plug connector. 3. R main output This is the output for the right channel if you want to send the stereo output to an active speaker set, mixer or audio interface.
- Page 8 10. Crash 2 It is possible to connect a second (not included) crash via this TRS jack plug connector. 11. Editing adapter The editing adapter ensures that the drum module is optimally positioned on the frame. All information and illustrations shown in this user manual are subject to change without further notice. User manual version: 1.0 Creation date + author initials: 05-05-2015 RV Revision date + author initials:...
- Page 9 Basic operations of the drum module Turning on the drum module To turn on the drum module, make sure it is connected to the power adapter and that the adapter is plugged Make sure the volume controls are turned down. Turn the drum module on by pushing the Power button. Once the drum module has started up, you can hit the trigger pads and adjust the volume gradually to a comfortable level.
-
Page 10: Advanced Settings
Advanced settings Adjusting the tempo of the metronome or song Press the Tempo button to adjust the tempo of the metronome or song. Then use the rotary knob or '+' / '-' buttons to change the tempo as desired. Selecting an instrument If you want to assign a different instrument or sound to a specific trigger, make sure you're in the main menu by pressing the Home button. - Page 11 You can configure the built-in metronome as you wish by pressing the Tempo button. Then, press the F1 function button to go to Setup. When you see Click Setup on the display, you can edit the metronome settings. Please note, the settings are on two separate pages, you can toggle between them using the F1 and F2 function keys.
- Page 12 Press the SETUP button to activate the Setup mode. Go to F1 (Trig) to activate the Trigger menu. Press F1 or F2 to toggle between Page 1 and Page 2 and browse through the options. Use the Cursor button to browse through the available parameters. Use the '+' / '-' buttons or the rotary knob to adjust the parameters.
- Page 13 MIDI IN ON/OFF This option allows MIDI data to be received from an external device . The default value is ON. System Utilities Adjusting the display contrast Press the Setup button, select Util with the F3 function key and the Utility menu will appear. Press the F1 function key to open the Ctrl section.
-
Page 14: Technical Specifications
Technical specifications General specifications: - complete drum kit with mesh heads - standard drum configuration - versatile, intuitive drum module operation - mesh head technique for accurate response - practical, compact and easily-adjustable drum frame - integrated cable tree in frame for neat, tidy appearance - all hardware is easily adjustable for optimal playing comfort Configuration: - drum frame... - Page 15 Technical details: - 25 preset kits - 15 user kits - 423 built in sounds - 38 built in songs - trigger inputs standaard: kick, snare, tom1, tom2, tom3, hi-hat, crash, ride, hi-hat controller - trigger inputs extra: tom4, crash2 - LCD-display: 128 x 64 dots graphic display (backlit LCD) - connection voltage: 100-240V AC, 50/60 Hz - operating voltage: 12V DC, 2A by power adapter (included)
- Page 16 Preset SONG list Preset drum kit list All information and illustrations shown in this user manual are subject to change without further notice. User manual version: 1.0 Creation date + author initials: 05-05-2015 RV Revision date + author initials:...
- Page 17 Preset VOICE list All information and illustrations shown in this user manual are subject to change without further notice. User manual version: 1.0 Creation date + author initials: 05-05-2015 RV Revision date + author initials:...
- Page 18 All information and illustrations shown in this user manual are subject to change without further notice. User manual version: 1.0 Creation date + author initials: 05-05-2015 RV Revision date + author initials:...
- Page 19 All information and illustrations shown in this user manual are subject to change without further notice. User manual version: 1.0 Creation date + author initials: 05-05-2015 RV Revision date + author initials:...
- Page 20 All information and illustrations shown in this user manual are subject to change without further notice. User manual version: 1.0 Creation date + author initials: 05-05-2015 RV Revision date + author initials:...
Need help?
Do you have a question about the DDK-100 and is the answer not in the manual?
Questions and answers