Table of Contents
Advertisement
Quick Links
Advertisement
Table of Contents

Related Manuals for Danatronics ECHO Series


Summary of Contents for Danatronics ECHO Series
- Page 1 User’s Guide ECHO Series Thickness Gages Ver: 2.1A...
-
Page 2: Liability
Ultrasonic Level I, 40 hour class room training in Ultrasonic Theory. Danatronics, Corp. and any of its employees or representatives shall not be held responsible for improper use of this equipment for its intended use. -
Page 3: Table Of Contents
ECHO Series Ultrasonic Thickness Gages Table of Contents Liability ............................2 1 Getting Started ........................... 6 About the ECHO Series ......................6 Latest Software Updates ......................6 Coating Thickness ........................7 Temperature Correction ......................7 Stored Setups ......................... 8 Oxide Scale .......................... 10 Setup Instructions ........................ - Page 4 Danatronics, Corp. General Lock ........................... 38 Advanced Locks ........................39 Options ............................ 39 Reset ............................40 Resolution ..........................40 Units ............................41 Beeper ............................. 41 Vibrate ............................. 42 6 Changing Measurement Options .................... 43 Alarm ............................43 Vibrating Alarm Display ......................46 Blank ............................
- Page 5 ECHO Series Ultrasonic Thickness Gages 11 Additional ECHO Series Gage Information ................. 98 ECHO 7 and ECHO 8 Series ....................98 Overview to Get Started ....................... 98 12 Technical Assistance ......................101...
-
Page 6: Getting Started
This gage offers reliable, accurate thickness readings on mostly steel structures with access to only one side. The ECHO series can be easily upgraded in the field to the add ECHO-9DL, EHCO-9CW, or ECHO-9DLW the live color waveform (A-scan). -
Page 7: Coating Thickness
ECHO Series Ultrasonic Thickness Gages the most recent version of Data XL, which is also available on the website to download at no charge, and use the USB cable provided with the kit. Plug the cable into the USB port on the top left of the ECHO and use the “Software Upgrade”... -
Page 8: Stored Setups
Danatronics, Corp. Stored Setups You can store and re-call up to 2,700 unique applications setups with this updated feature, allowing for easy parameter recall for a more efficient inspection. ECHO keeps track of various parameters, such as Gain, Range, Rectification, and Alarm Values. To get started, follow the steps below. - Page 9 ECHO Series Ultrasonic Thickness Gages 4. At this point, you can either SAVE the file by pressing the F2 key or DISCARD it by pressing the F3 key. If you press the F2 key to save the file, then a screen will appear with an alphanumeric keypad so you can name the custom file.
-
Page 10: Oxide Scale
Danatronics, Corp. Oxide Scale The Oxide Scale option comes standard on the ECHO-7W and ECHO-7DLW. When equipped with the Oxide Scale option and a 20mhz delay line transducer, both ECHO 7 and ECHO 8 units with live waveform can measure the Oxide Scale (0.015" –... -
Page 11: Setup Instructions
When turning on the ECHO 9 series, the gage does an automatic zeroing of the transducer thus eliminating the need for an on-block zero. (This manual is interchangeable when using the ECHO series basic operations and calibration steps, with the exception of the datalogger, B-scan, and Echo-to-Echo features.) The ECHO 9 will... -
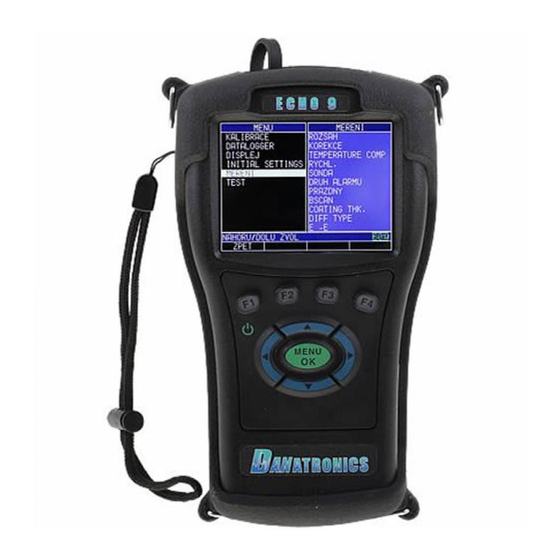
Page 12: Keypad Functions
Keypad Functions The figure below shows the full keypad layout representative of each ECHO series thickness gage. The following table refers to each key or symbol shown on the keypad. Note the F keys correspond to text above each key and prompts change depending on which screen you are adjusting. -
Page 13: Function Keys
ECHO Series Ultrasonic Thickness Gages MENU/OK key Varies Varies Varies Varies Function Keys Function keys, or F keys (e.g., F1, F2, F3, F4), have various gage functions and may change depending on the display screen. View the bottom of the display screen for the function that corresponds with the appropriate F key. -
Page 14: Display Screen
Danatronics, Corp. Display Screen The gage has a graphic style color display with 320 x 240 (1/4 VGA) pixel density. Viewing the screen is best from straight above or slightly below the surface rather than from side to side. If external temperatures are below 32°F (0°C), the display may be slower to update information. -
Page 15: Battery Pack
When the battery life is below 10%, the battery indicator will turn from green to red. When the battery life is below 5%, the indicator will flash. Note: Power off the ECHO series gage to ensure any saved data is stored internally. -
Page 16: Re-Charging The Battery
To re-charge the battery, simply plug in the charger to an AC outlet (between 100-240V) and plug the other end into the USB connector on the top of ECHO series gage. The F4 key will light up with a blue LED when charging, and the light will go out when fully charged. -
Page 17: Using Non-Rechargeable Aa Batteries
ECHO Series Ultrasonic Thickness Gages You may also use a computer instead of the wall charger to charge the gage, but this will take significantly more time than using an AC outlet. If you decide to charge the gage using this method, make sure the gage is powered off before you connect the USB to the computer and to the gage itself. -
Page 18: Boot, Bail, And Strap Features
T/R 1 port only. Locating the USB Slot The ECHO series gages are furnished with a USB 2.0 slot on the top of the gage. Use the USB slot to connect AC chargers or to connect to a computer for cross-functionality. -
Page 19: Locating The Altitude Change Release Regulator
ECHO Series Ultrasonic Thickness Gages Locating the Altitude Change Release Regulator At the bottom of the gage is a circular outline with small holes. This feature regulates pressure due to altitude change. Any pressure built up inside the gage will be... -
Page 20: Using Basic Gage Operations
2 Using Basic Gage Operations Power on the Gage To power on any of the ECHO series thickness gages, follow these steps: 1. Press and hold the F1 key for more than 3 seconds. The power symbol, as shown below, is under the F1 key printed on the keypad. -
Page 21: Performing A Reset
ECHO Series Ultrasonic Thickness Gages For a full description of all the Menu options, refer to Section 6. Performing a Reset You can reset the gage parameters back to the default settings by performing a gage reset. Note: Performing a reset permanently deletes all of the saved parameters from the gage and replaces the settings with default values. -
Page 22: Database Reset
Danatronics, Corp. Database Reset Performing a Database Reset clears all the files in the database and keeps the first three: Linear, Row Increment and Col Increment database files with cleared readings. All of the user created files in the database will be cleared and deleted. To perform a Database Reset, follow these steps: 1. -
Page 23: Database/Parameter Reset
After performing a Database/Parameter Reset, the Home screen appears automatically. About Screen You can find out information about your ECHO series thickness gage, such as the model number, version number, and contact information from the gage’s About screen. To go to the About Screen, follow these steps:... -
Page 24: Backlight
Danatronics, Corp. 2. Press the F3 – About key. The following About screen appears. 3. Press the F1 – Back key to return to Home screen. Backlight The backlight is always on, but the contrast can be adjusted. To modify the contrast, see... -
Page 25: Calibrating The Gage
ECHO Series Ultrasonic Thickness Gages 3 Calibrating the Gage Calibrating is the process of adjusting the gage for a specific material and transducer before testing material to ensure that all of the measurements are accurate. You must always calibrate before measuring material for standard accuracy. -
Page 26: Velocity And Zero Calibration
Danatronics, Corp. Velocity and Zero Calibration If you have a test step block of known thicknesses but unknown material, then you can calibrate the velocity and zero of the sound in the unknown material by measuring the time of flight from the main-bang to the first back echo for the thinner step and the thicker step. -
Page 27: Zero Calibration Only
ECHO Series Ultrasonic Thickness Gages Zero Calibration Only If you have a test step block of known thickness and known velocity of sound in the material, then you can calibrate the zero by measuring the time of flight from main-bang to the first back echo for the thinner step. -
Page 28: Delay Line Calibration
Danatronics, Corp. Delay Line Calibration Delay Line calibration is done every time the thickness gage is powered on and a transducer is selected, or when a different transducer is selected during normal operation. The gage automatically performs a Delay Line calibration by measuring the echo of the transducer itself when it is not placed on any material and there is no couplant on the transducer surface. -
Page 29: Measurement Mode With A Datalogger
4. Press the Menu = OK key to select the Menu option. (See: Menu section.) Note: The available choices for F1, F2, F3, and F4 are different for the ECHO series thickness gages without a datalogger. Also, the file symbol, filename, ID: xx,xxxx are not... -
Page 30: Customizing Display Options
Danatronics, Corp. 4 Customizing Display Options The ECHO series gages have several display options that are customizable based on your preferences. Backlight The gage is readable in direct sunlight as well as indoors. The backlight is always on by default, and it’s highly recommended to leave it on when using the gage indoors. - Page 31 ECHO Series Ultrasonic Thickness Gages Some color changes are dynamic, meaning you will see the changes as you make the selection (e.g., Flags, Background). Others, such as Waveform and Pop Up Background, can only be seen once the change is made and you return to the Home screen.
-
Page 32: User
Danatronics, Corp. User The ECHO series gage is compatible with both right-handed and left-handed users. To adjust your preference, follow the steps below: 1. From the Home screen, press the F1 – Menu key. The Menu screen appears. 2. Use the up and down arrow keys to select the Display option, and press the MENU/OK key. -
Page 33: Grid View
ECHO Series Ultrasonic Thickness Gages 4. Select either option: • Filled: Waveform will be solid • Outline: Waveform will be outlined 5. Press the MENU/OK key or the F1 – Back key to exit the screen. Grid View Grid view is a standard feature on any gage (version 2.07 or higher) equipped with the datalogger. - Page 34 Danatronics, Corp. 2. Use the up and down arrow keys to chose the any of the following parameters: • Off: Grid View remains off • Small Font: Determines how many rows and columns can be viewed simultaneously • Left Hand: Option for left hand users •...
- Page 35 ECHO Series Ultrasonic Thickness Gages If you have a suspect reading and would like to delete it from the system, follow the steps below: 1. Press F3 – Clear key. 2. Verify that you wish to delete the reading by pressing F2 – Yes key. If you decide not to delete the reading, then press F3 –...
-
Page 36: Adjusting The Initial Settings
Danatronics, Corp. 5 Adjusting the Initial Settings The ECHO series gages provide many usage settings that you can adjust depending on your location and preference. To get to the Initial Settings screen, follow these steps first: 1. From the Home screen, press the F1 – Menu key. -
Page 37: Clock
ECHO Series Ultrasonic Thickness Gages 1. Use the up and down arrow keys to select the Auto Off option and press the MENU/OK key. 2. Use the up and down arrow keys to scroll through the following settings. • 1–31 minutes: The gage will turn off automatically between 1–31 minutes •... -
Page 38: Language
There are multiple pre-loaded languages on the gage, such as: English, Italian, Spanish, French, German, Russian, Czech, Finnish, Chinese, Japanese, Hungarian, and Portuguese. Please contact Danatronics if you require a language other than the ones provided. To select a language, follow these steps: 1. -
Page 39: Advanced Locks
ECHO Series Ultrasonic Thickness Gages 2. Use the up and down arrow keys to change any of the following settings: • Off: The gage lock is disabled. • Key: The keys on the gage are locked. • Cal: Calibration keys and values cannot be modified. -
Page 40: Reset
Danatronics, Corp. Reset You can reset the gage parameters back to the default settings by performing a gage reset. Note: Performing a reset permanently deletes all of the saved parameters from the gage and replaces the settings with default values. -
Page 41: Units
ECHO Series Ultrasonic Thickness Gages 2. Use the up and down arrow keys to chose between the following options: • 0.01 IN/0.1 MM/0.1 US • 0.001 IN/0.01 MM/0.01 US 3. When finished, press the F1 – Back key to exit the screen. -
Page 42: Vibrate
Danatronics, Corp. 1. Use the up and down arrow keys to select the Beeper option and press the MENU/OK key. 2. Use the up and down arrow keys to chose between the following options: • Off: Disables the Beeper option •... -
Page 43: Changing Measurement Options
ECHO Series Ultrasonic Thickness Gages 6 Changing Measurement Options There are numerous options for taking measurements on the gage. All of the options can be made from the Measurements screen. To get to the Measurements screen, follow these steps first: 1. - Page 44 Danatronics, Corp. 2. Use the up and down arrow keys, followed by the MENU/OK key, to select any of the following options: • Alarm Type • Alarm High ref • Alarm Low Ref • Warning 3. If you select the Alarm Type option, you can chose from the following settings by using the up and down arrow keys: •...
- Page 45 ECHO Series Ultrasonic Thickness Gages Yellow indicates caution—the reading is nearing the Warning percentage set for a low or high alarm value: Green shows that the reading is safe within the alarm value margins: Note: The F4 key is not active in Alarm mode.
-
Page 46: Vibrating Alarm Display
Danatronics, Corp. 0.500") will result in the yellow keypad illuminating. Also, any reading above the low value of 0.101" and 0.120" will result in the yellow F2 key illuminating as you approach the minimum. In Alarm mode, choosing a non-zero percent value provides a warning for readings that approach the selected percent value of the high or low limits. -
Page 47: B-Scan
ECHO Series Ultrasonic Thickness Gages 2. Use the up and down arrow keys to select the setting you wish to change. • Off: Disables the Blank feature • On: Enables the Blank feature 3. When finished, press the F1 – Back key to exit the screen. -
Page 48: Saving An A-Scan While In B-Scan
Danatronics, Corp. Saving an A-scan while in B-scan If you would like to save an A-scan, you may do so while B-scan Save A-scan parameters are set to Never, Minimum, or Alarm. Below is an example: Note: We recommend using either Never or Min because the alarm will fill up the buffer quickly (61 events). -
Page 49: Differential (Diff)
ECHO Series Ultrasonic Thickness Gages Note: While in B-scan mode, you can use the left and right arrows to edit parameters real time such as gain, range, gates, etc. Differential (Diff) There are three Diff options from which to choose. -
Page 50: Echo-To-Echo
Danatronics, Corp. 3. If you select the Diff Type option, you can chose from the following settings by using the up and down arrow keys: • Off: Disables the Diff feature • Absolute: When this mode is enabled, the gage will display a thickness value as an absolute number of what has been entered. - Page 51 ECHO Series Ultrasonic Thickness Gages 2. Use the up and down arrow keys to select the following settings: • Off: Disables the Echo-to-Echo feature • On: Enables the Echo-to-Echo feature 3. When finished, press the F1 – Back key to exit the screen.
-
Page 52: Calibrating In Echo-To-Echo
Danatronics, Corp. Calibrating in Echo-to-Echo When using Echo-to-Echo it is best to use the transducers designated with a –EE part number, such as DK 537EE and DK 718EE. These transducers have greater damping, which allow for more stable readings in Echo-to-Echo mode. For gages with a live waveform, using the DKS537 is also possible. -
Page 53: Gain
ECHO Series Ultrasonic Thickness Gages 2. Use the up and down arrow keys to select any of the following settings: • Off: Disables the Fast feature • On: Enables the Fast feature. The LOS will work normally and not show the measured reading. -
Page 54: Hold
Danatronics, Corp. 2. Use the up and down arrow keys to toggle between the following two settings. • AGC (Auto Gain Control): When in AGC mode, the gage will use its sophisticated algorithms to automatically set the gain to the desired height. If echoes are not being detected but are somewhat visible, try increasing or decreasing the gain as described above. -
Page 55: Measure Type
ECHO Series Ultrasonic Thickness Gages 2. Use the up and down arrow keys to toggle between the following settings: • Off: Disables the Hold feature, so the gage does not continue to display the last measured thickness • On: Enables the Hold feature, so the gage continues to display the last measured thickness 3. -
Page 56: Range
Danatronics, Corp. 3. When finished, press the F1 – Back key to exit the screen. Range You can enter the range in which you are measuring when using the Range option. To set the Range option, follow these steps: 1. Use the up and down arrow keys to select the Range option and press the MENU/OK key. - Page 57 ECHO Series Ultrasonic Thickness Gages 2. Use the up and down arrow keys to select the settings you wish to change. RF: Both positive and negative lobes are displayed in the RF waveform, which the gives the greatest overall representation of position for more applications.
-
Page 58: Velocity
Danatronics, Corp. HW-: Displays the negative echo lobes as positive and does not show the positive lobes at all. An indicator is shown on the gage. 3. When finished, press the F1 – Back key to exit the screen. Velocity You can enter the range of velocity depending on your measurement needs and calibration by using the Velocity option. -
Page 59: Transducer
ECHO Series Ultrasonic Thickness Gages 3. When finished, press the F1 – Back key to exit the screen. Transducer The Transducer option allows you to match a transducer from the list to the transducer you are using on the gage. The Transducer screen is the first screen that appears on the gage and acts as a Home screen as well. -
Page 60: Special Gage Functions
Danatronics, Corp. 7 Special Gage Functions The ECHO series thickness gages have many special functions that go beyond the basics. This section will discuss these special gage functions in detail. Display Size Options The gage provides four different reading sizes on the display depending on your preference and operation environment. -
Page 61: Using The Save Option
ECHO Series Ultrasonic Thickness Gages 3. Use the up and down arrow keys to scroll through the tests in which you would like to select. 4. Press the MENU/OK key once you have selected the test you wish to perform. -
Page 62: Choosing Where To Save The Readings
DATA XL. Choosing Where to Save the Readings ECHO series has both internal and SD card memory. Be certain to select and note where your files are located, and always check for adequate memory before taking readings. -
Page 63: Using The Freeze Option
ECHO Series Ultrasonic Thickness Gages Note: Save is on the right. The data saved will depend on your setup parameters, which are selected from the Setup screen. For example, if the Notes option is set to Off then saved thickness reading will be stored at the ID location [Linear], [Row], [Col] without notes. -
Page 64: Advanced Locks
Danatronics, Corp. 2. Press the F2 - Unfreeze key to disable Freeze mode. Advanced Locks There are several types of advanced locks from which to choose. The available options are ideal for supervisors or managers who need to protect settings from being changed by other users. - Page 65 ECHO Series Ultrasonic Thickness Gages • Datalogger: Locks or unlocks datalogger settings • Keyboard: Locks or unlocks the keyboard • Measurements: Locks or unlocks measurement settings • Setups Locks: Locks or unlocks setups When locked, a lock symbol will appear next to the locked feature or a stored setup, as...
- Page 66 Danatronics, Corp. 5. Press the MENU/OK key. 6. Enter your 4-digit password/code by scrolling over each character and pressing the MENU/OK key. 7. Press F3 – Set key to complete the password. Note: If you forget or want to clear the password, enter 0081 to reset it. Once the code is activated, any locked function will require the password to unlock it.
-
Page 67: Using The Datalogger Directory Mode
ECHO Series Ultrasonic Thickness Gages 8 Using the Datalogger Directory Mode The datalogger has a built-in file and data management system. Each thickness reading and/or waveform is stored and tagged with an alphanumeric identification number and file name with descriptive field. A complete description of the measurement type, gage calibration, and setup parameters are stored along with each reading. - Page 68 Danatronics, Corp. Use the arrow keys to create a unique file name. Press the F4 – Create key when done. Use the up and down arrow keys to determine the file type and the amount of readings stored per file. The following file types include: •...
- Page 69 ECHO Series Ultrasonic Thickness Gages Note: It is not necessary to enter data into such fields as: Description, Location, Inspector ID, or Prefix. Description Location Inspector ID...
- Page 70 Danatronics, Corp. Configuration Linear Linear + CPT 2D + CPT Boiler Sequential...
- Page 71 ECHO Series Ultrasonic Thickness Gages B-scan Configuration After the file type is selected, press the F3 – Next key. Then use the arrow keys to select a number for the Step field, as shown below. Press the F4 – Next key when you are done.
- Page 72 Danatronics, Corp. Use the up and down arrow keys to select a pattern (standard or reverse). Press the F4 - Done key when you are finished. Standard Reverse The list of directories will appear. Simply highlight the file you want to open and press F2 for open or F3 to return to Measure screen Use the arrow keys to select any letter or symbol on the screen to create a Starting ID.
- Page 73 ECHO Series Ultrasonic Thickness Gages Once you have created a file, you may open the file, edit information, or delete the file from the datalogger. After you find the file name (e.g., “ECH09” as shown below), press the F4 – Next key.
- Page 74 Danatronics, Corp. Use the arrow keys to chose the file type (sequential, linear, or linear + CPT). Press the F4 – Next key when you are done. Sequential Linear Linear + CPT You will also need to decide, per file, if you want to save the thickness and an A-scan.
-
Page 75: Reviewing A File
ECHO Series Ultrasonic Thickness Gages Press the F1 – Save ASC key to save the measurement as an A-scan as show below: Reviewing a File To review a file from the Measurement mode screen in datalogger version only, follow these steps: 1. -
Page 76: B-Scan
Danatronics offers the EZ Scan 4 as a hardware option, which is a magnetic wheel, one axis encoder. When used with the ECHO 9DL or DLW, the image shows the... - Page 77 ECHO Series Ultrasonic Thickness Gages Distance Traveled (DT) so you can correlate the image on the gage to a spot that was tested. Follow the images below to help set up the B-scan. Image of a 5-step test block with both high and low alarms enabled The image above shows the B-scan after it stops.
- Page 78 Danatronics, Corp.
- Page 79 ECHO Series Ultrasonic Thickness Gages To set up a B-scan, go to measurement and turn B-scan on. Once B-scan is set to manual or (optional encoder), you will have other screen choices to select maximum thickness you expect to encounter. The max thickness should be set slightly higher than your maximum thickness so that the screen resolution on the vertical axis is maximized.
- Page 80 Danatronics, Corp. To review the image, use the left or right arrow key to scroll, or press the F4 - BEG key, for the Beginning of the image or the End of the image. Split A and B-scan When B-scan is enabled you can toggle between Full B-scan and Split Screen showing A-scan at the top and B-scan at the bottom by pressing the Display mode key (F4).
- Page 81 ECHO Series Ultrasonic Thickness Gages Saving A-scans with B-scan On CAUTION: Saving A-scan on alarm is limited to 65 A-scan and 185 B-scans and can fill up the buffer memory quickly. Below are descriptions of the different capacities in which the B-scan buffer can save thicknesses and A-scans.
-
Page 82: Technical Specifications
Danatronics, Corp. 9 Technical Specifications Product Specifications for the ECHO 9 Series Size: 7.25" (184 mm) (L) x 4.00" (101.5 mm) (W) x 2.00" (50.8 mm) (H) Weight: 1.15 lbs (0.52 kg) with internal Li-Ion battery. 1.0 lb. (0.45 kg) with optional Alkaline tray including 3 AA batteries Display: 3.5"... - Page 83 ECHO Series Ultrasonic Thickness Gages Gain: Low, Standard and High for gages without waveform, 20 – 94 db in 1 db increments Blanking: Main Bang Blank and Blank After First Received Echo Zoom: Automatically centers echos in the center of the display independent of...
- Page 84 5MHz, 0.375 inch diameter transducer with potted cable, 2oz bottle of couplant, operation manual, Data XL interface program, USB cable, Charger Adapter, Transport Case. *A transducer is included with each model. Contact Danatronics for details. Available software options: Datalogger with B-scan, Live waveform, Precision...
-
Page 85: Software Options For The Echo 9 Series
ECHO Series Ultrasonic Thickness Gages 10 Software Options for the ECHO 9 Series Datalogger with B-scan The B-scan represents a cross sectional view on the test piece. The simplest example is to show a 5-step test block. To turn on the option B-scan for EHC-09 series press the MENU/OK key, go to Measurement, find B-scan and press the MENU/OK key. -
Page 86: Floating Gate
The floating gate is a software option that can be enabled remotely by supplying Danatronics with your ECHO serial number and options code found under the Menu and Initial Settings parameters. Danatronics will provide you with a code to unlock the floating gate. -
Page 87: Tracking Gate
ECHO Series Ultrasonic Thickness Gages There are also “hot” keys above F2 for -6db, and F4 for -12db. Press F3 to enter the Measurement screen. A gate floating at the -3db point of the peak amplitude with edge depth set with a thickness of 0.400" is shown below. Note, you cannot change to peak depth when the floating gate is activated, and the image below does not capture the flashing letter “F”... - Page 88 Danatronics, Corp. In the next image shown below, Gate 2 automatically moved to the right. It starts at the graticule while the above image started at around the 3 division without touching the range or gate positions. When using tracking gate, normally the measurement box is set to Echo-to-Echo.
-
Page 89: Peak Pitch Memory
ECHO Series Ultrasonic Thickness Gages Note: All these setups can be saved as custom setups by going to the Setups screen and then pressing the F2 key to save and give the setup a new name. Peak Pitch Memory This patent pending features is standard on ECHO FD with software version 2.08 or higher. -
Page 90: Transducers
Danatronics, Corp. Transducers Danatronics offers the use of a wide variety of primarily dual probes with the EHCO 9 series as well as a few delay line probes. See chart below for specifications on our available probes. - Page 91 ECHO Series Ultrasonic Thickness Gages...
-
Page 92: Acoustic Sound Speed For Common Materials
Danatronics, Corp. Acoustic Sound Speed for Common Materials The sound velocity table below shows a list of the speed of sound in various materials. This information is necessary to have when using the gage as the speed of the ultrasound moving through the material in question needs to be programmed into the gage to obtain an accurate thickness. - Page 93 ECHO Series Ultrasonic Thickness Gages Monel 0.210 5400 Neoprene 0.063 1600 Nickel 0.220 5600 Nylon, 6.6 0.100 2600 Oil (SAE 30) 0.067 1700 Platinum 0.130 3300 Plexiglas 0.110 1700 Polyethylene 0.070 1900 Polystyrene 0.0930 2400 Polyurethane 0.0700 1900 Quartz 0.230 5800 Rubber, Butyl 0.070...
-
Page 94: Updating The Echo 9 Gage
Danatronics, Corp. Updating the ECHO 9 Gage To update an ECHO 9 gage, follow the below steps: 1. Power on the ECHO 9 gage by holding the F1 key until the unit beeps and displays the splash screen. 2. Connect the ECHO 9 gage via a USB cable to a computer that already has Data XL software (v3.7.4 or higher) installed on it. -
Page 95: Updating A Thickness Gage To Be Compatible With Windows 8 Or Windows 10 Usb
ECHO Series Ultrasonic Thickness Gages Updating a Thickness Gage to be Compatible with Windows 8 or Windows 10 USB With Windows 8 and Windows 10 there can be USB enumeration problems between the host computer and a thickness gage. Windows can report a “USB device not recognized”... -
Page 96: Exporting Files From A Gage
Danatronics, Corp. 2c. Click the “Start Download” button which will commence with the software update. Shortly after, the update program will proceed to update the thickness gage. Once the update is completed the screen will display a message to “Unplug USB cable to turn off power”. At this point the software update process is completed and the thickness gage will now successfully enumerate via USB with a computer running Windows 8 or Windows 10. - Page 97 ECHO Series Ultrasonic Thickness Gages 4. Click the “Refresh Gage Button” button in Data XL to get the file list loaded into Data XL. 5. The files that are present in the gage will now appear in the left side file list in the “Gage”...
- Page 98 11 Additional ECHO Series Gage Information ECHO 7 and ECHO 8 Series In addition to the ECHO 9 Thickness Gage, Danatronics also offers the ECHO 7 Precision Gage and the ECHO 8 Corrosion and Precision Gage. Described below are some of the applications and uses for the ECHO 7 and the ECHO 8 when it is set in precision mode.
- Page 99 ECHO Series Ultrasonic Thickness Gages Gages equipped with the Live Waveform option will have a screen similar to the one shown below, which is a 1" test block with echoes displayed and un-calibrated at 0.9953". The calibration procedure for ECHO 7 and 8 is the same as described in this manual.
- Page 100 Danatronics, Corp. Range: Displays how much material range, e.g. 5.000" Delay: Delays start of signal Main Bang Blank (MB blank): Used to eliminate main bang recover noise ECHO Window: End of maximum time (material) to be measured ECHO 1 Detect: + or –...
- Page 101 ECHO Series Ultrasonic Thickness Gages 12 Technical Assistance Call Danatronics, Corp. at 978-777-0081 or email us at sales@danatronics.com for specific technical assistance or troubleshooting questions.
Need help?
Do you have a question about the ECHO Series and is the answer not in the manual?
Questions and answers