
Related Manuals for Vident iMax Series

Summary of Contents for Vident iMax Series
- Page 1 Series Scan Tool USER MANUAL SHENZHEN VIDENT TECHNOLOGY CO., LTD Copyright ©2017 Vident Tech.
- Page 2 General Notice For your own safety and the safety of others, and to prevent damage to the equipment and vehicles, read this manual thoroughly before operating your scan tool. The safety messages presented below and throughout this user’s manual are reminders to the operator to exercise extreme care when using this device.
-
Page 3: Table Of Contents
Table of Contents 1 GETTING STARTED............................1 1.1 Tool Descriptions............................1 1.2 Accessory Included............................ 2 1.3 Specifications.............................. 2 1.4 Preparation &Connections........................2 1.4.1 Preparation............................2 1.4.2 Connecting to Vehicle........................2 1.5 System Setup.............................. 2 1.5.1 Select Language..........................3 1.5.2 Unit of Measure..........................3 1.5.3 Beeper set............................ - Page 4 3.8 TPMS Adaptation........................17 3.9 Immobilizer..........................17 3.10 Injector Coding........................17 3.11 Gear Learning........................17 3.12 Suspension Match........................17 3.13 Sunroof Initialization......................18 3.14 Gearbox Match........................18 3.15 .Ajuste Fuel...........................18 3.16 Odometer Calibration......................18 3.17 AFS (Adaptive Front Lighting System) .................18 3.18 PFP (Prime an Electric Fuel Pump)..................18 3.19 Turbo Match........
-
Page 5: Getting Started
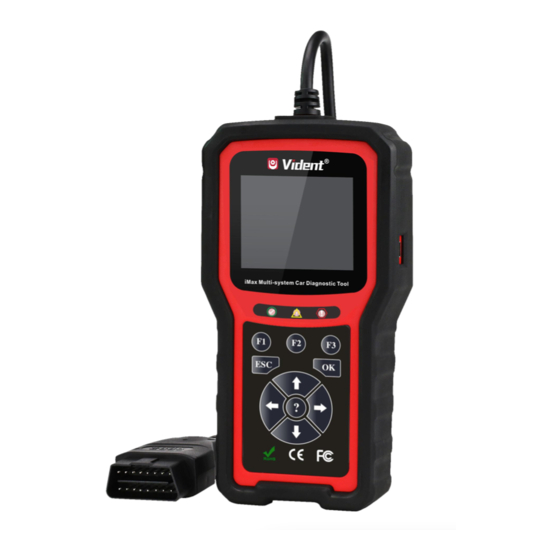
1 Getting Started iMax series is professional level diagnostic handheld tool, offering fundamental and basic diagnosis of full systems for certain car manufacturer. Featured with all supported system diagnosis including engine, transmission, ABS, Airbag, instrument, steering wheel, etc., and more than 10 commonly required services, iMax series tool is a poweful must-have for each car owner. -
Page 6: Accessory Included
RIGHT SCROLL Key-goes to next character when looking up DTCs. Scrolls back and forth through codes found and through different screens of data. Also it is used to cancel all selections of PIDs when viewing custom PID list. J,M, N Shortcut Key -configure user’s usual and favorite choices.Whenever there is choices at bottom of diagnostic menu, they can also be used as confirmation button. -
Page 7: Select Language
1.5.1 Select Language English is the default language. 1. Select Language from Setup menu and press the OK key. 2. Press the LEFT/RIGHT arrow key select a language and press the OK key to confirm. 1.5.2 Unit of Measure To change the unit setup: 1. -
Page 8: Beeper Set
1.5.3 Beeper set The default setting is Beep on. 1. Select Beep Set from Setup menu and press the OK key. 2. Press the LEFT/RIGHT arrow key to set the beep on or off and press the OK key to save. 1.5.4 Key Test This function checks if the keys are working properly. -
Page 9: About
2. When completed, press the ECS key to exit. 1.5.6 About Selecting Setup>About option opens a screen that show information about your scan tool, such as serial number and register password which may be required for product registration. 1.5.7 Configure Shortcut Keys Selecting Shortcuts option lets you to change the functionality of the shortcut buttons. -
Page 10: Diagnostic Operations
3. Scroll with the UP/DOWN arrow keys to highlight an application and press the OK key to assign the application to the shortcut key. 2 Diagnostic Operations This section illustrates how to use the scanner to read and clear diagnostic trouble codes, and view “live”... -
Page 11: Manual Vin Entry
2. The scan tool starts to communicate with the vehicle and read the Vehicle Specification or VIN Code automatically. 3. Answer YES if the Vehicle Specification or VIN code is correct and a menu of controller selection displays. Answer NO if it is incorrect, and you are required to enter the correct VIN number manually. -
Page 12: Manual Vehicle Selection
2. Input a valid VIN code and use the function key Finish to confirm. The scan tool starts to identify the vehicle. 2.1.3 Manual Vehicle Selection Manual Vehicle Selection identifies a vehicle by making several selections according to certain VIN characters, such as sub-brand, model year, and engine size. 1. - Page 13 2. When the test finished, press the function key Save on the screen, and a screen with a virtual keyboard displays. 3. Enter a unique name for this vehicle and save it, and you will see this new vehicle in Vehicle Data Recorder menu.
-
Page 14: System Selection
2. Select the vehicle under test and press the OK key. 2.2 System Selection When you have completed the identification of vehicle, a menu for selecting systems to test displays. Menu options typically are Auto Scan ● Control Unit ● 2.2.1 Auto Scan Auto Scan performs an automatic system test to determine which control modules are installed on the vehicle and obtain diagnostic trouble codes (DTCs) overview. -
Page 15: Control Unit
2.2.2 Control Unit Control Unit screen displays all controllers available to this specific vehicle manufacturer. 1. Select Control Unit from the menu and press the OK key. A controller menu displays. 2. Select the system you would like to test. When the scan tool has established connection with the vehicle, the Function Menu displays. -
Page 16: Diagnostic Function
2.3 Diagnostic Function After a system is selected and the scan tool establishes communication with the vehicle, the Function Menu displays. Typically the menu options are Read Codes ● Erase Codes ● Freeze Frame ● ECU Information ● Live Data ●... -
Page 17: Erase Codes
2.3.2 Erase Codes Erase Codes menu lets you to clear all current and stored DTCs from a selected control module. Also it erases all temporary ECU information, including freeze frame. Erase Codes does not fix the problem that caused the fault! DTCs should only be erased after correcting the condition(s) that caused them. -
Page 18: Live Data
2.3.5 Live Data Live Data menu lets you view and record real time PID data from a selected vehicle electronic control module. Menu options typically include: Complete Data List ● Custom Data List ● 2.3.5.1 Complete Data List Complete Data List menu lets you view all live PID data from a selected system. 1. -
Page 19: Custom Data List
3. Press the function key Merge Graph to display two PID plots in one coordinate for easy and intuitive diagnosis. 4. To record the data to memory of the scan tool, use the function key SAVE, and press Stop Saving to stop recording at any time. 5. -
Page 20: Common Special Services/Functions
Typical service operation screens are a series of menu driven executive commands. Follow on-screen instructions to complete the operation. (Following services are applied to iMax series depending on specific car makes.) 3.1 Oil Light Service/Reset a)If the service lamp is on, you must provide service for the car. After service, you need to reset the driving mileage or driving time so that the service lamp turns off and the system enables the new service cycle. -
Page 21: Diesel Particulate Filter (Dpf) Regeneration
and closing brake pads, and setting brakes after disc or pad replacement, on multiple brands of vehicles where electronic brake systems are fitted. 3.5 Diesel Particulate Filter (DPF) Regeneration DPF Regeneration menu let you perform the DPF cleaning to clear the blockage through continuous burning of the particulates captured in the DPF filter. -
Page 22: Sunroof Initialization
When the car body height sensor and control module in the air suspension system are replaced or the car level is incorrect, perform this function to adjust the car body height sensor for horizontal calibration. 3.13 Sunroof Initialization This function is used to set sunroof lockup close, close on rainy days, slide/tilt sunroof memory function, outside temperature threshold, etc. -
Page 23: Dashborad Language Change
position memory stored in the seat ECU. The seat (position control) ECU may need to be initialized if the seat memory settings cannot be recorded. 3.22 Dashborad Language Change This routine is to change language displayed in the instrument. 3.23 Clutch Adaptation Importance of clutch pedal free-play. -
Page 24: Live Data
4.3 Live Data Live Data menu lets you view, record and playback real time PID data from the electronic control module. Menu options typically include: View Data ● Record Data ● Playback Data ● 4.3.1 View Data The View Data function allows real time viewing of the vehicle’s electronic control unit’s PID data, including sensor data, operation of switches, solenoids and relays. -
Page 25: Playback Data
6. Press the OK key to start recording or wait codes to trigger. NOTE Different vehicles communicate at different speeds and support a different number of PIDs. Therefore, the maximum number of frames that can be recorded varies.The code reader keeps recording data until ●the memory is full. - Page 26 Oxygen Sensor Heater Monitor Exhaust Gas Recirculation System Monitor NOTE To review I/M Readiness status, make sure that the ignition key is switched to ON with the ● engine off. Not all monitors are supported by all vehicles. ● To retrieve I/M Readiness Status data by one-click I/M readiness key: 1.
- Page 27 To retrieve I/M Readiness Status data : 1. Scroll with UP/DOWN key to highlight I/M Readiness from Diagnostic Menu and press the OK key. If vehicle supports both types of monitors, a screen for monitor type selection displays. Select a monitor type and press the OK key. 2.
-
Page 28: O2 Monitor Test
4.6 O2 Monitor Test 1. Use the UP/DOWN key to highlight O2 Monitor Test from Diagnostic Menu and press the OK key. Use the UP/DOWN key to highlight an O2 sensor and press the OK key to confirm. 2. Use the up and down arrow keys to scroll through data to select lines, and left and right arrow keys to scroll back and forth through different screens of data. -
Page 29: Component Test
4.8 Component Test Component Test allows the code reader to control operation of vehicle components, tests or systems. 1. Use the UP/DOWN key to highlight Component Test from Diagnostic Menu and press the OK key. 2. Use the UP/DOWN key to highlight a system or component, press the OK key to start test and the code reader displays the message “Command Sent!”... -
Page 30: Playback Data
ENTER key. 2. A screen with detailed information displays. 5 Playback Data The PlayBack data function allows viewing test results recorded by the scan tool. 1. Select PlayBack from home screen and press the OK key. 2. A screen with a list of test records displays. If no data is recorded, the message “No Data available!”... -
Page 31: Software Update And Printing
4. If you are reviewing live data or freeze frame data, use the function key Next Frame or Pre. Frame to scroll through all possible frames when necessary. 5. To erase a record, scroll with the arrow keys to highlight it and press the function key Delete. To delete all records, press the function key Delete All. - Page 32 3.Tick a piece of data to either review it or print it out.
- Page 33 SHENZHEN VIDENT TECHNOLOGY CO., LTD Visit our website www.videnttech.com For Technical Assistance, send us email support@videnttech.com...
Need help?
Do you have a question about the iMax Series and is the answer not in the manual?
Questions and answers