Advertisement
Quick Links
Advertisement

Related Manuals for PortKeys BM5


Summary of Contents for PortKeys BM5
- Page 1 B M 5 Vtfs!Nbovbm TIFO[IFO!QPSULFZT!FMFDUSPOJD!UFDIOPMPHZ!DP/-MUE...
-
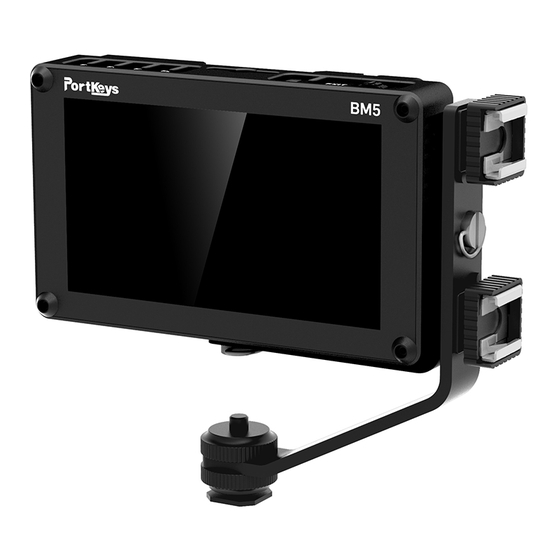
Page 2: Standard Accessories
Product Appearance Size Standard Accessories BM5 Monitor X1 Power Cord (Aviation Camera Control Cable X1 Head - D-TAP) X1 Tempered Glass Film X2 Power Cord (Aviation Screen Cleaning Wipe X1 Head - DC) X1 83MM Warranty Card X1 Screen Protection PC Board X1 M2 L-Type Inner Allen Key X1 U Disk(Manual,3D LUTs,... - Page 3 Supported input/output resolution and frame rate [Video Config] HDMI Signal Brightness 0~100 Press MENU, Then 1920×1080p@23.97Hz,24Hz,25Hz,29.97Hz,30Hz,50Hz,59.94Hz,60Hz 0~100 1920×1080psf@23.97Hz,24Hz,25Hz,29.97Hz,30Hz Contrast Press MENU, Then 1920×1080i@50Hz,59.94Hz,60Hz 0~100 Chroma Press MENU, Then 1280×720p@50Hz,59.94Hz,60Hz 0/10/20/30/40/50/60/70/80/90/100 Sharpness Press MENU, Then 720×576p&720×576i@50Hz 0~100 Tint Press MENU, Then 720×480p&720×480i@50Hz,59.94Hz,60Hz 5600K/6500K/7500K/9300K/Manual Color Temperature...
- Page 4 *UnderScan [LUT Config] Backlight* *Histogram Copied the cube format LUT file to the U disk, then insert it to BM5 USB interface. Note: Set these functions in the custom On(Null)/Off Press MENU, Then shortcut function key, long press in 3...
- Page 5 Camera Control Grids Long press in 3 sec set " " onto one custom function key Long press in 3 sec set " " onto one custom function key [Camera Control Setting] [Grids Setting] *The signal needs to be connected before setting. Canon/Canon(LANC)/Sony/Sony(LANC)/ Camera Grids...
- Page 6 Factor 0~128 Press MENU, Then Audio Meters Long press in 3 sec set " " onto one custom function key Color Blue/Black/White/Red/Green Press MENU, Then [Audio Meters ] Exit Audio Meters On/Off Press MENU, Then UnderScan Long press in 3 sec set " "...
- Page 7 [Waveform Setting] Luma Waverform On/Off Press MENU, Then Luma L+B/M+B/R+B/L+T/ Position Press MENU, Then Waveform Four Screen Press MENU, Then M+T上/R+T/L+C/R+C Waverform Back Options > Blending RGB Waverform On/Off Press MENU, Then SDI WF Mode On Screen/Output R+B/L+T/M+T/R+T/ Press MENU, Then Position Press MENU, Then L+C/R+C/L+B/M+B...
- Page 8 Touch Gestures Instructions: Canon Click Slide Display shortcut key Canon Drag image on/off and signal parameter information Double finger pinch Double finger spread Zoom out image Zoom in image Camera Control Page Introduction zoom Motor IRIS 18 19 AUTO TIME www.pkscorp.com TEL:4008090896...
- Page 9 Canon(LANC) 1、 (a): Click " ",Focus Adjustment FOCUS (During adjusting focus,peaking will be turned on actomatically and turned off in 1s delay ) (b): Click " ",Aperture Size Adjustment(+/-) (c): Click " ",Shutter Time Adjustment(+/-) (d): Click " ",ISO Control Adjustment(+/-) 2:...
- Page 10 16: After setting,the Motor Drive runs zoom automatically at A/B point 17: Drag to adjust Motor Drive's travel Motor IRIS 18: A/B point operation speed adjustment 20 21 19:Motor Drive POST 20:A point set/cacel AUTO TIME 21:B point set/cacel Sony 1、...
- Page 11 9: Switch to Control ISO Adjustment 10: Adjust NO.1 Motor Drive of Nucleus-M or Nucleus-N 11: Adjust NO.2 Motor Drive of Nucleus-M 12: Adjust NO.3 Motor Drive of Nucleus-M 13: After setting,the Motor Drive runs automatically at A/B point 14: Drag to adjust Motor Drive's travel 15:...
- Page 12 (b): Click " ",Focus Length T/W Control Page (c): Click " ",Aperture Size Adjustment(+/-/Auto) (d): Click " ",Handle Wheel can be Adjusted (+/-) 2: Record (During REC on, hidden other icons. If it is not on focus mode, It will be transfered to focus mode by compulsory) 3:...
- Page 13 9: After setting,the Motor Drive runs Panasonic automatically at A/B point 10: Drag to adjust Motor Drive's travel 11: A/B point operation speed adjustment 12: Motor Drive POST 13: A point set/cacel Panasonic 14: B point set/cacel BMPCC zoom Motor IRIS BMPCC 13 14...
- Page 14 Remote zoom Motor IRIS 14 15 AUTO TIME Remote 1、 (a): Click " ",Focus Adjustment FOCUS (During adjusting focus,peaking will be turned on actomatically and turned off in 1s delay ) (b): Click " ",Aperture Size Adjustment(+/-/Auto) zoom 2: Record Motor IRIS 3:...
- Page 15 8: Drag to adjust Motor Drive's travel 9: A/B point operation speed adjustment 10: Motor Drive POST 11: A point set/cacel 12: B point set/cacel Z CAM E2 Z CAM E2 Z CAM E2 Z CAM E2 www.pkscorp.com TEL:4008090896...
- Page 16 12: Switch to Control ISO Adjustment (When switch to camera control function,adjustment key zoom will be changed as well) Motor IRIS 13、 (a): Click " ",Resolution adjustment (b): Click " ",Frame adjustment 30 31 (c): Click " ",Manual frame adjustment (d):...
-
Page 17: Main Firmware Upgrade
Function Setup into firmware interface. > Main firmware upgrade: Firmware Exit Unzip the upgrade files of the main firmware,and then send the upgrade file (BM5.bin) to the root directory Firmware Select Firmware of the U disk. > Version Information Upgrade(USB) >... - Page 18 (Do not power off during this process). After completing the upgrade,boot up the Firmware Ver monitor and click Main BM5-V1.01.23 Menu → Firmware → Virsion Information to confrim whether the software is successfully upgraded. www.pkscorp.com TEL:4008090896...
Need help?
Do you have a question about the BM5 and is the answer not in the manual?
Questions and answers