Table of Contents
Advertisement
Quick Links
Actiheart Guide to Getting Started 5.1.11 (Feb 2020)
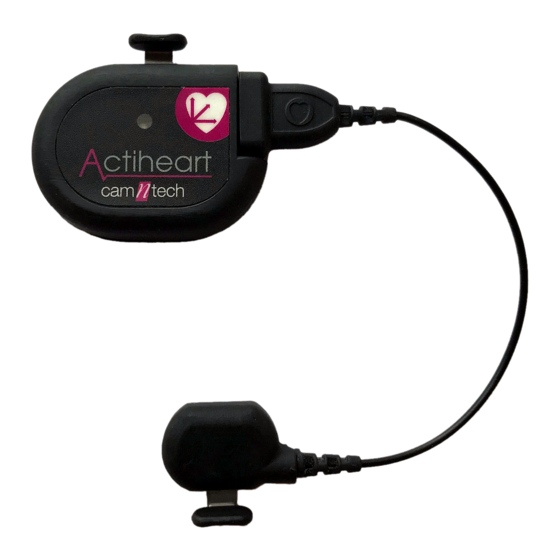
The Actiheart
Guide to Getting Started
Covering Actiheart & Actiheart Software
Document Reference:
Issue Version:
Issue Date:
This equipment must be configured and operated
in accordance with these instructions and in
conjunction with: 'The Actiheart 5 User Manual'
30209
5.1.11
24/02/2020
1
Advertisement
Table of Contents

Related Manuals for CamNtech Actiheart 5


Summary of Contents for CamNtech Actiheart 5
- Page 1 Covering Actiheart & Actiheart Software Document Reference: 30209 Issue Version: 5.1.11 Issue Date: 24/02/2020 This equipment must be configured and operated in accordance with these instructions and in conjunction with: ‘The Actiheart 5 User Manual’ Actiheart Guide to Getting Started 5.1.11 (Feb 2020)
-
Page 2: Regulatory Information
Energy Expenditure and research related to HRV and is NOT indicated for use in clinical applications. Please contact CamNtech UK for advice on application if further clarification is required. The CE mark is applied to the Actiheart to indicate conformity with the following Directives: Electromagnetic Compatibility Directive 2014/30/EU. -
Page 3: Important Safety Information
IMPORTANT SAFETY INFORMATION WARNINGS • Contains Lithium Battery – DO NOT ATTEMPT TO DISSASEMBLE: No user serviceable parts, danger of chemical hazard if battery is damaged. • Not Defibrillation proof. • Not indicated for use on areas of broken, damaged or irritated skin. •... -
Page 4: Table Of Contents
7.2 Downloading Recorded Data from the Actiheart......................21 7.3 Storing Comments with the Data ..........................22 7.5 Analysing the Signal Quality ............................22 8.0 Viewing Live Actiheart 5 Data ......................... 24 8.1 Set up for Live Display ..............................24 8.2 Pairing (for first use) ..............................25 8.3 Live Display on the PC .............................. - Page 5 IMPORTANT BATTERY CARE INFORMATION! The Actiheart device contains a miniature rechargeable battery which must be cared for correctly to maximise service life. Following any long recording, always ensure the battery is at least partly re-charged - do not leave it completely flat before storage. However, it need not be completely recharged. If the device is to be stored for an extended period then it should ideally be part-charged rather than left either completely full or empty.
-
Page 6: Introduction To The Actiheart System
1. Introduction to the Actiheart System 1.1 Overview The Actiheart 5 and is a compact lightweight device that records the electrocardiogram (ECG) between two ECG pads on the chest, simultaneously with three-axis acceleration waveforms within the same unit. Alternatively, the Actiheart 5 can record ECG peak information for continuous Inter-Beat-Interval (IBI) monitoring for up to two weeks, in addition to three-axis acceleration waveforms. -
Page 7: Installing The Actiheart Software
Installation Menu Place the CD-ROM into the drive; the operating system should automatically offer to install the Actiheart 5 software. You will then see the installation wizard below: To install the software, click “Next” and follow the installation process prompts. If... -
Page 8: Installing The Usb Drivers
Actiheart Software The Actiheart 4 software may be installed and used alongside the Actiheart 5 software. The use of Actiheart 4 devices is fully supported in the newer version, and we would recommend upgrading to it whenever possible. It also better supports installation for non-admin users than the older software. - Page 9 When you register your Actiheart system with CamNtech, you will be supplied with an 8 digit serial number along with the software. This serial number is unique to the user and will enable the user to obtain software support from CamNtech.
-
Page 10: Charging The Actiheart
Furthermore, full battery charge information can be checked using the Utilities -> Actiheart 5 -> Test Window function and then the “Battery” button. If charged, this will show a result similar to: If you experiencing any battery charge issues, leave the Actiheart connected to a mains powered USB supply for at least three hours. -
Page 11: Charging The Actiheart Using The Mains Power Supply
1. Select and fit appropriate ac input socket adaptor for country of use. 2. Plug the mains power supply into the wall outlet. 3. Connect the Actiheart 5 to the charger using the supplied cable. Actiheart Guide to Getting Started 5.1.11 (Feb 2020) -
Page 12: Setting Up A Database
4.0 Setting up a Database All data used in the Actiheart system is stored in SQLite databases. For full details of the databases used by the system, please see the chapter in the main manual on databases. For now, note that when the software is first run, the window below will be displayed. -
Page 13: Preparing For A Recording
3M Red Dot 2560. These are extremely adhesive pads that provide very good adhesion for short term use. The downside of this is that on removal, CamNtech has noticed some gel residue left on the skin. They are not really suitable for long term use. -
Page 14: Multi-Day Wear Of Ecg Pads
Use an abrasive material to remove the top layer of skin. The ideal preparation material is a Cardio prep which is similar to very fine emery paper. One that CamNtech has tried with success is the Cardio Prep from Unomedical, stock code 2121M. These are low cost adhesive backed skin preparation pads which are supplied in packs of 50. -
Page 15: Positioning Of The Actiheart
Rauharju et al. breast tissue appears to have a practically negligible effect on ECG amplitudes, and in women, the placement of chest electrodes on the breast rather than under the breast is recommended in order to facilitate the precision of electrode placement at the correct horizontal level and at the correct lateral positions. -
Page 16: Use Of The Actiheart In Water
5.5 Use of the Actiheart in Water Although the Actiheart is waterproof, use in the water, for example when swimming, can result in movement of water and the Actiheart, which will result in noise on the ECG signal. This can be avoided by covering the Actiheart unit completely with a swimsuit which will isolate movement over that area, or large waterproof plaster or equivalent whilst swimming. -
Page 17: Setting Up A User In The Database
6.0 Setting up a User in the Database Once the subject has been fitted with ECG pads and before a recording is started it is necessary to set up the user in the selected database. A user can be set up in any of the recording modes but prior to commencing any important recording it is recommended that the level of signal being picked up by the unit is checked by recording a short signal test, so this is usually the most appropriate place to set... -
Page 18: Setting Up A New User
The required user can now be selected from the list and the recording can be set up as detailed in Section 7. 6.2 Setting up a new User If a new user is being set up, selecting ‘Add New’ produces the following screen: The user ID, date of birth and sex are entered here. - Page 19 Once entered, selecting ‘Next’ produces the final user details window: This screen allows an estimate of the maximum heart rate and sleeping heart rate to be entered. Neither of these are essential at this point. In general, all user details can be modified after initial entry in order to facilitate more accurate analysis at a later date.
-
Page 20: Checking Signal Integrity And Performing A Test Recording
The signal test can also be performed with an Actiheart 4. In general, when using any setup function in the software, you may attempt to connect an Actiheart 5, Actiheart 4 & dock, or Actiwave Cardio & dock and the software will attempt to offer you the most suitable modes in all cases. -
Page 21: Downloading Recorded Data From The Actiheart
You may enter an additional ‘Test ID’ (i.e. to identify this particular test for this user). Note that the exact modes displayed in this window will depend on the device connected. Click the ‘Send’ button to write the setup information into the Actiheart. -
Page 22: Storing Comments With The Data
the micro-USB lead with connector logo facing upwards as for the main Actiheart logo. After connecting the Actiheart back to the PC there are two options for reading the data. The data can either be read from the recording mode / application that the unit was set up in using the “Read”... - Page 23 Any areas of the recording that have failed the test are displayed in red on the scan as shown in the screen below. You may click on the scroll bar just above the red / green bar to move the main data display to that point. This will allow you to examine each 10 second region which may have been problematic.
-
Page 24: Viewing Live Actiheart 5 Data
8.1 Set up for Live Display To view live data from an Actiheart 5 BT, you must choose the Live Display mode when setting up the device. This can be done from the Waveform or Step Test setup window. As an example, the Step Test Setup is shown below. -
Page 25: Pairing (For First Use)
Click on the Actiheart 5 BT in order to pair with it, and close the window. 8.3 Live Display on... -
Page 26: Capabilities & Requirements
Utilities -> Actiheart 5. Several Actiheart 5 BT live streams can be shown simultaneously. The windows may be opened automatically as each is set up, or through the Utilities window as described above. -
Page 27: Summary Of Recording, Reading And Analysis Options
This section summarises both the physical recording capabilities of the Actiheart 5, and the focus of the main operating modes of the software both for configuration and analysis. -
Page 28: Setup And Analysis Functions Summary
IBI Monitoring: Designed for capturing and measuring heart rate variability for up to two weeks. Requires IBI recording, and activity data quantifying the amount of movement each 15 seconds. Using an Actiheart 5, IBI Mode. Long Term: Designed for robustly capturing heart rate and movement data for up to two weeks, without emphasis on individual IBIs. - Page 29 EE calibrations. Due to the lack of rigid specific intent, this cannot be done automatically. Using an Actiheart 5, Full Waveform Mode. Actiheart Guide to Getting Started 5.1.11 (Feb 2020)
-
Page 30: Appendix 1 - Handling & Environmental Information
CamNtech has registered with an approved producer compliance scheme (PCS) in accordance with the requirements of the WEEE Directive. • CamNtech will provide free recycling for all of its WEEE products when returned to them. • CamNtech WEEE products will be designed with recycling, reuse and waste management as a consideration. -
Page 31: Appendix 2 - Troubleshooting
(see section 5). The Actiheart is not recognised by the PC – Ensure the Actiheart battery is fully charged. If the Actiheart is not detected at all, contact CamNtech or your local agent for support. I received read errors during download –... - Page 32 5.0.6 5.0.6a 01/02/2019 Corrected doc ref, corrected page no. position, minor layout corrections. 5.0.6a 5.0.28 01/12/2019 Inclusion of live Actiheart 5 data display 5.0.28 5.0.29 31/12/2019 Updated CamNtech address details 5.0.29 5.1.11 24/02/2020 Updated for longer IBI recordings up to two weeks...
Need help?
Do you have a question about the Actiheart 5 and is the answer not in the manual?
Questions and answers