Dreamland R7507 Instructions For Use Manual
Luxury heated throw
Hide thumbs
Also See for R7507:
- Instructions for use manual (12 pages) ,
- Instructions for use manual (12 pages)
Summary of Contents for Dreamland R7507
- Page 1 LUXURY HEATED THROW TYPE R7507 R7523 Instructions for use MI003585_R75.indd 1 MI003585_R75.indd 1 03/04/20 17:04 03/04/20 17:04...
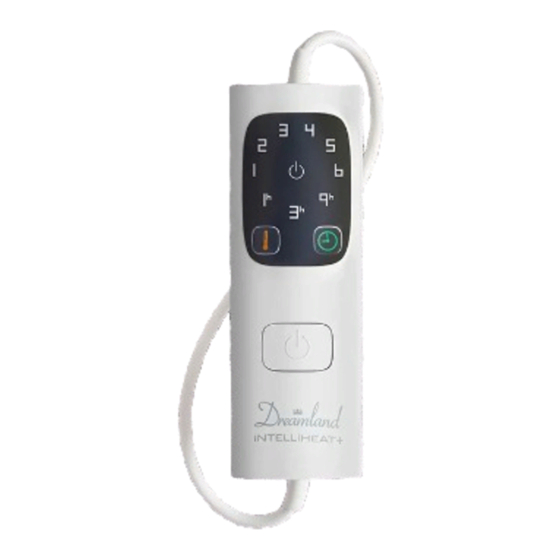
- Page 2 4. Rating Label 10. Auto shut off timer LED 5. Throw 11. Temperature LED 6. Timer selector TECHNICAL DATA TYPE R7507 TYPE R7523 220-240 V 50/60 Hz 150 W 220-240 V 50/60 Hz 150 W MI003585_R75.indd 1 MI003585_R75.indd 1 03/04/20 17:04...
- Page 3 Dear Customer, thank you for choosing our product. We feel certain you will appreciate its quality and reliability as it was designed and manufactured with customer satisfaction in mind. These instructions for use are compliant with the European Standard EN 82079. INDEX Illustrative guide page 1...
- Page 4 IMPORTANT INSTRUCTIONS. RETAIN FOR FUTURE USE. WARNING! Instructions and warnings for safe use. Before using this appliance, carefully read the instructions for use and in particular the safety notes and warnings, which must be complied with. Keep this manual together with its illustrative guide for future consultation.
- Page 5 • This appliance is only to be used with the types of detachable control unit that are marked on the appliance. Children under the age of three are not to use this appliance due to their inability to react to overheating. •...
- Page 6 DO NOT INSERT PINS OR NEEDLES. • When storing the appliance, allow it to cool down before folding. WARNING! DO NOT crease the appliance by placing items on top of it during storage. WARNING! For use, cleaning, maintenance and storage of the appliance, please follow the instructions specified in the corresponding chapters.
- Page 7 • Insert the plug of the control unit cable in the mains socket (3). Every time the plug is inserted, the control unit automatically performs a self-diagnosis, lighting up all LEDs (10, 11) in a clockwise sequence for around two seconds. SWITCHING ON AND SELECTING THE RIGHT TEMPERATURE The control unit can be set to the following temperature levels: 6: Fast pre-heat temperature...
- Page 8 AUTO SHUT OFF TIMER The throw has an automatic shut off timer of 1,3 or 9 hours. When switched on, the control unit automatically sets itself to 1 hour on the auto shut off timer and LED 1h lights up in green (10).
- Page 9 but at the end of the drying cycle it must be air-dried to allow it to dry completely. • Remove the throw from the tumble dryer at the end of the drying cycle and reshape it to its original size. •...
- Page 10 TROUBLESHOOTING This chapter describes the most common problems that can arise using the appliance. If the problems cannot be solved with the information below, please contact the Authorised Service Centre. Problem Solution Check that the control unit plug is fully inserted in The LEDs on the control unit the socket (3).
- Page 11 crossed bin symbol on the appliance or its packaging indicates that the appliance must be disposed of separately from other waste at the end of its useful life. The user must therefore take the appliance to an appropriate recycling centre for electrical and electronic equipment.
- Page 12 MI003585_R75.indd 11 MI003585_R75.indd 11 03/04/20 17:04 03/04/20 17:04...


Need help?
Do you have a question about the R7507 and is the answer not in the manual?
Questions and answers