
Related Manuals for Clearfield FieldSmart 144


Summary of Contents for Clearfield FieldSmart 144
- Page 1 FieldSmart Fiber Distribution Hub (FDH) ® 144, 288, 576 & 864 Port PON Cabinets Installation Manual ______________________________________________________ Manual 019703 REV B - March 2019...
-
Page 2: Table Of Contents
FieldSmart Fiber Distribution Hub (FDH) ® Installation Manual _________________________________________________________ Table of Contents Cabinet Packaging FDH Cabinet Component Views Vault Installation Cabinet Mounting Preparing the Enclosure Base for Installation Mounting Base to CraftSmart HDPE Lids Mounting Base to Polymer Concrete Lid Mounting Base on Concrete Pad Mounting Enclosure on Base Pole Mount Installation... -
Page 3: Cabinet Packaging
FieldSmart Fiber Distribution Hub (FDH) ® Installation Manual __________________________________________________________ Cabinet Packaging All cabinets are packaged for protection for shipment to our customers, depending on the application, packaging may vary. 144 and 288 patch and splice cabinets are typically bubble wrapped and put inside of a cardboard box. Patch only cabinets with pre-terminated fiber tails, as well as the 576 and 864 patch and splice cabinets, will be bubble wrapped and attached to a pallet. -
Page 4: Fdh Cabinet Component Views
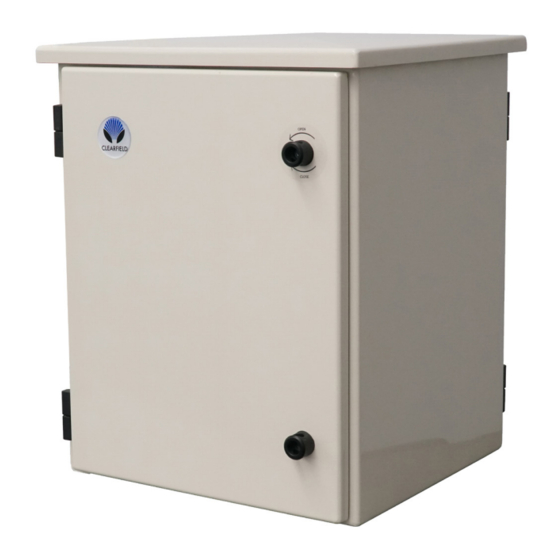
FieldSmart Fiber Distribution Hub (FDH) ® Installation Manual _________________________________________________________ FDH Cabinet Component Views 144 Front View 1. Designation Card 2. Feeder Cassettes 3. Distribution Cassettes 4. Fiber Management Rods and Spools 5. Fiber Splitter Storage 6. Staging Plate Area 7. Vent/Filter* 8. - Page 5 FieldSmart Fiber Distribution Hub (FDH) ® Installation Manual __________________________________________________________ 144 Back View 1. Distribution and Feeder Cassettes 2. Distribution and Feeder Cable Ports 3. Grounding Bar 4. Fiber Management Spools 5. Vent/Filter* 6. 12” Riser with Access Door *Remove foam filter and rinse with water every 6 months Direct: 763.476.6866 •...
- Page 6 FieldSmart Fiber Distribution Hub (FDH) ® Installation Manual _________________________________________________________ 288 Front Views 1. Designation Card 2. Feeder Cassettes 3. Distribution Cassettes 4. Fiber Management Rods and Spools 5. Fiber Splitter Storage 6. Staging Plate Area 7. Vent/Filter* 8. Riser (Available in 4” or 12”) *Remove foam filter and rinse with water every 6 months Direct: 763.476.6866 •...
- Page 7 FieldSmart Fiber Distribution Hub (FDH) ® Installation Manual __________________________________________________________ 288 Back View 1. Distribution and Feeder Cassettes 2. Distribution and Feeder Cable Ports 3. Grounding Bar and Lug 4. Fiber Management Spools 5. Vent/Filter* 6. Riser (Available in 4” or 12”) *Remove foam filter and rinse with water every 6 months Direct: 763.476.6866 •...
- Page 8 FieldSmart Fiber Distribution Hub (FDH) ® Installation Manual _________________________________________________________ 576 Front View 1. Designation Card 2. Feeder Cassettes 3. Distribution Cassettes 4. Fiber Management Rods and Spools 5. Fiber Splitter Storage 6. Staging Plate Area 7. Vent/Filter* 8. Riser (Available in 4” or 12”) *Remove foam filters and rinse with water every 6 months Direct: 763.476.6866 •...
- Page 9 FieldSmart Fiber Distribution Hub (FDH) ® Installation Manual __________________________________________________________ 576 Back View 1. Distribution and Feeder Cassettes 2. Distribution and Feeder Cable Ports 3. Grounding Bar 4. Fiber Management Spools 5. Vent/Filter* 6. 4” or 12” Riser (12” with Access Door shown) *Remove foam filter and rinse with water every 6 months Direct: 763.476.6866 •...
- Page 10 FieldSmart Fiber Distribution Hub (FDH) ® Installation Manual _________________________________________________________ 864 Front View 1. Designation Card 2. Feeder Cassettes 3. Distribution Cassettes 4. Fiber Management Rods and Spools 5. Fiber Splitter Storage 6. Staging Plate Area 7. Vent/Filter* 8. Riser (Available in 4” or 12”) *Remove foam filters and rinse with water every 6 months Direct: 763.476.6866 •...
- Page 11 FieldSmart Fiber Distribution Hub (FDH) ® Installation Manual __________________________________________________________ 864 Back View 1. Distribution and Feeder Cassettes 2. Distribution and Feeder Cable Ports 3. Grounding Bar 4. Fiber Management Spools 5. Vent/Filter* 6. 4” or 12” Riser (12” with Access Door not shown) *Remove foam filter and rinse with water every 6 months...
-
Page 12: Vault Installation
Installation: Clearfield highly recommends the the installation of a vapor barrier beneath the crushed rock floor of the excavated area. It is recommended to use a minimumn of three to six (3” - 6”) inches of crushed rock to prevent subsidence over time. Gravel is the recommended material because of its drainage characteristics. -
Page 13: Cabinet Mounting
FieldSmart Fiber Distribution Hub (FDH) ® Installation Manual __________________________________________________________ Cabinet Mounting Preparing the Enclosure Base for Installation Locate the enclosure base and remove any packaging materials. They are typically assembled and packaged on top of FieldSmart FDH Cabinets. There are both a 4” and 12” riser kit available for each size of cabinet. All have pre-cut vent holes and the 12”... -
Page 14: Mounting Base To Craftsmart Hdpe Lids
FieldSmart Fiber Distribution Hub (FDH) ® Installation Manual _________________________________________________________ Mounting Base to CraftSmart HDPE Lids Locate the bolt hardware kit, supplied with each CraftSmart vault that have cut outs for the FieldSmart FDH Cabinets. Bagged bolt kit (P/N 009092) will be attached to the underside of the vault lid via two zip ties using these two pre-drilled base mounting holes. - Page 15 FieldSmart Fiber Distribution Hub (FDH) ® Installation Manual __________________________________________________________ 30 x 48 Vault (144, 288 & 576 FDH): Use the J-bolts supplied in the bolt kit to attach the cabinet base/riser to the vault lid. J-bolts are installed from the bottom of the lid and are “hooked”...
-
Page 16: Mounting Base To Polymer Concrete Lid
FieldSmart Fiber Distribution Hub (FDH) ® Installation Manual _________________________________________________________ Mounting Base to Polymer Concrete Lid When mounting the FDH bases to a polymer concrete lid, four 3/8-16 bolts are needed (bolt kit part number 020538). Shown are diagrams featuring the spacing for anchor points for FDH cabinet bases on half of the pad. The threaded hole inserts shown in these diagrams are used for mounting the cabinet base/riser to the lid. - Page 17 FieldSmart Fiber Distribution Hub (FDH) ® Installation Manual __________________________________________________________ 30 x 48 Vault (144, 288 & 576 FDH): Direct: 763.476.6866 • National: 800.422.2537 • www.SeeClearfield.com • techsupport@clfd.net Manual 019703 REV B - March 2019...
- Page 18 FieldSmart Fiber Distribution Hub (FDH) ® Installation Manual _________________________________________________________ 48 x 48 Vault (864 FDH): Direct: 763.476.6866 • National: 800.422.2537 • www.SeeClearfield.com • techsupport@clfd.net Manual 019703 REV B - March 2019...
-
Page 19: Mounting Base On Concrete Pad
FieldSmart Fiber Distribution Hub (FDH) ® Installation Manual __________________________________________________________ Mounting Base on Concrete Pad Mount the cabinet base to the concrete pad per your local practice. If the base is installed on the enclosure, remove the base by removing the 4 bolts from the bottom of the inside of the cabinet. -
Page 20: Mounting Enclosure On Base
FieldSmart Fiber Distribution Hub (FDH) ® Installation Manual _________________________________________________________ Mounting Enclosure on Base Locate the hardware package shipped with the enclosure. Locate the (4) bolts, washers and lock washers. Assure the enclosure is oriented properly to the base and then insert the bolts through holes in the corners of the enclosure. Insert all four bolts before tightening them with a wrench. -
Page 21: Pole Mount Installation
Pole Mount Installation (144 & 288 Port FDH) Note: Clearfield does not provide the mounting hardware. Required hardware includes a 5/8” threaded rod (3” longer than pole diameter), washers, lock washers, nuts and Lock Tight (red). Note: 288 cabinet shown for reference. 144 cabinet will be mounted to the pole using the same method. - Page 22 Note: Clearfield does not recommend using lag bolts to mount cabinet to pole. Clearfield recommends using hardware with a minimum of 5/8” diameter. Care should be taken to avoid over-tightening and deforming the hoist plate. Lock tight (red) should be used on nuts to prevent loosening of nuts.
- Page 23 FieldSmart Fiber Distribution Hub (FDH) ® Installation Manual __________________________________________________________ 6. Level cabinet and drill 5/8” hole through lower bracket and pole, and install 5/8” rod, washers and nuts. Note: Care should be taken to avoid over-tightening and deforming the hoist plate. 7.
-
Page 24: Fieldsmart Fsc Pole Mount Under Plate Kit
FieldSmart Fiber Distribution Hub (FDH) ® Installation Manual _________________________________________________________ FieldSmart FSC Pole Mount Under Plate Kit (Riser Required) 1. After cabinet has been mounted on pole, the optional Pole Mount Under Plate Kit may be installed. The kit comes with two plates with stenciled templates for multiple sizes of conduit. The standard knock out is for a 2” conduit. -
Page 25: Cable Installation And Splicing
FieldSmart Fiber Distribution Hub (FDH) ® Installation Manual __________________________________________________________ Cable Installation and Splicing The steps below are written with the 4” riser in mind, which doesn’t feature an access door. If you have a 12” riser with an access door, any step which involves removing the entrance plate can be done instead by removing the riser access door and accessing the underside of the entrance plate from inside the riser. - Page 26 FieldSmart Fiber Distribution Hub (FDH) ® Installation Manual _________________________________________________________ 5. Remove the plugs from selected holes in the entrance plate and feed the cables through. Ensure the entrance plate gasket is around the cables and below the entrance plate before proceeding. 6.
- Page 27 FieldSmart Fiber Distribution Hub (FDH) ® Installation Manual __________________________________________________________ 7. In order to swap grommets, remove the dome nut from the sealcon and pry the current grommet out, being careful not to damage the compression fitting. Push the new one in to place. Ensure new grommets are installed with the tapered side up (see pictures).
- Page 28 NOT tighten to secure cable. Note: Clearfield recommends the use of a set of sealcon wrenches (P/N’s 013190 - 40mm, and 013191 - 42mm) to properly tighten the sealcon lock nut and dome nut.
- Page 29 __________________________________________________________ Pull the length of cable you intend to open through the sealcon and out of the cabinet. Clearfield recommends 15 feet of opened cable to work with inside the cabinet (12 feet of slack and 3 feet for splicing in the cassette). Open the cable.
- Page 30 FieldSmart Fiber Distribution Hub (FDH) ® Installation Manual _________________________________________________________ Pull the extra unopened cable slack back through the sealcon and out of the cabinet. If utilizing a strength member clamp, bring the strength member over to the clamp and secure tightly. Tighten the dome nut on the sealcon securely, being careful not to damage the threads.
- Page 31 FieldSmart Fiber Distribution Hub (FDH) ® Installation Manual __________________________________________________________ Route the grouped buffer tubes first over the top radius limiter (Figure 1). Continue routing the grouped buffer tubes down and around the bottom radius limiter (Figure 2). Figure 1 Figure 2 Finish routing the grouped buffer tubes back up and around the top radius limiter.
- Page 32 FieldSmart Fiber Distribution Hub (FDH) ® Installation Manual _________________________________________________________ Note: The suggested cable routing for feeder and distribution cables is on a sticker in the rear of the cabinet. Cables should enter cassettes on side closest to cable management – not crossed over. Direct: 763.476.6866 •...
-
Page 33: Grounding The Enclosure
__________________________________________________________ Grounding the Enclosure Clearfield recommends that all grounding installations follow the “per local practice” guidelines for each application. A grounding bar and grounding lug are located in the lower left corner of the rear of the cabinet. The cabinet can be ground- ed via the lug attached to the base of the cabinet. -
Page 34: Optical Splitter Routing
Proceed to connecting the feeder and distribution legs of the splitter as needed. Choose your desired port to connect the splitter leg. Clearfield recommends you reference the routing diagram and designation card shown here and in the cabinet. Each port will have one or two colors, corresponding to the radius spools that the splitter leg must route over and under to properly take up the slack before connection. - Page 35 Route the splitter up and around the management spools and to the staging area. Clearfield recommends following the routing diagram shown here. Install the staging plate(s) into the staging area, as shown in the pictures below and the install manual provided with the splitter.
- Page 36 Route the splitter legs up and around the center spools and radius fin- gers until the staging plate is ready to be placed into the staging area. Clearfield recommends following the routing diagram shown here. Install the staging plate into its place, first inserting the tabs of the staging plate into the innermost bracket and then pressing the opposite side until the staging plate is fully seated.
-
Page 37: Cabinet Accessories
FieldSmart Fiber Distribution Hub (FDH) ® Installation Manual __________________________________________________________ Cabinet Accessories Mid-Span Opening Feed-Trough Plate Kit Grommet Tape Feed Through Plate A Feed Through Plate B (x2) Clamping Bracket Foam Sealing Plug Foam Gasket Cable Clamp Shells a. 1” b. 3/4” c. - Page 38 FieldSmart Fiber Distribution Hub (FDH) ® Installation Manual _________________________________________________________ Prep the cable according to the instructions provided earlier in the manual and your local rules for mid-span cable opening. Note: This kit will enable the cable to be prepped using either a mid-span opening or the end of the cable.
- Page 39 FieldSmart Fiber Distribution Hub (FDH) ® Installation Manual __________________________________________________________ Wrap grommet tape around the cable at the mark, until you have an overall outside diameter of 1 3/4”. Place the foam gasket around the cable entrance hole in the bottom of the cabinet.
- Page 40 FieldSmart Fiber Distribution Hub (FDH) ® Installation Manual _________________________________________________________ Attach the cable clamps to the bracket using the clamp mounting screws. Note: If choosing to use the strength member clamp plate, the plate will go in behind the cable clamps and the clamp mounting screws will secure both in place to the cable clamp bracket.
-
Page 41: Ground/Locate Box
The ground/locate box for the FDH allows the ability to locate distribution cables without the risk of damage to live circuits by opening the cabinet. Through the use of the main cabinet ground bar, and Clearfield’s ground stud kit (P/N 016953), the customer can have a locate point on the outside of the cabinet. -
Page 42: Connector Cleaning Procedure
Inspect Then Connect These are Clearfield recommended products/applications. Use the product you feel will complete your cleaning procedures. Create a “best practice” for your company and follow those procedures. - Page 43 FieldSmart Fiber Distribution Hub (FDH) ® Installation Manual __________________________________________________________ Cleaning the Ferrule • Lightly moisten the fiber optic swab (2.5mm/38542F or 1.25mm/38040) by spotting a small amount (about 1”) of Electro-Wash PX or Electro-Wash MX pen onto the QbE. Hold the swab, 1 side down to the wetted area and hold for a count of 1-2-3-4-5.
- Page 44 FieldSmart Fiber Distribution Hub (FDH) ® Installation Manual _________________________________________________________ Cleaning an MPO/MTP Connector Female Connector • Place one wiping paper on QbE-2 FiberSafe™ Cleaning Platen and apply small amount of precision cleaner (about 1” in diameter) with Electro-Wash MX pen on to one end of the wipe. (Figure 1) Figure 1 •...
-
Page 45: Standard Warranty
Clearfield shall repair or replace the defective Product at its sole option and discretion, and return the repaired or replacement Product to Cus- tomer’s site, freight prepaid Note: If the Product is not found to be defective by Clearfield, the product will be returned to the Customer and the customer billed for freight in both directions. -
Page 46: Proprietary Notice
_________________________________________________________ Proprietary Notice Information contained in this document is copyrighted by Clearfield, Inc. and may not be duplicated in full or part by any person without prior written approval of Clearfield, Inc. Its purpose is to provide the user with adequately detailed documentation to efficiently install the equipment supplied. Every effort has been made to keep the information contained in this document current and accurate as of the date of publication or revision.
Need help?
Do you have a question about the FieldSmart 144 and is the answer not in the manual?
Questions and answers