Table of Contents
Advertisement
Quick Links
Advertisement
Table of Contents

Related Manuals for Samplix Xdrop

Summary of Contents for Samplix Xdrop
- Page 1 Xdrop™ manual Droplet MDA (dMDA) User manual v. 1.0 released 26 Aug. 2019...
-
Page 2: Table Of Contents
3 Targeted enrichment overview Xdrop™ instrument overview Required items for Xdrop™ dMDA Suggested Samplix products Equipment and reagents for Xdrop™ supplied by the user Chapter 2: General DNA Amplification by dMDA page 9 Break sorted droplets Set up dMDA reaction Load the dMDA cartridge Generate dMDA droplets on the Xdrop™... -
Page 3: Chapter 1: Xdrop™ At A Glance
Using the Xdrop™ instrument, cartridges, and reagents, sample DNA is partitioned into millions of picolitre size highly stable droplets. The Xdrop™ droplet PCR (dPCR) droplets are suitable for standard PCR cycling, flow cytometry analysis and sorting. -
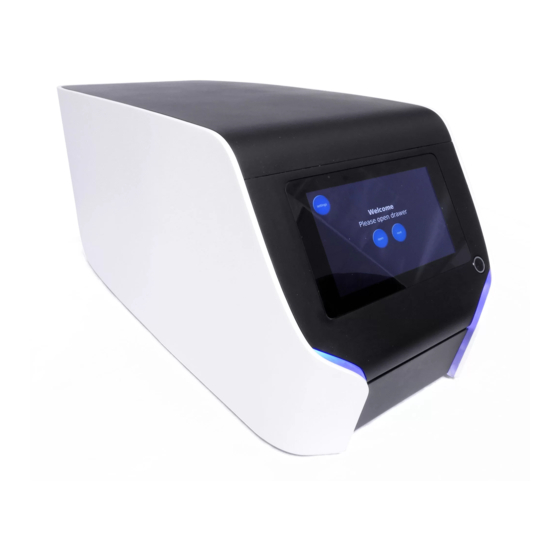
Page 4: Xdrop™ Instrument Overview
Xdrop™ instrument overview The Xdrop™ droplet generator is compatible with Samplix dPCR cartridges for production of dPCR droplets and Samplix dMDA cartridges for the generation of droplets for amplification of DNA. When using dMDA cartridges, always use the accompanying holder. The Xdrop™ droplet generator is used for generating both dPCR and dMDA droplets. - Page 5 To find technical support, contact the technical support team at support@samplix.com Warranty The Xdrop™ instrument and associated accessories are covered by a standard Samplix ApS warranty. Contact your local Samplix ApS office for the details of the warranty. Safety We strongly recommend that you follow the safety specifications listed in this section and throughout this manual.
- Page 6 Intended use and intended users The Xdrop™ instrument is intended for use by trained laboratory personnel in a clean laboratory environment for DNA sample preparation from mixed DNA samples using droplet microfluidic technology.
-
Page 7: Required Items For Xdrop™ Dmda
Required items for dMDA Xdrop™ Instrument (Cat. No. IN00100) dMDA cartridge (Cat. No. CA20100) dMDA holder (Cat. No. HO10100) dMDA gasket (Cat. No. GA20100) Storage films (Cat. No. FI00100) dMDA kit (Cat. No. RE20300) dMDA kit part 1 (store at -20°C) dMDA-mix (5x) ●... - Page 8 Equipment and reagents for Xdrop™ enrichment and amplification supplied by the user In addition to required and suggested Samplix products, the following items are also suggested. Thermal cycler Real-time PCR cycler LAF (Laminar Air Flow) hood Flow cytometry analyser / cell sorter Quantification of nucleic acids –...
-
Page 9: Chapter 2: General Dna Amplification By Dmda
DNA. If amplifying already purified DNA, continue directly to “Set up dMDA reaction” page 10. For advice on the dPCR reaction see Xdrop™ manual droplet PCR (dPCR). -
Page 10: Set Up Dmda Reaction
Set up dMDA reaction Note: Do not use any other reagents than Samplix dMDA kit (Cat. No. RE20300) for Xdrop™ dMDA droplet production as this may compromise droplet production, droplet stability, and downstream enrichment. Prepare amplification mix following the table below in a Laminar Air Flow (LAF) bench or similar dust free environment. -
Page 11: Load The Dmda Cartridge
Load the dMDA cartridge The dMDA reaction takes place inside droplets formed in the dMDA cartridge in the dMDA holder (Fig. 2.2). The cartridge must be sealed with a gasket on top during droplet production. Load samples in a clean LAF bench. NB: re-use the holder for the next run. - Page 12 Place the dMDA cartridge in the groove of the dMDA holder as shown in Fig 2.3. Inlet wells are placed closest to the numbers on the holder while the outlet wells are placed closest to the side with the Samplix logo.
- Page 13 Fig. 2.5. Loading the dMDA cartridge. Left: Pipette positions when loading the dMDA sample mix, 1: The tip outside the sample, press the pipette’s push button to the first stop. 2: Transfer 20 μl sample mix to the dMDA cartridge and insert the tip correctly in the sample hole in the inlet well.
-
Page 14: Generate Dmda Droplets On The Xdrop™ Instrument
When the “open” or “next” button has been pressed, the screen shifts to “Please place cartridge” and “close drawer”. Place the loaded cartridge with the holder in the Xdrop™ instrument drawer. Make sure that the cartridge is correctly positioned into the drawer by aligning the rounded corner on the holder to the rounded corner on the instrument drawer (Fig. - Page 15 “dMDA” option on the touch screen (Fig. 2.9). Fig. 2.9. The Xdrop ™ instrument “select cartridge screen”. Select dMDA cartridge. The channels to be processed are selected by pressing the corresponding numbers 1-8 on the screen. When selected, the button turns green (green = selected & blue = not selected) (Fig. 2.10). Deselect the channels not...
- Page 16 Fig. 2.10. Selecting the channels to be used. Selected channels will be indicated by green buttons (in this figure, channels 2, 4, 6, and 8). Blue buttons indicate channels not yet selected. Press “run”. The message “Making your droplets” and the remaining run time is displayed on the screen (Fig. 2.11). The dMDA protocol will produce droplets in approximately 45 seconds.
- Page 17 Press “Open” to eject the cartridge. 10. Remove the cartridge from the instrument and place it in a LAF bench. 11. Press “Close” to make the instrument retract the drawer back into its closed position. 12. Press “Finish” to return to the Welcome screen. 13.
- Page 18 Fig. 2.13. Place a transparent protective foil on the dMDA cartridge to seal the wells to avoid cross-contamination. 18. Incubate dMDA droplets in a thermo cycler at 30°C for 16 hours followed by 10 minutes at 65°C. Run the following program on a thermocycler: Temperature Duration 30°C...
-
Page 19: Chapter 3: Evaluation Of Targeted Enrichment
Chapter 3: Evaluation of Targeted Enrichment Quantify total DNA After dMDA incubation at 30°C, finalising at 65°C, break the dMDA droplets with Break solution ● and Break colour ● (Fig. 3.1). Add 20 μl Break solution ● to each tube. Add 1 μl of Break colour ●. -
Page 20: Evaluate The Enrichment Of Target Dna
To determine fold enrichment of target DNA, perform a qPCR using primers not overlapping the dPCR amplicon used in the dPCR step. See “General guidelines for primer design” or at the online primer design tool at samplix.com. If a specific region of DNA is required, place the validation primer pair on the opposite side of this region but with maximum 5 kb distance from the dPCR primers. -
Page 21: Calculate Fold Enrichment Of Target Dna
Calculate fold enrichment of target DNA Use the “Actual enrichment calculator” in the online tool (Fig. 3.3) to calculate the fold enrichment of target DNA available at samplix.com Fig. 3.3. From the beta calculator, choose the “Actual enrichment calculator” tool. - Page 22 Fig. 3.4. Example of calculation using the online enrichment calculator tool. See explanation below. As input in the calculator (Fig. 3.4) use: Genome size: Size of (host) genome in base pairs. PCR efficiency: Efficiency of PCR reaction in %. You can use the efficiency calculated when validating primers designed. Calculate the PCR efficiency using the Ct values as input with the formula: (10^(-1/slope)-1) *100.
Need help?
Do you have a question about the Xdrop and is the answer not in the manual?
Questions and answers