Table of Contents
Advertisement
Advertisement
Table of Contents

Subscribe to Our Youtube Channel
Related Manuals for AT&T Cingular Flip 3


Summary of Contents for AT&T Cingular Flip 3
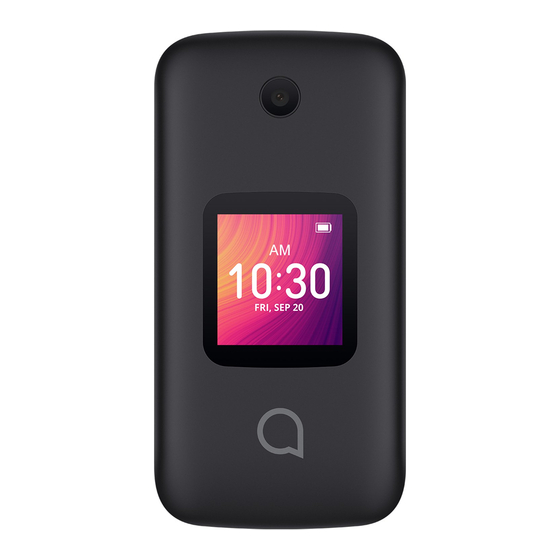
- Page 1 AT&T Cingular Flip ™ USER MANUAL...
-
Page 2: Table Of Contents
Table of Contents Getting started ..................1.1 Keyboard layout and icon status ................ 1.2 Set up your device ......................1.3 Power options ......................... Home Screen apps .................. 2.1 KaiStore ..........................2.2 Google Assistant ......................2.3 Google Maps ........................2.4 YouTube ..........................Phone call .................... - Page 3 Camera ....................... 7.1 Take a photo ........................7.3 Other options ........................Gallery ......................8.1 Gallery options ........................ 8.2 Individual photo options ..................Video ......................9.1 Play videos ......................... 9.2 Other options ........................Browser ...................... 10.1 Top sites ..........................10.2 History ..........................10.3 Search or enter URL ....................
- Page 4 16.2 Personalization ......................16.3 Privacy & security ....................... 16.4 Storage ..........................16.5 Device ..........................16.6 Account ..........................Unit Converter ..................File Manager ..................... Note ......................Recorder ....................Troubleshooting ..................Warranty ....................
- Page 5 carrying the device or using it while worn on your body, either use levels for long periods. Exercise caution when holding your device near your ear while the loudspeaker is in use.
-
Page 6: Getting Started
1. Getting started 1.1 Keys and Icon status Keyboard Layout Speaker Navigation Ring (Up, Down, Left, Right) - Page 7 Camera Headset Jack Camera Key External Screen Volume Charging Port Icon Function/Description • • • Long press to launch the Google Assistant or activate speech-to-text Navigation Ring • • UP: Shortcut settings • DOWN: • LEFT: Use the navigation ring to scroll up and down to access the KaiStore , Google Assistant, Google Maps and YouTube •...
- Page 8 Internal and External Display Status/Notifications Bar • Displays Status and Notification indicators. Time Date Contacts Notices • Lists all saved contacts, • Displays all press the Right Menu key Notifications, to access. press the Left Menu key to access. Apps (Applications) Menu •...
-
Page 9: Set Up Your Device
1.2 Set up your device Remove the back cover hand corner of the phone's back cover Replace the back cover Replace the back cover properly by aligning it with the back of the device. Make sure the speaker holes are positioned at the top and press gently until the back cover clicks into place on all sides. - Page 10 Insert a SIM or microSD card downward and the cut corner at the the card with gold contacts facing separately). Remove nano SIM or microSD card Push down on the plastic clip located at slot to allow the card to slide out of the of the slot.
-
Page 11: Power Options
Power options Power On Press down on the Power button If screen lock is set up, enter your passcode to access the Note: If you don't know your passcode or if you have forgotten it, contact your service provider. Do not store passcodes within your phone; instead store passcodes in a location that is accessible without using your phone. - Page 12 2. Use the Navigation ring pressing Right Select to Skip. Press OK to select the desired network and enter the password, if needed. function, press OK to continue.
- Page 13 4. Press Right Select to Accept and Privacy Policy, and then press Right Select 5. The About KaiOS page will be displayed. Use the Navigation ring and OK to select, and then press Right Select...
-
Page 14: Home Screen Apps
2. More apps ..............To access More apps Navigation ring Navigation ring to select the app you want. Press OK Store , Google Maps, and Twitter . The KaiStore and without touchscreens. They’re easy to install, use and update. Download an app from Store Navigation ring Navigation... - Page 15 Navigation ring to select an app, and press OK to launch it. Update an app in Store 1. In the Store app, select the app that you have already downloaded and want to update by navigating with the Navigation ring in the apps list.
-
Page 16: Google Assistant
2. Press Right Select to enter Options. 3. Select Terms and Services with the Navigation ring 4. Press OK Request Help in Store Help 1. In Store , use the Navigation ring to select the app for which you want to get help. 2. -
Page 17: Google Maps
Try speaking: • "What's the weather today?" to get the day's weather forecast. • "Where's the nearest grocery store?" to get directions to the nearest grocery store. • "How many milliliters are in a tablespoon?" for an easy way to convert units. - Page 18 Detect your location 1. In Maps , select Your location by using the Navigation ring , and press OK 2. If not already done, press Right Select to allow Maps 3. Press Right Select 4. Use the Navigation ring to highlight On, and press Right Select to enable geolocation.
-
Page 19: Youtube
YouTube Launch YouTube Navigation ring to select YouTube 2. Press OK to launch the app. Search for a video 1. In YouTube , use the Navigation ring to activate the search bar, and press OK 2. In the search bar, type in the keywords that you want to search, and press Right Select 3. - Page 20 View Trending videos 1. Use the Navigation ring 2. Use the Navigation ring to select Trending and press Enter Library page 1. Use the Navigation ring icon at the 2. Use the Navigation ring to select Library and press Sign in to your account 1.
-
Page 21: Phone Call
3. Phone call 3.1 Make a phone call Place a call by dialing directly from the keypad 2. Press OK or Call/Answer Place a call from the Call Log 1. Press Call/Answer the Call Log Navigation ring select Call Log . -
Page 22: Answer Or Decline A Call
For an emergency call Call/Answer Note: Emergency calls can be made even without network service. However, this phone like any wireless phone operates using radio signals, which cannot guarantee connection in all conditions. Therefore, you must never rely solely on any wireless phone for emergency communications. 3.2 Answer or decline a call Incoming call 1. -
Page 23: Contacts
4. Contacts ............To access Contacts and select Contacts . Press OK Right Select on the device keypad to launch the Contacts app. 4.1 Add a contact Contacts screen, use the Navigation ring select New. 2. Select where the contact will be stored: Phone memory or SIM memory. -
Page 24: View Contact Details
4.2 View contact details to view Right Select Contacts 2. Use the Navigation ring to select a contact. 3. Press OK to view a contact’s details. 4.3 Edit contact details Contacts screen, use the Navigation ring select a contact. 2. Press OK to enter the contact’s detail page. -
Page 25: Delete A Contact
4. Use the Navigation ring to select Edit contact and press to select. 5. Use the Navigation ring and the keypad to edit a to save or press to cancel and exit. Note: For additional options, from the Edit Contact screen, use the Navigation ring to select Add and press OK. -
Page 26: Other Options
4.5 Additional options Call Make a call to the selected contact. Contacts 1. Use the Navigation ring to highlight the contact you want to call. 2. Press Right Select to go to Options. 3. Use the Navigation ring to highlight Call, press OK select. - Page 27 Move contacts Move a contact between your device and SIM card. Contacts 1. Use the Navigation ring to highlight the contact that 2. Press Right Select to go to Options. 3. Use the Navigation ring to highlight the Move contacts option, press OK to select.
-
Page 28: Messages
Settings Setting Function Memory Select the storage location of your contacts. Sort contacts Set speed dial contacts Set speed dial contacts. Set ICE contacts Create group Create a new contact group. Block contacts Import contacts Export contacts Add Account Add a new Google account. 5. - Page 29 3. Use the Navigation ring 4. Press Note: An SMS of more than 160 characters will be counted as an additional SMS. Certain letters or characters can also increase the size of the SMS. This may cause your SMS to be sent in multiple text messages. Messages screen, press Right Select access Options.
- Page 30 • desired character is displayed. If the next letter is located on letters have disappeared. • press * to select a character and press OK • Back/Clear all text. Note: Use the predictive input method to quickly type words. To turn the Use Predictive option ON select Settings >...
-
Page 31: Other Options
5.4 Other options Messages , press Right Select to access the 2. Use the Navigation ring to select Settings and press Messaging Settings Select On Auto Retrieve Messages Select header which will be displayed on the WAP Push Messages Wireless Emergency Alerts View the Alert Inbox or to access alert settings. - Page 32 Email screen, press Right Select to go Next. 2. Use the Navigation ring edit, and enter Your name and Email address with the keypad. Right Select to go Next. Or press to go Advanced 4. Press down on the Navigation ring to select Next and press OK 5.
- Page 33 Inbox: 1. Press to Compose. To bar. 3. Use the Navigation ring in the Subject bar Edit area. 4. Press to Send. 1. Press OK 2. Press to Reply. Edit area. to Send. Inbox: 2. Press OK to Delete. 3. Press Right Select Delete.
-
Page 34: Camera
7. Camera ............... To access Camera , press OK Navigation ring to highlight Camera , and press OK to Select. Or you can press the Camera button located on the right side of your device to... -
Page 35: Take A Photo
Note: screen will display. Press the Right Select key to allow or key to deny. 7.1 Take a photo Camera screen, line up your shot. Use the Navigation ring 2. Press OK or the Camera Button on the right side of the Gallery Press to preview. -
Page 36: Other Options
7.3 Other options Camera screen, press Right Select 2. Use the Navigation ring to access the following options: Self-Timer OK or Camera Button. Grid your shots. Gallery Select Go to Gallery Application to view photos previously taken. Modes... -
Page 37: Gallery
8. Gallery ..............To access Gallery , press OK highlight Gallery and press OK Gallery 1. Press to launch Camera and take a photo. 2. Use the Navigation ring to select a photo, and press OK to view the selected photo. 3. -
Page 38: Individual Photo Options
8.2 Individual photo options Gallery , the options Delete, Edit, Share, File Info, Lock and Sort and Group are available by pressing Right Select . You also have the option to Set as, which you can use to set the Option Function Set as... -
Page 39: Video
9. Video ..............To access Video , press OK highlight Video and press OK 9.1 Play videos Video 1. Highlight a video and press OK to Select. The video will 2. To Pause the video, press OK again. 3. Press to view Full Screen. -
Page 40: Other Options
9.2 Other options 1. To access Options Video , press Right Select 2. Use the Navigation ring to choose an Option and press to Select deleting a video. Share a Video Navigation ring highlight Share. Press OK to select. Use the Navigation ring to choose how you would like to share your video. - Page 41 File Info Options Navigation ring highlight File Info. Press OK to view your video Name, Length, Size and Video Type. Delete a Video Navigation ring highlight Delete. Press OK to select. Press Right Select Delete or press to Cancel.
-
Page 42: Browser
Select Multiple Navigation ring highlight Select Multiple. Press OK . Use the Navigation ring to highlight the videos you want to select and press . Or press to select All. 10. Browser ............. To access the Browser , press OK screen, highlight Browser and press OK... -
Page 43: Top Sites
10.1 Top sites Top Sites to navigate to your favorite sites. ate t You can pin a website to Browser . These pinned websites will appear when Browser is opened. 1. Press the Navigation ring up or down to highlight the website you want to visit. -
Page 44: History
4. You can Unpin Browser Use the Navigation ring to highlight the site to be unpinned, press Right Select to Unpin. Press Right Select 10.2 History Browser , press right on the Navigation ring select History. 2. Use the Navigation ring to highlight the site to be revisited and press OK to launch. -
Page 45: Search Or Enter Url
10.3 Search or enter URL 1. To Search or enter URL, press the Navigation ring up or press to access the search bar. Input your search criteria or desired web address and press OK 2. Use the Navigation ring screen, press OK Note: Press Back/Clear to delete incorrect digits. -
Page 46: Clock
11. Clock ..............To access Clock , press OK highlight Clock and press OK 11.1 Clock press... - Page 47 Option Function Time Repeat Sound Activate or deactivate the vibration. Vibrate Alarm name Right Select to Save. To adjust the alarm settings More options are available for saved Alarms by highlighting the Alarm to be edited and pressing Right Select Alarm screen: Option Function...
-
Page 48: Start A Stopwatch
to Pause to Resume the Right Select to add 1 to Reset the 11.3 Start a stopwatch 1. Use the Navigation ring to enter the Stopwatch screen. -
Page 49: Music
2. Press OK to start the Stopwatch. Right Select Record each lap. to Pause the to Continue to Reset 12. Music ..............To access Music , press OK highlight Music and press OK 12.1 2. If your device is on, long press End/Power to turn the cover. - Page 50 6. Replace the battery, ensuring the gold contacts on the battery align with the gold contacts in the battery of the back cover to snap it into place. 7. Long press End/Power to turn your device back on. and use the Navigation ring to select Music .
-
Page 51: Calendar
File Manager under Internal > Downloads > Bluetooth. 13. Calendar ............To access Calendar , press OK highlight Calendar and press OK 13.1 Create an event 1. Press OK to enter the Calendar view. -
Page 52: Calculator
2. Press to add a new event. you can select All-day Event. Right Select to Save. More options are available by pressing Right Select the Calendar view: Option Function Go to date Use to go to preferred date. Search Searches scheduled events. Calendar to Display Displays phone calendar or another account if added. -
Page 53: Fm Radio
Using the Calculator Navigation ring 4. Press OK to select equals = and get results. 15. FM Radio ............To access FM Radio , press OK highlight FM Radio and press OK Note: To use this feature, you must plug in a wired headset, sold separately, into the phone. - Page 54 1. Press the Navigation ring increase 0.1MHz. 2. Press the Navigation ring 3. Press Right Select to access Options to favorites, Edit favorites or Switch to speaker/earphone star and will be displayed in the channel list for easy access. Note: The quality of the radio depends on the coverage of the radio station in that particular area.
-
Page 55: Settings
16. Settings ............To access Settings , press OK highlight Settings and press OK 16.1 Network & connectivity • Airplane mode Turning on Airplane mode... - Page 56 • Mobile data Turning Data Connection data for apps, • International data roaming Turning International Data roaming on will enable • APN mode You can access the internet by using the default APN mode add a new APN, contact your service provider for the required •...
- Page 57 • Call barring blocked callers). • Fixed dialing numbers Note: Emergency numbers will always be dialable. • DTMF tones You can set DTMF tones dialed. • RTT call button The on-screen Real-Time Text alternative to external TTY keyboards. As you text during an RTT call, the person you are talking with can see you type RTT: - To use RTT, you need to be connected to LTE.
-
Page 58: Personalization
• Multi Language Support • Presidential alert Mark the checkbox to enable presidential alerts. The default is on. • Extreme alert • Severe alert Mark the checkbox to enable severe alerts. • AMBER alert • Public Safety alert Mark the checkbox to enable public safety alerts. •... - Page 59 • Tones Ringtones and Notice Alerts for reviewing or sharing, and My • Other sounds Display • Wallpaper Gallery Camera • Brightness Set the brightness of the display. • Screen Timeout Search • Search engine or DuckDuckGO. • Search suggestions Enable or disable the search suggestions.
- Page 60 • Auto Sync Date & Time with the server. • Date • Time • Time zone • Format Select the 12-hour or 24-hour • Home Screen Clock Language...
-
Page 61: Privacy & Security
16.3 Privacy & security Screen Lock device. SIM Security A SIM PIN prevents access to the SIM card’s cellular data SIM card will request the PIN upon restart. A SIM PIN is not the • Assistant • Camera • Maps app. -
Page 62: Storage
Do Not Track Set whether you want to be tracked by websites and apps. Do Not Track, your phone tells every providers) that you do not want your behavior tracked. Browsing Privacy About KaiOS always change these setting in Settings > Privacy & Security > About KaiOS. -
Page 63: Device
16.5 Device Network Settings Reset and Reset Phone. • Check for Updates to search for available updates for your device, or Continue Update to continue updating your device's • Network Settings Reset restore all settings to default. • Reset Phone Erase all your data and restore the phone to factory conditions. - Page 64 Battery View your battery's current charge level and power settings. • Current Level View current battery level. • Power Saving Mode when the phone reaches 5%, 10% or 15% battery level. Accessibility View and change the device's accessibility options. • Invert Colors •...
-
Page 65: Account
• Hearing Aid Compatibility (HAC) phone and hearing aid device, calls are linked to a relay service, aid device to a spoken voice for the person on the other end 16.6 Account KaiOS Account ever lose your phone, your KaiOS account will allow you to To create a KaiOS account: 1. -
Page 66: Unit Converter
5. Enter your password, then press down on the Navigation ring 6. Press Right Select to go Next. account. Account Manager settings and Sign in to KaiOS. Anti-Theft • Make Ring Make your phone ring. • Remote Lock • Remote Wipe Add Account Add a new account: Google or ActiveSync. -
Page 67: File Manager
18. File Manager ..........To access File Manager , press OK screen, highlight File Manager and press OK 19. Note ..............To access Note , press OK highlight Note and press OK To create a new Note Note screen, press new Note. -
Page 68: Troubleshooting
How to update to access the app Navigation ring to select Settings and press OK 2. In Settings , use the Navigation ring to go to the Device tab and navigate down to Device Information. Press OK to select. 3. Use the Navigation ring to select press OK Check for Update. - Page 69 Battery not charging indicator on the screen if your phone's battery was • Check to ensure proper contact between the charging port connected properly to the device. Unable to make outgoing calls • Check to ensure the Fixed Dialing Numbers feature is turned dialed.
- Page 70 Unable to send and receive MMS • Check your subscription status with your service provider. • • Check with your service provider to ensure MMS functions are included in your service. • SIM card PIN locked • assistance, contact your service provider.
-
Page 71: Warranty
23. Warranty defective products. Warranty duration: Phone 12 Months Charger 12 Months Other Accessories (if included in the box) 12 Months whatsoever, extend the original warranty period of the product concerned. However, the repaired or replaced parts are guaranteed warranty period has expired. Proof of purchase required. Implementation of the Warranty: then provide you with instructions on how to return the product for support under warranty. - Page 72 Warranty exclusions: an accident, regardless of the cause. Instructions for use and Manual. out or repair of the product by the end user or by persons or by parts not approved by Manufacturer. 4. Use of the product with accessories, peripherals and other products Manufacturer’s standards.
- Page 73 Upon expiration of the warranty period or upon an exclusion of warranty, Manufacturer may, at its discretion, provide a quote for country of residence.
Need help?
Do you have a question about the Cingular Flip 3 and is the answer not in the manual?
Questions and answers