Table of Contents
Advertisement
Quick Links
Advertisement
Table of Contents

Subscribe to Our Youtube Channel
Related Manuals for Proton ICS-1290


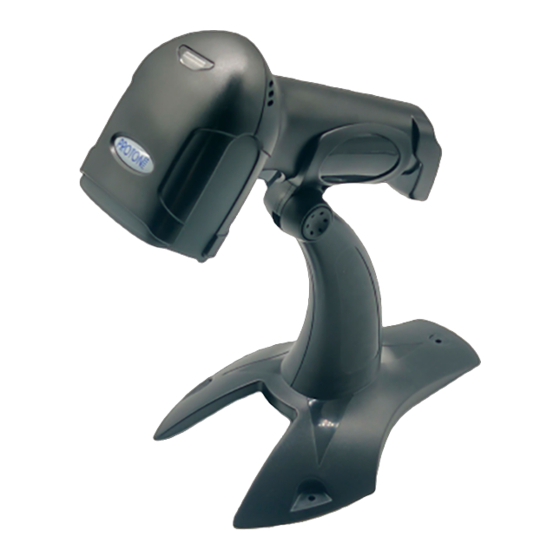
Summary of Contents for Proton ICS-1290
-
Page 1: Precautions
Проводной 2D сканер Proton ICS-1290 Руководство пользователя (новая версия) -
Page 2: Version Record
Precautions Please read all the contents of the manual carefully before using the products described in this manual. Please read the following precautions carefully toensure that the barcode scanner is safe to use according to the design specifications,and please carefully keep the manual for future reference. All software (including firmware) provided to the user with the barcode scanner is protected by copyright. -
Page 3: Table Of Contents
Table of Contents Precautions......................2 Version Record......................3 Foreword........................ 10 Introduction....................10 Chapter Outline..................... 11 Chapter 1 Connection and Basic Settings...........12 Introduction....................12 Unpacking...................... 12 Device Connection..................12 USB Connection..................13 PS/2 Connection..................14 RS232 Connection..................15 Barcode Reading..................16 Defaults Setting.....................17 User-defined Settings................17 Factory Default Setting................17 Delete User-defined Settings.............. - Page 4 Good Read Beeper Volume..............26 Good Read Beeper Frequency.............27 Good Read Beeper Duration..............27 Error Read Beeper Frequency..............27 Good Read LED..................28 Good Read Delay................... 29 Manual Trigger Mode................... 29 Mobile Phone Read Mode................30 Chapter 4 Data Editing..................31 Introduction....................31 Add Prefix or Suffix..................
- Page 5 Concatenation..................50 Message Length..................51 Code 39......................52 Code 39 On/Off..................52 Start/ Stop Characters................52 Check Character..................53 Message Length..................53 Code 39 Append..................55 Example....................55 Code 32 Pharmaceutical (PARAF)............56 FULL ASCII....................57 Interleaved 2 of 5..................58 On/Off....................... 58 Check Digit....................58 Message Length..................60 NEC 2 of 5......................61 On/Off.......................
- Page 6 Message Length..................71 GS1-128......................72 On/Off....................... 72 Message Length..................72 Telepen......................73 On/Off....................... 73 Message Length..................73 UPC-A......................74 Check Digit....................74 Number System..................75 Addenda....................75 Addenda Required..................76 Addenda Separator................76 UPC-E0......................77 On/Off....................... 77 Expand......................78 Addenda Required..................78 Addenda Separator................78 Check Digit....................79 Number System..................80 Addenda....................
- Page 7 Message Length..................89 GS1 DataBar Omnidirectional..............91 On/Off....................... 91 GS1 DataBar Limited..................91 On/Off....................... 91 GS1 DataBar Expanded................92 On/Off....................... 92 Message Length..................92 PDF417......................93 On/Off....................... 93 Message Length..................93 QR Code......................94 On/Off....................... 94 Message Length..................94 Data Matrix.....................95 On/Off....................... 95 Message Length..................95 Aztec Code....................
- Page 8 2D Symbologies..................105 Postal Symbologies................106 ASCII Conversion Chart................107 Sample Symbols..................111 Programming Charts.................. 114...
-
Page 9: Foreword
Foreword Introduction This manual provides instructions for starting and configuring the barcode scanner, as well as maintenance and customer support information. Some content about the above models are not supported in this manual: Chapter 2 Interface Type Chapter 3 input and output settings :Good Read Delay Chapter 5 Data Formatting Chapter 6 Symbologies code 39- Full ASCII,UPC-E1 The barcode scanners are factory configured for common terminal and... -
Page 10: Chapter Outline
Chapter outline Chapter 1 Getting Started Barcode scanner connection method Chapter 2 Interface Type Describes the main types of interface types. Chapter 3 Input/Output Settings Decoding success/failure LED and buzzer response. Chapter 4 Data Editing Describe how to add a prefix/suffix Chapter 5 Data Formatting Introduce the addition and editing of data formats Chapter 6 Symbologies Introduce all the code systems and... -
Page 11: Chapter 1 Connection And Basic Settings
Chapter 1 Connection and Basic Settings Introduction The barcode scanner supports three connection methods. Please follow the appropriate connection procedure to connect the barcode scanner. Unpacking To open the product packaging, perform the following steps: • Remove the scanner and its accessories and inspect for damage during shipment. -
Page 12: Usb Connection
USB Connection The barcode scanner can be connected to the USB port of your computer. Connect the device interface (RJ45 connector) of the USB cable to the device. Connect the host interface (USB interface) of the USB cable to the host. -
Page 13: Ps/2 Connection
PS/2 Connection 1. Connect the device interface end (RJ45 interface) of the PS/2 data cable to the scanner. 2. Connect the host interface end (PS/2 interface) of the PS/2 data cable to the host. 3. Connect the PS/2 cable to the power adapter if needed. 4. -
Page 14: Rs232 Connection
RS232 Connection Connect the device interface (RJ45 connector) of the RS-232 cable to the scanner. Connect the host interface (RS-232 interface) of the RS-232 cable to the host. The barcode scanner is humming. Verify the operation by scanning the Sample Symbols at the end of this manual. -
Page 15: Barcode Reading
Barcode Reading The barcode scanner has a line of sight/point that projects a red aiming beam that corresponds to the horizontal field of view of the barcode scanner. The line of sight/point should be at the center of the barcode, but it can be positioned in any direction to facilitate reading. -
Page 16: Defaults Setting
Defaults Setting User-defined Settings Create user-defined settings according to your needs. Scan the “Load User-defined Settings” barcode first, scan the settings you need to customize, and then scan “Save User-defined Settings” to save the current settings to user-defined settings and overwrite the previously set users. -
Page 17: Delete User-Defined Settings
Delete User-defined Settings If you are not sure which user-defined settings are in the barcode scanner, or if you have changed some settings and want to restore the barcode scanner to the factory defaults, first scan the "Delete User-defined Settings" barcode and then scan "Load Factory Defaults" barcode. This will reset the barcode scanner to the factory default settings. -
Page 18: Chapter 2 Interface Type
Chapter 2 Interface Type Introduction This chapter introduces the USB and RS232 interface types and lists their related configurations. RS232 Connect RS232 interface, you need to scan the "RS232" barcode, the serial port related configuration is: 115200 baud rate, 8 data bits, no parity, 1 stop bit, add carriage return and line feed by default. -
Page 19: Rs232 Baud Rate
RS232 Baud Rate Baud Rate sends the data from the scanner to the terminal at the specified rate. The host terminal must be set for the same baud rate as the scanner. Default =115200. (8310030.) (8310031.) (8310032.) 1200 (8310033.) 2400 (8310034.) 4800 (8310035.) -
Page 20: Rs232 Word Length: Data Bits, Stop Bits, And Parity
(8310037.) 38400 (8310038.) 57,600 (8310039.) *115,200 RS232 Word Length: Data Bits, Stop Bits, and Parity Data Bits You can choose to transfer 7,8-bit data bits, and you must set the terminal to the same data bit as the barcode scanner to communicateproperly. Default = 8. - Page 21 (8310064.) 7 Data, 2 Stop, Parity Even (8310061.) 7 Data, 2 Stop Parity None (8310067.) 7 Data, 2 Stop, Parity Odd (8310065.) 8 Data, 1 Stop, Parity Even (8310062.) * 8 Data, 1 Stop, Parity None (8310068.) 8 Data, 1 Stop, Parity Odd...
-
Page 22: Usb
USB IBM SurePos Scan one of the following codes to program the scanner for an IBM SurePos (USB handheld scanner) or IBM SurePos (USB tabletop scanner) interface. Note: After scanning one of these codes, you must power cycle the cash register. -
Page 23: Usb Serial
(881001131.) USB HID BarCode Scanner USB Serial Scan the following code to program the scanner to emulate a regular RS232- based COM Port. (881001130.) USB Serial Note: No extra configuration (e.g., baud rate) is necessary. -
Page 24: Chapter 3 Input/Output Settings
Chapter 3 Input/Output Settings Introduction This chapter mainly introduces the configuration of the beep and LED of the barcode scanner when it is powered on, decoded, and triggered by the button. Startup Beeper The scanner can be programmed to beep when it’s started up. Default = Startup Beeper On. -
Page 25: Good Read And Error Read Indicators
Good Read and Error Read Indicators Good Read Beeper The beeper may be programmed On or Off in response to a good read. Default = Good Read Beeper On (8410010.) Good Read Beeper Off (8410011.) * Good Read Beeper On Good Read Beeper Volume The beeper volume codes modify the volume of the beep the scanner emits on a good read. -
Page 26: Good Read Beeper Frequency
Good Read Beeper Frequency The beeper frequency codes modify the frequency of the beep the scanner emits on a good read. Default = Medium. (8410061600.) Low (1600 Hz) (8410062400.) * Medium (2400 Hz) (8410064200.) High (4200 Hz) Good Read Beeper Duration The beeper duration codes modify the length of the beep the scanner emits on a good read. -
Page 27: Good Read Led
(8410073250.) Medium (3250 Hz) (8410074200.) High (4200 Hz) Good Read LED The LED indicator can be programmed On or Off in response to a good read. Default = On. (8410081.) * Good Read LED On (8410080.) Good Read LED Off... -
Page 28: Good Read Delay
Good Read Delay This sets the minimum amount of time before the scanner can read another barcode. Default = * Short Delay (750 ms) (8510060.) No Delay (851006750.) * Short Delay (750 ms) (8510061000.) Medium Delay (1,000 ms) (8510061500.) Long Delay (1,500 ms) Manual Trigger Mode When in manual trigger mode, the scanner scans until a barcode is read, or until the button is released. -
Page 29: Mobile Phone Read Mode
Mobile Phone Read Mode When this mode is selected, your scanner is optimized to read barcodes from mobile phone or other LED displays. However, the speed of scanning printed barcodes may be slightly lower when this mode is enabled. (801031.) Hand Held Scanning - Mobile Phone (801033.) Presentation Scanning - Mobile Phone... -
Page 30: Chapter 4 Data Editing
Chapter 4 Data Editing Introduction This chapter describes how to add prefixes and suffixes. • Default prefix = None. Default suffix = None. • A prefix or suffix may be added or cleared from one symbology or all symbologies. • You can add any prefix or suffix from the ASCII Conversion Chart deplus Code I.D. -
Page 31: Add Prefix Or Suffix
Add Prefix or Suffix Step 1. Scan the Add Prefix or Add Suffix symbol Step 2. Determine the 2 digit Hex value from the Symbology Chart for the symbology to which you want to apply the prefix or suffix. For example, for Code 11, Code ID is “h”... -
Page 32: Example
Example Add a Suffix to a specific symbology To send a CR (carriage return)Suffix for code 128. only: Step 1. Scan Add Suffix. Step 2. Determine the 2 digit hex value from the Symbology Charts code 128. Step 3. Scan 6, 3 from the Programming Chart inside the back cover of this manual. - Page 33 (800002.) Save...
-
Page 34: To Add A Carriage Return Suffix To All Symbologies
To Add a Carriage Return Suffix to All Symbologies Scan the following barcode if you wish to add a carriage return suffix to all symbologies at once. This action first clears all current suffixes, then programs a carriage return suffix for all symbologies. (890000.) Add CR Suffix All Symbologies Clear Prefixes or Suffixes... -
Page 35: Prefix Selections
Prefix Selections (889002.) Add Prefix (889004.) Clear One Prefix (889003.) Clear All Prefixes Suffix Selections (888002.) Add Suffix (888004.) Clear One Suffix (888003.) Clear All Suffixes... -
Page 36: Function Code Transmit
Function Code Transmit When this selection is enabled and function codes are contained within the scanned data, the scanner transmits the function code to the terminal. Default = Enable. (8870010.) * Enable (8870011.) Disable Intermessage Delay An intermessage delay of up to 5000 milliseconds (in 5ms increments) may be placed between each scan transmission. -
Page 37: Chapter 5 Data Formatting
Chapter 5 Data Formatting Introduction You may use the data format editor to change the scanner’s output. Forexample, you can use the data format editor to insert characters at certain points in bar- code data as it is scanned. The selections in the following pages are used onlyif you wish to alter the output. -
Page 38: Add A Data Format
Add a Data Format Step 1. Scan the Enter Data Format barcode . Step 2. Select Primary/Alternate Format Determine if this will be your primary data format, or one of 3 alternate formats. This allows you to save a total of 4 different data formats. -
Page 39: Example
(886002.) Enter Data Format (800002.) Save (800000.) Discard Example Add Specific Data Format Step 1. Scan the Enter Data Format barcode. Step 2. To select an alternative data format 1, please scan the "1" barcode in the appendix to the manual. Step 3. - Page 40 input is E902. Scan the digital barcodes “E”, “9”, “0”, “2” from the Programming Chart Step 7. Scan Save to “save” your data format, or “Discard” to exit without saving your changes. Step 8. Scan the selected data format "Data Format 1" barcode forthe configuration to take effect.
-
Page 41: Other Programming Selections
(SES.) (S9S.) (S2S.) (800002.) Save (800000.) Discard (8850011.) Data Format 1 Other Programming Selections Clear One Data Format This deletes one data format for one symbology. If you are clearing the primary format, scan 0 from the Programming Chart inside the back cover of this manual. If you are clearing an alternate format, scan 1, 2, or 3, depending on the format you are clearing. - Page 42 unaffected. Clear all Data Formats This clears all data formats. Save to exit and save your data format changes. Discard to exit without saving any data format changes. (886004.) Clear One Data Format (886003.) Clear All Data Formats (800002.) Save (800000.) Discard Terminal ID Table...
-
Page 43: Data Format Editor Commands
Data Format Editor Commands Send Commands Send all characters F1 Command format=F1xx(xx: hexadecimal of the character to be inserted) Outputs all characters to the right of the cursor and then outputs the character xx. Refer to the ASCII Conversion Chart for decimal, hex and character codes. -
Page 44: Primary/Alternate Data Formats
Primary/Alternate Data Formats You can save up to four data formats, and switch between these formats. Your primary data format is saved under 0. Other three formats are saved under 1, 2, and 3. To set your device to use one of these formats, scan one of the barcodes below. -
Page 45: Chapter 6 Symbologies
Chapter 6 Symbologies Introduction Each type of barcode has its own unique properties. The barcode scanner can be adjusted to accommodate these property changes through the configuration code in this chapter. The fewer the barcode types, the faster the barcode scanner can read. You can disable the barcode scanner to read the barcode types that will not be used to improve the performance of the barcode scanner. -
Page 46: All Symbologies
All Symbologies If you want to decode all the symbologies allowable for your scanner,scan the All Symbologies On barcode. If on the other hand, you want to decode only a particular symbology, scan All Symbologies Off followed by the On barcode for that particular symbology. (9990011.) All Symbologies On (9990010.) -
Page 47: Codabar
Codabar <Default All Codabar Settings> (900000.) Default All Codabar Settings On/Off (9000031.) * On (9000030.) Start/Stop Characters Start/Stop characters identify the leading and trailing ends of the barcode. You may either transmit, or not transmit Start/Stop characters. Default = Don’t Transmit. (9000061.) Transmit (9000060.) - Page 48 When Check Character is set to Validate and Transmit, the scanner will only read Codabar barcodes printed with a check character, and will transmit this character at the end of the scanned data. When Check Character is set to Validate, but Don’t Transmit, the unit will only read Codabar barcodes printed with a check character, but will not transmit the check character with the scanned data.
-
Page 49: Concatenation
Concatenation Codabar supports symbol concatenation. When you enable concatena- tion, the scanner looks for a Codabar symbol having a “D” start character, adjacent to a symbol having a “D” stop character. In this case the two mes- sages are concatenated into one with the “D” characters omitted. A 1 2 3 4 D D 5 6 7 8A Select Require to prevent the scanner from decoding a single “D”... -
Page 50: Message Length
Message Length Scan the barcodes below to change the message length. Refer to Message Length Description for additional information. Minimum and Maximum lengths = 2-60. Minimum Default = 4, Maximum Default = 60. (900005.) Minimum Message Length (900004.) Maximum Message Length... -
Page 51: Code 39
Code 39 < Default All Code 39 Settings > (901000.) Default All Code 39 Settings Code 39 On/Off (9010011.) * On (9010010.) Start/ Stop Characters Start/Stop characters identify the leading and trailing ends of the barcode. You may either transmit, or not transmit Start/Stop characters. Default = Don’t Transmit. -
Page 52: Check Character
Check Character No Check Character indicates that the scanner reads and transmits bar- code data with or without a check character. When Check Character is set to Validate, but Don’t Transmit, the unit only reads Code 39 barcodes printed with a check character, but will not transmit the check character with the scanned data. - Page 53 (901007.) Maximum Message Length...
-
Page 54: Code 39 Append
Code 39 Append This function allows the scanner to append the data from several Code 39 barcodes together before transmitting them to the host computer. When the scanner encounters a Code 39 barcode with the append trigger char- acter(s), it buffers Code 39 barcodes until it reads a Code 39 barcode that does not have the append trigger. -
Page 55: Code 32 Pharmaceutical (Paraf)
Code 32 Pharmaceutical (PARAF) Code 32 Pharmaceutical is a form of the Code 39 symbology used by Ital- ian pharmacies. This symbology is also known as PARAF. (9010051.) (9010050.) * Off... -
Page 56: Full Ascii
FULL ASCII If Full ASCII Code 39 decoding is enabled, certain character pairs within the bar- code symbol will be interpreted as a single character. For example:$V will be decoded as the ASCII character SYN, and /C will be decoded as the ASCII character #. -
Page 57: Interleaved 2 Of 5
Interleaved 2 of 5 < Default All Interleaved 2 of 5 Settings > (902000.) Default All Interleaved 2 of 5 Settings On/Off (9020021.) * On (9020020.) Check Digit No Check Digit indicates that the scanner reads and transmits barcode data with or without a check digit. When Check Digit is set to Validate, but Don’t Transmit, the unit only reads Interleaved 2 of 5 barcodes printed with a check digit, but will not transmit the check digit with the scanned data. - Page 58 (9020011.) Validate, but Don’t Transmit (9020012.) Validate and Transmit...
-
Page 59: Message Length
Message Length Scan the barcodes below to change the message length. Refer to Message Length Description for additional information. Minimum and Maximum lengths = 2-80. Minimum Default = 4, Maximum Default = 80. (902004.) Minimum Message Length (902003.) Maximum Message Length... -
Page 60: Nec 2 Of 5
NEC 2 of 5 < Default All NEC 2 of 5 Settings > (903000.) Default All NEC 2 of 5 Settings On/Off (9030011.) * On (9030010.) Check Digit No Check Digit indicates that the scanner reads and transmits barcode data with or without a check digit. When Check Digit is set to Validate, but Don’t Transmit, the unit only reads NEC 2 of 5 barcodes printed with a check digit, but will not transmit the check digit with the scanned data. - Page 61 (9030021.) Validate, but Don’t Transmit (9030022.) Validate and Transmit...
-
Page 62: Message Length
Message Length Scan the barcodes below to change the message length. Refer to Message Length Description for additional information. Minimum and Maximum lengths = 2-80. Minimum Default = 4, Maximum Default = 80. (903004.) Minimum Message Length (903003.) Maximum Message Length... -
Page 63: Code 93
Code 93 < Default All Code 93 Settings > (904000.) Default All Code 93 Settings On/Off (9040021.) * On (9040020.) Message Length Scan the barcodes below to change the message length. Refer to Message Length Description for additional information. Minimum and Maximum lengths = 0-80. -
Page 64: Straight 2 Of 5 Industrial (Three-Bar Start/Stop)
Straight 2 of 5 Industrial (three-bar start/stop) <Default All Straight 2 of 5 Industrial Settings> (905000.) Default All Straight 2 of 5 Industrial (three-bar start/stop)Settings On/Off (9050011.) (9050010.) * Off Message Length Scan the barcodes below to change the message length. Refer to Message Length Description for additional information. -
Page 65: Straight 2 Of 5 Iata (Two-Bar Start/Stop)
Straight 2 of 5 IATA (two-bar start/stop) <Default All Straight 2 of 5 IATA Settings> (906000.) Default All Straight 2 of 5 IATA (two-bar start/stop)Settings On/Off (9060011.) (9060010.) *Off Message Length Scan the barcodes below to change the message length. Refer to Message Length Description for additional information. -
Page 66: Matrix 2 Of 5
Matrix 2 of 5 <Default All Matrix 2 of 5 Settings> (907000.) Default All Matrix 2 of 5 Settings On/Off (9070011.) (9070010.) * Off Message Length Scan the barcodes below to change the message length. Refer to Message Length Description for additional information. -
Page 67: Code 11
Code 11 <Default All Settings> (908000.) Default All Code 11 Settings On/Off (9080021.) (9080020.) * Off Check Digits Required This option sets whether 1 or 2 check digits are required with Code 11 barcodes. Default = Two Check Digits. (3110280.) One Check Digit (3110281.) * Two Check Digits... -
Page 68: Message Length
Message Length Scan the barcodes below to change the message length. Refer to Message Length Description for additional information. Minimum and Maximum lengths = 1-80. Minimum Default = 4, Maximum Default = 80. (908004.) Minimum Message Length (908003.) Maximum Message Length... -
Page 69: Code 128
Code 128 <Default All Code 128 Settings> (909000.) Default All Code 128 Settings On/Off (9090011.) * On (9090010.) ISBT 128 Concatenation (9020051.) ISBT 128 On (9020050.) *ISBT 128 Off... -
Page 70: Message Length
Message Length Scan the barcodes below to change the message length. Refer to Message Length Description for additional information. Minimum and Maximum lengths = 0-80. Minimum Default = 0, Maximum Default = 80. (909003.) Minimum Message Length (909002.) Maximum Message Length... -
Page 71: Gs1-128
GS1-128 <Default All GS1-128 Settings> (910000.) Default All GS1-128 Settings On/Off (9100011.) * On (9100010.) Message Length Scan the barcodes below to change the message length. Refer to Message Length Description for additional information. Minimum and Maximum lengths = 1-80. Minimum Default = 1, Maximum Default = 80. (910003.) Minimum Message Length (910002.) -
Page 72: Telepen
Telepen <Default All Telepen Settings> (911000.) Default All Telepen Settings On/Off (9110011.) (9110010.) * Off Message Length Scan the barcodes below to change the message length. Refer to Message Length Description for additional information. Minimum and Maximum lengths = 1-60. Minimum Default = 1, Maximum Default = 60. (911003.) Minimum Message Length (911002.) -
Page 73: Upc-A
UPC-A <Default All UPC-A Settings> (912000.) Default All UPC-A Settings (9120031.) * On (9120030.) Note: When UPC-A Off is scanned, UPC-A barcodes are transmitted as EAN- 13. Check Digit This selection allows you to specify whether the check digit should be transmitted at the end of the scanned data or not. -
Page 74: Number System
Number System The numeric system digit of a U.P.C. symbol is normally transmitted at the beginning of the scanned data, but the unit can be programmed so it will not transmit it. Default = On. (9120051.) * On (9120050.) Addenda This selection adds 2 or 5 digits to the end of all scanned UPC-A data. -
Page 75: Addenda Required
Addenda Required When Required is scanned, the scanner will only read UPC-A barcodes that have addenda. You must then turn on a 2 or 5 digit addenda. Default = Not Required. (9120061.) Required (9120060.) * Not Required Addenda Separator When this feature is on, there is a space between the data from the barcodeand the data from the addenda. -
Page 76: Upc-E0
UPC-E0 <Default All UPC-E Settings> (914000.) Default All UPC-E0 Settings On/Off Most U.P.C. barcodes lead with the 0 number system. To read these codes, use the *UPC-E0 On selection. If you need to read codes that lead with the 1 number system, use UPC-E1. -
Page 77: Expand
Expand UPC-E Expand expands the UPC-E code to the 12 digit, UPC-A format. Default = Off. (9140021.) (9140020.) * Off Addenda Required When Required is scanned, the scanner will only read UPC-E barcodes that have addenda. Default = Not Required. (9140031.) Required (9140030.) -
Page 78: Check Digit
(9140040.) Check Digit Check Digit specifies whether the check digit should be transmitted at the end of the scanned data or not. Default = On. (9140051.) (9140050.) -
Page 79: Number System
Number System The numeric system digit of a U.P.C. symbol is normally transmitted at the beginning of the scanned data, but the unit can be programmed so it will not transmit it. To prevent transmission, scan Off. Default = On. (9140061.) * On (9140060.) -
Page 80: Upc-E1
UPC-E1 Most U.P.C. barcodes lead with the 0 number system. For these codes, use UPC-E0. If you need to read codes that lead with the 1 number system, use the UPC-E1 On selection. Default = Off. (9140091.) UPC-E1 On (9140090.) EAN/JAN-13 * UPC-E1 Off <Default All EAN/JAN Settings>... -
Page 81: Check Digit
Check Digit This selection allows you to specify whether the check digit should betransmitted at the end of the scanned data or not. Default = On. (9150021.) * On (9150020.) Addenda This selection adds 2 or 5 digits to the end of all scanned EAN/JAN-13 data. Default = Off for both 2 Digit and 5 Digit Addenda. -
Page 82: Addenda Required
Addenda Required When Required is scanned, the scanner will only read EAN/JAN-13 barcodes that have addenda. Default = Not Required. (9150051.) Required (9150050.) * Not Required Addenda Separator When this feature is On, there is a space between the data from the barcode and the data from the addenda. - Page 83 (9150070.) * Off...
-
Page 84: Ean/Jan-8
EAN/JAN-8 <Default All EAN/JAN-8 Settings> (916000.) Default All EAN/JAN-8 Settings On/Off (9160011.) * On (9160010.) Check Digit This selection allows you to specify whether the check digit should betransmitted at the end of the scanned data or not. Default = On. (9160021.) * On (9160020.) -
Page 85: Addenda Required
(9160031.) 2 Digit Addenda On (9160030.) * 2 Digit Addenda Off (9160041.) 5 Digit Addenda On (9160040.) * 5 Digit Addenda Off Addenda Required When Required is scanned, the scanner will only read EAN/JAN-8 barcodes that have addenda. Default = Not Required. (9160051.) Required (9160050.) - Page 86 When this feature is On, there is a space between the data from the barcode and the data from the addenda. When turned Off, there is no space. Default = On. (9160061.) * On (9160060.)
-
Page 87: Msi
<Default All MSI Settings> (917000.) Default All MSI Settings On/Off (9170011.) (9170010.) * Off... -
Page 88: Check Characte
Check Characte MSI barcodes use different types of check characters. You can configure the barcode scanner to read the MSI barcode using the check character. Default = Validate MOD 10, but Don’t Transmit When Check Character is set to Validate MOD 10 and Transmit, the scanner will only read MSI barcodes printed with the specified type check character(s), and will transmit the character(s) at the end of the scanned data. - Page 89 (917003.) Maximum Message Length...
-
Page 90: Gs1 Databar Omnidirectional
GS1 DataBar Omnidirectional < Default All GS1 DataBar Omnidirectional Settings > (918000.) Default All GS1 DataBar Omnidirectional Settings On/Off (9180011.) * On (9180010.) GS1 DataBar Limited < Default All GS1 DataBar Limited Settings > (919000.) Default All GS1 DataBar Limited Settings On/Off (9190011.) * On... -
Page 91: Gs1 Databar Expanded
GS1 DataBar Expanded < Default All GS1 DataBar Expanded Settings > (920000.) Default All GS1 DataBar Expanded Settings On/Off (9200011.) * On (9200010.) Message Length Scan the barcodes below to change the message length. Refer to Message Length Description for additional information. Minimum and Maximum lengths = 4-74. -
Page 92: Pdf417
PDF417 < Default All PDF417 Settings > (924000.) Default All PD417 Settings On/Off (9240011.) * On (9240010) Message Length Scan the barcodes below to change the message length. Refer to Message Length Description for additional information. Minimum and Maximum lengths = 1-2750. -
Page 93: Qr Code
QR Code < Default All QR Code Settings > (928000.) Default All QR Code Settings On/Off This selection applies to both QR Code and Micro QR Code. (9280011.) * On (9280010.) Message Length Scan the barcodes below to change the message length. Refer to Message Length Description for additional information. -
Page 94: Data Matrix
Data Matrix < Default All Data Matrix Settings > (930000.) Default All Data Matrix Settings On/Off (9300011.) * On (9300010.) Message Length Scan the barcodes below to change the message length. Refer to Message Length Description for additional information. Minimum and Maximum lengths = 1-3116. -
Page 95: Aztec Code
Aztec Code < Default All Aztec Code Settings > (931000.) Default All Aztec Code Settings On/Off (9310011.) * On (9310010.) Message Length Scan the barcodes below to change the message length. Refer to Message Length Description for additional information. Minimum and Maximum lengths = 1-3832. -
Page 96: China Post (Hong Kong 2 Of 5)
China Post (Hong Kong 2 of 5) <Default All China Post (Hong Kong 2 of 5) Settings> (936000.) Default All China Post (Hong Kong 2 of 5)Settings On/Off (9360011.) (9360010.) * Off Message Length Scan the barcodes below to change the message length. Refer to Message Length Description for additional information. -
Page 97: Korea Post
Korea Post <Default All Korea Post Settings> (937000.) Default All Korea Post Settings On/Off (9370011.) (9370010.) * Off Message Length Scan the barcodes below to change the message length. Refer to Message Length Description for additional information. Minimum and Maximum lengths = 2-80. Minimum Default = 4, Maximum Default = 48. (937003.) Minimum Message Length (937002.) - Page 98 at the end of the scanned data. Default = Don’t Transmit. (9370041.) (9370040.) * Off...
-
Page 99: Chapter 7 Utilities
Chapter 7 Utilities Show Software Revision Scan the barcode below to output the current software revision, unit serialnumber, and other product information. (809005.) Show Revision... -
Page 100: Chapter 8 Common Problems And Solutions
Chapter 8 Common Problems And Solutions Problem: The barcode scanner does not work. possible reason: 1. The barcode scanner is not powered, check the power of theequipment. If you are using an incorrect cable, use the cable that was originally configured. The cable interface is loose and reconnected. -
Page 101: Chapter 9 Maintenance And Customer Service
Chapter 9 Maintenance And Customer Service Maintenance Stains and dust on the scanning window can sometimes affect the normal operation of the barcode scanner. When cleaning, use a good quality tissue to wipe gently, or use a soft cloth to clean. If you use a paper with poor paper quality for a long time, it willdamage the surface finish of the window and affect the reading effect of the barcode scanner. -
Page 102: Reference Charts
Reference Charts Symbology Charts Linear Symbologies Symbology Possible Modifiers (m) All Symbologies Codabar Code 11 Code 128 0, 1, 2, 4 Code 32 < Pharmaceutical (PARAF) Code 39 (supports Full 0, 1, 3, 4, 5,7 ASCII mode) TCIF Linked Code 39 (TLC39) Code 93 and 93i 0-9, A-Z,... - Page 103 Symbology Possible Modifiers (m) GS1 DataBar GS1 DataBar Limited GS1 DataBar Expanded GS1-128 2 of 5 China Post (Hong Kong 2 of Interleaved 2 of 5 0, 1, 3 Matrix 2 of 5 NEC 2 of 5 Straight 2 of 5 IATA 0, 1, 3 Straight 2 of 5 Industrial 0, 1...
-
Page 104: 2D Symbologies
2D Symbologies Symbology Possible Modifiers (m) All Symbologies Aztec Code 0-9, A-C Chinese Sensible Code (Han Xin Code) Codablock A 0, 1, 4, 5, 6 Codablock F 0, 1, 4, 5, 6 Code 49 0, 1, 2, 4 Data Matrix GS1 Composite GS1 DataBar Omnidirectiona... -
Page 105: Postal Symbologies
Postal Symbologies Symbology Possible Modifiers (m) All Symbologies Australian Post British Post Canadian Post Symbology Possible Modifiers (m) China Post InfoMail Intelligent Mail Barcode Japanese Post KIX (Netherlands) Post Korea Post Planet Code Postal-4i Postnet... -
Page 106: Ascii Conversion Chart
ASCII Conversion Chart Char NUL (Null char.) SOH (Start of Header) STX (Start of Text) ETX (End of Text) EOT (End of Transmission) ENQ (Enquiry) ACK (Acknowledgment) BEL (Bell) BS (Backspace) HT (Horizontal Tab) LF (Line Feed) VT (Vertical Tab) FF (Form Feed)... - Page 107 $ (Dollar Sign) % (Percent) & (Ampersand) ` (Single Quote) ((Right / Closing Parenthesis) )(Right / Closing Parenthesis) * (Asterisk) + (Plus) ,(Comma) -(Minus / Dash) . (Dot) / (Forward Slash) :(Colon) ;(Semi-colon) < (Less Than) (Equal Sign) > (Greater Than) (Question Mark)...
- Page 108 [ (Left / Opening Bracket) \(Back Slash) ] (Right / Closing Bracket) ^ (Caret / Circumflex) _ (Underscore) ' (Grave Accent)...
- Page 109 { (Left/ Opening Brace) | (Vertical Bar) } (Right/Closing Brace) ~ (Tilde) DEL (Delete)...
-
Page 110: Sample Symbols
Sample Symbols UPC-A Interleaved 2 of5 01234567890 Code 128... - Page 111 Code 93 Straight 2 of 5Industrial 123456-9$ 123456 Matrix 2 of 5 GS1DataBar 6543210 PDF417 0100123456789012 Codabar...
- Page 112 Data Matrix TestSymbol QRCode Numbers Aztec Micro PDF417 MaxiCode Test Message Test Message...
-
Page 113: Programming Charts
Programming Charts (S0S.) (S1S.) (S2S.) (S3S.) (S4S.) (S5S.) (S6S.) (S7S.) - Page 114 (S8S.) (S9S.)
- Page 115 (SAS.) (SBS.) (SCS.) (SDS.) (SES.) (SFS.) (800002.) Save (800000.) Discard Note: If an error occurs while scanning a letter or number (before scanning the "Save" barcode), scan the "Discard" barcode, rescan the correct letter or number, and then scan the "Save" barcode.
Need help?
Do you have a question about the ICS-1290 and is the answer not in the manual?
Questions and answers