
Related Manuals for Ella Ultimate 93217 L


Summary of Contents for Ella Ultimate 93217 L
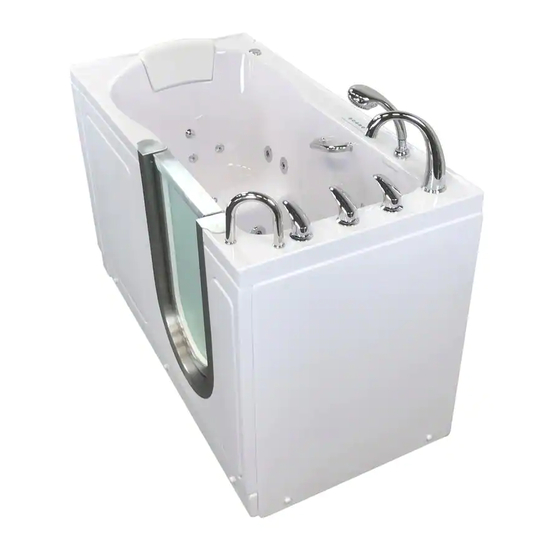
- Page 1 ELLA ACRYLIC WALK IN BATHTUBS OWNERS MANUAL Ultimate Deluxe Royal Elite Petite 93217 L / 93218 R 93057 L / 93058 R 93117 L / 93118 R 93107 L / 93108 R 93167 L / 931688 R...
- Page 2 Failure to complete both pages (p.18 and p.19) will void the warranty on this bathtub. Completed Ella Warranty Activation Forms can be emailed to warranty@ellasbubbles.com, faxed to 312.666.3551, OR mailed to 2101 S. Carpenter St., Chicago, IL 60608...
-
Page 3: Unpacking And Inspecting
Unpacking and Inspecting Inspect the carton for damage: Take a picture if possible. CAREFULLY RECORD ALL PERCEIVED DAMAGE DO NOT LIFT THE TUB BY THE PLUMBING. Doing so can result in leaks, for which the installer is responsible. All Walk-In Tubs are water tested before they leave our factory and the bath tub you have purchased has passed... -
Page 4: Warnings And Labels
Warnings and Labels Your Ella's bathtub comes with several warning label stickers throughout and are as follows: Details on Page 12 Push Control Acrylic Shell Back nut Air hose Details on Page 3 www.ellasbubbles.com 03/18... - Page 5 Warnings and Labels continued Backnut MUST be securely tightened. Failure to do so will cause loosening over time resulting in it coming apart and falling down the drain. Drain closed Drain open completely all the way Drain must open completely to drain properly and close completely to avoid unnecessary drainage.
- Page 6 WARNING! PLEASE READ BEFORE BEGINNING INSTALLATION WARNING: Do not attach the hand held shower to the wall unless you have an extension hose with a barrel protection. This may cause water to leak behind your walk in tub. TO INSTALL BARREL EXTENSION HOSE: Water from the hose can drip down into the hand shower base and get behind your tub without the barrel...
- Page 7 Please heed all warnings listed in the previous pages to avoid potential issues...
- Page 8 Moving your Ella Walk in Bath •Remove all four (4) access panels before moving the tub •Take off the screw caps •Unscrew the screws with a Philips head screwdriver Large Access Panel (1) •Remove the end access panel Small Access Panel (2)
-
Page 9: Important Safety Instructions
Temperature in excess of 100.4 Fahrenheit (38 Celsius) may be harmful to your health. Check and adjust the temperature before use. Consult your physician before using your Ella Walk in Bath if you have a heart condition or other health issues. People using medications, herbal remedies, sleep aids, and/or having adverse medical history should consult a physician before using this product. - Page 10 Important Safety Instructions WARNING: ***USE TUB ONLY AS INTENDED! FAILURE TO DO SO CAN LEAD TO INJURY OR DEATH*** WARNING CORRECT BATHER SHOULD ONLY SIT AS SHOWN IN FIGURE TO THE LEFT. SIT FULLY IN SEAT WITH BACK ON THE BACKREST.
- Page 11 Required Steps Prior to Installation Protecting the Bath Cover and protect the bath shell and fixtures from scratches or other damages during the installation and tests. Remove the access panels when moving the Walk in Bath and always lift the bathtub from the frame. Electrical The unit MUST be connected to a circuit protected by a ground fault circuit interrupter (GFCI) provided and installed by a licensed electrician and tested periodically (refer to...
- Page 12 Drain and Plumbing There are 2 types of drains used for Ella's Bubbles Walk-In Tubs. 2" Brass or PVC T-type. Please refer to the drain delivered with your Walk-In Tub. 2" Brass Drain System Brass Drain Setup: The 2" Brass Drain setup will have a 90 PVC elbow connected to each of the drains.
- Page 13 Make sure that the drain rough in has been placed at the proper location. The specifications and drawings shown below and on page #7 are for the Ella Deluxe (each model comes with separate specifications, please refer each model's specification).
- Page 14 Drain and Plumbing Positioning Options for 2" T Type Dual Port Drain Systems www.ellasbubbles.com 03/18...
- Page 15 Drain and Plumbing Positioning Options for 2" T Type Dual Port Drain Systems www.ellasbubbles.com...
- Page 16 Drain and Plumbing Positioning Options for 2" T Type Dual Port Drain Systems www.ellasbubbles.com...
- Page 17 Door and Frame Adjustments Prepare the sub-floor for the drain and ensure that the area is level. The supporting sub-floor must be able to support the total weight of the bathtub, bather and water and must meet local construction code requirements. Use a level and make sure that the sub-floor below the tub is leveled.
- Page 18 Door and Frame Adjustments Your walk in bathtub has been tested and leveled properly before leaving our facility. Our walk in bathtubs have been set on a perfectly level surface to ensure no leaks and proper door closing. It is up to your installer to test and make any adjustments necessary to ensure that all leveling legs support the tub frame and that the door is aligned correctly to prevent any leaks.
- Page 19 Door and Frame Adjustments WARNING: Failure to level the tub correctly WILL RESULT IN MISALIGNMENT! The drawings below illustrate some examples of what types of frame warping will occur if the legs are not level with the floor. www.ellasbubbles.com...
- Page 20 It is the responsibility of the installer or owner to provide access for service required, per code. Ella is not responsible for any costs related to obtaining access for repair. The owner shall assume responsibility for such costs, and if appropriate, must seek recovery from the installer.
- Page 21 Installation of Deck Mount Grab Bar Parts List: Chrome grab bar x (1) Escutcheon x (2) Rubber washers x (4) Metal washers x (2) Bolts x (2) WARNING Grab Bar GRAB BAR WASHERS MUST BE INSTALLED TO PREVENT CRACKING OF THE ACRYLIC SHELL, FAILURE TO DO SO WILL VOID THE WARRANTY Escutcheon *THE LARGER METAL WASHER IS THE MOST...
- Page 22 Installing Extension Kits Installing Extension Kits Deluxe Dimensions: 5"W x 29 1/2"L x 37"H L" Stainless Steel Brackets ......Qty (3) Elite Dimensions: 7"W x 29 3/4"L x 37 3/4"H L" Acrylic Bracket ........Qty (1) Royal Dimensions: 7"W x 31 3/4"L x 37 3/4"H 1"...
-
Page 23: Finishing Installation
After all of the water and electrical testing is completed and all fixtures are checked, the tub can be installed to the surrounding wall or walls. Ella Walk in Baths come with low rise tile flange which allows for two or one wall installations. The extension panel of the bathtub can be installed as needed for 60"... -
Page 24: Cleaning And Maintenance
Cleaning and Maintenance Recommended Acrylic Cleaners DO NOT USE the following on your ACRYLIC Bath System. The use of the Use only cleaning products whose labels state that they are SAFE for ACRYLIC. following chemicals will cause a dull Always test products on a small are of skirt surface or chemical cracks. - Page 25 Cleaning and Maintenance Recommended Acrylic Cleaners Acrylic tubs provide customers with a better quality tub vs gel coat tubs. Unfortunately, these tubs can scratch if cleaned incorrectly. The way to proceed is gently, very gently. The good news: gentle cleaning does not translate into high maintenance.
- Page 26 Cleaning and Maintenance Hospital and Nursing Home Approved Bathtub Disinfectant DISINFECTANT 100337 NUTRA-MAX ® Is a Proven One-Step Disinfectant, Cleaner, Fungicide and Virucide*. For Hospitals, Nursing Homes, Hotels & Motels, Institutional, Industrial Sites, Schools, Restaurants, Food Handling and Processing Areas, Bars and Institutional Kitchens.
- Page 27 4-Fold BathScreen Installation Instructions...
- Page 28 ● Please read these instructions in full before installing. IMPORTANT ● Check that the bath has been installed to the manufacturer’s instructions. ● Opening wall adjustments 4-Fold Bath Screen - adjustment =44"-42"(1108-1118mm) GENERAL SAFETY INSTRUCTIONS ● Do not fix the wall profile to newly plastered, painted or papered walls as chemical reaction may cause discolouration to the surface finish.
- Page 29 IDENTIFICATION OF PARTS N4FS08 N4FS07 N4FS06 N4FS05 N4FS10 N4FS04 N4FS09 N4FS01 N4FS02 N4FS03 Fixings & fittings supplied Quantity Item No.: Part Quantity Item No.: Part N4FS07 N4FS01 N4FS02 N4FS08 N4FS03 N4FS09 N4FS04 N4FS10 ST4X10 N4FS05 N4FS11 SILICONE GREASE ST4X40 N4FS06...
- Page 30 Four fold bath screen is ok to be installed in left hand or right hand. Below steps are based on left hand. For right hand, please follow below steps in mirror direction. THE SCREEN MUST BE INSTALLED ON THE OPPOSITE SIDE OF THE EXTENSION PANEL. FAILURE TO DO SO WILL RESULT IN A GAP BETWEEN THE SCREEN AND TUB DECK Put top cover(N4FS08) on the top of the pivot of the N4FS02...
- Page 31 Loosen the screw in the bottom of the vertical profile, remove the bottom bracket. N4FS03 - Cut the soft edge of the seal N4FS03 by 3"(75mm) on one end. - Insert the seal into the bottom aluminum frame. - Tie off the end of the seal keep it from moving. - Put the bottom cap on the vertical profile, fix it with screw.
- Page 32 Drill the holes(Ø6mm) according to the marks and insert the wall plugs(N4FS06) into the holes. N4FS06 N4FS06 Fasten wall profile(N4FS01) on the wall with screw N4FS01 N4FS05 (N4FS05). ST4X40 N4FS01 N4FS05...
- Page 33 Insert screen panel into wall profile. - There is 0.39"(10mm )adjustment between panel and wall profile for any out of true walls. - Adjust the screen panel in correct position and make sure glass panel fits parallel to the bath edge, but does not sit down directly on bathtub edge.
- Page 34 - Put top cap N4FS07 on the top of wall profile. N4FS07 N4FS07 - Apply silicone sealant to the outside of the enclosure. Please note: Do not apply silicone sealant to the inside of the enclosure. Sealant drying times may vary in cold damp conditions and will be extended where thicker beads of sealant are applied.
- Page 35 - Before the first use, apply the silicone grease on each N4FS11 joint part as below drawing to make the opening and closing smoothly. SILICONE GREASE Cleaning and Maintenance: Please do not use abrasive or strong cleaning solutions on the shower enclosure, such as alcohol, petroleum liquids or any other chemical cleaner.
- Page 36 You may need to cut into the 4-Fold Screen if your walk-in bathtub has a tile edge or decorative deck lip. Please see below. If your walk-in bathtub has a tile edge or decorative deck lip, you will need to carefully cut out a small section so that your 4-fold screen will sit flush with the tub deck.
- Page 37 WARNING The 4-fold Screen MUST BE installed on the opposite side of the extension panel as shown below. Failure to do so WILL result in a gap between the screen and the tub. If your walk-in bathtub has a flange or tile edge, please refer to step 11.
- Page 38 May not be applicable to your specific package Refer to your package diagrams for more information Additional Operating Instructions by the Original Part Manufacturer TOUCHSTONE Dual Load Controller CIMC-296-01-01-01 (15 Amp) CIMC-296-01-02-01 (20 Amp) Configuration #1 Single Speed Pump Variable Speed Blower Owner’s Manual 22 of 38...
-
Page 39: Important Safety Instructions
May not be applicable to your specific package Refer to your package diagrams for more information Important Safety Instructions PLEASE READ CAREFULL Y PRIOR TO Troubleshooting and Servicing Electrical Equipment Definitions: WARNING (May cause serious injuries or death) CAUTION (May cause property damage) For information on NuWhirl Instructions, see: www.nuwhirl.com/docs/product-instructions.html When installing and using this electrical equipment, basic safety... - Page 40 May not be applicable to your specific package Refer to your package diagrams for more information TOUCHSTONE Dual Load Bath Control System Configuration #1 Owner’s Manual Your whirlpool bathtub has been equipped with TOUCHSTONE Electronic Controls to provide features that allow you to customize your bathing experience to your individual preference.
- Page 41 May not be applicable to your specific package Refer to your package diagrams for more information Air Button Operating Instructions Single Speed Pump (Water): The Whirlpool Water System is activated by pressing the Water Button. Ensure first that there is sufficient water in the Tub to at Water least cover the Jets.
- Page 42 May not be applicable to your specific package Refer to your package diagrams for more information TOUCHSTONE Dual Load Bath Control System Configuration #1 Owner’s Manual Electronic Keypad Operating Instructions Keypad Backlighting: When in Standby, the keys are not lighted. When in use, Blue keys indicate "No Water Detected", and Green keys indicate "Water Is Detected".
- Page 43 May not be applicable to your specific package Refer to your package diagrams for more information TOUCHSTONE Dual Load Control System Installation Instructions System Identification: CIMC-296-01-[01 or 02]-01 Configuration #1 01 Configuration #1 System features: Air Buttons or Electronic Keypad, Independent Timers, Single Air Buttons or Electronic Keypad, Independent Timers, Single-Speed Pump, Variable-Speed Blower, Multi-Color LED Tub Lights, Conductive Water Detect.
- Page 44 May not be applicable to your specific package Refer to your package diagrams for more information TOUCHSTONE Surface Heater Controller System For controller CIHC-300-01-01-01 Installation & Operating Instruction Manual NuWhirl Systems Corp • www.nuwhirl.com • 951-817-5600 MAN300010101 REV B 1/13/16 28 of 38...
- Page 45 May not be applicable to your specific package Refer to your package diagrams for more information Important Safety Instructions PLEASE READ CAREFULL Y PRIOR TO Troubleshooting and Servicing Electrical Equipment Definitions: WARNING (May cause serious injuries or death) CAUTION (May cause property damage) For information on NuWhirl Instructions, see: www.nuwhirl.com/docs/product-instructions.html When installing and using this electrical equipment, basic safety...
-
Page 46: System Features
May not be applicable to your specific package Refer to your package diagrams for more information TOUCHSTONE Surface Heater Control System Installation Instructions Your whirlpool bathtub has been equipped with TOUCHSTONE Electronic Controls to provide features that allow you to customize your bathing experience to your individual preference. - Page 47 May not be applicable to your specific package Refer to your package diagrams for more information Electronic Keypad Your Surface Heater System is controlled by a single electronic keypad power switch or combination heater and light keypad. When LED is lit the Surface Heaters are running.
- Page 48 May not be applicable to your specific package Refer to your package diagrams for more information TOUCHSTONE Surface Heater Control System Installation Instructions Operating Instructions Surface Heaters It is recommended to turn the Surface Heater ON 5-10 minutes prior to entering the tub.
-
Page 49: Controller Installation
May not be applicable to your specific package Refer to your package diagrams for more information System Identification: CIHC-300-01-01-01 System features: Electronic Keypad, Timer, Surface Heaters, Optional Multi-color LED Lights Controller Installation To Surface Heaters 24VDCPower Connectors Power In 120V 15A GFCI Surface Heater Max 96 Watts Heater... - Page 50 May not be applicable to your specific package Refer to your package diagrams for more information TOUCHSTONE Surface Heater Control System Installation Instructions Connect cables to ports as shown. Installation may not require the use of all connection ports. CAUTION: Failure to connect cables to ports as shown, may damage the control box and its components and void any warranties.
- Page 51 May not be applicable to your specific package Refer to your package diagrams for more information TOUCHSTONE TOUCHSTONE Air-Activated Controller Air-Activated Controller Owners Manual Owners Manual Product Illustration: Product Illustration: NEMA NEMA Socket NEMA Socket NEMA Plug Plug Air Tube Air Tube Nipple Nipple...
- Page 52 The door is designed to hold its own weight and not designed to hold user’s weight. Should service be required for any reason of any defect or malfunction of the product during the first five years, Ella’s Bubbles will ship the part to the original customer’s address without charge (subject to verification of the defect or malfunction).
- Page 53 Upon completing the installation of an Ella Walk In Bath, the following Warranty Activation Form must be completed, signed by both the customer and installer, and returned to Ella’s Bubbles, LLC. In order for the Warranty to be activated (faxed, scanned, or emailed, or hard copy mailed).
- Page 54 Copy of sales receipt must be included with warranty activation forms. To activate manufacturer's warranty, please complete both pages and use one of the options below to submit. Via mail: Ella's Bubbles, LLC. Warranty Department 2101 S. Carpenter St., Chicago, IL 60608 Via fax: 1-312-666-3551 Via email: warranty@ellasbubbles.com...
Need help?
Do you have a question about the Ultimate 93217 L and is the answer not in the manual?
Questions and answers