Table of Contents
Advertisement
Quick Links
Advertisement
Table of Contents

Related Manuals for AmazonBasics B07MNBYN11


Summary of Contents for AmazonBasics B07MNBYN11
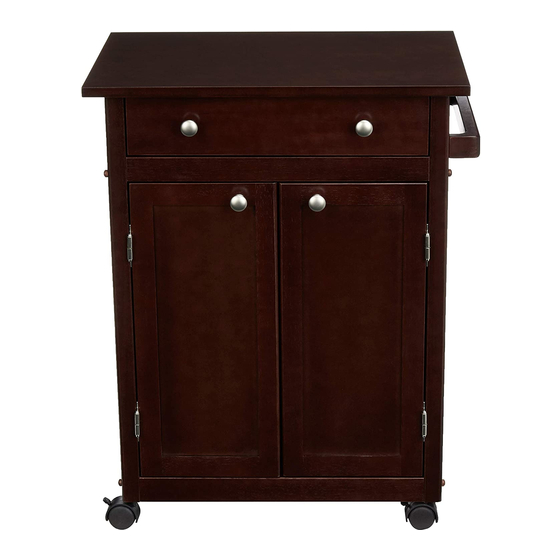
- Page 1 Classic Kitchen Cart with Cabinet Charriot de Cuisine Classique avec Armoire Klassischer Küchenwagen mit Schrank Carrello da Cucina Classico con Mobile Carrito de Cocina Clásico con Armario クラシックキッチンカートキャビネット付 B07MNBYN11, B07MND862G, B07MGL8651...
- Page 2 English ��������������������������������������������������� 3 Français ����������������������������������������������� 11 Deutsch ������������������������������������������������ 19 Italiano ������������������������������������������������� 27 Español ������������������������������������������������ 35 日本語 ��������������������������������������������������� 43...
- Page 3 Welcome Guide • English Contents: Before getting started, ensure the package contains the following components: You will need...
-
Page 4: Important Safeguards
IMPORTANT SAFEGUARDS Read these instructions carefully and retain them for future use. If this product is passed to a third party, then these instructions must be included. When using the product, basic safety precautions should always be followed to reduce the risk of injury including the following: •... - Page 5 Assembly Step 2: • Attach the lower back cross bar (I1), the lower front cross bar (J), the upper back cross bar (I2) and the upper front cross bar (K) to the right panel (D). Secure each connection with 1 screw (V) and 1 short wood dowel (R). Insert the screw covers (Y) after assembly step 4.
- Page 6 Assembly Step 4: • Attach the left panel (C) to the top panel (A), the lower back cross bar (I1), upper back cross bar (I2), upper front cross bar (K) and the lower front cross bar (J). Secure the connection with 4 short wood dowels (R) and 5 screws (V). Tighten all the screws after assembly step 4.
- Page 7 Assembly Step 6: • Lift the product carefully and place it on its wheels. • Fit the bottom panel (H) into the bottom frame of the product. • Fit the shelf (B) into the corresponding supports on the inside of the side panels. Step 7: •...
- Page 8 Assembly Step 8: • Slide the drawer into the drawer compartment. • Insert the long wood dowel (S) into the corresponding hole at the bottom of the top panel (A). Step 9: • Attach 1 knob (Q) to the left door (F) and to the right door (E). Secure each connection with 1 screw (T).
-
Page 9: Cleaning And Maintenance
• Avoid any vibrations and shocks. Specifications Item number Dimensions (W x H x D) Weight Color B07MNBYN11 Espresso B07MND862G approx. 68.3 x 86.4 x 44.1 cm (26.9 x 34 x 17.4 in) approx. 19.8 kg (43.6 lbs) Rustic White B07MGL8651... -
Page 10: Warranty Information
Love it? Hate it? Let us know with a customer review. AmazonBasics is committed to delivering customer-driven products that live up to your high standards. We encourage you to write a review sharing your experiences with the product. Please visit: amazon.com/review/review-your-purchases# For further services: Visit amazon.com/gp/help/customer/contact-us... - Page 11 MADE IN THAILAND FABRIQUÉ EN THAÏLANDE HERGESTELLT IN THAILAND PRODOTTO IN THAILANDIA HECHO EN TAILANDIA タイ国製...
Need help?
Do you have a question about the B07MNBYN11 and is the answer not in the manual?
Questions and answers