Table of Contents
Advertisement
1
SAFETY ........................................................ 2
1.1
SAFETY................................................................................ 2
1.3
EEC ...................................................................................... 3
2
INSTALLATION ............................................ 5
2.1
Set-up / Installation............................................................. 5
3
OPERATION ................................................. 6
3.1
Control Panel....................................................................... 6
3.2
Disassembly ........................................................................ 7
3.3
Optimisation buttons optional ........................................... 8
4
COMPONENTS............................................. 9
4.1
Power module (optional) .................................................... 9
4.2
Program - Residual moisture ............................................ 9
5
FUNCTIONS ............................................... 10
5.1
Removal of safety temperature regulator KI01............... 10
5.2
6
REPAIR....................................................... 12
6.1
Facia Panel ........................................................................ 12
6.2
Door ................................................................................... 13
6.3
Interior and outer door ..................................................... 13
6.4
Front Panel ........................................................................ 14
6.5
Bearing plate ..................................................................... 16
6.6
Removal of Drum interior lighting (Optional) ................. 17
113_58300000104082_ara_en_h.doc - 19.03.07
R
E
P
A
I
R
I
N
S
T
R
U
C
T
I
O
N
R
E
P
A
I
R
I
N
S
T
R
U
C
T
I
O
N
R
E
P
A
I
R
I
N
S
T
R
U
C
T
I
O
N
Repair instractions
6.7
Motor.................................................................................. 18
6.8
Belt removal KI01.............................................................. 19
6.9
Belt Tension adjuster ....................................................... 19
6.10
Removing the Ki03 belt .................................................... 20
6.11
Heating element ................................................................ 22
6.12
Disassembly safety temperature regulator KI01............ 23
6.13
Removal of safety temperature regulator KI02 .............. 24
6.14
Removing temperature regulator exhaust air ................ 25
6.15
Drum bearings .................................................................. 26
6.16
Diagnostic-repair tools..................................................... 27
7
FAULT DIAGNOSTICS ...............................28
7.1
Time jumps........................................................................ 28
7.2
Odour................................................................................. 29
7.3
Leaks ................................................................................. 29
8
TECHNICAL SPECIFICATIONS.................30
Seite 1 von 30
Advertisement
Table of Contents

Related Manuals for Bosch WTA4410US


Summary of Contents for Bosch WTA4410US
-
Page 1: Table Of Contents
Repair instractions SAFETY ............2 Motor.................. 18 Belt removal KI01.............. 19 SAFETY................2 Belt Tension adjuster ............19 EEC ..................3 6.10 Removing the Ki03 belt ............ 20 INSTALLATION ..........5 6.11 Heating element ..............22 6.12 Disassembly safety temperature regulator KI01.... 23 Set-up / Installation............. -
Page 2: Safety
SAFETY SAFETY WARNING! DANGER! Observe the following advice at all times: When carrying out a measurement according to VDE 0701 using the connecting plug, the safety test must be carried out as described in Repairs may only be carried out by an electrical specialist! the circuit diagrams. -
Page 3: Eec
► of up to 35,000 V, if you walk over a non conductive carpet, 1.1.1 Description ► of up to 12,000 V, if you walk over a non conductive PVC soil ► and of up to 1,800 V, if you sit on a padding chair. Electrostatically - The electrostatic voltage of their body is passed to electronics and EEC`s affected by them, which are possibly damaged thereby. - Page 4 1.1.5 EEC – Notes On all electronics modules and electronics components are electrostatically endangered elements For the protection of these electrostatically endangered elements the following measures are to be met: Noticing the appropriate marking of the components and modules: Put on before contact and measurement of the EEC`s a electrostatics protective system (bracelet with grounding component).
-
Page 5: Installation
INSTALLATION Set-up / Installation The appliance must be located firmly and at floor level. Use a water- level. A Exhaust air hose max. 2 B Power supply cable 1.5m ► The feet are adjustable for height. ► The dryer can neither be built in nor set up under an appliance. -
Page 6: Operation
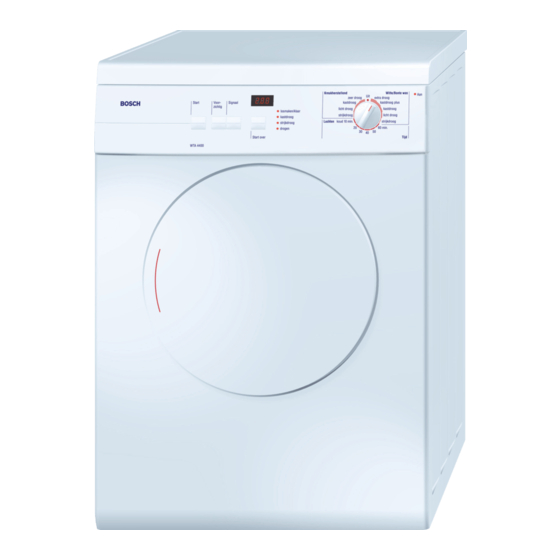
OPERATION Control Panel Programme selector Programm progress indicator LED - Modul (Optional) Additional funcations Start button 113_58300000104082_ara_en_h.doc – 19.03.07 Seite 6 von 30... -
Page 7: Disassembly
Disassembly ► Worktop Disassembly. ► 3 screws on the panel disassembly (B). ► Panel forward overboard end to upturn. A Screws button and Modul Screws panel 113_58300000104082_ara_en_h.doc – 19.03.07 Seite 7 von 30... -
Page 8: Optimisation Buttons Optional
Optimisation buttons optional Low heat button: For temperature-sensitive textiles. Lowers the temperature by reducing the heat output, the drying time is extended simultaneously. Signal: For switching on the signal and drawing attention to the end of the programme. Start: When a programme starts, a brief acoustic signal sounds when the signal is switched on. -
Page 9: Components
COMPONENTS Program – Residual moisture The programs "Easy care" and "Cotton / Color laundy" damp-steered Power module (optional) and after reaching the drying goal or the maximum running time (180 min) were terminated. A cooling phase of 10 min follows. At the end of Description of function the cool down phase a signal of 5x1sec.sounds. -
Page 10: Functions
FUNCTIONS Removal of safety temperature regulator KI01 At the bottom channel cover the safety temperature regulator is installed. The safety temperature regulator switches switching off temperature: 120 °C +/- 3K Safety temperatur by ca. 150 °C +/- 4K Temperature regulator processing air Safety temperature regulator Hinweis The safety disconnection may not be put back. -
Page 11: Removal Of Safety Temperature Regulator From Ki02
Removal of safety temperature regulator from KI02 At the bottom channel cover the safety temperature regulator is installed. The safety temperature regulator switches switching off temperature: 120 °C +/- 3K Safety temperatur by ca. 150 °C +/- 4K Hinweis Safety temperature regulator 150°C After elimination of errors the safety temperature regulator can be put Temperatur regulator100°C back. -
Page 12: Repair
REPAIR Facia Panel 6.1.1 Dismantle facia panel ► Dismantle work top plate ► Above the facia panel remove 5 screws (B) ► Release facia panel forward and then turn upward. ► Take off the data line from electronics at the facia panel. ►... -
Page 13: Door
Door Interior and outer door The outer door and internal door are only with one another clipped Removal of the Interior and outer door ► The outside -und internal door are only with one another rest. Removal of the Door ►... -
Page 14: Front Panel
1 walked Front Panel Dismantling Front Panel ► Remove work top panel. ► Dismantle Facia Panel ► Door removal. ► Take off all screws (A/B/C und D) ► Electronics and wiring harness solve and take away front panel. 2 Screws PC-Board Screws facia panel and front panel 7 Screws bearing panel 3 Screws bottom panel... - Page 15 ► Electrical connections from the drum interior lighting and door switch take off. 3 walked 2 walked A Plugs drum lighting and door switch ► Develop after front front of. ► Cable straps loosen and wiring harness with key bank dismantle.
-
Page 16: Bearing Plate
Bearing plate Picture 2 Disassembly bearing plate ► Remove work top plate and facia panel. ► Remove front panel. ► Disconnect the electrical connection to the drum interior lighting. ► Take away the door switch. ► Screws (A) dismantle. Bearing plate on the left and on the right release and develop forward. -
Page 17: Removal Of Drum Interior Lighting (Optional)
Removal of Drum interior lighting (Optional) ► Remove the top work panel ► Remove the facia panel. ► Take of the plug of the lamp. ► Remove the lamp cover. ► Release the retaining tie-clip with a slot screwdriver. Support clip B Lamp socket A Electrical connections 113_58300000104082_ara_en_h.doc –... -
Page 18: Motor
Pic 1 Motor The Drying Phase: Motor rhythm: 118s right 3s off 118s left. The Cool down Phase: When the required humidity threshold or the time of the sequence are reached, the program starts its cool down phase. It lasts 10min. Motor rhythm: 3s Off 118s right 3s Off 118s left. -
Page 19: Belt Removal Ki01
Belt removal KI01 Belt Tension adjuster ► Take of the opening cover on the base plate. ► Put the appliance on the backside. ► Remove the belt from the belt tension adjuster. ► Open the opening ion the base plate. ►... -
Page 20: Removing The Ki03 Belt
Step 3 6.10 Removing the Ki03 belt Protective gloves must be worn Remove the worktop. Remove the rear panel. Pull off the electrical connections F for the heater and temperature controller. Remove the bottom process air duct cover. Remove the process air impeller. Detach the belt over the drum. - Page 21 Step 4 Step 7 Step 8 Step 5 B belt C cross bar 113_58300000104082_ara_en_h.doc – 19.03.07 Seite 21 von 30...
-
Page 22: Heating Element
6.11 Heating element Removal ► Take off the back panel. ► Take away the bottom air duct cover. ► Disconnect the electrical connections. ► Take off the upper and bottom screws of the heating element. 113_58300000104082_ara_en_h.doc – 19.03.07 Seite 22 von 30... -
Page 23: Disassembly Safety Temperature Regulator Ki01
Step.5 6.12 Disassembly safety temperature regulator KI01 Equipment from electricity mains separate Cover in the back dismantle Electrical connections (F) take off Processing air temperature regulator remains existing (G) Lower processing air cover dismantle and by the conversion kit 445193 replaced. New processing air cover insert. -
Page 24: Removal Of Safety Temperature Regulator Ki02
6.13 Removal of safety temperature regulator KI02 At the bottom channel cover the safety temperature regulator is installed. The safety temperature regulator switches switching off temperature: 120 °C +/- 3K Safety temperatur by ca. 150 °C +/- 4K Safety temperature regulator 150°C Temperatur regulator100°C Current linkage 113_58300000104082_ara_en_h.doc –... -
Page 25: Removing Temperature Regulator Exhaust Air
6.14 Removing temperature regulator exhaust air ► Remove work top plate, facia panel, front panel and bearing plate. ► Unscrew the two screws and remove the temperature regulator. A Temperature regulator exhaust air 113_58300000104082_ara_en_h.doc – 19.03.07 Seite 25 von 30... -
Page 26: Drum Bearings
6.15 Drum bearings Removal: ► Take off the back Panel. ► Remove work top panel, door, facia panel, front panel and bearing plate. ► Bearing plate at the air duct loosen and drum forward remove ► Take out grounding pin and feather/spring. ►... -
Page 27: Diagnostic-Repair Tools
Measuring lead connection 6.16 Diagnostic-repair tools Measuring (50 cm) Mat.-Nr.:340954 Universally valid Before each repair and/or examination of the equipment the KD test program is to be started. Probe tip Probe tip material - No.: 340730 (with resistance tests absolutely the construction units on the module take off). -
Page 28: Fault Diagnostics
FAULT DIAGNOSTICS Time jumps Customer complaint Cause Remedial action Remaining running time jumps at the end of the Load too high, max.+100% Observe max. load. programme Time jumps Very high ambient temperature > 30 °C Ensure that there is adequate ventilation. Initial moisture too high Increase spin speed. -
Page 29: Odour
Odour Customer complaint Cause Remedial action Scorching odour Drum overloaded Observe max. load. Washing not suitable for drying Observe care symbols. Foreign objects in the appliance Remove foreign objects. Plug-in contacts / components Scorched plugs / replace components. Chemical odour Detergent / fabric softener / scented cloths Changing detergent / fabric softener / scented cloths, if possible do without fabric softener /... -
Page 30: Technical Specifications
TECHNICAL SPECIFICATIONS 113_58300000104082_ara_en_h.doc – 19.03.07 Seite 30 von 30...
Need help?
Do you have a question about the WTA4410US and is the answer not in the manual?
Questions and answers