Table of Contents
Advertisement
Quick Links
Advertisement
Table of Contents

Summary of Contents for Aquarium Guardian Monitor and Controller
- Page 1 2.4GHz, 802.11 b/g/n USER MANUAL www.AquariumGuardian.com...
-
Page 2: Table Of Contents
USER MANUAL Contents About Aquarium Guardian ....1.0 ....1.1 Requirements ........1.2 In the Box ........... 1.3 Status LEDs ........1.4 Wiring Panel ........1.5 Installation ...........2.0 Installation Warning ......2.1 . 2.2 Mounting to Aquarium Stand/Wall Installing the Water Temperature .......... - Page 3 USER MANUAL Device Detail ..........7.0 Per Device Detail...... 7.1A – 7.1G .....7.2A – 7.2D .7.2E -7.2G ..7.2H ....... Testing Per Sensor......8.1-8.6 Maintenance..........9.0 Wi-Fi Password Reset......10.0 Battery Warning ........11.0 Service Disclaimer........12.0 Warranty...........13.0 Test Log............. 14.0 Trouble Shooting........15.0 Revision Log ..........
-
Page 4: About Aquarium Guardian
1.0 About Aquarium Guardian Aquarium Guardian is a Wi-Fi based aquarium monitor and aquarium as alarm inputs: Aquarium Guardian: Please read the User Manual carefully before using the Aquarium Guardian device. Head Unit Specifications Operating Temperature: Ambient Temperature Sensor Accuracy: Operating Humidity: 0-95% RH, non-condensing Humidity Sensor Accuracy: ±... -
Page 5: In The Box
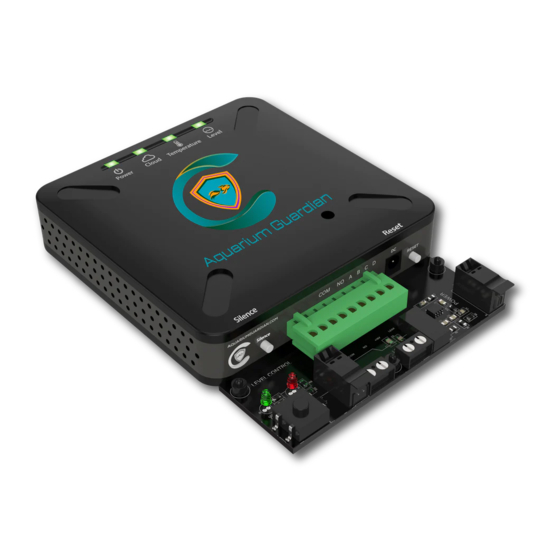
In the Box 1. Level Sense Pro 2. Power Supply 2. Power Supply 1. Aquarium Guardian Silence Reset 3. Float Switch & Bracket 4. Leak Sensor Water Level & 4. Leak ensor Temperature Sensor 5. Level Sensor Wire 6. Accessories 5. -
Page 6: Status Leds
Status LEDs The status LEDs on the Level Sense Pro provide a visual indication of the control state. The below table is a system status guide. If the four lights have a pattern not shown it is a claim code, and you should reference section 5.2. -
Page 7: Installation
Wiring Panel the connector until the jaw of the connection is shut. Installation range, contact us, and we can troubleshoot... -
Page 8: Installation Warning
Mounting to Aquarium Stand/ Wall The back of the Aquarium Guardian accepts two #6 screws, which are included. The screws are placed 3.375” apart and are mounted horizontally. The head unit can be mounted on a wall near the aquarium, or on or... -
Page 9: Installing The Water Temperature Sensor
“Device Detail” page on the website. The water level in the aquarium can be monitored real-time through the Aquarium Guardian website, which allows the user to monitor their water level while away from home. - Page 10 Water Change: There is a level-control enable switch on the connection board as a convenience for use with water changes. When the green LED is lit, then water level sensing and ATO are enabled. When conducting water changes, push the button. Once pressed the red LED will illuminate demonstrating that water level sensing and ATO are disabled.
-
Page 11: Installing The Leak Sensor
Installing the Leak Sensor Powering On... -
Page 12: Product Registration Portal
Product Registration—Portal The Aquarium Guardian is set up and managed via a cloud service called account. With an account, you can claim your device, setup alarm contacts and set alarms. Create Portal Account Using an internet browser, preferably on a laptop or desktop, navigate to the Aquarium Guardian Portal: https://aquariumguardian.com/account/login... -
Page 13: Connect With Hotspot
To connect to Wi-Fi with hotspot mode you will need a Wi-Fi enabled device like a smart phone or laptop. The cloud LED of the Aquarium Guardian should be white, which indicates the device is broadcasting a Wi-Fi hotspot. If you are using a smart for this process. -
Page 14: Connect With Wps
Connect with WPS If the Cloud LED turns red following a WPS attempt, press the RESET button to restart the device. If the Cloud LED returns to red after restarting, refer to section 10.0 for password reset instructions and check the router settings to see if WPS is enabled on the 2.4G network. -
Page 15: Account Registration
6.0 Account Registration Claim Device Contacts Personal Information... -
Page 16: Device Detail
Aquarium Maintenance alerts however are optional. 7.1A: Device Name By default, the Aquarium Guardian is named “My Aquarium Guardian” in the Portal. The device name can be modi ed and is useful if you have multiple devices in your Portal. - Page 17 Notification Settings Enable and Disable sensor inputs to suit your application. Sensors can be 7.2A Power Loss Alarms 7.2B Water Temperature Alarms 7.2C Water Level Alarms 7.2D Leak Alarms...
- Page 18 7.2E Audible Alarm (Siren) 7.2E Audible Alarm (Siren) Enable the 90 dB audible alarm in the Portal for the conditions desired. The audible alarm can be Enable the 90 dB audible alarm in the Portal for the conditions desired. The audible alarm can be temporarily silenced by pressing the Silence button on the device.
- Page 19 7.2H Silencing an Alarm on the Device Alarms can be temporarily disabled by pressing the SILENCE button on the Aquarium Guardian. This is particularly useful to silence the audible alarm once you are aware of the alarm. This will disable the audible alarm temporarily. If the alarm cannot be quickly resolved it will be necessary to disable the SIREN checkbox for that condition in the Portal.
- Page 20 Device and Alarm Testing The Aquarium Guardian and sensors should be tested monthly to ensure proper operation. Humidity and Air Temperature Testing Testing for temperature and humidity sensors is done by comparing current levels in Portal with a calibrated reference. Readings of +/-3% are expected.
-
Page 21: Maintenance
If the product is damaged in shipping, please quarantine the device and contact us immediately. 12.0 Service Disclaimer right to alter, amend or change information, services and pricing at any time. Aquarium Guardian also reserves the right to modify or discontinue services at... -
Page 22: Warranty
13.0 Warranty 2 YEAR LIMITED WARRANTY PLEASE READ THIS WARRANTY CAREFULLY BEFORE USING THE PRODUCT. THIS LIMITED WARRANTY CONTAINS THE STANDARD TERMS AND CONDITIONS (“TOC”) OF AQUARIUM GUARDIAN. WHERE PERMITTED BY THE APPLICABLE LAW, BY KEEPING YOUR AQUARIUM GUARDIAN BEYOND THIRTY (30) DAYS AFTER THE DATE OF DELIVERY, YOU FULLY ACCEPT THE TERMS AND CONDITIONS SET FORTH IN THIS LIMITED WARRANTY. - Page 23 WITHOUT WAIVING ANY PROVISION IN THIS LIMITED WARRANTY, IF A CIRCUMSTANCE ARISES WHERE WARRANTORS ARE FOUND TO BE LIABLE FOR ANY LOSS OR DAMAGE ARISING OUT OF MISTAKES, NEGLIGENCE, OMISSIONS, INTERRUPTIONS, DELAYS, ERRORS OR DEFECTS IN WARRANTORS’ PRODUCTS OR SERVICES, SUCH LIABILITY SHALL NOT EXCEED THE TOTAL AMOUNT PAID BY THE CUSTOMER FOR WARRANTORS’...
-
Page 24: Test Log
Test Log Please maintain a monthly test log. This page can be replicated for additional recordings. Date Ambient Water Leak Water Humidity Tested Battery Temp Temp Switch Level Reading Reading Test Reading EXAMPLE: Pass Pass 3 hours 78˚F 1/1/2020 Smith www.AquariumGuardian.com... -
Page 25: Troubleshooting
15.0 Troubleshooting There are a series of articles on more advanced troubleshooting on the Aquarium Guardian Website at https://aquariumguardian.com then click Wi-Fi connectivity. Wi-Fi Will Not Stay Connected: Device out of range. Check router antennas are not blocked, and router is optimally placed within house. -
Page 26: Revision Log
16.0 Revision Log Version R1.0 ..............Initial Release... -
Page 27: Support
17.0 Support HAVE A QUESTION? Send an email to customerservice@aquariumguardian.com or submit a request through our webpage: https://aquariumguardian.com/pages/aquarium-guardian-tech-support-form Contact support CustomerService@AquariumGuardian.com or Phone: 314-787-8059... - Page 28 www.AquariumGuardian.com...
Need help?
Do you have a question about the Monitor and Controller and is the answer not in the manual?
Questions and answers