
Related Manuals for Toro Soil Cultivator


Summary of Contents for Toro Soil Cultivator
- Page 1 Form No. 3431-447 Rev A Soil Cultivator Compact Tool Carrier Model No. 23102—Serial No. 319000001 and Up *3431-447* A Register at www.Toro.com. Original Instructions (EN)
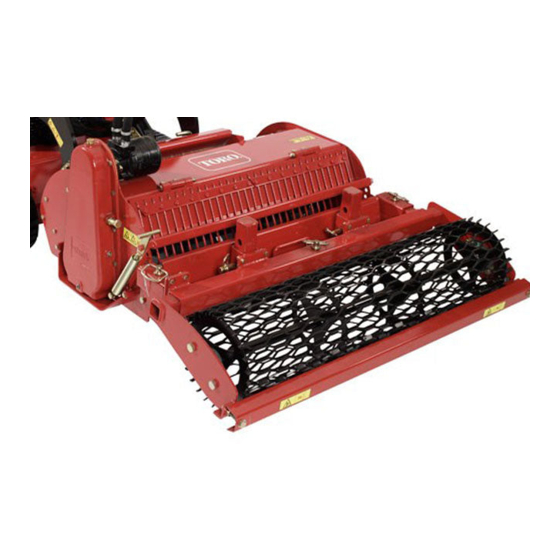
- Page 2 Figure 1 1. Model and serial number location Introduction Model No. This soil cultivator is intended to be used on a Toro Serial No. compact tool carrier. It is designed primarily for burying stones, soil clods, debris, and grass, which...
-
Page 3: Table Of Contents
DANGER General Safety ........... 3 Slope Safety ............4 There may be buried utility lines in the work Soil Cultivator Safety .......... 4 area. Digging into them may cause a shock Maintenance and Storage Safety......4 or an explosion. Safety and Instructional Decals ......5 Setup ................ -
Page 4: Slope Safety
Slope Safety Soil Cultivator Safety • Operate the machine up and down slopes with • For wheeled traction units, use the counterweight the heavy end of the machine uphill. Weight on the traction unit when using the attachment. distribution changes with attachments. This •... -
Page 5: Safety And Instructional Decals
Safety and Instructional Decals Safety decals and instructions are easily visible to the operator and are located near any area of potential danger. Replace any decal that is damaged or missing. decal93-7321 93-7321 1. Cutting/dismemberment hazard of hands and feet, rotating knives/blades—stay away from moving parts. -
Page 6: Setup
Figure 3 To ensure optimum performance and continued safety 1. Drift pin 3. Cultivator arm certification of the machine, use only genuine Toro 2. Snap-ring clevis pin 4. Roller arm replacement parts and accessories. Replacement parts and accessories made by other manufacturers... -
Page 7: Operation
Operation CAUTION Hydraulic couplers, hydraulic lines/valves, Determine the left and right sides of the machine from and hydraulic fluid may be hot. If you contact the normal operating position. hot components, you may be burned. • Wear gloves when operating the hydraulic Installing and Removing couplers. -
Page 8: Setting The Digging Depth
Setting the Digging Depth Adjusting the Grader Blade You can adjust the grader blade that sits just behind Set the dig depth of the cultivator according to the work you are performing up to 13.9 cm (5-1/2 inches). the roller to give the desired finish. Typically, you The depth of cut is determined by the position of should adjust it so that the edge of the blade is just the roller. -
Page 9: Changing The Horizontal Position Of The Roller
Changing the Horizontal Operating the Cultivator Position of the Roller Lower the cultivator to the ground and ensure that the chain case is perpendicular to the The roller has 3 horizontal positions. To cultivate along ground (Figure the edge of the work area, align the edges of the roller with the edges of the cultivator. -
Page 10: Operating Tips
Operating Tips • Inspect the area where the cultivator is to be used and remove all objects such as large rocks, trash, and branches before cultivating to prevent equipment damage. • Always begin cultivating with the slowest ground speed possible. Increase the speed if conditions permit. -
Page 11: Maintenance
Maintenance Determine the left and right sides of the machine from the normal operating position. CAUTION If you leave the key in the switch, someone could accidently start the engine and seriously injure you or other bystanders. Remove the key from the switch before you perform any maintenance. Recommended Maintenance Schedule(s) Maintenance Service Maintenance Procedure... -
Page 12: Adjusting The Drive-Chain Tension
Adjusting the Drive-Chain Tension Service Interval: After the first 5 hours Every 25 hours Park the machine on a level surface, lower the attachment, and engage the parking brake (if equipped). Shut off the engine and remove the key Loosen the jam nut on the chain-adjusting screw (Figure 12). -
Page 13: Replacing Tines
Replacing Tines Check and replace tines when they become worn or dull. Worn or dull tines degrade the performance of the cultivator Park the machine on a level surface, lower the attachment, and engage the parking brake (if equipped). Shut off the engine and remove the key Remove the roller assembly from the cultivator. -
Page 14: Storage
Storage Before long-term storage, wash the attachment with mild detergent and water to remove dirt and grime. Grease all fittings. Check and adjust the tension of the drive chain. Check and tighten all hardware. Repair or replace any damaged or worn part. Ensure that all hydraulic couplers are connected together to prevent contamination of the hydraulic system. -
Page 15: Troubleshooting
Troubleshooting Problem Possible Cause Corrective Action The cultivator does not operate. 1. A hydraulic coupler is not completely 1. Check and tighten all couplers. connected. 2. A hydraulic coupler is damaged. 2. Check the couplers and replace any that are damaged. 3. - Page 16 Notes:...
- Page 17 Notes:...
- Page 18 The method of transmission shall be electronic transmittal. This machinery shall not be put into service until incorporated into approved Toro models as indicated on the associated Declaration of Conformity and in accordance with all instructions, whereby it can be declared in conformity with all relevant Directives.
- Page 19 The Toro Company (“Toro”) respects your privacy. When you purchase our products, we may collect certain personal information about you, either directly from you or through your local Toro company or dealer. Toro uses this information to fulfil contractual obligations - such as to register your warranty, process your warranty claim or to contact you in the event of a product recall - and for legitimate business purposes - such as to gauge customer satisfaction, improve our products or provide you with product information which may be of interest.
- Page 20 While the exposure from Toro products may be negligible or well within the “no significant risk” range, out of an abundance of caution, Toro has elected to provide the Prop 65 warnings. Moreover, if Toro does not provide these warnings, it could be sued by the State of California or by private parties seeking to enforce Prop 65 and subject to substantial penalties.
Need help?
Do you have a question about the Soil Cultivator and is the answer not in the manual?
Questions and answers