
Related Manuals for EMD Serono Easypod


Summary of Contents for EMD Serono Easypod
- Page 1 Instructions For Use Questions about exclusively for use with easypod™? www.easypodus.com click.easy ® cartridges 8.8 mg 800-582-7989...
- Page 2 If easypod™ does not work properly Call Connections for Growth………800-582-7989 Default Settings Table Your easypod comes programmed with the following default settings. These settings may be changed to suit your individual preference. Note: Clinical settings should be changed only under guidance from your healthcare provider.
-
Page 3: Table Of Contents
....... . Traveling with easypod ....31 Clinical settings . -
Page 4: A Message About Easypod™ To Saizen
(a) 8 mg/mL; (b) 5.83 mg/mL; and, (c) 1.5 mg/mL. You should check the expiration date printed on the click.easy carton prior to use. • easypod should be handled with care. When possible, store easypod in the storage case provided, which limits exposure to dirt, dust, liquid, and other substances. - Page 5 Never rinse or immerse easypod or any of its parts in water. • easypod contains no harmful components. • easypod should be replaced after three years of use. A new easypod can be obtained through your healthcare provider, or through Connections for Growth ® (CFG), the patient-support program provided by EMD Serono.
-
Page 6: Getting Started
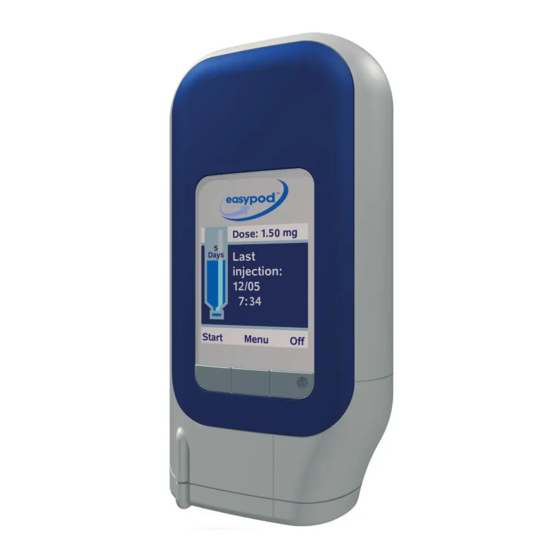
Section 1. Getting Started Getting to know easypod™ Front View Back View Side View Removable Cartridge Rear Cover Door (to personalize Button device) Display Cartridge (Welcome screen) Door Power On/Off (indicated by “O I “ symbol) Needle Button Selection Buttons... -
Page 7: First-Time Use Of Easypod
(mixing). Follow the directions under “Cartridge expiration”, page 23, to change the setting to 21 days. easypod will automatically notify you when the cartridge has been in use for 21 days. Make sure the cartridge setting is correct according to your prescription (see “Cartridge”, page 21). -
Page 8: Dose History And Battery Status Settings
Section 1. Getting Started Dose history and Battery status settings Dose history Menu Select “Menu”. “Dose history” will be Dose history highlighted (6a) Dose history Select “Open”. “Calendar” will be Calendar Battery status highlighted. Comfort settings Use the “ ” key to select a display of Dose history in either “Calendar”... -
Page 9: Comfort Settings
Section 1. Getting Started Comfort settings There are four Comfort settings for easypod™: Menu • Needle speed Comfort settings • Injection speed Dose history • Injection depth Needle speed • Battery status Injection time Injection speed Comfort settings Injection depth... -
Page 10: Needle Speed
Section 1. Getting Started Comfort settings Needle speed – controls how fast the needle is inserted into your skin. Open the “Comfort settings” menu (8a) “Needle speed” will be highlighted. Menu Select “Change” to open the Comfort settings (8b) Dose history Needle speed “Needle speed”... -
Page 11: Injection Depth
Section 1. Getting Started Comfort settings Injection depth – controls how deep the needle is inserted into your skin. Open the “Comfort settings” menu (9a) Use the “ ” key to highlight Menu “Injection depth” (9b) Comfort settings Dose history Injection depth Select “Change”... -
Page 12: Device Settings
Section 1. Getting Started Device settings There are five Device settings for easypod™: • Menu Date & Time • Device settings Sound Battery status • Name Date & Time • Comfort settings Welcome picture • Sound Language Remove cartridge Name... -
Page 13: Date & Time
“ ” key to highlight “Time”. Select “Change”. Use the same steps to change the time as you used to change the date. Note: Each time the batteries are removed, easypod will prompt you to change the date and time. -
Page 14: Sound
Date & Time (12e) Comfort settings Sound Select “Change” to open “Name”. Remove cartridge Name easypod Use the “OK” key to move the cursor Device settings Welcome picture under the letter you would like to Open Exit change, and use the “ ” key to... -
Page 15: Welcome Picture
Section 1. Getting Started Device settings Welcome picture Select a Welcome picture Open the “Device settings” Menu Device settings menu (13a). Battery status Welcome picture Date & Time Use the “ ” key to highlight Comfort settings Sound “Welcome picture” Remove cartridge (13b) Name... -
Page 16: Clinical Settings
Section 1. Getting Started Clinical settings There are six Clinical settings for easypod™: • • • Dose settings Cartridge expiration Connection Menu • • • Warning Injection settings Dose log PIN code Comfort settings Remove cartridge To change a Clinical setting:... -
Page 17: Dose Settings
Section 1. Getting Started Clinical settings Dose settings There are three options in easypod™ Menu Clinical settings for setting the dose: Comfort settings Dose settings Dose settings • Remove cartridge Input in mg Input in mg Injection settings • Device settings... -
Page 18: Input In Mg
Section 1. Getting Started Clinical settings Input in mg – dose in milligrams Dose settings Daily dose Open the “Dose settings” Input in mg Frequency menu . “Input in mg” will (16a) Dose confirmation By weight be highlighted. 7 days/week 1.00 mg By body surface 1.00 mg/day... -
Page 19: By Body Surface
Section 1. Getting Started Clinical settings By body surface – dose per m of body surface Dose settings By body surface Input in mg Open the “Dose settings” menu and use the Dose: By weight “ ” key to highlight “By body surface” (17a). -
Page 20: Dose Adjustment
(see “Partial dose”, page 30). easypod will automatically calculate the dose needed for the second injection. Select “OK”, or “Back” to change the dose settings... - Page 21 <50% of the daily dose is remaining in the current cartridge, you will be prompted to change the cartridge and easypod will inject the full daily dose from the new cartridge.
-
Page 22: Injection Settings
Section 1. Getting Started Clinical settings Injection settings Menu There are two Injection settings Clinical settings Comfort settings Injection settings for easypod: Dose settings Remove cartridge • Cartridge Cartridge Injection settings Device settings • Needle type Cartridge expiration Clinical settings... -
Page 23: Cartridge
Section 1. Getting Started Clinical settings Cartridge The dose range depends on the type of cartridge selected containing a specified concentration of Saizen ® . The following click.easy ® cartridge concentrations [somatropin (rDNA origin) for injection] are available: • Cartridge type A (concentration of 8 mg/mL): range can vary between 0.5 mg to 6.4 mg in increments of 0.01 mg. -
Page 24: Needle Type
Clinical settings Needle type easypod™ should only be used with Serofine™ single-use, disposable sterile needles. Serofine needles are available as a 29 G x 1/2” (12 mm) or a 30 G x 5/16” (8 mm). Choose the appropriate needle type. -
Page 25: Cartridge Expiration
Section 1. Getting Started Clinical settings Cartridge expiration Clinical settings To change the Cartridge expiration setting: Cartridge expiration Dose settings Open the “Clinical settings” menu and 21 days Injection settings enter the PIN code (see page 14) (23a) Cartridge expiration Use the “... -
Page 26: Teach Me - A Pictorial Demonstration Built Into Easypod
Section 1. Getting Started “Teach me”— pictorial demonstration built into easypod™ See the chart below for the easypod operations demonstrated in “Teach me“. Menu To watch “Teach me”: Remove cartridge Device settings Select “Menu” from the Welcome screen. Clinical settings Use the “... -
Page 27: [Somatropin (Rdna Origin) For Injection]
Always start by washing your hands thoroughly with antibacterial soap and water. Daily Make sure to use a clean towel when drying your hands. Dose To turn on easypod, press the power button with the “O I “ symbol and hold down until the Welcome screen appears (25a) Note: If your refrigerator is very cold, easypod will be cold. -
Page 28: Giving Your Daily Injection In Three Steps
Do not use the needle if the sterility seal is damaged or lifting. Make sure to completely remove the sterility seal. Insert the needle cap into the needle cavity on easypod until it locks into place . When (26b) inserted correctly, the needle cap clicks into Warning place and easypod will beep once. -
Page 29: Step 2: Inject
During the injection, hold easypod steady and always in contact with your skin. Removing easypod prior to the end of the injection will result in an incomplete injection. Lift easypod from the skin. The display will read “Injection completed” and show the injected dose . -
Page 30: Step 3: Detach The Needle
IMPORTANT: Make sure you insert an empty cap. Do not continue to hold the needle cap while easypod detaches the needle. When the display reads “Press needle button until beep”, press and hold the needle button until easypod beeps twice. -
Page 31: After Your Injection
(29a) To turn off easypod, press and hold the “Power” (“O I “) button until the display is blank. Note: Make sure easypod is turned off to preserve the batteries. -
Page 32: Partial Dose
32. Follow the daily-injection Days Second Injection? instructions beginning on page 25. easypod automatically calculates the dose needed for the second injection and injects this dose. IMPORTANT: The second injection is automatically canceled if not performed within 60 minutes. -
Page 33: Maintenance, Care, And Handling Of Easypod
The display will read “Continue?”. (31e) Select “No”. Select and hold “Off” until the display is blank to turn off easypod. Note: When travel is over, see “Insertion of a new cartridge or change of an empty/expired cartridge”, page 32, for instructions on reinserting your click.easy... -
Page 34: Insertion Of A New Cartridge Or Change Of An Empty/Expired Cartridge
Section 3. Maintenance, Care, and Handling of easypod ™ C. Insertion of a new cartridge or change of an empty/expired cartridge If there is no cartridge inside easypod, or no medication left in the cartridge, the display will read “Cartridge empty. Change cartridge” (32a) If the cartridge is used for longer than 21 days, the warning “Cartridge expired”... -
Page 35: Replacing The Batteries
Reset the date and time. Each time the batteries are changed, the date and time need to be reset (see “Date & Time”, page 11). *Alkaline batteries can be used in easypod and are expected to last approximately six months. E. Storage When containing a Saizen ®... -
Page 36: Replacement Of Easypod
Make sure you are using the correct type of batteries and they are correctly inserted. Lithium batteries are recommended. Try inserting a new set of batteries. To turn on easypod, you need to press and hold the power button (“O I ”) until the Welcome screen appears. - Page 37 You can complete the injection within a time period of five minutes and inject the balance of your dose by replacing easypod onto your skin. Or, you can stop the injection, but only a partial dose will have been delivered.
- Page 38 If you have dropped easypod and it still turns on, continue use of easypod. In the event of a mechanical problem, easypod will shut down automatically.
-
Page 39: Technical Information About Easypod
2°C to 30°C (36°F to 86°F), 20%RH to 90%RH, 800hPa to 1060hPa. Storage condition, (without batteries/cartridge): -20°C to 60°C (-4°F to 140°F), 20%RH to 75%RH, 800hPa to 1060hPa. Memory: All data (except date and time) is stored permanently in easypod. ® Cartridge: Saizen [somatropin (rDNA origin) for injection] 3mL cartridges. - Page 40 Guidance and manufacturer’s declaration – electromagnetic emission Emissions test Compliance Electromagnetic environment – guidance easypod uses RF energy only for its internal function. Therefore, its RF emissions RF emissions CISPR 11 Group 1 are very low and not likely to cause interference in nearby electronic equipment.
- Page 41 RF transmitters, an electromagnetic site survey should be considered. If the measured field strength in the location in which easypod is used exceeds the applicable RF compliance level above, easypod should be observed to verify normal operation.
- Page 42 RF communications equipment and easypod easypod is intended for use in an electromagnetic environment in which radiated RF disturbances are controlled. The user of easypod can help prevent electromagnetic interference by maintaining a minimum distance between portable and mobile RF communications equipment (transmitters) and easypod as recommended below, according to the maximum output power of the communications equipment.
- Page 43 ©2007 EMD Serono, Inc. All rights reserved. Printed in U.S.A. SI 07-15701 10/07...
- Page 44 Instructions For Use Questions about exclusively for use with easypod™? www.easypodus.com click.easy ® cartridges 8.8 mg 800-582-7989...
Need help?
Do you have a question about the Easypod and is the answer not in the manual?
Questions and answers