
Related Manuals for JRClancy PowerAssist

Summary of Contents for JRClancy PowerAssist
- Page 1 © PowerAssist Counterweight Assisted Hoist System Installation Manual Design, Manufacture and Installation of Theatrical Equipment Worldwide (315) 451-3440 Fax (315) 451-1766 www.jrclancy.com...
-
Page 2: Table Of Contents
......................17 NSTALL ARBOR WEIGHT WARNING SIGNS 12. C ....................17 HAIN TENSION ADJUSTMENT AFTER BREAK IN OPERATING AND MAINTAINING THE POWERASSIST .................18 APPENDIX A: ROTARY LIMIT SWITCHES ......................19 APPENDIX B: STRIPPING COATED CABLE .....................21 003-001 PowerAssist Installation Page 2 of 24... -
Page 3: Introduction: How The System Works
NOTICE! REQUIREING A MAX LOAD GREATER THAN 2000LBS. The PowerAssist is designed to be installed with a dedicated counterweight arbor. In the most common application the arbor is loaded with one half of the capacity of the counterweight set, not to exceed 1000 lbs. -
Page 4: Project Planning
STRUCTURE ARE CAPABLE OF WITHSTANDING LOADS WITH THE APPROPRIATE DESIGN FACTORS 1. Use of PowerAssist with existing rigging equipment The PowerAssist can be used to add powered hoisting and electronic control to existing manual counterweight sets. However if existing equipment is to be used, the system must be carefully inspected to ensure that it is suitable. -
Page 5: Winch Mounting Conditions
The building structure to which the hoist is anchored must be of sufficient strength to resist the loads at the appropriate design factors. The PowerAssist exerts 1000 lbs of uplift, plus dynamic forces, on the structure below. Consult a qualified Structural Engineer to determine if the building is capable of resisting these loads. -
Page 6: Special Tools
3. Special tools Due to the special nature of the roller chain used in the PowerAssist system, we recommend that the installer invest in a chain breaking tool for #60 to #100 roller chain. This will drive out the rivet head pins quickly and without damaging the side plates (See Figure 4a). The Chain pins may also be removed by grinding away the rivet head and driving the pin thru with a flat pinned punch. -
Page 7: Installing The Powerassist
Installing the PowerAssist INSTALLATION AND ADJUSTMENT OF RIGGING COMPONENTS SHOULD NOTICE! NOTICE! NOTICE! NOTICE! ONLY BE PERFORMED BY TRAINED PROFESSIONALS. WARNING! LOAD MAY FALL IF PARTS ARE SUBSTITUTED USE ONLY THE PARTS PROVIDED BY THE FACTORY TO ASSEMBLE THIS MACHINE... -
Page 8: Nomenclature
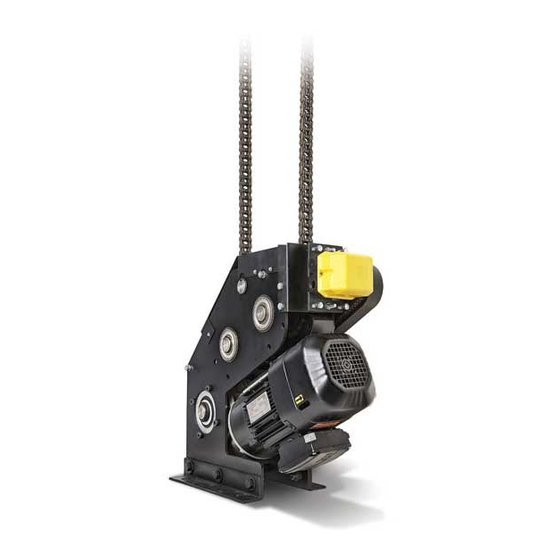
1. Nomenclature The terms seen in Figure 5 and Figure 6 will be used throughout this manual Figure 5: Drive chain nomenclature 003-001 PowerAssist Installation Page 8 of 24 Rev. 0–27APR07... -
Page 9: Install The Counterweight Rigging Hardware
Do not install a hand line. 2. If you are using existing rigging, see the Project Planning section of this manual to ensure that the components are suitable for this application. 003-001 PowerAssist Installation Page 9 of 24 Rev. 0–27APR07... -
Page 10: Anchor The Hoist To The Building Structure
3. Align the offstage side of the offstage sprocket with the center of the arbor as seen in Figure 8. 4. The PowerAssist hoist is provided with four 9/16” holes in the base for anchoring to the facility. A fastener must be installed in each of these holes. We recommend that each fastener have an ultimate strength of at least 8,000 lbs. -
Page 11: Energize The Hoist And Verify Operation
2. Turn on the power and make sure the sprockets are rotating in the right directions for the up and down control buttons. 3. Adjust the limit switches so that the machine can move in either direction for 10 feet without hitting any limits. 003-001 PowerAssist Installation Page 11 of 24 Rev. 0–27APR07... -
Page 12: Install The Drive Cable
Record this number and subtract from it the height of the batten at low trim. (It is usually desirable to make the low trim for the PowerAssist set the same as the other battens.) Add 40 inches to this number to get dimension “A” as seen in figure 8 and 8A. - Page 13 See Appendix B. 8. Use a thimble and Nicopress oval sleeve to terminate the cable as shown in Figure 8A. Figure 9: Connection of the drive rope to the top of the arbor 003-001 PowerAssist Installation Page 13 of 24 Rev. 0–27APR07...
-
Page 14: Attach The Drive Chain To The Drive Cable
Add enough counterweight to the arbor to balance the system and compensate for the roller chain weight, and then add approximately 30 more pounds. Figure 10: Terminating the drive chain. 003-001 PowerAssist Installation Page 14 of 24 Rev. 0–27APR07... -
Page 15: Install The Drive Chain Into The Hoist
Bolt through the arbor top with a ½-13 UNC Grade 5 hex bolt. The Arbor Link Spacer can be identified by the two grooves turned into the part at each end. See figure 11. 003-001 PowerAssist Installation Page 15 of 24 Rev. 0–27APR07... -
Page 16: Adjust The Counterweight And Tension The Drive Chain
2B. For existing systems with loads already on the battens, experiment with the batten position until you find the condition in which the greatest length of chain possible is put into tension. 003-001 PowerAssist Installation Page 16 of 24 Rev. 0–27APR07... -
Page 17: Set The Limit Switches
The turnbuckle must be adjusted as this occurs to ensure safe operation. The owners must be notified of this condition and steps taken to make sure the chain is adjusted properly. 003-001 PowerAssist Installation Page 17 of 24 Rev. 0–27APR07... -
Page 18: Operating And Maintaining The Powerassist
You are responsible for identifying & evaluating any hazards and determining the correct operation method to be used. Operation and maintenance of the PowerAssist system is covered in the PowerAssist Operations and Maintenance Manual. Contact JR Clancy to obtain a copy of this document prior to operating this machinery. -
Page 19: Appendix A: Rotary Limit Switches
(i.e. if the cam stack rotates clockwise when the winch travels down, and you are setting a down limit, the cam must actuate the down limit while moving in a clockwise direction) 003-001 PowerAssist Installation Page 19 of 24 Rev. 0–27APR07... - Page 20 Once all limits are set, check that cam stack clamping screws are tightened, and then replace the limit switch cover. 003-001 PowerAssist Installation Page 20 of 24 Rev. 0–27APR07...
-
Page 21: Appendix B: Stripping Coated Cable
Appendix B: Stripping coated cable The following section describes the procedure used to strip the coating frothe coated PowerAssist drive cable. CUT THE PLASTIC JACKET ONLY. IF THE AIRCRAFT CABLE IS NICKED OR OTHERWISE DAMAGED DURING NOTICE! NOTICE! NOTICE! NOTICE! - Page 22 45 degrees. Rotate the knife to “pop” the jacket open at this end. Step 7: Use your fingers to split the jacket open. Bend the jacket backwards to break it at the scored mark. 003-001 PowerAssist Installation Page 22 of 24 Rev. 0–27APR07...
- Page 23 FIGURE B-2: CUTTER GUIDE 003-001 PowerAssist Installation Page 23 of 24 Rev. 0–27APR07...
- Page 24 REVISION HISTORY Date Description DRAFT 21FEB07 DRAFT RELEASE 27APR07 INITIAL RELEASE 003-001 PowerAssist Installation Page 24 of 24 Rev. 0–27APR07...
Need help?
Do you have a question about the PowerAssist and is the answer not in the manual?
Questions and answers