Advertisement
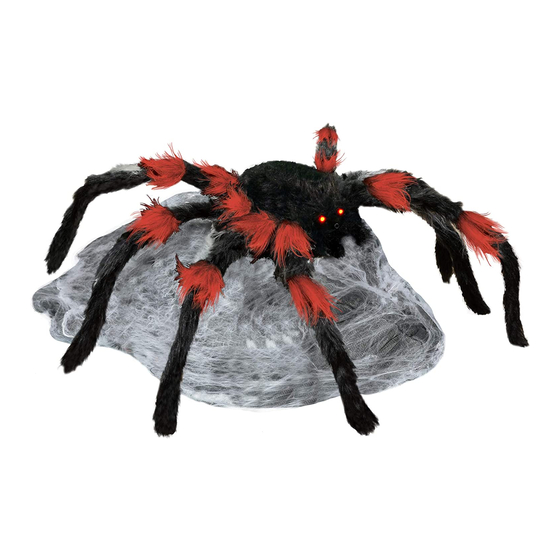
BLACK & RED JUMPING SPIDER
WARNING: DO NOT TURN ON THE PROP UNTIL FULLY ASSEMBLED. STAY CLEAR OF THE PROP WHILE OPERATING.
A
PARTS:
A: MODULE WITH SPIDER
B: FRONT FOOT
C: BACK FOOT
D: SIDE FEET
E: FOOT REMOVAL "KEY"
Assembly:
1. Insert FRONT FOOT into bottom of MODULE WITH
SPIDER until it locks into place. (Match A to A)
NOTE: Press to make sure each FOOT is flush with
rectangular base.
2.
To remove FOOT, insert plastic "KEY" (included) into
holes on bottom. To release locks, twist and pull.
3.
Insert BACK FOOT into bottom of MODULE WITH
SPIDER until it locks into place. (Match B to B)
4. If needed place weight on FOOT to increase stability.
5. Insert SIDE FEET into bottom of MODULE WITH
SPIDER until they lock into place. (Match C to C)
6.
IMPORTANT:
Lift SPIDER wrapped in fabric until poles
are vertical. Attach the 2 metal springs by pulling each
spring backward and securing them to the posts located on
either side of the pole on MODULE WITH SPIDER.
Pull black fabric bag up and over the springs.
7. Insert 4 AA alkaline batteries (not included) into the
battery compartment located on the top of the MODULE
or connect the DC Adapter (sold separately).
NOTE: Make sure there are no obstructions to hinder the
SPIDER'S movement.
8. Remove spring instruction label located on the corner of
the MODULE and turn switch on top of MODULE to ON
to operate in sound and motion activation mode. Make a
loud sound (clap) or move in front of the item to activate.
Leave switch in OFF position when not in use.
9. Release fabric around SPIDER and attach hook and loop
fasteners under fabric to the opposite hook and loop
fasteners located on all four FEET. Spread out fabric and
pose legs as desired.
Installation and Operating Instructions
Keep all plastic and wire parts away from children.
B
C
FOOT
MODULE
BOTTOM
1
3
MODULE
BOTTOM
FOOT
FOOT
5
7
9
Patent
™
RE46,087
D
E
2
4
6
8
Advertisement
Table of Contents

Summary of Contents for Spirit BLACK & RED JUMPING SPIDER
- Page 1 BLACK & RED JUMPING SPIDER Patent ™ RE46,087 Installation and Operating Instructions Keep all plastic and wire parts away from children. WARNING: DO NOT TURN ON THE PROP UNTIL FULLY ASSEMBLED. STAY CLEAR OF THE PROP WHILE OPERATING. PARTS: A: MODULE WITH SPIDER FOOT B: FRONT FOOT C: BACK FOOT...
- Page 2 1. Install 4 D Batteries into Spirit Battery Adapter. (See Fig. 1) 2. Connect wire from Spirit Battery Adapter to the DC adapter port on the MODULE. (See Fig. 2) 3. Turn switch on Battery Adapter to the ON position to power the prop.


Need help?
Do you have a question about the BLACK & RED JUMPING SPIDER and is the answer not in the manual?
Questions and answers