Advertisement
Assembly Instructions Packet
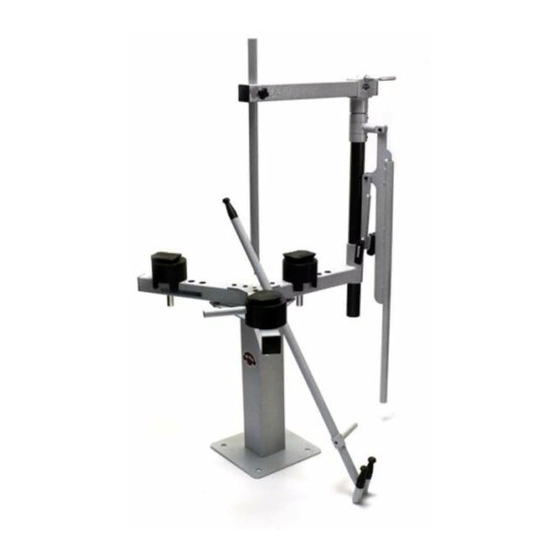
Motorcycle Tire Changer
For our latest instructional videos, visit:
5/32" Hex (Allen) Wrench - Included in Lube Box inside of Box A
•
3/16" Hex (Allen) Wrench - Included inside of Box B
•
3/4" (or 19mm) Wrench - Socket w/Ratchet, Combination or similar
•
7/16" (or 11mm) Wrench - Socket w/Ratchet, Combination or similar
•
For mounting your Tire Changer to the floor, we recommend using 1/2" x 3+1/2" (or 12mm x 100mm)
Concrete Wedge anchors (Power-Stud+® SD1 or similar) drilled to a minimum depth of 2+3/4" (or 70mm)
and installed per manufacturer directions with nuts and washers.
Classic® HD
NoMarTireChanger.com
(or scan the QR code below)
Tools Required for Assembly:
Advertisement
Table of Contents

Related Manuals for No-Mar Classic HD

Summary of Contents for No-Mar Classic HD
- Page 1 Assembly Instructions Packet Classic® HD Motorcycle Tire Changer For our latest instructional videos, visit: NoMarTireChanger.com (or scan the QR code below) Tools Required for Assembly: 5/32" Hex (Allen) Wrench - Included in Lube Box inside of Box A • 3/16" Hex (Allen) Wrench - Included inside of Box B •...
- Page 2 Classic® HD Tire Changer Assembly Preparation We recommend unpacking and assembling your tire changer in the following order: 1. Box A - Mount/Demount Bar (save 5/32" Hex (Allen) Wrench for use with Box B and Box D). The Mount/Demount Bar has its own set of assembly and usage instructions inside of Box A. 2.
- Page 3 STEP 9 Attach Bead Breaker "Tee" (I) to the Bead Breaker Arm (H) using the 1/2" shoulder bolt (W) and Nylock nut (X). Verify proper alignment of the tee so that the No-Mar markings on the non- marring wedges face forward when the break arm is raised.
- Page 4 Figure C - Assembled Changer Figure B - Space Requirements...
Need help?
Do you have a question about the Classic HD and is the answer not in the manual?
Questions and answers