Table of Contents
Advertisement
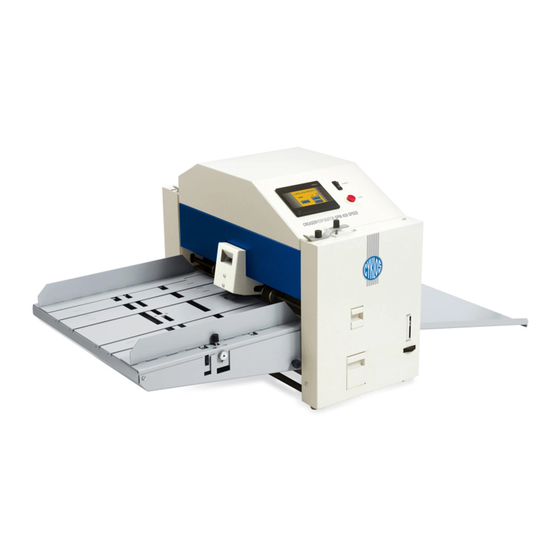
Automatic Creasing, Perforating and
Punching Machine GPM 450 SPEED
This document including the attachments is exclusive intellectual property of Cyklos Choltice (producer
cooperative). Any other use (copying, distribution or sale) is possible only with approval of the chairman of
the cooperative.
Operating Instructions
Valid from serial number
Warnings
17123999
Issue no.
4
Sheets
35
Advertisement
Table of Contents

Related Manuals for Cyklos GPM 450 SPEED

Summary of Contents for Cyklos GPM 450 SPEED
- Page 1 Automatic Creasing, Perforating and Punching Machine GPM 450 SPEED Warnings This document including the attachments is exclusive intellectual property of Cyklos Choltice (producer cooperative). Any other use (copying, distribution or sale) is possible only with approval of the chairman of the cooperative.
-
Page 2: Table Of Contents
Operating Instructions | GPM 450 SPEED CONTENTS 1. Introduction ............................... 4 2. Safety Risks ............................. 5 2.1 Safety Warning ........................... 5 2.2 General Work Safety and Health Protection ..................5 3. Warnings ..............................6 4. Technical Parameters ..........................7 5. Machine Description ..........................8 6. - Page 3 Operating Instructions | GPM 450 SPEED 11. Machine Disposal ..........................30 Appendix 1: Accessories ..........................31 Appendix 2: Instructions for Table Assembly ....................34 Appendix 3: Optional Accessory ......................... 35...
-
Page 4: Introduction
Operating Instructions | GPM 450 SPEED 1. INTRODUCTION We are presenting you with Operating Instructions that contain machine technical data and instructions necessary for correct setting, machine start-up, operation and maintenance. Instructions are intended for machine operation as well as for service engineers. People manipulating, installing and operating the machine should familiarise themselves with the instructions before they start. -
Page 5: Safety Risks
If the GPM 450 SPEED is used correctly, it is a very safe machine. However, if used incorrectly, it can be dangerous. When operating the machine, the operator is responsible for their own personal safety. The manufacturer is not responsible for any injury to a person or damage to the machine caused by use or operation that is not in compliance with the Operating Instructions. -
Page 6: Warnings
Operating Instructions | GPM 450 SPEED The customer will receive the accompanying technical documentation for the machine – Operating Instructions. The manufacturer hereby asks the user to ensure comprehensive safety as directed by the relevant legal proceedings, standards and regulations, the Operating Instructions and other, by training the workers consistently. -
Page 7: Technical Parameters
Operating Instructions | GPM 450 SPEED 4. TECHNICAL PARAMETERS a) Max. working width 450 mm b) Recommended paper grammage - creasing 80 - 400 g/m² Recommended paper grammage - perforation 80 - 250 g/m² Recommended paper grammage - punching 80 - 400 g/m²... -
Page 8: Machine Description
Operating Instructions | GPM 450 SPEED 5. MACHINE DESCRIPTION 1 – Front table 16 – Position regulation screw 2 – Delivery table 3 – Front side guide 4 – Telescopic table 5 – Magnetic strip 6 – Display unit 7 – Paper brake + weight 17 –... - Page 9 Operating Instructions | GPM 450 SPEED 25 – Top bar (fig. 1) 34 – Perforating tool screw M4x25 (fig. 2) 26 – Head thrust regulator 35 – Needle bearings of eccentric axis (fig. 1) 27 – Front table thrust scale 36 –...
- Page 10 Operating Instructions | GPM 450 SPEED Fig. 2: Perforating tool 2:1- 9 TPI (571 40 465a) – standard equipment. Microperforating tool (571 40 464) as optional accessory. Fig. 3: Creasing tool CITO 1,0 mm (571 40 467) – standard equipment. Creasing tool CITO 1,4 mm (571 40 468) as optional accessory.
-
Page 11: Machine Installation
Operating Instructions | GPM 450 SPEED 6. MACHINE INSTALLATION When unpacked, place the machine on the table (See the Instructions for Table Assembly in Appendix 2). Place the machine on the table, so that the heads of the table bolts (*) fit into the rubber legs of the machine. -
Page 12: Adjustment Of Machine And Feeding Table
Operating Instructions | GPM 450 SPEED 7. ADJUSTMENT OF MACHINE AND FEEDING TABLE 7.1 Introduction Electric automatic creasing and perforating machine serves for final processing of graphic material of the width up to 450 mm. Creasing allows easy folding of the paper and that’s why it is convenient to use the machine in combination with a folding module. - Page 13 Operating Instructions | GPM 450 SPEED Fig. 7: Correctly prepared table – even placement of the magnetic strips (position 5). Fig. 8: Incorrectly prepared table – absence of the magnetic strips (position 5) leads to the paper deformation.
- Page 14 Operating Instructions | GPM 450 SPEED Place 2 – 3 sheets to be processed on the feeding table. Push the sheets to the stainless steel plate, so that they are collinear (fig. 9). This ensures the sheets are perpendicular to the tool. Push the side guides (3) towards each other, so that there is a minimum gap between them and the sheets.
- Page 15 Operating Instructions | GPM 450 SPEED Adjust the auxiliary feeding wheels (29) to the edge of the sheet and secure with the setscrew. For adjustment use the Allen “T” key size 2. When the wheels are adjusted, tighten the setscrews, so that the wheels do not spin on the axle.
-
Page 16: Adjustment Of Feeding Table Thrust
Operating Instructions | GPM 450 SPEED Fig. 14: Incorrect adjustment of the feeding wheels – they are placed behind the side guide 7.2.1 Adjustment of Feeding Table Thrust Release the feeding table by pressing the table release button (15) and set the table thrust regulation screw (14) to minimum thrust. -
Page 17: Function Of Auxiliary Feeding Head
Operating Instructions | GPM 450 SPEED Fig. 15: Example of correct placement of paper pile Fig. 16: Example of incorrect setting of table thrust – too much thrust for the low paper grammage 7.2.3 Function of Auxiliary Feeding Head Paper feeding is influenced by many external factors. They are humidity, static electricity, type of print, etc. - Page 18 Operating Instructions | GPM 450 SPEED Fig. 17: Pulling callipers to the upper position Fig. 18: Defining the gap of the friction feed system by placing paper under the callipers If the machine has been adjusted correctly, but the friction feed system is not able to feed paper into the...
-
Page 19: Setting Machine Using Touch Screen
Operating Instructions | GPM 450 SPEED 8. SETTING MACHINE USING TOUCH SCREEN 8.1 Display Unit Preview and "SETTING" Screen Fig. 19: Start-up Screen When the electric switch (4) is turned on, the Start-up Screen (Fig. 13) displays on the touch screen showing the machine’s name and picture. -
Page 20: Manual Control
Operating Instructions | GPM 450 SPEED 8.2.2 Manual Control Press to display the "MANUAL CONTROL" screen, see Section 8.8 8.2.3 Info Press to display the information screen. The data are approximate. Press OK to go back to the “SETTING” screen. -
Page 21: Setting Number And Position Of Creases/Perforations
Operating Instructions | GPM 450 SPEED the “SETTING” screen (Fig. 17a). Entering the correct password and confirming by OK displays the “SERVICE MENU” screen. Press OK to go back to the “SETTING” screen. Fig. 23a: “SERVICE MENU” Screen – Password Fig. -
Page 22: Most Common Folds
Operating Instructions | GPM 450 SPEED 8.3.1 Most Common Folds The most commonly used folds are created by placing the crease at exactly defined relative distances of 1/2, 1/3 or 1/4 of the paper. The most common creases are easily set by pressing the corresponding button. -
Page 23: Setting The Speed Of Processing
Operating Instructions | GPM 450 SPEED 8.4 Setting the Speed of Processing Press SPEED OF PROCESSING on the “SETTING” screen (Fig. 20) to display the following menu. Fig. 26: “SPEED OF PROCESSING” Screen Change speed by using the + and - keys. Minimum and maximum values: 50 and 100, respectively. The default value is 100, which means 100% speed of the machine (2,500 A4 sheets per hour). -
Page 24: Starting Working Cycle
Operating Instructions | GPM 450 SPEED Fig. 27: “PROGRAM SAVING AND LOADING” Screen Press SAVE if you have your job ready and wish to save it. In the JOB NAME field you may enter up to 24 characters to name the program you wish to save. The field changes along with the program number. -
Page 25: Manual Control
Operating Instructions | GPM 450 SPEED Fig. 28: “WORKING CYCLE” Screen The feeding wheels (29 start feeding sheets of paper into the machine. Do not load another pile of paper onto the feeding table until the machine has processed the last paper, which automatically ends the working cycle and the “WORKING CYCLE”... -
Page 26: Adjustment Of Top Bar Stroke
Operating Instructions | GPM 450 SPEED Fig. 30: “MANUAL CONTROL” Screen (tool backwards) under the UPPER TOOL field if the perforation/creasing force gets too high and the top bar (25) remains in the lower position. Press to unlock the tool and adjust the thrust by using the tool thrust regulation screws (18). -
Page 27: The Most Common Faults (Troubleshooting)
Operating Instructions | GPM 450 SPEED Fig. 31: "CALLIPERS" Screen 9. THE MOST COMMON FAULTS (TROUBLESHOOTING) 1) Crinkled paper The paper gets crinkled, especially paper of lower paper grammage, because there is too much thrust of the feeding system on paper during feeding into the machine fig. 32 and fig. 33. - Page 28 Operating Instructions | GPM 450 SPEED Fig. 33: Example of crinkled paper 2 2) The "start" key cannot be pressed There is no paper on the feeding table or the paper is not pushed close to the stainless steel plate and the feeding table sensor cannot sense paper.
- Page 29 Operating Instructions | GPM 450 SPEED 9) Paper is folded askew Check the position of the side guides on the feeding table. If necessary, adjust the side guides using the angle regulation screw, see Section 7.2. Paper on the feeding table is bent. Use the magnetic strips to straighten paper, see Section 7.2.1.
-
Page 30: Recommended Machine Maintenance
Operating Instructions | GPM 450 SPEED 10. RECOMMENDED MACHINE MAINTENANCE Clean the machine from dust particles after each job using for example pressured air. Lubricate the top bar (position 25) bearings (position 36) with a suitable bearing lubricant once a year. -
Page 31: Appendix 1: Accessories
Operating Instructions | GPM 450 SPEED APPENDIX 1: ACCESSORIES 571 40 467 Creasing tool (CITO channel 1.0 mm) 1 pc 571 40 466 Creasing tool (iron channel) 1 pc 571 40 465a Perforating tool 2:1 1 pc 571 49 884... - Page 32 Operating Instructions | GPM 450 SPEED 571 49 885 Back side guide 1 pc 571 49 886 Side guide fastening 1 pc 321 00 020/0 Bolt VZJ40 M6x30 1 pc 571 46 262 Delivery table 1 pc...
- Page 33 Operating Instructions | GPM 450 SPEED 580 49 240 Safety bolt 2 pcs 309 10 381/2 Bolt M6x14 VS 24 pcs 309 10 278/2 Bolt M6x12 VS 4 pcs 413 00 007/0 Allen key size 2 1 pc 413 00 012/0...
-
Page 34: Appendix 2: Instructions For Table Assembly
Operating Instructions | GPM 450 SPEED APPENDIX 2: INSTRUCTIONS FOR TABLE ASSEMBLY Base + wheels – A Bottom – B Shelf – C Leg 1 – D Leg 2 – E Leg 3 – F Leg 4 – G Top – H Bolt M6x12 –... -
Page 35: Appendix 3: Optional Accessory
Operating Instructions | GPM 450 SPEED APPENDIX 3: OPTIONAL ACCESSORY 1. Punching tool for wire binding – square 4 x 4, 3:1 (571 40 462) 2. Punching tool for wire binding – square 4 x 4, 2:1 (571 40 508) 3.
Need help?
Do you have a question about the GPM 450 SPEED and is the answer not in the manual?
Questions and answers