Table of Contents
Advertisement
Quick Links
Advertisement
Table of Contents

Related Manuals for genoQs Machines Octopus

Summary of Contents for genoQs Machines Octopus
- Page 2 We invite you to explore the capabilities of Octopus as you like and provide this manual as a start-up guide. Herein, you will recognize many known terms and concepts.
-
Page 3: Table Of Contents
TABLE OF CONTENTS OVERVIEW............................I-0 GENERAL CONCEPTS ..........................I-1 START-UP ............................II-0 CONNECT AND POWER-ON ......................II-1 GENERAL CONTROLS.........................II-3 INTERFACE CONVENTIONS......................II-4 BASIC STEP OPERATION ........................II-5 BASIC TRACK OPERATIONS......................II-7 TRACK CHAINING ..........................II-10 STEP REAL-TIME ENTRY ........................ II-12 THE MODE BLOCK..........................II-13 STEP MODE............................III-0 BASIC OPERATION .......................... - Page 4 STEP CHORDS ..........................VIII-2 PAGE SCALES........................... VIII-7 THE GRID SCALE..........................VIII-9 ADVANCED TOPICS........................IX-0 CUSTOM TRACK DIRECTIONS .......................IX-1 VIRTUAL MIDI CHANNELS ......................IX-6 TRACK ATTRIBUTE MAPS ......................IX-7 STEP EVENTS ............................IX-11 THE EFFECTOR ..........................IX-13 NOTE ATTRIBUTE COMPUTATION ....................IX-17 MIDI IN ............................. X-0 NOTE STREAM RECORDING......................X-1 CONTROLLER STREAM RECORDING ...................
-
Page 5: Ioverview
I OVERVIEW... -
Page 6: General Concepts
Octopus hierarchy of objects The ultimate idea is to allow and their related attributes. Octopus hierarchy of objects and related attributes CC Map 0 GRID PAGE GRID CC Map 5 CC Map 0... - Page 7 You would do the same to get NAVIGATION BASICS further down into a specific track and from there into a The Grid contains all Page specific step. You may also objects and any Page is made up choose to go from a page into a of Tracks and Steps.
- Page 8 System THE GRID Load Handling. See the picture Octopus provides a total of 144 above for a better understanding pages grouped in 9 banks of 16 of the Matrix in the Grid mode. pages each, making up the GRID.
- Page 9 The range and live play. includes but is not limited to Velocity, Pitch, Length, Start, Position, and others. TRACKS If pages are Octopus' track Page Track Step containers, then tracks are the step containers. Apart from other attributes, each...
- Page 10 not all attributes are applicable to all entities. The attached table gives an overview of the entities and their applicable attributes. ATTRIBUTE MAPS The attribute maps are basically views associated with TRACK objects which will allow you to view and edit directly the values of all steps in a track, for a specific attribute.
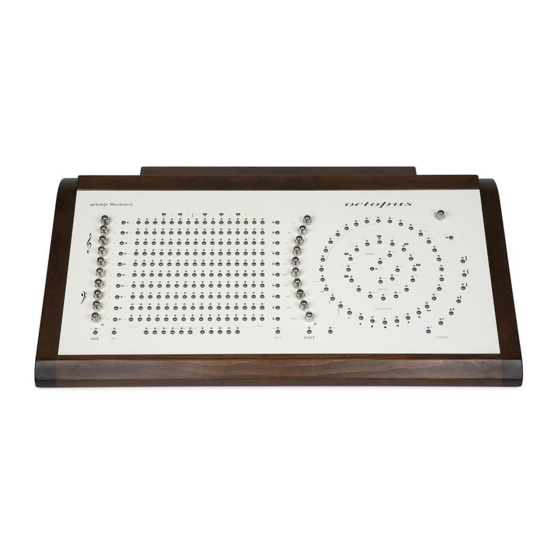
- Page 11 MATRIX The MATRIX refers to the field of THE FRONT PANEL 16x10 buttons. The Octopus front panel consists The buttons take on various of visual groups which we will functions, depending on the name and to which we will refer operating mode of the sequencer.
- Page 12 The reset button is located modes and objects. under the main Octopus panel just under the Main knob. The Among other controls, the circle red reset button does what the includes the SCALE, MODE, name suggests –...
-
Page 13: Start-Up
START-UP II-0... -
Page 14: Connect And Power-On
Octopus has an auto-sensing 110-240 Volt (50-60Hz) power Upon power-on (or reset), supply so you can safely power it Octopus starts in the state that up in any country without extra was last saved to its internal adapters or converters. All you FLASH (non-volatile) memory. - Page 15 GRID mode powering up the machine, button, while pressing the CLR Octopus will not load the FLASH button. memory contents, but will simply start with the factory Again, this only clears the RAM defaults. (volatile) memory contents and leaves the content of the FLASH (non-volatile) memory untouched.
-
Page 16: General Controls
GENERAL CONTROLS Octopus features a set of Stopping the sequencer will reset transport buttons, which are no the chase light position to zero. different from what you may know from other devices. Start, PAUSE Stop and Pause functions are available. -
Page 17: Interface Conventions
INTERFACE CONVENTIONS Experiment a bit with this and NUMBER DISPLAY CONVENTION you will get a good feel for this representation quickly. You will Two other things to notice here: re-encounter it at many other the LED of the button labelled occasions as we move along. -
Page 18: Basic Step Operation
MUT expect anyways, knowing that button pressed, you will see it Octopus is a chase-light pattern toggle on as an active step. sequencer. Let’s press some buttons now. STEP TWEAKING... - Page 19 Turning PIT counter-clockwise will decrease the pitch – one GHOST TOGGLE half-tone per encoder click. Press and hold pressed two or The PIT rotary is the second one more step buttons placed in from the top of the EDIT block. separate rows.
-
Page 20: Basic Track Operations
(move your finger off the selector). You have On the left side of the just copied the track you have Octopus panel you see grabbed to an internal buffer*. a block called SEL, to the right of the MIX TRACK PASTE rotary encoder block. - Page 21 depending on your sound mute buttons directly, will also choice)? Well, for now yes – remove the stored mute pattern unless you put one of the tracks and make the MUT LED go off. on mute. TRACK TRANSPOSE We will now do just that. To mute one of the tracks, first Remember, we wanted to decide which track you want to...
- Page 22 To make things a bit more paused and the Pause button is interesting, take one of the two clicked again, the track will playing tracks and increase its advance one step but still velocity (do we still really need to remain paused.
-
Page 23: Track Chaining
TRACK CHAINING Press now the button labelled Let’s assume for a moment that XXX. The corresponding LED we are back to having two tracks, will light orange indicating that with the second one originating this chain mode is selected. from the first, but modified to your taste in the meantime. - Page 24 leaving the other tracks at a playing individual tracks length of 16 steps each. sequentially in a defined order, and does not influence in any The way to accomplish this is to way the parameters you have set select the tracks you want to for the individual tracks.
-
Page 25: Step Real-Time Entry
STEP REAL-TIME ENTRY If you are less than satisfied There is a simple way to tap with the results of your play, you steps into a track in real time. may clean up the mess by simply clearing the track as we Simply grab the track you would have already seen before. -
Page 26: The Mode Block
For example, upon power on you A green light in the PAGE LED will see that Octopus is in PAGE indicates that the page is solo-ed mode (indicated by the blinking in the grid. A red light in the... -
Page 27: Iii Step Mode
III STEP MODE III-0... -
Page 28: Basic Operation
BASIC OPERATION This blinking LED indicates the position of the step you have WHY STEP MODE? zoomed into. If it is red, it means it is not toggled on, if it is green, Let’s assume now that you are it is toggled on. looking for a very particular note you want to trigger –... -
Page 29: Step Attributes
STEP ATTRIBUTES As you may expect, the PIT row Going over the front panel from shows the pitch value for the left to right, you see all LEDs lit step. up in the SEL column. Bear with us for a moment; we The number displayed is really will explain in a second what an offset that the step applies to... - Page 30 of a note and each red value it is enough to mention that this corresponds to 1/16 of a note. indicates the amount to which For technical reasons the max an event programmed on this note value is one full note – step will affect the current track.
-
Page 31: Step Mutators
STEP MUTATORS on the actual Step value and You may have noticed that the using 50 as randomization mutator column has several amount. LEDs lit up. They are labelled according to the mutator STEP (UN-) ZOOM (ZOM) functions that they trigger. A lit up mutator indicates that it is In STEP mode the LED is lit up available. -
Page 32: Step Selections
STEP SELECTIONS attributes – the pitch, the length, After having tweaked a step to and the start, anything you anything we were looking for, would like, by simply turning the let’s assume that we are trying knobs. to make parameter changes to a group of steps in the page This method produces a relative instead of just a single step. -
Page 33: Track Mode
TRACK MODE IV-0... -
Page 34: Basic Operation
BASIC OPERATION mode is easy and predictable by now: decide which track you WHY TRACK MODE? want to zoom into and double click its selector button. The TRACK mode provides similar functionality to the STEP In our example, by double mode for any track and its clicking selector number 5 we attributes. -
Page 35: Track Attributes
Step values happen as you turn the knob to are just offsets to this base. the right. Octopus uses the convention that middle C (MIDI note #60 For the STA factor, use a track decimal) maps to c5. - Page 36 Turning the POS applied to the track when the knob will shift the RND function is called. steps around, depending on the turn direction, TRACK GROOVE (GRV) modifying the contents of the play window, just to use the The GRV amount shows how same terms.
- Page 37 you reach 16. Turning it once buttons. Typically a single click more to the right will light the will move the ones value to the LED in position 1 red. This pressed value, a double click will means that channel 1 on port 2 set the ones value to zero and is now selected.
-
Page 38: Track Mutators
TRACK MUTATORS You may have noticed that the The pitch will be set to the mutator column has several default value of 60. Note that the LEDs lit up. They are labelled factory pitch assignment can be according to the mutator recalled by calling the CLR functions that they trigger. - Page 39 notion of a destination track, Another thing to realize is that which is always the one from the FLT is MIDI channel agnostic – selection with the lowest index. you may FLT different tracks playing on different channels, Applying FLT to the track but the result will always play selection will fill the destination on the MIDI channel of the...
- Page 40 Below is an overview of what the are zooming out is indicated by a RMX function does: red LED light, as opposed to an orange one. Influenced Random Random MAP* MAP* shift Step When in page mode, hold one offset track selector down and press ZOM to zoom into the track –...
-
Page 41: Track Selections
TRACK SELECTIONS SEL will store the last track Sometimes it may be convenient selection you have made. to make a change to more than Holding SEL down again will one track at once. bring back your previous selection. This can be done easily using the same method you have Holding SEL down, you may now already seen in the STEP... -
Page 42: Track Chaining
TRACK CHAINING You will now see that they start playing in sequence. The play TRACK CHAINS EXPLAINED sequence is per default top to bottom (i.e. row 9 to row 0). A track chain is simply a defined sequence of playing tracks from There are cases when you will a page, in a given consecutive see this order changed as a... - Page 43 the following information in the track base values of the head selector LED column. track. The track selected (one you have Simply toggle the chain selection your finger on) is blinking indicator between orange and orange. red. Orange means that tracks are being played in their natural Other track members may be lit state but in chained order.
-
Page 44: Track Program Changes
0-127. activated for play, but not when you send program change The Octopus convention is to messages from Track mode. display values in the range 0- 128, where a value of 0 means... -
Page 45: Track Tempo Multipliers
TRACK TEMPO MULTIPLIERS Tempo Hold Click Double- One other interesting parameter Multiplier click is the track tempo multiplier. Basically this selects whether a particular track is to be played at master tempo, or for example twice, or four times that speed. Several tempo multipliers are available. - Page 46 easy triplet creation - a triplet being three notes played instead of two. The 1.5 multiplier is shown as an orange 2 and a red 1. Its inverse, the 1/1.5 multiplier, is shown as an orange 2 and a green 1. The 8 multiplier is shown as an orange 4 and a red 2 LED.
-
Page 47: Track Auxiliaries
TRACK AUXILIARIES When Follow is active and you TRACK CHASE-LIGHT are zoomed into a track that is part of a chain, the view will If you are in Track mode while always follow the chase light in the sequencer is playing, you the respective track chain, in the will notice a chase-light in the sense that it will always show... -
Page 48: Vpage Mode
PAGE MODE... -
Page 49: Basic Operation
BASIC OPERATION grid position of the page you are currently in. Please refer to the WHY PAGE MODE? introductory chapter on general concepts to get an overall view of We have all along used the page what the grid is. mode as a starting point, from where we have been zooming This function is a useful... -
Page 50: The Mixer Block
THE MIXER BLOCK is showing in every row the value In the previous sections we have respective to the corresponding talked to a large extent about track for the chosen attribute. what the EDITOR block does – in short, it is used to change the QUICK ASSIGN attributes of a selected entity, where applicable. - Page 51 button. This will assign random If the ATR type is selected by a values to all tracks at once – for double click, the SEL buttons the selected attribute of course. will light up green, indicating that any of them may be selected. ALIGN The already selected attribute Using the ALN function you may...
- Page 52 15, and 16 indicate no CC has the GRID CC Maps directly from been assigned. within pages. Now press the MCH button. This This is especially useful when view allows you to assign the you have assigned some “global” MIDI channel on which the CC mappings to the GRID maps and signal is sent.
-
Page 53: Preview State
PREVIEW STATE data of the steps is played out of Octopus provides a quick way of the MIDI port as it is. previewing steps, in the sense that you can immediately hear Grab a step and now tweak its what they contain, and how they attributes (for example pitch, to would play. -
Page 54: Editor Atr State
EDITOR ATR STATE In this mode the EDIT knobs will In Page mode, an ATR may be behave just like another group of temporarily assigned to the EDIT MIX knobs for the just selected knob group. attribute. ENGAGE DIS-ENGAGE This is done by holding Pressing the EDIT master button the selector of the once will cancel the assignment... -
Page 55: Editor Mcc State
EDITOR MCC STATE you don’t remember the details The EDIT button has one more for setting up Track MIDI CCs. state – that is the MCC send state. This is used to make the ENGAGE editor knobs send MCC data. To activate the MCC state, double-click on the EDIT button SENDING MCC DATA... -
Page 56: Page Functions
PAGE FUNCTIONS When in PAGE mode, holding Page can be copied to the copy the PAGE key pressed will make buffer. The copy operation will some mutator functions include the chain configuration available for the page local to the page at the time of itself –... -
Page 57: Bank View
BANK VIEW When in PAGE mode, by default Note that this says nothing you see a green lit Select LED in about which column in the bank the top right quadrant of the is currently playing. circle, along with the orange Tempo LED. -
Page 58: Play Mode
PLAY MODE green. Also you will notice that The PLAY mode provides the the Program button will be lit capability to try new things in a red. page, in a non-destructive manner. Now make all the changes and editing that you need to make to Activating the PLAY mode is your page until you reach a equivalent to taking a snapshot... -
Page 59: Grid Mode
GRID MODE VI-0... -
Page 60: Basic Operation
This clock runs through 16 the mode used for controlling a cycles after which it starts over. large amount of sequence data This is the lowest-level Octopus at once. clock and the only interaction you have with it is when you For example, sets of active pages change the master tempo. -
Page 61: Page Operations
PAGE OPERATIONS finally choose is really up to In GRID mode, you are looking your personal style and workflow. at all your pages at a glance: every button in rows 1-9 PAGE CONSIDERATIONS represents a page, and the LEDs indicate the status of the pages. If the PAGE mode LED is flashing red, the selected page is not active. -
Page 62: Page Clusters
PAGE CLUSTERS the next page in the cluster starts to play and so forth. Clustering side note: in total you may set up to 16 pages for WHY PAGE CLUSTERS consecutive play (maximum size So far we have only played pages of a cluster). - Page 63 PAGE REPEATS Page clustering can become even more fun, as you can set the number of repetitions individually for each page. For example, page A can play 4 times, page B 2 times and page C 1 time. The number of repetitions can be any value between 1 and 16, where 1 is the default value.
- Page 64 In order to change that, use the row zero buttons and click / PAGE LENGTH double-click them to achieve the desired result. Note that the As we have seen, clustering maximum length of a page can pages is a way to create be set up to be 8 cycles, or 128 structures spanning more than step lengths.
- Page 65 that the matrix display will always switch to the page that is PAGE FOLLOW currently playing, essentially following the chase-light as it At any time during play in GRID moves forward through the mode you may zoom into any pages of the current bank. page you would like by the methods described already.
-
Page 66: Vii Performance Tools
VII PERFORMANCE TOOLS VII-0... -
Page 67: Working With Pages
WORKING WITH PAGES will un-solo it. Only one page This section is assuming we are can be in solo mode at any one working in the GRID mode, time. Groups of pages playing where we have control over the concurrently are handled by the behaviour of individual pages. - Page 68 PAGE TRANSPOSITION want them to start playing right on the beat – and they will When a page is selected in the (provided the progress bar of the grid, you may notice that the master clock is lit red). pitch circle lights up. It indicates the page’s pitch offset and lets you modify it, in order to IMMEDIATE SWITCHING...
-
Page 69: Grid Cc Maps
GRID CC MAPS parameters of a more global Just as seen in the page mode, nature, such as certain the GRID has the notion of a CC instrument volumes, or other map – i.e. you may assign CC things that are not specifically functionality to the MIX bound to a particular page. - Page 70 GRID MODE PAGE MUTES In GRID mode, when no page is A green LED means there is a grabbed (i.e. held down), the stored mute pattern that may be mutator buttons take on a activated, and a red LED means similar role to the one that the that there is a mute pattern main MUT button has in PAGE...
-
Page 71: Page Sets
CONCURRENT PAGE ACTIVATION have stored a set, into a slot, its corresponding LED turns green Octopus can store the pointers – indicating that the set of that of all active pages at a given time slot is now playing in the grid. -
Page 72: Grid-Track Mode
GRID-TRACK MODE Each lit button acts as virtual The GRID-TRACK mode may be track selectors and the LEDs imagined as a sub-mode of the indicate the mute / un-mute GRID Mode. state of the corresponding track. WHY GRID-TRACK MODE HANDS-ON The GRID-TRACK mode provides As an example, let’s assume most of the GRID functionality... - Page 73 is a quick way to do that by BACK TO GRID-TRACK MODE holding any button that belongs To return from TRACK mode to to columns 1-3 or 14-16 while GRID-TRACK mode simply press pressing a virtual track selector. the GRID and TRACK mode The virtual track selector now buttons at the same time –...
-
Page 74: Musical Tools
VIII MUSICAL TOOLS VIII-1... -
Page 75: Step Chords
STEP CHORDS The next section will assume we are working in STEP mode. To follow along, please make sure to enter STEP mode before we move Steps may be set to play more than one pitch at a time, effectively forming chords. Chords can be directly programmed in, or directly recorded (see the section on... - Page 76 Try holding down a chord button, PLAYING CHORDS compose a chord, and tweak the PIT encoder. You will see how Press and hold any of the the chord gets transposed across CHORD buttons down. Use the the scale. octave circle to toggle notes in and out of the chord up to a Further pitch adjustments may cardinality of seven.
- Page 77 While you can configure the strum The row numbers behaviour in great detail for each correspond to the strum level, Octopus comes with strum level a preset strum configuration number. So, row which affects the note start 5 sets what values (only).
- Page 78 of 1, likewise in strum levels 2, 3, across the entire machine. 4 and 5. Changing strum levels on the fly while playing may have some Note that the STA offset is interesting side effects. always relative to the STA of the step holding the chord, and not If you decide that you do not like absolute to the beat grid.
- Page 79 STEP REPEATS Step will retrigger according to While in Step ZOOM mode, hold cardinality and strum setting for down the chord button of your start, and play note OFFs for choice. every one of the played notes. This may render interesting If you now press the base pitch effects.
-
Page 80: Page Scales
PAGE SCALES CHANGING SCALE NOTES Each page can be associated with a particular musical scale. Press the Select scale button (in Once that association is done the outer circle, button XIV) and and a scale is active, all page it should blink orange, while the notes are forced to play in the Chr. - Page 81 EXITING THE SCALE MODE To activate the SCALE CAD, You may want to have your page please activate force-to-scale if notes forced to the selected scale, not already active, and then but not see the details behind press CAD (so it blinks red that and also prevent any indicating operation).
-
Page 82: The Grid Scale
THE GRID SCALE EXEMPTING PAGES FROM GRID The GRID may be assigned a SCALE scale, in the same manner that a scale is assigned to a page, Note that by definition, the GRID except the GRID scale will act scale is overruled by any other globally. -
Page 83: Advanced Topics
ADVANCED TOPICS IX-0... -
Page 84: Custom Track Directions
Then What may catch your attention you will see how the pieces fall though, is that on the Octopus into place. you can not only specify what direction a track should play,... - Page 85 16 slices of specified? Well, every time time it takes to play all steps in Octopus gets an empty slice, it a track”. Makes sense? Realizing will pick a trigger for you at this is the key to understanding random, and play it normally.
- Page 86 previous slice will be called – and then its triggers played. Note that the certainty_next parameter applies to the switch between slices, but does not apply to the trigger set and sequence inside a particular slice. EXAMPLE For example, let’s assume slice 4 has a certainty_next of 50% and a trigger set of 2, 5, and 8.
- Page 87 You may select triggers at will by understood how the Octopus simply toggling them in the direction model works. Please Matrix, but there can be only also note the dedicated tutorial...
- Page 88 Octopus. However, RND. That one may get you unlike with regular MIDI data, going. there is no „PLAY“ capability for the directions.
-
Page 89: Virtual Midi Channels
VIRTUAL MIDI CHANNELS SETTINGS Octopus has the notion of virtual MIDI channels. They provide a To set a track to a virtual MIDI mechanism to cross channel, you have to turn the communicate data between MCH knob past channel 16 of tracks, Octopus internally, port 2. -
Page 90: Track Attribute Maps
TRACK ATTRIBUTE MAPS EXAMPLE Now that we have looked in some detail at the mutators Press VEL and you will notice while in TRACK mode, you may that keeping it pressed will make wonder what is going on to the it blink orange and the mutator left of the matrix –... - Page 91 Now press any button in row 6 – as an example. You will see that WORKING WITH MAPS the bar for the step in the column of your press will jump The matrix display is built up to the position of the button you starting at row 0 with the have pressed.
- Page 92 The way to read the display is the following: the red dots will SHIFTING MAPS indicate the octave and the green dot will indicate the note The POS knob in the Editor in that octave. block is also assigned a function –...
- Page 93 for LEN and STA shown in the TRACK mode are depicted as MAP FACTORS 0…16, with 8 being the neutral value. Maps are useful in the sense that we can see and edit a Lower than neutral values have particular step attribute for all a reducing effect, higher than steps at once.
-
Page 94: Step Events
STEP EVENTS SET EVENT VALUES Steps may be used to generate so called events. Events are The amount (AMT) automated changes that happen value of the step at runtime. determines the change in the track attribute every time GENERAL DEFINITION the step is played. - Page 95 To change the size of the interval CLEARING EVENTS used by events, proceed as Events may be cleared from a follows: track by zooming into the step and pressing the flashing SEL Go into STEP mode, i.e. zoom attribute button so it is solid into your respective step.
-
Page 96: The Effector
PAGE. Some additional explanation is needed here, so let’s start with the theory. In each Octopus page there is the notion of an Effector. In simple terms, the effector is a mechanism allowing tracks inside a page to modulate other tracks inside the same page. - Page 97 Because the effect of the feeder tracks is additive down the track THE EFF MECHANISM indexes, you may picture the feeder tracks as feeding the The modulation is always effector and listener tracks happening “top-down”, i.e. upper listening to whatever is in the tracks may modulate lower effector at their particular index tracks, but not vice-versa.
- Page 98 tracks below will see a total PIT cross modulation among the modulation effect of +3 -1 = +2. page tracks. Similarly, Tracks 3 and 2 are set as further feeders, which means that the last listener, Track 0, is being modulated by four feeders: Tracks 9, 6, 3, and 2.
- Page 99 will be played regularly, as they would independent of the PLAYING THE EFF effector. FEEDERS MUTING On to the operation of the Effector. Setting a track to be a If a feeder track is muted, it will feeder is done by pressing its not have any effect on listener EFF mutator and toggling its tracks.
-
Page 100: Note Attribute Computation
NOTE ATTRIBUTE COMPUTATION turn is generated by a step offset In the following we would like to in the feeder track, factorized by summarize the mechanism of its local VEL map factor. In the note attribute computation. The default case, where the effector model is depicted by the diagram does not apply, this offset is 0. - Page 101 PITCH The pitch value is computed in a LENGTH very similar fashion to the The default length of a played computation of the velocity value. note is 1/16 The only difference is in the The length is influenced by the application of the page PIT offset, effector in ways similar to which is an actual numeric...
-
Page 102: Xmidi In
MIDI IN... -
Page 103: Note Stream Recording
MIDI note, MIDI correct MIDI IN port on the controller and pitch bend data Octopus, i.e. the one that the onto its tracks, at (sequencer) track is set to send on (IN 1 or 2). runtime, recording the data... -
Page 104: Controller Stream Recording
This includes the pitch bend, do the recording of the controller which is handled by Octopus in accordingly. a similar fashion to a controller. A fun exercise may be to enter... -
Page 105: Step-Note Recording
STEP-NOTE RECORDING Octopus offers an alternative to Also Note that the recording of note stream recording, and that MIDI data will follow the pattern what we term step-note described in the following. recording. Note that this is not FRESH RECORDING... -
Page 106: Advanced Recording
Note that the Track DIR setting will be followed even during As you have seen in previous MIDI recording. chapters, the pitch of a note played by Octopus is computed... - Page 107 as the sum of the track base QUANTIZED RECORDING pitch and the PIT offset of the In the section on attribute map particular step. factors, we have described the workings of the factoring The track PIT value can be mechanism. One application is anywhere between 0 and 127, non-destructive quantization of however the step PIT offset may...
-
Page 108: Controller Map Learning
CONTROLLER MAP LEARNING select the encoder for which we While somewhat unrelated to want to make the assignment. what we have discussed so far, another aspect of MIDI recording Per default you will see the is the ability to have a CC map amounts of the map displayed, learn from the MIDI input. -
Page 109: External Force To Scale
EXTERNAL FORCE TO SCALE MIDI MERGE While in page mode, with the REC armed, your external MIDI By selecting a chromatic scale input will be forced to the scale for your page you can effectively of the current page. implement a MIDI merger functionality –... -
Page 110: External Scale Building
We have used the All notes received on the MIDI IN Octopus pitch circle to select the will be interpreted in the same notes of the scale, or the base way that key presses in the pitch bitch of the scale accordingly. -
Page 111: External Program Change
EXTERNAL PROGRAM CHANGE of the incoming program change Octopus allows external control message. of page toggle states via program change messages. For example, MIDI program changes 0-15 will select grid sets The program change messages 1-16 respectively. A MIDI received will be interpreted... -
Page 112: General Tools
GENERAL TOOLS XI-0... -
Page 113: Utility Functions
UTILITY FUNCTIONS INTERFACE LOCK CHASELIGHT ALIGN Sometimes you may want to There are many reasons why hide the Octopus from preying your chase-light in a page may eyes or even unauthorized become misaligned in a visual button pressers. sense. Sometimes that’s what you want, but sometimes not. -
Page 114: Midi Clock
This is simply to A double click turns it green or save bandwidth. However, red (more on that below), Octopus may act as a MIDI clock meaning that Octopus is now source in your setup, or will listening to MIDI clock and is synchronize to some other acting as a MIDI slave. - Page 115 Octopus will remember the last indicator LED is red, or green, port that provided MIDI clock one of which you may not be signal. Implicitly this means that expecting. when entering slave mode you may discover that the clock XI-3...
-
Page 116: System Load Handling
MIDI pipe and accordingly between the two. the capacity of the Octopus central processing unit (CPU). CPU load is a bit trickier, since the CPU has many tasks to complete. - Page 117 Before we get lost into technicalities – the CPU load is When Octopus is under very indicated in the CHORD3 to high load, you may possibly see CHORD7 LEDs in two stages: slight glitches of the display. stage one indicates that CPU is at about 80% load.
-
Page 118: Instrument State Internal Save
OR RESET DURING THE SAVE the last saved state by simply OPERATION! pressing the reset button found on the bottom pane of Octopus (just underneath the Tempo SAVING THE MACHINES STATE knob). This will clear all changes To perform a save of the... -
Page 119: Export Memory Content To Midi
LED will stop blinking for the stopped. Connect the MIDI Out duration of the data transfer. A 1 port of your Octopus with your single exported page should take receiving device, considering on the order of 8 KB. - Page 120 BANK EXPORTS periphery needs a lower A BANK export will export all transmission rate than Octopus non-empty pages in a bank, and is potentially capable of behaves very similarly to providing. Obviously, a lower exporting page content, basically...
-
Page 121: Operating System Update
Once in a while, you will want or v1.xx. Telling the two cases need to update the OS of your apart is quite easy: Octopus. This may be the case when we are releasing OS Scenario 1: the numeric field of versions with additional built-in the outer circle reads out the functionality. - Page 122 PROGRESS INDICATOR OF THE a MIDI utility (or device) that WRITE OPERATION. can read and dump SYSEX files to the Octopus. IF THE OPERATION DOES NOT COMPLETE, YOU WILL END UP Examples thereof are “MIDI-OX” WITH OLD DATA ERASED AND NEW DATA NOT WRITTEN for Windows and “SysEx...
- Page 123 Connect your SYSEX dump please make sure to connect your utility to the MIDI IN 1 on the Octopus directly to the MIDI out of Octopus. If you have the option, your interface without any set it for 100ms delay between intermediary devices.
- Page 124 Start the SYSEX dump of the boot-loader configuration file OCT_BL_UPDATER.syx, with the machine running the OS updater and the same MIDI connection as before. You should see the Octopus matrix field counting up the LED’s in red and the Program XI-12...
- Page 125 OCT_OS_v100.syx with the machine running the OS updater and the same MIDI connection as before. You should see the Octopus matrix field counting up the LED’s in green and the Program LED blink orange. This should take on the order of 4-5 minutes.
- Page 126 From here on, you will continue This is important! to work with Octopus as you have before – and try out the Turn the machine ON – and new functions of the new OS.
-
Page 127: Xii Release Notes
XII RELEASE NOTES XII-0... -
Page 128: Release 1.00
RELEASE 1.00 EDIT TRACK DIRECTIONS (***) The release of the OS 1.00 Directions 6-16 are now involved re-structuring the available and freely editable by manual from scratch. the user, including re-trigger and randomize options. For that reason, you will not find any section pointers respective to the new features and changes. - Page 129 VIRTUAL MIDI CHANNELS (***) The STA and LEN attribute Provide an internal wiring of values of Tracks are now tracks to the Octopus MIDI in. assigned to influence the effect In this way, Octopus tracks may of LEN and STA maps on the be used to leverage the steps played in a Track.
- Page 130 FORCE TO SCALE INPUT (**) are trying to make a certain note mapping. Externally played notes can be passed through the Octopus and forced to the scale of the current TRACK FLATTENING (**) page. The FLT mutator has evolved to new semantics.
- Page 131 means of transposing an entire page. RECORDING DISCARDS OFF- RANGE NOTES (*) PAGE MODE SINGLE STEP Notes from MIDI IN recording SELECTION UNCOVERED (*) that were not in the proper data range are now ignored, as When only one step is selected opposed to being ceiled to the in a page (in page mode), the range boundary.
-
Page 132: Release 0.98
RECORDING MIDI chord. Octopus now features the capability of recording incoming STRUMMING MIDI note and controller data onto its tracks. Recording is... - Page 133 GRID SCALE capability to try new things in a non-destructive way. Setting By popular demand, the GRID Octopus (and hence all playing now has the notion of a scale. pages) in PLAY mode is The scale may be selected and...
-
Page 134: Known Issues
There are for both pros and cons. When Octopus is turned on or reset, there is some scrambled Pages automatically activate if MIDI data coming out of MIDI they are part of a cluster. -
Page 135: Legend
LEGEND ABBREVIATIONS Maj. Major Scale Min. Minor Scale VEL Velocity Dim. Diminished Scale Pitch Chr. Chromatic Scale LEN Length STA Start MOD Modulation POS Position SEL Selection Direction CAD Cadence AMT Amount GRV Groove ALN Align MCC MIDI Continuous EXC Export Content Controller MCH MIDI Channel SYMBOLS... -
Page 136: Tutorials
XIII TUTORIALS XIII-0... -
Page 137: Midi Cc Control
You should see 3 SEL buttons STANDARD IMPLEMENTATION light up (AMT, MCC, MCH) and one (AMT) should be blinking. First, Octopus has a standard MIDI CC implementation that For this tutorial, skip changing spits out a cc amount per step. - Page 138 You will find that the MIDI cc change. changes will have an effect even if the Octopus is playing another BANKS page in the cluster. This allows you to make real-time changes Finally Octopus has a setup for...
-
Page 139: Lfo-Type Modulations / Superstep
Latronic Notron sequencer. modulation applied to. It is Although the capabilities of important however that you set Octopus go quite beyond that, the note-holding tracks to the we describe here how to same MIDI channel as the instantiate that particular modulator track in order to hear behaviour on the Octopus. - Page 140 The shape was a simple repeating triangle wave. I used Further on the bright side, you the Octopus to record and then are able to modify and interact play back the info. A MIDI with the CC modulators as you...
- Page 141 6). Also, changing the shape original CC data. requires re-editing the CC map data. The fact that the Octopus lets you record/create a block of For slower tempos, you might be modulation data and allows able to get away with x2...
-
Page 142: Direction Editing
DIRECTION EDITING Let’s start with an empty page so Repeat for steps 9 and 13. Slow there’s no distraction. Select an the tempo way down and start empty page and zoom into a the sequencer - you should see it track (use 9 for this example). - Page 143 9. Since no LEDs are on in Button 7, any rows for steps 5 and 9, position 2 in row 1, 15 in row 2; Octopus picks a random step to go to next. Button 8, position 1 in row 1, 16 in row 2;...
- Page 144 90% of the time randomly by Octopus. Octopus will play the next step and 10% of the time it will play In a sequence, if you have a the previous step. This is how...
- Page 145 For example, using direction 7 with all slices set to 100% certainty_next, change slice 9 to have certainty_next set to 0. Exit to Play mode and start the sequence running. As soon as step 8 is completed, it will play step 9.
Need help?
Do you have a question about the Octopus and is the answer not in the manual?
Questions and answers