
Related Manuals for Orion Network Pro RTX2


Summary of Contents for Orion Network Pro RTX2
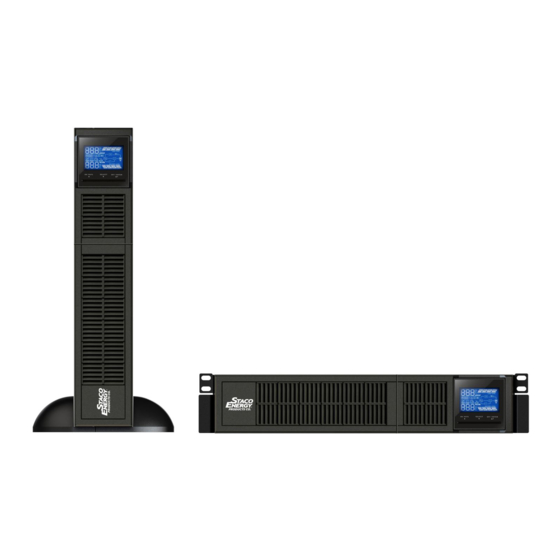
- Page 1 Network Pro RTX2 User Manual Line Interactive Sinewave UPS 800/1.1K/1.5K/2K /2.2K/2.5K/3K VA Uninterruptible Power Supply System Version: 1.1 www.orionpowersystems.com...
-
Page 2: Table Of Contents
Table of Contents 1. Important Safety Warning ..................... 1 1-1. Transportation ....................... 1 1-2. Preparation ......................1 1-3. Installation ......................1 1-4. Operation ......................3 1-5. Maintenance, Service And Faults ................3 2. Installation and Setup ....................7 2-1. Rear Panel View ....................7 2-2. -
Page 3: Important Safety Warning
1. Important Safety Warning Avertissement de sécurité important Please comply with all warnings and operating instructions in this manual strictly. Save this manual properly and read carefully the following instructions before installing the unit. Do not operate this unit before reading through all safety information and operating instructions carefully Veuillez vous conformer strictement à... - Page 4 système UPS. Please use only VDE-tested, CE-marked (or UL-marked for 100/110/115/120/127 ⚫ VAC models) mains cable (e.g. the mains cable of your computer) to connect the UPS system to the building wiring outlet (shockproof outlet). Veuillez utiliser uniquement un câble d'alimentation (par exemple le câble d'alimentation de votre ordinateur) homologué...
-
Page 5: Operation
1-4. Operation - Opération Do not disconnect the mains cable on the UPS system or the building wiring outlet ⚫ (shockproof socket outlet) during operations since this would cancel the protective earthing of the UPS system and of all connected loads. Ne débranchez pas le câble d'alimentation du système UPS ou de la prise de câblage du bâtiment (prise de courant antichoc) pendant les opérations car cela annulerait la protection par mise à... - Page 6 personnes qui ont des connaissances suffisantes sur les batteries et les mesures de précaution requises peuvent remplacer les batteries et superviser les opérations. Les personnes non autorisées doivent être tenues à l'écart des batteries. Caution - risk of electric shock. The battery circuit is not isolated from the input ⚫...
- Page 7 Manufacture Type Rated Toplite (Guangzhou) NPW45-12 12 V dc, 9.0 Ah Technology Battery Co Ltd UXW460-12 12 V dc, 9.0 Ah (MH29104) NPW36-12 12 V dc, 7.2 Ah UXW360-12 12 V dc, 7.2 Ah NPW45-12 FR 12 V dc, 7.0 Ah UXW460-12/FR 12 V dc, 7.0 Ah NPW36-12 FR...
- Page 8 product may cause radio interference, in which case the user many be required to take additional measures. (only for 220/230/240 VAC system) AVERTISSEMENT: Il s'agit d'un onduleur de catégorie C2. Dans un environnement résidentiel, ce produit peut provoquer des interférences radio, auquel cas l'utilisateur peut être amené...
-
Page 9: Installation And Setup
2. Installation and Setup NOTE: Before installation, please inspect the unit. Be sure that nothing inside the package is damaged. Please keep the original package in a safe place for future use. Avant l'installation, veuillez inspecter l'unité. Assurez-vous que rien à l'intérieur de l'emballage n'est endommagé. Veuillez conserver l'emballage d'origine dans un endroit sûr pour une utilisation future. -
Page 10: Operating Principle
2-2. Operating principle The operating principle of the UPS is shown as below. Output The UPS is composed of mains input, EMI/RFI Filters, Inverter, Battery charger, DC-to-DC converter, battery, AVR TX and EMI/RFI UPS output Inverter Filters DC-to-DC Converter Battery Battery Charger 2-3. - Page 11 Install UPS and external battery Tower Installation Install UPS alone Step 1 Step 2 Step 3 Install UPS and external battery NOTE: When installing the UPS or battery pack with feet, please keep 70mm distance from the edge of the unit. REMARQUE: Lors de l'installation de l'onduleur ou de la batterie avec des pieds, veuillez garder une distance de 70 mm du bord de l'unité.
-
Page 12: Setup The Ups
2-4. Setup The UPS Step 1: UPS input connection Plug the UPS into a two-pole, three-wire, grounded receptacle only. Avoid using extension cords. Step 2: UPS output connection There two kinds of outputs: programmable outlets and general outlets. Please connect non-critical devices to the programmable outlets and critical devices to the general outlets. -
Page 13: Battery Replacement
It’s in closed status for UPS To activate EPO normal operation as default. function, remove these two screws. Step 6: External battery connection Connect one end of external battery cable to UPS unit and the other end to battery box. Use the chart below for detailed connection. -
Page 14: Battery Kit Assembly (Option)
MISE EN GARDE!! Tenez compte de tous les avertissements, mises en garde et consignes avant de remplacer les piles. Remarque: Lors de la déconnexion de la batterie, l'équipement n'est pas protégé contre les coupures de courant. Step 1 Step 2 Step 3 Remove front panel. - Page 15 Tapes Step 3: Put assembled battery packs on Step 4: Cover the other side of plastic shell as one side of plastic shells. below chart. Then, battery kit is assembly well. 4-battery kit Step 1: Remove adhesive tapes. Step 2: Connect all battery terminals by following below chart.
- Page 16 Tapes Tapes Step 3: Put assembled battery packs on Step 4: Cover the other side of plastic shell as one side of plastic shells. below chart. Then, battery kit is assembly well.
-
Page 17: Operations
3. Operations 3-1. Button Operation Button Function ➢ Turn on the UPS: Press and hold ON/Mute button for at least 2 seconds to turn on the UPS. ➢ Mute the alarm: After the UPS is turned on in battery mode, press and hold this button for at least 3 seconds to disable or enable the alarm system. -
Page 18: Audible Alarm
Display Function Backup time information Indicates the estimated backup time. H: hours, M: minute Configuration and fault information Indicates the configuration items, and the configuration items are listed in details in section 3-5. Indicates the warning and fault codes, and the codes are listed in details in section 3-7 and 3-8. -
Page 19: Lcd Display Wordings Index
3-4. LCD Display Wordings Index Abbreviation Display content Meaning Enable Disable Escape Active open Active close Temperature Charger Rack display Tower display Site Fault EEPROM error Battery Replacement 3-5. UPS Setting There are two parameters to set up the UPS. Parameter 3 Parameter 1: It’s for program Parameter 1... - Page 20 02: Programmable outlets enable/disable ⚫ Interface Setting ENA: Programmable outlets enable (Default) DIS: Programmable outlets disable 03: Programmable outlets setting ⚫ Interface Setting Setting the backup time limits in minutes from 0-999 for programmable outlets which connect to non-critical devices on battery mode.
- Page 21 Steps for setting runtime calculation ( Chart A) Battery AH Chart AH Rating NP800RTX2 NP1100RTX2 NP1500RTX2 NP2000RTX2 NP2200RTX2 NP2500RTX2 NP3000RTX2 NP1100RTX2EBM 18AH NP2000RTX2EBM 18AH NP3000RTX2EBM 18AH The LCD screen runtime calculation is defaulted to internal batteries. To setup the LCD runtime calculator when adding EBMs, you must change the parameter 07: Battery total AH setting ( see above).
-
Page 22: Operating Mode Description
Step 2: Press and hold the “Selection” button for 3 seconds to enter Setting mode. Step 3: Press the “Up“ button (ON/MUTE) to switch to "02" of program list. Then press “Enter“ button to enter value setting of parameter 2. Press the “Up” button to change the value to “ENA”... - Page 23 Buck mode When the input voltage is higher than when AC is the voltage regulation range but lower normal. than high loss point, the buck AVR will be activated. Boost mode When the input voltage is lower than when AC is the voltage regulation range but higher normal.
-
Page 24: Faults Reference Code
3-7. Faults Reference Code Fault event Fault code Icon Fault event Fault code Icon Bus start fail Inverter output short Bus over Battery voltage too high Bus under Battery voltage too low Inverter soft start fail Over temperature Inverter voltage high Over load Inverter voltage Low Charger failure... -
Page 25: Warning Indicator
3-8. Warning Indicator Warning Icon (flashing) Alarm Sounding every 2 seconds Low Battery Sounding every second Overload Sounding every 2 seconds Battery is not connected Sounding every 2 seconds Over Charge Sounding every 2 seconds Site wiring fault Sounding every 2 seconds EPO enable Sounding every 2 seconds Over temperature... -
Page 26: Troubleshooting
4. Troubleshooting If the UPS system does not operate correctly, please solve the problem by using the table below. Symptom Possible cause Remedy No indication and alarm even The AC input power is not Check if input power cord though the mains is normal. connected well. -
Page 27: Storage And Maintenance
Symptom Possible cause Remedy Fault code is shown as 01, 02, 03, A UPS internal fault has Contact your dealer 11, 12, 13 and 41 on LCD display occurred. and alarm is continuously sounding. Battery backup time is shorter Batteries are not fully Charge the batteries for at than nominal value charged... -
Page 28: Specifications
6. Specifications MODEL NP800RTX2 NP1100RTX2 NP1500RTX2 NP2000RTX2 NP2200RTX2 NP2500RTX2 NP3000RTX2 800 VA / 1100 VA / 1500 VA / 2000 VA / 2000 VA / 2500 VA / 3000 VA / CAPACITY 720 W 990 W 1350 W 1800 W 2000 W 2250 W 2700 W... - Page 29 When more than 1 set of external battery pack is used (or battery capacity is more than 18AH), please reduce the connected load to 80% of UPS capacity. Network Pro RTX2 Runtime Chart Load (watts) / Time in minutes Model...
- Page 30 Call Orion Power Systems at 877-385-1654 for long runtime applications Orion Power Systems Service and Technical Support If you have any problems or questions with the UPS, call your local distributor or Orion Power Systems technical support at the following telephone number:...
Need help?
Do you have a question about the Network Pro RTX2 and is the answer not in the manual?
Questions and answers