Advertisement
Quick Links
WS4-2D-E
2 Door access control unit with web access
QUICK USER GUIDE
DESCRIPTION
WS4-2D-E is a 2 door control unit designed to operate with readers with RS485 output.
There is no need to install any software. There is no need to have a dedicated PC
either. Everything is available online and the operators just need to register with
controller's serial number to start using the software application.
SPECIFICATIONS
• Capacity:
2500 Users
• Events:
50000 max.
• Doors:
2 (max. 20 doors in same network)
• Readers:
2
• Door contact inputs:
2
• Push button inputs:
2
• Auxiliary Inputs:
2 (emergency, vehicle detection)
• Auxiliary Outputs:
3 (alarm, storing alarm status, presence)
• Supply for the readers:
250 mA each max.
• Supply for the locks:
600 mA each max.
• Relay characteristics:
2A/48 VAC/DC
• Processor:
ARM A5 - 528 Mhz
• Memory:
64 MB Ram DDR2 133 Mhz
• TCP/IP connection:
10/100/1000 Base-T – HTTP or HTTPS
• Dimensions (mm):
130 x 86 x 36 mm
• Operating temperature:
0 °C to +50 °C
• Humidity:
0% to 85% (non-condensing)
• Tamper:
Yes
• Wiegand readers connection:
Yes, via Wiegand to RS485 converter - WS4-CNV
• Elevator feature:
Yes, 2 elevators per installation, each - 24 floors
• Interlock, Anti pass back, people counter, presence, system logs, reports in CSV
FIRST CONNECTION AND CONFIGURATION
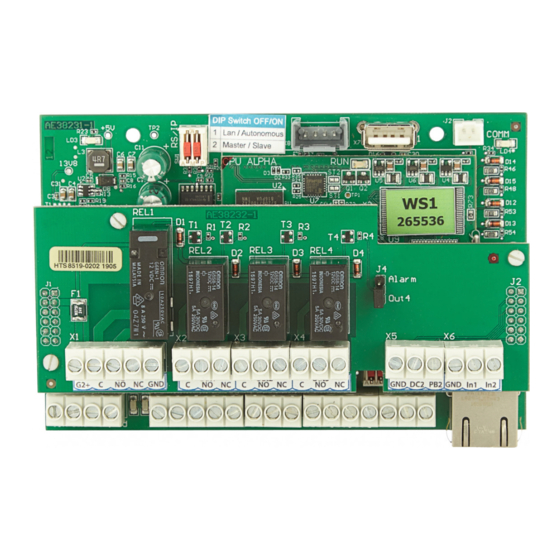
1
Serial number
DIP Switch
pos. 1
The WS4-2D-E does not have default IP address. By default is set to DHCP. There are 2
methods to connect to and configure WS4-2D-E - LAN and Standalone method.
METHOD 1
(For use in a home or business LAN network)
In this configuration, the network's DHCP server will assign an IP address to your WS4-2D-E
1. Put the DIP switch 1 in position OFF.
2. Connect a cable from your network to the ethernet connector of Ws4-2D-E.
3. Open a web browser and enter http://ws4 followed dash and the serial number of
the WS4-2D-E controller
If you can not connect, it is because your network does not recognize the name of the
EN
FR
IT
ES
DE
NL
WS4-2D-E controller. In this case, go to our web site http://www.xprgroup.com/prod-
ucts/ws4/ and download the tool called "Device Finder".
The "Device Finder" will enable you to find out the IP address of the WS4-2D-E controller.
Run the "Device Finder" and you will get a list of all the WS4 controllers connected in
your network, including their IP addresses, just like the picture below.
Open a browser and type the IP of the WS4-2D-E controller and you will be prompted to
the login page.
User Name: admin
Password: WS4 followed by Dash and the Serial Number (ex. WS4-110034) just like the
image below, all in capital letters without space.
METHOD 2
(For standalone use - without LAN network)
In this configuration, the WS4-2D-E will assign an IP address to your PC. The PC must be set to obtain IP
address automatically.
1. Put the DIP switch 1 in position ON.
2. Connect a cable from your PC directly to the ethernet connector of WS4-2D-E.
3. Open a web browser and enter the following IP - 192.168.50.100, then put the login
credentials like explained above
3
FACTORY RESET
DIP Switch 1, 2 and the tamper allows a complete re-initialization of the system.
1. Unplug the TCP/IP network cable (Rj45).
2. Set the two dip switches to position ON.
3. Wait until the green COMM LED flashes.
4. Close and reopen the Tamper 3 times in 10 seconds.
2
CHANGE PASSWORD
DIP Switch 1 and 2 allows to log into the system as an administrator if login
or password is forgotten.
1. Unplug the TCP/IP network cable (Rj45).
2. Set the two dip switches to position ON.
3. Wait until the green COMM LED flashes.
4. To log into the system as an administrator: close the Tamper for
15 seconds, then release it.
SOFTWARE SETTINGS
ADDING READERS
Go to "Doors", select the reader(fig.2) and then select the type of the reader in the
field "Card". (fig.3). While off line, red LED blinks fast and buzzer beeps continuously.
Once communication is established, the red LED and the buzzer stop. Green LED
starts to blink continuously. If you want to stop the green LED, go to Settings/System
Options and select for the backlight ON or OFF (not default) fig.4
OFF
Factory reset
OFF
Change
password
www.xprgroup.com
fig.1
fig.3
fig.5
To add 2 readers on 1 Door, select the reader (fig.2) and there, for "Type of Access"
select "Access with 2 readers" (fig 5). Fill the form for both readers and they will
merge in one door (fig. 6)
ADDING USERS
Go to Users (fig.1), select "New"(fig.2) and then fill the form (Name, category, card
number...)(fig.3).
fig.1
fig.2
ADDING SLAVE CONTROLLERS
WS4 system can manage up to 10 WS4 boards in the same installation (with up to 20
doors, whether single or double). One WS4-2D-E must be master, the others must be
ON
slaves. The master/slave selection is made with Dip-switch 2: OFF - Master (factory
1
setting), ON - Slave.
2
Go to "Doors" and click on the link "Add slave"(fig.1). Enter the serial number of the
WS4-2D-E to be added and click Search. If it finds it, the system directly adds this slave
into the installation and you can configure its doors (fig.2).
In case of error, a message is displayed in red.
Switch
ON
1
2
Master
Slave 1
Slave 9
DIP switch 2
DIP switch 2
DIP switch 2
OFF
ON
ON
OFF
ON
Master/
1
Slave
DIP switch 2 - ON
2
fig.2
fig.2
fig.4
fig.6
fig.3
fig.1
EN
1
Advertisement

Related Manuals for XPR Access WS4-2D-E


Summary of Contents for XPR Access WS4-2D-E
- Page 1 Yes, via Wiegand to RS485 converter - WS4-CNV • Elevator feature: Yes, 2 elevators per installation, each - 24 floors In this configuration, the WS4-2D-E will assign an IP address to your PC. The PC must be set to obtain IP fig.2 address automatically.
- Page 2 Connection example of 2 doors Dip Switch Autonomous Master Slave Run Led Box Tamper electric strike 12V/600mA max Led Comm Push button Door contact Electromagnetic Lock 12V/600mA max Example: emergency button Reader Network Power supply 14,2VDC Door contact Reader Address 1 1.
Need help?
Do you have a question about the WS4-2D-E and is the answer not in the manual?
Questions and answers