Advertisement
Quick Links
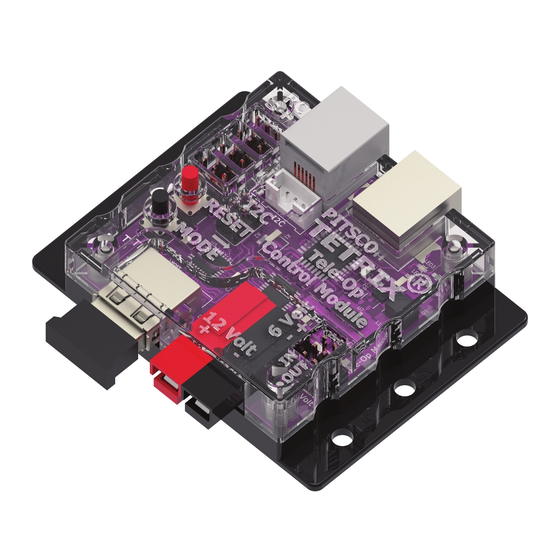
Tele-Op Module Activity 1 – Tele-Op Commands
Overview
This activity will introduce you to the TETRIX® Tele-Op Control Module and how it
connects to the PRIZM® controller. It will also help you to become familiar with the
functions and commands for using the Tele-Op module paired with a
PS4 DUALSHOCK 4 gaming controller.
Parts Needed
• PRIZM controller
• Tele-Op module
• PS4 DUALSHOCK 4 gaming controller
• TETRIX MAX 12-volt battery
• PRIZM controller on/off switch
• Powerpole extension cable
• Daisy-chain data cable
• USB cable
Hardware Connections
1.
Connect the TETRIX MAX 12-volt battery to the PRIZM on/off switch.
2.
Connect the PRIZM on/off switch to one of the battery connection
ports on PRIZM.
3.
Connect one end of the Powerpole extension cable to the other battery
connection port on PRIZM. Connect the other end of the Powerpole
extension cable to the battery connection port on the Tele-Op module.
4.
Connect one end of the daisy-chain data cable to PRIZM's expansion
port (labeled EXP). Connect the other end of the daisy-chain data cable
to the I2C port on the Tele-Op module.
TETRIX Tele-Op Control Module Activity 1
1
Advertisement

Related Manuals for TETRIX Tele-Op

Summary of Contents for TETRIX Tele-Op
- Page 1 Tele-Op Module Activity 1 – Tele-Op Commands Overview This activity will introduce you to the TETRIX® Tele-Op Control Module and how it connects to the PRIZM® controller. It will also help you to become familiar with the functions and commands for using the Tele-Op module paired with a PS4 DUALSHOCK 4 gaming controller.
-
Page 2: Bluetooth Connections
The controller is now in discovery mode. Press the black button on the Tele-Op module. The green LED on the Tele-Op module should remain on and stop flashing. Also, the light bar on the game controller should be a solid green color to indicate the controller is paired and ready to be used to control the Tele-Op module. - Page 3 PS4 controller. Following this section is a listing of all the functions and commands that are included in the Tele-Op library along with descriptions of what they do and possible values that can be returned by the functions depending on the controller’s status.
- Page 4 This USB port should not Make sure PRIZM is turned on and the PS4 controller is paired with the be used when uploading sketches. Tele-Op Module. If it isn't, follow the steps in the Bluetooth Connections Make sure you use the USB port section.
-
Page 5: Moving Forward
When it was time to pass off control, you could do a remote reset of the Tele-Op module, power off the first controller, and power on the second controller to take control of the robot, all without ever having to restart the program. - Page 6 This is normal and centered, the x and y positions should be about 128. is why the dead zone command can be very useful when using the sticks to control motors and servos. TETRIX Tele-Op Control Module Activity 1...
- Page 7 • ROLL – rotating the controller side to side using the PS4’s controller’s internal gyroscope These are the only controls that work for the ps4.Motor(CONTROL) command because these are the PS4 button and joystick controls that return analog values based on their position. TETRIX Tele-Op Control Module Activity 1...
- Page 8 STATUS can be SLOW, FAST, or STOP. One use of the rumble motors would be to have the controller vibrate when it is out of range of the Tele-Op module. LEDcolor() This function changes the LED color of the PS4 controller's light bar. The light bar will change from red to blue to yellow to green every 500 milliseconds.
- Page 9 Binary value when all buttons in Group 1 are pressed. There are too many button combinations to list them all here. However, you can use this sketch any time you are programming with the Tele-Op module to quickly identify the unique byte value of any button combination.
- Page 10 On the other hand, a small dead zone gives you more precise sensitivity but reduces the neutral area of the joystick. You’ll need to experiment with your controller to find the right balance of joystick sensitivity and dead zone. TETRIX Tele-Op Control Module Activity 1...
Need help?
Do you have a question about the Tele-Op and is the answer not in the manual?
Questions and answers