
Related Manuals for KENT Tap Guard


Summary of Contents for KENT Tap Guard
- Page 1 \\RAJ\LnK_Kent_2013\Mannual_2014 \ TAP GAURD MANUL\Size: 9.75 x 6.25Inch Last Modified on: 10 01 14 Job No. 0 ...
-
Page 2: Table Of Contents
6. Exploded Diagram of KENT UF Tap Water Purifier. We are confident that your decision to own KENT Tap Guard will go a long way 7. Installation Procedure 1-Choosing the Correct Adapter. -
Page 3: Introduction
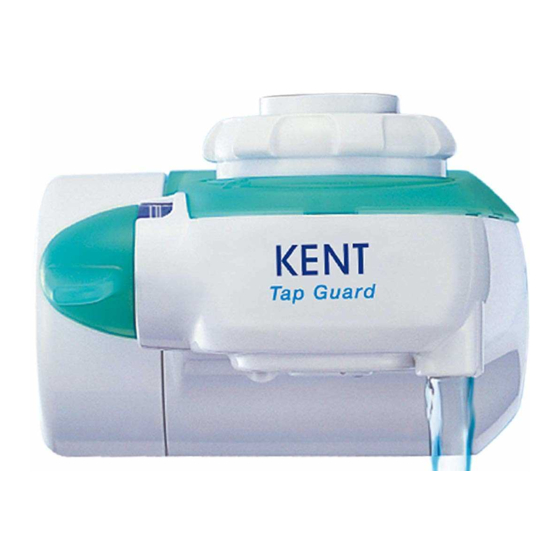
Introduction Specifications Presenting the all-new KENT Tap Guard, which will provide your family with safe, clean and germ-free water. Now Product KENT Tap Guard just connect the innovative KENT Tap Guard to your tap and get instant, convenient and unlimited supply of quality water suitable for brushing teeth, gargling, washing fruits/vegetables and cooking. - Page 4 Avoid damage to the faucet and its parts Preventing leaks or accidents Do not use soap, chemical detergents, thinner or alcohol to clean the unit. If the faucet is not tight enough, excessive load may cause water to leak from the faucet attachment, faucet or ...
-
Page 5: Installation Procedure 1-Choosing The Correct Adapter
Exploded diagram of KENT Tap Guard Installation Procedure 1-Choosing the correct Adapter Attachment nut Adapters For Aerated faucets with exterior screw threads For Aerated faucets with interior screw threads Rubber gasket (prevents water leakage) Stainless steel screen (removes large impurities) -
Page 6: Installation Procedure 2-Attaching The Adapter (A-Type)
Installation Procedure 2-Attaching the Adapter (A-type) For aerated faucets with exterior threads. Use the attachment tool. Please keep this to enable removal. Type Remove the attachment nut from the valve body. Remove the aerator cap from your faucet For this type of faucet, place the attachment nut over the faucet pipe. Attachment Nut Attachment Nut Aerator cap... -
Page 7: Installation Procedure 2-Attaching The Adapter (B-Type)
Installation Procedure 2- Attaching the Adapter (B-Type) For aerated faucets With these types of faucets, you will be unable Use the attachment tool. Please keep this (interior threads) to see the interior screw threads once you to enable removal. remove the aerator cap. Type Remove the attachment nut from the valve body. -
Page 8: Installation Procedure 2-Attaching The Adapter (C-Type)
Installation Procedure 2-Attaching the Adapter (C-Type) Round Spout with no rim Other faucets Screw fastener You’ll need a Phillips-head screwdriver Type 13 mm - 24 mm Remove the attachment nut from the valve body. Turn the screw fastener about half a revolution, attaching it loosely. Set the screw fastener on the valve body. -
Page 9: Installation Procedure 2-Attaching The Adapter (Universal Type)
Installation Procedure 2-Attaching the Adapter (Universal-Type) Universal Type Use the attachment tool. Please keep this (For most types of faucets) to enable removal. Remove the attachment nut from the valve body. Set the Universal Adapter on the valve body. Tighten the attachment nut securely to the valve body. Attachment Nut The nut may be damaged if tightened too much with a tool. -
Page 10: Installation Procedure 3-Attaching The Filter Cartridge
Switching between purified / unpurified water Installation Procedure 3-Attaching the Filter Catridge Attaching/replacing the filter cartridge. Pure Water (Purified water). Tap Water-Unfiltered Spray Tap Water-Unfiltered Straight When removing the filter cartridge, follow the instructions in reverse order from step 3. The flow rate of filtered water is slower than that of unfiltered water. -
Page 11: Maintenance
Maintenance Basic troubleshooting Problem Cause Solution 1. Remove tap purifier from the faucet in reverse order of installation. Water leaks from the Check whether unit is properly Install again. faucet attachment. installed. 2. Rinse the purifier with unfiltered tap water. Check whether the adapter threads Contact Customer Care.
Need help?
Do you have a question about the Tap Guard and is the answer not in the manual?
Questions and answers