Advertisement
Quick Links
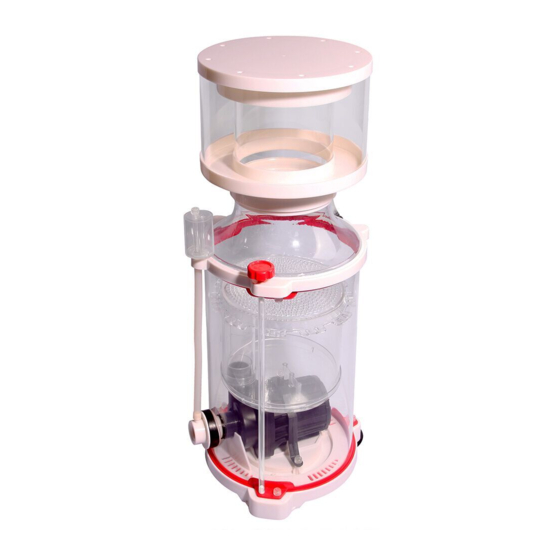
ReefSkim
300/600
Before you work on
your
aquarium,
your hands and arms.
It is very important to
remove dirt, moisturiser and
other impurities.
A new protein skimmer (or one
that has been thoroughly cleaned)
requires a running in period before
it reaches peak efficiency. During
this time, it may spill microbubbles into the
sump and may under/overskim.
For this reason, your skimmer will require
daily inspection and adjustment. This is
commonly known as running in the skimmer.
This process typically takes 1-2 weeks.
C
C
USTOMER
USTOMER
Thank you for choosing this Aqua One product.
Your Aqua One product is covered for parts and labour for 1 year from the date of purchase as detailed in
the terms of the Guarantee in this instruction manual. For any inquiries or concerns regarding this product
or any of our products, please do not hesitate to contact your local Aqua One Retailer or visit Aqua One
Customer Care online in your country of purchase via the websites listed.
wash
C
C
ARE
ARE
Inspiring Excellence in Fish Care!
Read and follow all
safety instructions
and important notices
in these instructions
as well as on the
product itself.
Regular maintenance of this product
and components are required in order
to keep equipment within guarantee
and to maintain fish health.
Download the Aqua One App.
Instructions version: 28/06/2018
Available for iOS & Android
Australia:
www.aquaone.com.au
New Zealand:
www.aquaone.co.nz
United Kingdom:
www.aquaone.co.uk
All other countries:
www.aquaone.com.au
Advertisement

Related Manuals for Aqua One ReefSkim 300


Summary of Contents for Aqua One ReefSkim 300
- Page 1 Thank you for choosing this Aqua One product. www.aquaone.co.nz Your Aqua One product is covered for parts and labour for 1 year from the date of purchase as detailed in United Kingdom: the terms of the Guarantee in this instruction manual. For any inquiries or concerns regarding this product www.aquaone.co.uk...
- Page 2 MPORTANT AFEGUARDS If you are in any doubt about the electrical installation or safety of this product you must consult a qualified electrician. Water and electricity can be dangerous. Take care to place the skimmer securely Do not attempt repairs yourself. Return on a level surface in the sump of your the appliance to an authorised service aquarium.
-
Page 3: Specifications
Inspiring Excellence in Fish Care! Inspiring Excellence in Fish Care! PECIFICATIONS MAXIMUM ODEL OWER AQUARIUM IMENSIONS FLOW RATE VOLUME ONSUMPTION ReefSkim 18L x 15D 300 L 800 L\hr 25 W x 37.5H cm ReefSkim 28L x 24D 600 L 1200 L\hr 35 W x 55H cm EPLACEMENT... - Page 4 KIMMER OLLECTION SSEMBLY Collection Cup Lid Collection Cup Collection Cup Drain Collection Cup Drain Hose Collection Cup Drain Hose Plug Collection Cup O-Ring Pump Bracket Outlet Adapter Pump Pump Mounting Plate Skimmer Base Base Ring Gear Ring Cable Clip KIMMER SSEMBLY Base Screws (x4) End Caps...
- Page 5 Inspiring Excellence in Fish Care! KIMMER SSEMBLY Air Adjustment Screw (Same as #33) Air Intake Silencer Air Intake Hose IFFUSOR HAMBER Venturi Intake SSEMBLY Venturi Intake O-ring Skimmer Neck Water Level Adjuster Knob Skimmer Body Body O-rings (x2) Water Level Adjuster Rod Adjuster Gear Adjuster Gear Lock Nut Body Screws (9 total including #21)
- Page 6 ETTING Please refer to previous pages for identification and correct placement of skimmer components. Unpack and Prepare Skimmer Carefully remove Check that all Ensure that the As with all aquarium skimmer from box assemblies have not Air Intake Hose is equipment, it is and remove all become dislodged...
- Page 7 Inspiring Excellence in Fish Care! Ensure that your hands and all power cables are dry before plugging in equipment and turning power on. Setting Up Ensure that the Collection For ease of waste collection, you Position the power cable so Cup Drain Hose Plug is may wish to use a piece of airline* that it does not interfere with...
- Page 8 UNNING IN A new protein skimmer (or one that has been thoroughly cleaned) requires a running in period before it reaches peak efficiency. During this time, it may spill microbubbles into the sump and may under/overskim. For this reason, your skimmer will require daily inspection and adjustment. This is commonly known as running in the skimmer.
-
Page 9: Maintenance
Inspiring Excellence in Fish Care! AINTENANCE Unplug all equipment before beginning work on any part of the aquarium. AILY For extended life and ease of assembly and disassembly during maintenance, it is recommended that o-rings are lubricated with an aquarium safe o-ring lubricant such as AquaLube*. - Page 10 AINTENANCE CONT. ONTHLY CONT. Cleaning and lubrication of o-rings To remove the o-ring, use a plastic card, such as a credit card to gently lever the o-ring up and over the lip of its seat. Then roll it off the part.
- Page 11 Inspiring Excellence in Fish Care! ONTHS OR AS EQUIRED Remove the Adjuster Gear. Turn the skimmer the right Lift the Skimmer Body up It may be necessary to way up. Remove the three from the Base Assembly. gently lever it up with a body screws from the base.
- Page 12 AINTENANCE CONT. ONTHS OR AS EQUIRED Pull the Impeller Assembly Remove the o-ring from the Clean the pump with fresh out. A clean pair of Impeller Cover. water. Use a pipe brush* to needlenose pliers may be clean the internal channels required.
-
Page 13: Troubleshooting
Inspiring Excellence in Fish Care! ROUBLESHOOTING The external flexible cables of this unit cannot be replaced; if the cable is damaged, the part should be replaced. KIMMER OLLECTING ASTE If your skimmer is new or if you have recently cleaned the skimmer thoroughly, it is likely that you will need to run in the skimmer. - Page 14 ROUBLESHOOTING NOUGH IR IN THE KIMMER Check all connections are Check that the Air Flush out Venturi Intake as secure in the Air Intake. Adjustment Screw is open. described in “Monthly” on Check both ends of the Air page 9 Intake Hose.
- Page 15 Inspiring Excellence in Fish Care! EDUCED ATER Ensure that the Venturi Ensure that the venturi Disassemble and clean Intake is firmly connected to intake is positioned more pump as described in the Pump and is not blocked than 1cm away from any “Pump Maintenance”...
-
Page 16: Customer Care
What is covered: 1. Aqua One warrants to the purchaser, for 1 Year from date of original purchase, to repair or replace products where fault is found due to defective materials or faulty workmanship and where goods do not operate in accordance with the instructions.
Need help?
Do you have a question about the ReefSkim 300 and is the answer not in the manual?
Questions and answers