
Related Manuals for Sensus 121 Series


Summary of Contents for Sensus 121 Series
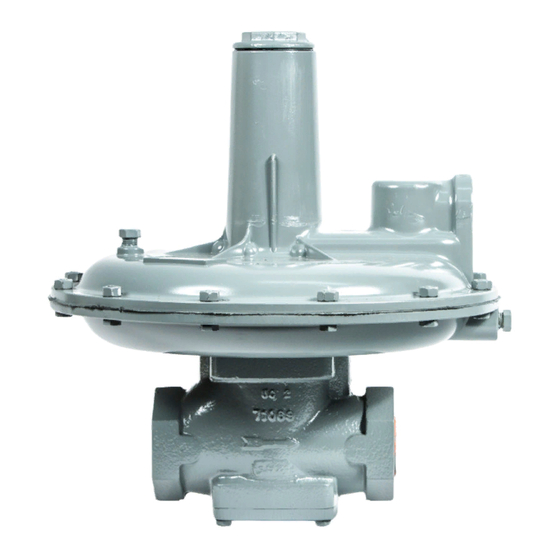
- Page 1 RM-1328 R10 Sensus Metering Systems Model 121 Regulators Installation and Maintenance Instructions...
-
Page 2: Installation
Installation and Maintenance Model 121 Regulators Introduction preferred). It must be well protected against breakage. Regulator will open wide if the control line breaks. The Model 121 Regulator represents a combination of capacity, Make sure the regulator is correctly connected and adequately performance and value... -
Page 3: Temperature Limits
Installation and Maintenance Model 121 Regulators Temperature Limits CAUTION The Model 121 Regulator can be used for flowing temperatures from The diaphragm case vent must be positioned to protect against -20° F to 150° F. flooding, drain water, ice formation, traffic, tampering, etc. The vent must be protected against nest building animals, bees, Buried Service insects, etc. - Page 4 Installation and Maintenance Model 121 Regulators Outlet Pressure Ranges and Springs Maximum Nominal Outlet Spring Spring Inlet Diaphragm Size Pressure Range Color Part Number Pressure Size Blue-Black 143-82-021-01 (main spring) 1-1/2" to 3-1/2" w.c. Black-Red 121-10-021-50 (counterspring) Green-Black 143-82-021-02 (main spring) 1-1/2"...
- Page 5 Installation and Maintenance Model 121 Regulators Differential Regulator Maximum Maximum Maximum Differential Spring Body Diaphragm Pressure Diaphragm Case Size Pressure Range Spring Color Part Number Pressure Differential Pressure 3-1/2" to 6-1/2" w.c. Red-Black 143-82-021-00 5" to 8-1/2" w.c. Blue-Black 143-82-021-01 3/4", 1"...
-
Page 6: Pipe Sizes
Installation and Maintenance Model 121 Regulators 3/4" – 1" – 1-1/4" Standard, Differential, Atmospheric or Zero Governors 121-8 – Standard Pipe Sizes (inlet x outlet) Screwed, NPT 1" NPT Vent connection 3/4" x 1" 3/4" x 1-1/4" 1" x 1" 1"... - Page 7 Installation and Maintenance Model 121 Regulators 3/4" – 1" – 1-1/4" Back Pressure 121-8 – Back Pressure 1" NPT Vent connection 1" NPT Control line connection 121-8 – High Pressure – Back Pressure High Pressure Spring Adjustment 1" NPT Vent connection 1/4"...
- Page 8 121-10-550-55 substitute outlet pressure) For 121-8 Back Pressure 121-10-598-54 11a Elastic Stop Nut 29-NE-066 903955 For 121-8 HP Back Pressure Contact Sensus 11b Bottom Spring Button 121-10-022-53 Add Item 47 11c Diaphragm Pan 121-10-017-50 Valve, Seal Diaphragm and 121-10-511-54 11d Diaphragm, Buna-N...
- Page 9 Installation and Maintenance Model 121 Regulators Servicing – 3/4", 1", 1-1/4" General Instructions To Service Orifice – 19 Make sure the regulator is entirely depressured before servicing. Remove valve 15 per section “To Service Valve-15”. Carefully note location and position of all disassembled parts Unscrew orifice 19 using 1-5/8"...
- Page 10 Installation and Maintenance Model 121 Regulators Servicing – 3/4", 1", 1-1/4" To Service Orifice – 20 Remove top cap 1, and release and remove adjustment 3. Back Pressure Models General Instructions On high pressure model remove cap 1a, release adjustment Make sure the regulator is entirely depressured before servicing.
- Page 11 Installation and Maintenance Model 121 Regulators 1-1/2" – 2" – 2-1/2" Standard, Differential, Atmospheric or Zero Governors 121-12 – Standard 121-8 HP – High Pressure High Pressure Spring Adjustment 1" NPT Vent connection 1" NPT Vent connection 1/4" NPT 1/4" NPT Vent Control connection line...
- Page 12 Installation and Maintenance Model 121 Regulators 1-1/2" – 2" – 2-1/2" Standard, Differential, Atmospheric or Zero Governors 121-12 – Back Pressure 121-8 – Back Pressure 1" NPT Vent Connection 30 33 1" NPT Vent Connection 29a 29 121-8 HP – High Pressure – Back Pressure High Pressure Spring Adjustment Pipe Sizes...
- Page 13 11b Bottom Spring Button 121-10-022-50 Gasket 121-16-104-50 11c Diaphragm Pan 121-16-017-50 Travel Indicator Contact Sensus 11d Molded Diaphragm, Buna-N 121-16-150-53 Repair Kits, consisting of Buna-N Main and Seal 11d Diaphragm, Viton 121-16-150-55 Diaphragms, Buna-N Molded Valve plus Wave 11f Seal Washer...
- Page 14 Installation and Maintenance Model 121 Regulators Servicing – 1-1/2", 2", 2-1/2" General Instructions To Service Orifice – 19 Make sure the regulator is entirely depressured before servicing. Remove valve 15 per section “To Service Valve-15”. Carefully note location and position of all disassembled parts Remove main diaphragm assembly 11 per steps 1 through 4 to be certain reassembly is correct.
- Page 15 Installation and Maintenance Model 121 Regulators Servicing – 1-1/2", 2", 2-1/2" Back Pressure Models General Instructions Make sure the regulator is entirely depressured before servicing. To Service Seal Diaphragm – 12b Carefully note location and position of all disassembled parts Remove main diaphragm assembly 11 per steps 1 through 4 to be certain reassembly is correct.
-
Page 16: Back Pressure
Installation and Maintenance Model 121 Regulators 3" – 4" Standard 1" NPT Vent connection 27 28 1/4" NPT Control line connection Pipe Sizes (inlet x outlet) Flanged ANSI 125 lb. FF 3" 121 as shown. 3" x 3" 4" uses a spacer, approx. 1"... - Page 17 Installation and Maintenance Model 121 Regulators Condensed Parts List 3" and 4" Condensed Parts List 3" and 4" Illustration Description Part Illustration Description Part Number Number Number Number 3" and 4" Model 121 3" Model 121 only Seal Cap for 121-16 138-02-005-01 12a Piston 121-20-053-50...
- Page 18 Installation and Maintenance Model 121 Regulators Servicing – 3", 4" 12b. Make sure the screwed connection 11h and 12d is loose by approximately 1/2 turn. To do this, carefully rotate seal General Instructions diaphragm assembly 12 clockwise until this screwed connection Same general instructions as listed on page 9.
-
Page 19: Vacuum Breaker
Installation and Maintenance Model 121 Regulators To Service Seal Diaphragm – 12b Do not pinch loop in seal diaphragm 12b between ring 33 and centerpiece 27. Also, rounded edge of 33 faces upward toward Remove valve 15 per section “To Service Valve – 15”, item 1. seal diaphragm 12b. -
Page 20: Vacuum Regulator
Installation and Maintenance Model 121 Regulators – Variations Vacuum Regulator Vacuum Regulators are used to maintain a certain negative pressure (vacuum) in enclosed spaces such as tanks, vessels, chambers, piping systems, etc. In general, these are piped to the regulator inlet and control line connections and the regulator outlet piped to the inlet of a vacuum pump or other vacuum source. -
Page 21: Set-Point Adjustment
Installation and Maintenance Model 121 Regulators – Variations 121-RPC (Relay Pilot Control) The 121-RPC is a genuine Pilot Operated Regulator (Relay Principal of Operation). The relay principal means exceptional precise control. Accuracy is largely unaffected by changes in the inlet pressure. The control line is piped to both the inlet and main regulator. - Page 22 Installation and Maintenance Model 121 Regulators – Variations 121-PL (Pressure Loaded) To Service 121-PL body The 121-PL is a pressure loaded, Pilot Operated Regulator. The Take regulator out of service pressure loading of the diaphragm minimizes droop caused by spring per the following section and diaphragm effect, thus providing more accurate control.
-
Page 23: Materials Of Construction
The allowable outlet pressure is the lowest of the maximum pressures permitted by federal codes, state codes, Sensus Bulletin RDS-1498 or other applicable standards. The method of protection can be a relief valve, monitor regulator, shutoff device or similar mechanism. -
Page 24: Installation And Maintenance Instructions
(D) shall only extend to Buyer and not to any subsequent buyers or users of the Goods. Buyer shall provide Seller access to the Goods as to which Buyer claims a purported defect or nonconformance; upon request by Seller, Buyer shall, at its own risk and expense, promptly return the Goods in question to Seller’s Plant. © Sensus Metering Systems 2008 Becken 11/08 5M...
Need help?
Do you have a question about the 121 Series and is the answer not in the manual?
Questions and answers