Table of Contents
Advertisement
About This Guide
This guide is a complement of Quick Installation Guide. The Quick Installation Guide
instructs you on quick internet setup, and this guide provides details of each function and
shows you the way to configure these functions appropriate to your needs.
When using this guide, please notice that features of the router may vary slightly depending
on the model and software version you have, and on your location, language, and internet
service provider. All screenshots, images, parameters and descriptions documented in this
guide are used for demonstration only.
*Maximum wireless signal rates are the physical rates derived from IEEE Standard 802.11
specifications. Actual wireless data throughput and wireless coverage are not guaranteed
and will vary as a result of network conditions, client limitations, and environmental factors,
including building materials, obstacles, volume and density of traffic, and client location.
*Use of MU-MIMO and 1024-QAM requires clients to also support those functions.
More Info
The latest software, management app and utility can be found at Download Center at
https://www.juplink.com/pages/juplink-rx4-1500-firmware-download-center
The Quick Installation Guide can be found where you find this guide or inside the package of
the router.
Specifications can be found on the product page at https://www.juplink.com.
2
Our Technical Support contact information can be found at the
Contact Technical
Support
page at
https://www.juplink.com/pages/contact-us
Advertisement
Table of Contents

Related Manuals for Vanin Juplink RX4-1500

Summary of Contents for Vanin Juplink RX4-1500
- Page 1 About This Guide This guide is a complement of Quick Installation Guide. The Quick Installation Guide instructs you on quick internet setup, and this guide provides details of each function and shows you the way to configure these functions appropriate to your needs. When using this guide, please notice that features of the router may vary slightly depending on the model and software version you have, and on your location, language, and internet service provider.
- Page 2 Chapter Get to Know About Your Router This chapter introduces what the router can do and shows its appearance. It contains the following sections: - Product Overview - Panel Layout...
-
Page 3: Product Overview
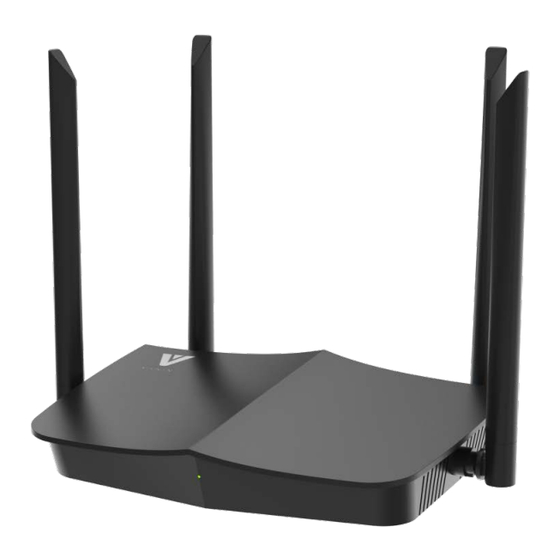
1. 1. Product Overview The VANIN Juplink router is designed to fully meet the need of Small Office/Home Office (SOHO) networks and users demanding higher networking performance. The powerful antennas ensure continuous Wi-Fi signal to all your devices while boosting widespread coverage throughout your home, and the built-in Ethernet ports supply high-speed connection to your wired devices. - Page 4 LED Explanation Solid Green -The router is starting to connect or has been successfully connected to the internet Fast blinking -The router is performing WPS negotiation. Off - Power is off or the LED is turned off. 1. 2. 3. The Side and Back Panel Button Description WPS Button - Press this WPS button, and immediately press the WPS button on your client device.
-
Page 5: Connect The Hardware
Chapter Connect the Hardware This chapter contains the following sections: - Position Your Router - Connect Your Router... -
Page 6: Position Your Router
2. 1. Position Your Router • The router should not be located in a place where it will be exposed to moisture or excessive heat. • Place the router in a location where it can be connected to multiple devices as well as to a power source. - Page 7 • Method 3: Use the WPS button Wireless devices that support WPS, including Android phones, tablets, and most USB network adapters, can be connected to your router through this method. Note: • WPS is not supported by IOS devices. • The WPS function cannot be configured if the wireless function of the router is disabled. Also, the WPS function will be disabled if your wireless encryption is WEP.
-
Page 8: Log In To Your Router
Chapter Log In to Your Router... - Page 9 With a web-based utility, it is easy to configure and manage the router. The web-based utility can be used on any Windows, Mac OS or UNIX OS with a web browser, such as Microsoft Internet Explorer, Mozilla Firefox or Apple Safari. Follow the steps below to log in to your router.
-
Page 10: Set Up Internet Connection
Chapter Set Up Internet Connection This chapter introduces how to connect your router to the internet. The router is equipped with a web-based Quick Setup wizard. It has necessary ISP information built in, automates many of the steps and verifies that those steps have been successfully completed. Furthermore, you can also set up an IPv6 connection if your ISP provides IPv6 service. -
Page 11: Manually Set Up Your Internet Connection
4. 1. Manually Set Up Your Internet Connection In this part, you can check your current internet connection settings. You can also modify the settings according to the service information provided by your ISP. Follow the steps below to check or modify your internet connection settings. ( If you need the IPv6 internet connection, please refer to the section of Set Up an IPv6 Internet Connection ) 4.1.1. - Page 12 4.1.3. If you choose Static IP, enter the information provided by your ISP in the corresponding fields. 4.1.4. When you have finished modifying and clicked the Continue button. You will jump to the page that confirms the modification. ( You can take a screenshot to keep this information for the next time or for others to use) Click OK button Router will reboot and reconnect to your device in a short time.
-
Page 13: Set Up The Router As An Access Point
4. 2. Set Up the Router as an Access Point The router can work as an access point, transforming your existing wired network to a wireless one. Before Installation Please complete the following settings: 1) After disconnecting the WAN port. Connect a device to your Juplink router and launch a web browser. -
Page 14: Set Up An Ipv6 Internet Connection
4. 3. Set Up an IPv6 Internet Connection Your ISP provides information about one of the following IPv6 internet connection types: IPV6 (Auto Configured) ; IPV6 Static 4.3.1. IPV6 (Auto Configured) 1) After Log In to Your Router, Click Network >... -
Page 15: Guest Network
Chapter Guest Network This function allows you to provide Wi-Fi access for guests without disclosing your main network. When you have guests in your house, apartment, or workplace, you can create a guest network for them. It contains the following sections: - Create a Network for Guests... -
Page 16: Create A Network For Guests
5. 1. Create a Network for Guests 1) After Log In to Your Router, Click Network > Guest SSID >Enable 2) Set Authentication Mode to WPA-PSK/WPA2-PSK AES (recommended), and customize your own password. 3) Click Apply to finish your setting. Now your guests can access your guest network using the SSID and password you set. - Page 17 Chapter Security Set –WAN Access Control, Parent Control Create a personalized network that caters for the whole family in Security Setting. You can ensure appropriate internet access for everyone with Parent Control. keep your network secure in WAN Access Control. It contains the following sections: - WAN Access Control - Parental Controls...
-
Page 18: Wan Access Control
6.1. WAN Access Control WAN Access Control is used to block or allow specific URL to access your network (Via wired or wireless) based on a list of blocked devices (Blacklist) or a list of allowed devices (Whitelist). Block or allow specific URL to access your network (via wired or wireless). - Page 19 6.2. Parental Controls Parental Controls allows you to set up unique restrictions on internet access for each member of your family. You can set daily limits for the total time spent online. 1) After Log In to Your Router, Click Status >...
-
Page 20: Vpn Server
Chapter VPN Server The VPN (Virtual Private Networking) Server allows you to access your home network in a secured way through internet when you are out of home. The router offers two ways to setup VPN connection: L2TP connection mode - Use L2TP VPN to Access Your Home Network. - Page 21 7.1. L2TP VPN 1) After Log in to Your Router, Click Network > Fill in the corresponding information then click add.
- Page 22 Chapter Customize Your Network Settings This chapter guides you on how to configure advanced network features. It contains the following sections: - QoS - Bridge mode - Change the LAN IP address - Specify DHCP Server Settings - Specify Wireless Settings - Use Repeater to Extend Network - Virtual Server (LAN Port Forwarding)
- Page 23 8.1. QoS QoS (Quality of Service) allows you to prioritize the internet traffic of specific online activities, such as gaming or streaming. Activities set as high priority will be allocated more bandwidth and so continue to run smoothly even when there is heavy traffic on the network. You can also prioritize the connection of specific devices for a set duration.
-
Page 24: Bridge Mode
8.2. Bridge mode You can modify the working mode-Bridge of the router in this page. Bridge mode - You can select Bridge if your ISP is not listed and no other parameters are required. After Log in to Your Router, Click Network >... -
Page 25: Specify Dhcp Server Settings
8.4. Specify DHCP Server Settings By default, the DHCP (Dynamic Host Configuration Protocol) Server is enabled and the router acts as a DHCP server; it dynamically assigns TCP/IP parameters to client devices from the IP Address Pool. You can change the settings of the DHCP Server if necessary, and you can reserve LAN IP addresses for specified client devices. - Page 26 8.5.2. To change the wireless network name (SSID) and wireless password: Network > 2.4 G Wireless / 5 G Wireless 1) After Log in to Your Router, Click 2) Select Authentication (Mode WPA-PSK/WPA2-PSK is recommended) 3) Set your SSID (Wi-Fi name) and Key (Wi-Fi password) Click Apply button, you can reconnect your Wireless network with new SSID and Key.
- Page 27 8.5.4. To enable or disable the wireless function 1) After Log in to Your Router, Click Network > 2.4 G Wireless / 5 G Wireless > Advanced Setup 2) Hide SSID: Select it, your SSID won’t display when you scan for local wireless networks on your wireless device and you need to manually join the network.
- Page 28 3) Channel: You can Select Wireless Channel in drop-down list (Auto is recommended) 4) Band Width: You can select a channel width (bandwidth) in drop-down list for the wireless network (20MHz/40MHz/80MHz is recommended) 5) Transmit Power - Select 20% (Low), 40%, 60%, 80%, 100% (High) to specify the data transmit power.
- Page 29 8.6. Use Repeater to Extend Network Extend your existing wireless network range with the repeater feature. 1) After Log in to Your Router, Click Application > Repeater 2) Click the Scan Wi-Fi button, wait about 5 seconds. 3) Select Enable & Sync with gateway (suggest) 4) Enter the password of the Wi-Fi that will be extended in Key blank.
- Page 30 8.7. Virtual Server (LAN Port Forwarding) A virtual server is a server using a device on the LAN side, which can be accessed directly from the external network. 1) After Log in to Your Router, Click Application > Virtual Server 2) Fill in the Outer Port, Client IP Address and Inner Port, choose Protocol Type in drop-down list.
-
Page 31: Manage The Router
Chapter Manage the Router This chapter will show you the configuration for managing and maintaining your router. It contains the following sections: - Upgrade the Firmware - Restore Default Setting - Change the Login Password - System Log - Set up System Time - Set the Router to Reboot Regularly... -
Page 32: Upgrade The Firmware
9.1. Upgrade the Firmware VANIN Juplink aims at providing better network experience for users. the latest firmware will be released at the Juplink official website www.juplink.com, and you can download it for free Note: • Do NOT turn off the router during the firmware upgrade. -
Page 33: Change The Login Password
9.3. Change the Login Password The account management feature allows you to change your login password of the web 1) After Log in to Your Router, Click Management > User Management 2) Set your password in the New Password and Confirm Password blank. 3) Click Save/Apply Button, Use the new password for future logins Note: •If you forgot your password and can't log in, you need to restore the router to factory... - Page 34 Q1: Why cannot the router setup successfully? A1: If router did not complete the setup you can try the following: Press and hold the Reset button on your router with a paperclip or pin until the front illuminated turns off and the Green indicators start blinking (about 10 seconds).
- Page 35 router rather than a LAN port. - Ensure that your wireless device is connected to the router’s SSID. - Ensure that your wired device is connected to port 1, 2 or 3, 4 of the router properly by Ethernet cable. And the device is also set to Obtain an IP address automatically and Obtain DNS server address automatically.
- Page 36 an older Intel wireless network adapter (some older Intel adapters include: Intel Dual Band Wireless AC-3160, AC-3165, AC-7260, AC-7265 and AC-8260). To check which wireless network adapter is on your Windows device: ① Open the Control Panel. ② Enter Device Manager in the search bar at the top of the window. ③...
- Page 37 Q15: How to connect to Xfinity cable Modem? A15: ① Connect to the Wi-Fi of the router and log in to the web management page: 192.168.0.1 ② Tap or click Network on top menu. ④ Tap or click WAN Setting ⑤...
-
Page 38: Fcc Statement
FCC statement FCC compliance information statement Product Name: VANIN Juplink RX4-1500 Router Model Number: Juplink RX4-1500 Responsible party: This equipment has been tested and found to comply with the limits for a Class B digital device, pursuant to part 15 of the FCC Rules. These limits are designed to provide reasonable protection against harmful interference in a residential installation.
Need help?
Do you have a question about the Juplink RX4-1500 and is the answer not in the manual?
Questions and answers