
Related Manuals for RoentDek DLD40

Summary of Contents for RoentDek DLD40
- Page 1 RoentDek Handels GmbH Supersonic Gas Jets Detection Techniques Data Acquisition Systems Multifragment Imaging Systems MCP Delay Line Detector Manual (Version 11.0.1304.1)
- Page 2 Mail Addresses: Headquarter RoentDek Handels GmbH Im Vogelshaag 8 D-65779 Kelkheim-Ruppertshain Germany Frankfurt branch RoentDek Handels GmbH c/o Institut für Kernphysik Max-von-Laue-Str. 1 D-60438 Frankfurt am Main Germany Web-Site: www.roentdek.com WEEE: DE48573152 Product names used in this publication are for identification purposes only and may be trademarks of their respective companies.
-
Page 3: Table Of Contents
1.2.4 Assembly of the MCP-stack......................... 14 1.2.4.1 Assembly of the MCP-stack for the DLD40, DLD80 and HEX80 ................14 1.2.4.2 Assembly of the MCP-stack for the DLD120 and HEX120 ..................18 MOUNTING OF THE DETECTOR AND CABLE CONNECTIONS VIA VACUUM FEEDTHROUGH ..23 .................. - Page 4 HV 2/4 ................... 69 DUAL OLTAGE SUPPLY MODULE BIASET3 SPS2( ) ......................... 71 WITH MINI ............................. 73 BATTERY UNIT HVT4 H ....................74 OLTAGE ERMINATORS ..........................75 VOLTAGE DIVIDER UNIT APPENDIX: (MCP’S): ..............................79 LIST OF FIGURES ................................81 LIST OF TABLES ................................83 LIST OF EQUATIONS ..............................
-
Page 5: Detector System - Components
RoentDek DLD40(EP), DLD80(75eT), HEX80/HEX75 and DLD120 and HEX120(100) detector. Even if you have not purchased the complete system you will find valuable information in the chapters describing the different components about the link between the components and the operation. - Page 6 Page 6 of 83 MCP Delay Line Detector Manual (11.0.1304.1)
-
Page 7: The Microchannel Plate Detector With Delay-Line Anode
The Microchannel Plate Detector with delay-line anode The Micro-Channel Plate detector with delay-line anode is a device for single particle/photon counting, giving information on the position of each particle/photon and its impact time with high precision. It uses an electronic read-out scheme employing fast timing amplifiers, timing discriminators and digitizers. -
Page 8: General Description
The linear active diameter is at least 40mm for the detectors with the DL40 anode (e.g. DLD40 and DLD40EP), 75mm for the DL80 anode (e.g. DLD80 and DLD75eT), and about 120mm for the DLD120. - Page 9 The fast timing signal picked up from an MCP contact or, in the case of a pulsed particle/photon source, a “machine trigger” signal can serve as time reference. The single pitch propagation time (for 1mm) on the delay line is about 0.75ns for DLD40, 1ns for DLD80 and 1.24ns for DLD120.
-
Page 10: Timing Information
RoentDek program codes appropriate for your detector. The linearity deviations in each delay-line layer should be calibrated to achieve optimal results. Please contact RoentDek for an auto-linearization routine and advanced position codes. The X and Y positions can be calculated from any combination of the Equation 1.2. If for a given event more signals than from the minimum of two layers are available, it is recommended to choose signals from those two layers where the positions are most distant from the respective delay line ends (or gaps). -
Page 11: Assembly Of The Mcp-Detector
Therefore, please review the following instructions even if you have received a “readily mounted” anode. For DLD40, DLD80 and HEX80 the MCP holder with rear ceramic ring may already be placed on the delay-line anode, it is fixed by the retractable “shields”... -
Page 12: Connecting The Wires To The Delay-Line Anode
(see also next section). A fourth single cable can be used for connecting a mesh. For DLD40, DLD80 and HEX80: The cables for the MCP connections can be soldered or spot-welded directly onto the metallization of the ceramic rings or clamped to the ring with special recessed M2 nuts and screws (obtainable form ). - Page 13 Also connect the anode holder with a cable, wherever suitable (see also below). This cable has to supply the anode holder potential. Figure 1.4: Cables for holder and wires on DLD40, DLD80 and HEX80. The four M2 rods and the MCP holder plate are on the same “Holder”...
-
Page 14: Assembly Of The Mcp-Stack
1.2.4.1 Assembly of the MCP-stack for the DLD40, DLD80 and HEX80 A cartoon about the assembly of the MCP stack for the DLD40, DLD80 and HEX80 can be found on our web-site in the MOVIES section. There you can also find cartoons showing the mounting of the MCP stack to the anode. - Page 15 1.8). Any other contact or mounting screw (i.e. for a mesh) cannot be on the same azimuthal position later. Figure 1.9: Recommended ring orientations on a DLD40 assembly (DLD80 & HEX80 similar). Left picture: cable connection of this type without lug. Cable connection pads must rest in the recessed parts of the holder plate near the diagonal.
- Page 16 RoentDek ring can be recommended. • DLD40, DLD80, HEX75 with 60:1/40:1 MCP: there is no intermediate contact ring recommended, the second (and possibly third) MCP can be placed in direct contact with each other. • HEX80 with 60:1 MCP: a shim ring can optionally be supplied to reduce the active MCP diameter to 75mm.
- Page 17 (obtainable from RoentDek Figure 1.17: MCP stack with spring clamp for the MCP back cable (DLD40, DLD80 & HEX80) Now the MCP-stack can be mounted to the anode by inserting it into the butterfly-shaped indent of the holder plate and fixing it with the movable shields.
-
Page 18: Assembly Of The Mcp-Stack For The Dld120 And Hex120
Figure 1.18: Assembly of MCP-stack - Stage 4 (DLD40 & DLD80) Check with an Ohm meter that there is no electric contact between “MCP back”, “MCP front” and “holder” plate. There should be a resistance in the 10-100MΩ regime between “MCP back” and “MCP front”. In the presence of humidity the MCP stack resistance may be less than the default value. - Page 19 Usually, the delivered MCPs will be matched in resistance within 10% for direct stacking. If not, a shim ring with contact lug must be used with cable connection to a feedthrough for bias via a high voltage supply. Please contact RoentDek such a case Figure 1.21: Rear metal plate with one MCP (DLD120 and HEX120)
- Page 20 Figure 1.23: Assembly of MCP-stack - Stage 3-1 (DLD120 and HEX120) Now fix the stack with three plastic screws very carefully and only lightly. Due to the indentions in the rear plate and the front ring, the MCP will not fall out even if the screws are not entirely tight. Remove the guide pins and add the other three screws. Once all screws are in place fix them again slightly without excessive force Figure 1.24: Assembly of MCP-stack - Stage 3-2 (DLD120 and HEX120) Figure 1.25: Assembly of MCP-stack - Stage 3-3 (DLD120 and HEX120)
- Page 21 The recommended distance between the MCP back plate and the anode body plate is about 8mm. A woven potential mesh wMesh120 can be supplied for being placed on the MCP front side. Please contact RoentDek this option. MCP Delay Line Detector Manual (11.0.1304.1)
- Page 22 Page 22 of 83 MCP Delay Line Detector Manual (11.0.1304.1)
-
Page 23: Mounting Of The Detector And Cable Connections Via Vacuum Feedthrough
One can use sheets of Kapton for security if distances appear too small for safe operation. Please contact RoentDek options. The vacuum port where the detector is mounted must have at least 100mm open diameter for , 150mm for DLD40 200mm for and 250mm for . If the detector shall come DLD80,... - Page 24 Figure 2.1: Sketch of the detector with mounting flange (only flange mounting option, here: FT12TP/100). For connecting a Hexanode, the same 12-pin feedthrough is used and an additional set of at least 3 MHV or SHV feedthroughs (e.g. the FT4) is needed for connecting the MCP front, MCP back, Holder (and optionally a mesh). Figure 2.2: CF200 flange with two CF35 ports for mounting a Hex80 detector.
-
Page 25: Connecting The Signal Cables To A Feedtrough Flange
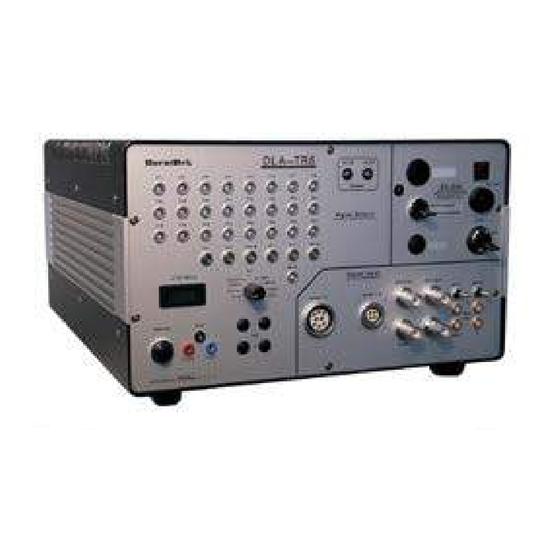
2.2 Connecting the Signal Cables to a Feedtrough Flange In the following the connection scheme to the FT12 feedthrough flange is described. This flange is used for airside coupling to the FT12TP(hex) signal decoupling plugs. The following connection schemes are also compatible with earlier read-out concepts (FT12/16 with DLATR6/8). -
Page 26: The Ft12Tp (Hex) - Feedthrough Flange With Signal Decoupler
Figure 2.3). can supply a test plug to ease this verification task. Some of the tests can be RoentDek done more efficiently via the signal decoupler plug (see next section). A cabling error which cannot be detected RoentDek by verifying the cables with an Ohm meter from the feedthrough air-side alone (e.g. - Page 27 In case you have an older FT12TP plug for use with DLD with 6 lemo sockets (and 6 SHV connectors) please refer to the manual that came with this delivery or ask for a manual of old-type FT12TP assemblies. RoentDek MCP Delay Line Detector Manual (11.0.1304.1) Page 27 of 83...
- Page 28 (middle trace), delayed according to the delay-line transmission time (plus offset from connection cables). The cross talk to another layer (lower trace) is small. The lower left image shows the same for a DLD40. If the connections between pin 6 and 8 are swapped as in the right lower picture the response is clearly different.
-
Page 29: The Ft4(Tp) For Ft16(Tp) And Det40/75
FT4TP with HFSD and HFST single line decouplers (see next section). It RoentDek is possible to measure the actual resistance values with an Ohm meter between the high voltage input socket and the pin that connects to the respective feedthrough. -
Page 30: Operation Of The Mcp Detector With Delay-Line (Or Timing) Anode
HVT function (see power supply manual which may be appended to this document). RoentDek 2.5 Operation of the MCP detector with delay-line (or timing) anode This introduction to the MCP detector operation shall only give general info on the detector startup and basic function verification. - Page 31 (i.e. above noise level). Such MCP saturation can usually be recognized from non-linear bias/current characteristics. Therefore we recommend using high voltage supplies with current reading, as available from RoentDek Note, that some high voltage supplies may also increase the noise level, especially at high bias.
-
Page 32: General Operation
(the decouplers are) you must turn down the voltage before connecting a cable for signal verification. Otherwise a RoentDek discharge may occur and potentially damage the detector and/or the follow-up electronics. (If you had to turn down the voltage you can steadily increase the voltage again with a ramp speed of up to 1000V per second to the value which was reached before). - Page 33 (e.g. with the HVZ and/or BA3). RoentDek Again you must verify that set voltages on high voltage supplies for MCP back and MCP front are maintained which is sometimes not the case, especially when biased with the same polarity. Also...
- Page 34 Page 34 of 83 MCP Delay Line Detector Manual (11.0.1304.1)
-
Page 35: The Front-End Timing Electronics Modules: Amplifier & Cfd Module
3 The Front-end timing electronics modules: Amplifier & CFD Module offers different versions of front-end timing electronics. RoentDek This manual contains the ATR19 description. If you have received different front-end electronics please refer to separate manual(s) which shall replace the following section This is (Version 11.0.1303.1). -
Page 36: Signal Inputs And Amplification
The recommended readout version of the delay-line detectors involves the FT12(16)-TP plug with internal signal RoentDek transformers for the delay-line signals. For applications where only the single particle timing is of importance (e.g. with DET40/75) a FT4TP-type read-out in combination with the ATR19-2 is recommended. The physical characteristics of the ATR19-2 are described in Chapter 3.6. -
Page 37: Figure 3.3: Atr19
a) no jumpers: inputs + and – are active (differential) with 100Ω impedance. Please observe the polarity b) jumper on JP6/JP9: input – (inverting 50Ω impedance to ground); can be used for positive input signals c) jumper on JP5/JP8: input + (non-inverting 50Ω impedance to ground); can be used for negative input signals Default settings are: ch1 and ch2 as (b) and ch3 to ch8 as (c), for ATR19-2: ch1 as (b) and ch2 as (c) when used with a DET40/75 or both channels as (c) for read-out of a delay-line anode. -
Page 38: The Dlatr Board
3.2 The DLATR board The ATR19 module contains boards of type DLATR, which are occasionally updated in the circuit design without altering their function. Currently DLATR+ and DLATR2.0 boards are supplied. The board can easily be exchanged. To modify settings on the boards or exchange the boards please refer to Chapter 3.5. The amplification gain can be changed without opening the ATR19 unit. -
Page 39: Figure 3.7: Inputs
LEMO connector serves as input for the DC voltage from an external source. Please contact for adequate RoentDek remote DC level controls (e.g. the USB-I/O modules). A DC voltage of +5V corresponds to a threshold level of -100mV on the amplified signal (as obtained from the “Mon” output). -
Page 40: Connecting And Operating The Atr19
(JP7 and JP10 removed). If in doubt please contact to insure that your module can also be operated with ±6V RoentDek and JP7 and JP10 set. Adequate DC supply and cabling can be achieved from the SPS1(b) modules with a corresponding cable. -
Page 41: Opening The Atr19 Module
Figure 3.8: Rear panel of the ATR19 (for ATR19-2 see Chapter 3.6) Before connecting the input cables to the LEMO connectors on the ATR19 front panel make sure that the detector voltages are switched off and that you are aware of the input jumper settings for the respective channels and the active input connectors (see Chapter 3.1). -
Page 42: The Atr19-2(B) Module
If you want to change your ATR19 module between ECL and NIM versions please contact RoentDek These are the following options for the signal output levels on the ECL and NIM output connectors: Standard NIM: JP1/JP3 and JP2/JP4 set, JP22/JP23 open (as in Figure 3.4) -
Page 43: Final Adjustment For Detector Operation
The ATR19 units were specifically designed for the read-out of delay-line detectors (ATR19-6 for DLD, ATR19- RoentDek 8 for HEX) and timing detectors (ATR19-2). The ATR19-2 can also be used for the read-out of one delay-line layer. If the voltages to the detector are supplied in the recommended way the signal from the MCP front or back contact (positive) has to be connected to ch1- or ch2- and the delay-line signals to ch3+ to ch6+ (or to ch8+). -
Page 44: Figure 3.12: Typical ( Analogue )
performance, can only be improved be increasing MCP gain (which may require reducing amp gain for avoiding saturation effects and non-linear amplification). If the analogue outputs are satisfactorily, one can check the corresponding timing (CFD) outputs on the sockets “NIM” or “ECL”. -
Page 45: Figure 3.14: Overview Of Atr19
“main” NIM signal on the CFD output line. If a RoentDek delay-line detector is used the presence of such events can be clearly observed in the time sum spectrum during data acquisition, see Figure 3.15. Ideally, the time sum on each layer consists only of one narrow peak with few ns width (lower pictures left side). -
Page 46: The Sps1(B) Mains Adapter
3.8 The SPS1(b) mains adapter SPS1/SPS1b are external power supplies for the (N)DLATR8, (N)DLATR6 and ATR19 RoentDek RoentDek units. The SPS1b can also supply the CFD1b. The SPS1 provides DC-outputs (V ) adjustable between 5V and 6V, both positive and negative from 100-125V/200-250V, 50/60Hz AC mains power. -
Page 47: How To Switch The Ac Supply Voltage
SPS1. Only use cables with a cross-section of at least 0.75mm². Use shielded cables if possible. CAUTION : Do not connect any other devices than the RoentDek (N)DLATR6, (N)DLATR8, ATR19 (or CFD1b) to the SPS1(b) before checking with RoentDek. -
Page 48: Output Voltage Adjustment
Figure 3.18: Fuse holder Figure 3.17: How to remove the input fuse 3.8.3 Output voltage adjustm ent Both output voltages may be adjusted if necessary. The two potentiometers are accessible from the bottom side of the SPS1’s casing (see Figure 3.19). For safety reasons use a fully insulated screwdriver to adjust the potentiometers. Figure 3.19: Adjusting the output voltages (SPS1 seen from bottom side) 3.8.4 M aintenance and Troubleshooting... -
Page 49: Technical Specifications
3.8.5 Technical Specifications Protection Class: IP20 AC Input Voltage: 100-125V or 200-250V (selection switch is at the rear panel), 50-60Hz DC Outputs: positive output: 5.0 .. 6.0V (adjustable), max. 1.2A negative outputs: -5.2V (fixed) max. 1A -5.0 .. -6.0V (adjustable), max. 2.2A both negative outputs COMBINED may not exceed 2.2A! Power Consumption: typ. -
Page 50: Figure 3.21: Remove The Ribbon Cable From The Power Supply
2) Remove the power cord and all other cables connected to the ATR19. Open the ATR19 case. Check that all internal cables are correctly fixed in the terminals (yellow arrows in the picture below). Figure 3.21: Remove the ribbon cable from the power supply 3) Remove the ribbon cable from the power supply (green arrow in the picture above). -
Page 51: Figure 3.23: Voltages Near The Output Fuses
8) Close the casing of the ATR19. Restore the power connection and check if the problem has been solved. If not, repeat the steps above. If the failure persists, contact for further assistance. RoentDek MCP Delay Line Detector Manual (11.0.1304.1) Page 51 of 83... - Page 52 Page 52 of 83 MCP Delay Line Detector Manual (11.0.1304.1)
-
Page 53: Data Acquisition Hard- And Software
HM1(B), and the TDC8 (for ISA and PCI bus). The fADC units are not yet documented in this manual. If you have purchased fADC units please contact RD. For all data acquisition hardware modules there are separate more detailed manuals available. Please see http://roentdek.com/manuals/. 4.1 The Time-to-Digital-Converters (TDC) for PC... -
Page 54: The Hm1 / Hm1-B
Figure 4.2: PCI2PCIe adapter crate with PCIe card for the PC. Here two TDC8HP and a clock card are inserted The PCI2PCIe adapter requires a mains cord with IEC-60320-C7 norm (only the EURO version of this cord can be supplied RoentDek 4.1.2 The HM 1 / HM 1-B The HM1 is based on the GP1-chip of ACAM. -
Page 55: The Tdc8
Figure 4.4: PCI interface card Figure 4.3: HM1-B/T and HM1-B front panel Details of the HM1(-B) operation is given in a separate manual. HM1 modules cannot be operated with x64 OS. 4.1.3 The TDC8 (This product line is discontinued!) The TDC8 is based on the LeCroy MTD133B-chip (production discontinued). It has an input for common start or common stop operation and 8 channels. -
Page 56: Hm1 / Hm1-B
• Locate a free PCI slot in your computer, and firmly insert the card into the selected slot. To avoid damaging your hardware, insert the card only into a slot with the same bus type as the card. Inserting the card into any other type of slot can damage your card, your computer, or both. -
Page 57: Tdc8
Figure 4.7: Side and input panel view of the HM1 - I/O-board (ISA) For a detailed description please refer to the HM1-B Module manual 4.2.3 TDC8 (This product line is discontinued!) • Shut down your computer • For your devices safety, turn off the power to your computer and all peripheral devices. •... -
Page 58: Tdc8Hp (Or Tdc8)
4.3.1 TDC8HP (or TDC8) (You should have installed the TDC card already in the PC) Connect via the short LEMO coax cable the TDC8HP channel 8 (in case of TDC8 input “C”) with the timing (CFD) output (NIM signal only) used for the MCP signal. Likewise connect the outputs of the delay line anode timing signals to the channels 1 to 4(6) according to Chapter 0 of the manual. -
Page 59: Figure 4.8: Screen After Starting The
Figure 4.8: Screen after starting the CoboldPC 2011 R3 program You will recognize corresponding files easily from the similarities in the filenames. Browse for a “filename.lmf” and select it If you have selected an adequate listmode file. The program will resume and sort the file. Now you can look at the spectra with the “view”... - Page 60 various coordinate representations. The program calls a sub-script for defining hardware-specific parameters which must be chosen (default: TDC8HP) . Due to this modular construction it is possible to use almost the same data analysis sequences for different hardware, i.e. TDC types. The parameters from 0 up to 999 are reserved for DAq-parameters.
-
Page 61: Hardware Specific Commands: Daq-Parameters And Coordinates
number of hits per channel to be read out Parameter 33 DataFormat (Internally set) Parameter 40 unique ID-number checking compatibility of CCF with DAn and DAq Parameter 50 4.4.1 Hardw are specific com m ands: DAq-param eters and coordinates executes the commands in the specific file, here for TDC8HP, if you use execute TDC8HP-DAq-Parameters.ccf different hardware please enable a different sub-script execution (see above) The following commands are part of the TDC8HP-DAq-Parameters.ccf sub-script, for details please refer to the TDC8HP... -
Page 62: Analysis Specific Commands: Dan Parameters And Coordinates
; defines coordinates for number of hits per channels and Call UserFCall,SetDAQCoordinates,T1Ch??n,T1Ch??S?? values for each hit according to parameters 32 and 33. This command (for parameter 32 = 8 and parameter 33 = 2) is the equivalent to the following "manual" coordinate definition block: note that it is possible to define several coordinates in one Coordinate T1Ch01n,T1Ch01S01,T1Ch01S02;... - Page 63 “false” hits in a certain TDC channel. Time to Position calibration factor for PosX coordinate (v in mm/ns) ⊥ Parameter 1010 DLD40: 1.32, DLD80: 1.02, DLD120: 0.77 For Hexanode (u): HEX80: 0.737, HEX120: 0.583 Time to Position calibration factor for PosX coordinate (v in mm/ns) ⊥...
- Page 64 channel number for x2 Parameter 1027 channel number for y1 Parameter 1028 channel number for y2 Parameter 1029 channel number for z1 (ignored if parameter 1002 = 0) Parameter 1030 channel number for z2 (ignored if parameter 1002 = 0) Parameter 1031 channel number for TOF (-1 if not used) Parameter 1032...
-
Page 65: Spectra And Condition Definition Commands
sum of TDC channel values 1&2 minus sum of 3&4 Coordinate raw_diffxy (uncalibrated) same as raw_sum… but calibrated in ns and shifted (parameter Coordinate sumx,sumy,sumw,sumxyw values) example: sumx = x1 +x2 + pOSum same as raw_diffxy but calibrated in ns and shifted (parameter Coordinate diffxy values) calibrated... - Page 66 For the Hexanode an extra software package is available to optimize its function. Please contact on the availability of specific software packages for RoentDek your application. The following condition and spectra definition commands are recommended for first time users. Those definitions disabled by the “;”...
- Page 67 These spectra give information on the trigger (count) rate. define1 -1000,9000,4,raw_sumx,,none,always,raw_sumx (channels),,true define1 -1000,9000,4,raw_sumy,,none,always,raw_sumy (channels),,true define1 -1000,9000,4,raw_sumw,,none,always,raw_sumw (channels),,true define1 -2000,20000,4,raw_sumxyw,,none,always,raw_sumxyw (channels),,true define1 -5000,5000,4,raw_diffxy,,none,always,raw_diffxy (channels),,true define1 -6000,6000,4,raw_x,,none,always,raw_x (channels),,true define1 -6000,6000,4,raw_y,,none,always,raw_y (channels),,true define1 -6000,6000,4,raw_w,,none,always,raw_w (channels),,true define2 -6000,6000,10,raw_x,x1-x2 raw,-6000,6000,10,raw_y,y1-y2 raw,none,always,X/Y (u/v) raw (channels),true define2 -6000,6000,10,raw_x,x1-x2 raw,-6000,6000,10,raw_y,y1-y2 raw,none,clean_hit,X/Y (u/v) raw clean (channels) ;define2 -6000,6000,10,raw_x,u1-u2 raw,-6000,6000,10,raw_w,w1-w2 raw,none,always,u/w raw (channels),true ;define2 -6000,6000,10,raw_y,v1-v2 raw,-6000,6000,10,raw_w,w1-w2 raw,none,always,v/w raw (channels),true...
- Page 68 ;define1 -100,100,1,none,,none,always,Empty 1D ;define2 -100,100,1,none,,-100,100,1,none,,none,always,Empty 2D Now the data acquisition is started: start ;show status view 10 Note that the command definitions here shall only allow a “quick start” for the use of our delay-line detectors. More advanced data treatments like defining new (computed) coordinates to the analysis can be done by additionally modifying the DAn Dll module using a MS C++ compiler of Visual Studio 2011 or above.
-
Page 69: High Voltage Supplies
Safe and high-performance operation of the detector operation of the detectors requires adequate high voltage RoentDek supplies and auxiliary passive bias units. In the following the standard units are described. If you have received a different model please refer to the respective manual. - Page 70 On the rear panel on some modules you find a 9-pin socket where the external power cable for amplifier modules of type DLATR6 and ATR19-2 can be powered (only if RoentDek labeled accordingly, see Figure 5.3, not for N24 version. N24 and non-standard modules may not have this 9-pin socket or the socket is used for digital remote control.
-
Page 71: The Biaset3 With Sps2(Mini)
<40°C. A spare main fuse (250V 4A, slow) is supplied in the AC-input plug. For instructions how to replace the fuse please refer to the ATR19 manual see “SPS1 module”. RoentDek The output from the SPS2(b) cannot supply operation voltages for the (N)DLATR or FAMP/CFD modules. MCP Delay Line Detector Manual (11.0.1304.1) - Page 72 Figure 5.5: SPS2 front and rear panel with connection cable to HV2/4 module (not shown). High voltage modules of the type “N24” and EHQ 1xxx (e.g. HV1/4) can alternatively be supplied via the SPS2mini mains adapter which delivers only ±24V. If you want to purchase a mains adapter for an existing HV2/4 modules verify of which type it is.
-
Page 73: Ba3 Battery Unit
To supply this constant voltage offset between the wires a battery can be used. The BA3 battery pack provides RoentDek this offset with values between 35 and 40V (nominally 36V, without load 38 - 39V). If you want to use the BA3 for supplying the wire potentials you need to connect the SHV output “HV +36V” to the U input of the FT12/16-TP plug and the other SHV output “HV”... -
Page 74: Hvt And Hvt4 High Voltage Terminators
MCP stack resistance R . On the RoentDek directly be observed on the voltage display (when the set voltage is zero or low enough). This can be avoided by “terminating” the low-bias output to “ground” via a well-selected resistor R , e.g. -
Page 75: Hvz Voltage Divider Unit
Important: only use resistors with sufficient voltage and power rating. If you need help in determining R for passive HVT use or finding adequate resistors please contact RoentDek For applications with demands for slow heavy ion or negative ion detection please contact for special detector RoentDek mounting, signal decoupling and high voltage supply rated up to 10kV. - Page 76 ( e.g. via the FT12TP or FT16TP decoupling circuits) the bias applied to “HV In” is directly RoentDek connected with the “Sig” output socket, i.e. for the signal wire potential (U ). “Ref” output provides the 36V more negative potential (i.e.
- Page 77 jumper at J4: + 168V MCP back jumper at J5: + 224V (= U MCP back Changing this jumper position from the default setting can be beneficial for modified detector geometry (MCP holding plate at a non-standard position) or if the effective MCP back potential is significantly shifted (use J1 position). J7 and J8: placing a jumper on J7 or on J7 and J8 reduces the total voltage drop across the HVZ by 56V or 112V, respectively.
- Page 78 Page 78 of 83 MCP Delay Line Detector Manual (11.0.1304.1)
-
Page 79: Appendix: (Mcp's)
Appendix: (MCP’s): STORAGE, HANDLING and OPERATION of MICROCHANNEL PLATES from Galileo Corp. STORAGE Because of their structure and the nature of the materials used in manufacture, care must be taken when handling or operating MCPs. The following precautions are strongly recommended: Containers in which microchannel plates are shipped are not suitable for storage periods exceeding the delivery time. - Page 80 Page 80 of 83 MCP Delay Line Detector Manual (11.0.1304.1)
-
Page 81: List Of Figures
LUGS WITH CRIMPED WIRES CRIMPED ARE USED LEASE FOLLOW THE NEXT FIGURES DIRECTIONS ......................... 15 TO ACHIEVE SUCH A DETECTOR MOUNTING 1.10: A MCP- 1 (DLD40, DLD80 & HEX80) ............. 15 IGURE SSEMBLY OF STACK TAGE 1.11: A MCP- (DLD40, DLD80 & HEX80) ............16... - Page 82 2.6: R FT12TP( IGURE ESPONSE OF A DELAY LINE TO A SIGNAL PASSING THROUGH A PLUG PPER TRACE INPUT SIGNAL MIDDLE TRACE OUTPUT SIGNAL FROM THE OPPOSING TERMINAL OF THE SAME LAYER LOWER TRACE OUTPUT ). T FROM A TERMINAL OF ANOTHER LAYER X ENLARGED HE LEFT MARKER DEFINES THE INPUT TIME REFERENCE .
-
Page 83: List Of Tables
5.6: SPS2 “N24”- IGURE MINI MAINS ADAPTER LEFT AND THE SPECIFIC LABEL RED ARROW ON THE FRONT SIDE OF A TYPE HV2/4 N24- MODULE WHICH CAN BE POWERED BY IT TYPE MODULES CAN ALSO BE OPERATED WITH OLD TYPE NIM- ±6V.
Need help?
Do you have a question about the DLD40 and is the answer not in the manual?
Questions and answers