Table of Contents
Advertisement
Advertisement
Table of Contents

Related Manuals for MAFI T225


Summary of Contents for MAFI T225
- Page 1 MAFI - Trac T225/T230 Terminal Trac Production no. 326xxxx ...get it rolling...
- Page 2 Any use or change made outside the strict limitations of the copyright law without the consent of MAFI-Transport-Systeme GmbH is not permitted and is punishable by law. This particularly applies to reproductions, translations, microfilming, and the storage and processing in electronic systems.
-
Page 3: Table Of Contents
Intended use ..............17 Other dangers ..............19 Qualifications of the operating personnel ......22 Personal safety gear ............23 Warning signs on the MAFI Trac ........24 Your MAFI Trac ............27 Product description ............28 Exterior view ..............29 Interior view ................ - Page 4 Disposing of operating materials ........112 MAINTENANCE CERTIFICATES ......117 General information ............118 Maintenance certificate ............ 119 Maintenance manual T225/T230...
-
Page 5: Vehicle Identification
VEHICLE IDENTIFICATION Vehicle identification plate Production number Maintenance manual T225/T230... -
Page 6: Vehicle Identification Plate
Fig. 1: Mounting location The vehicle identification plate is attached behind the driver's seat. 11-C26-003-007A-5 Fig. 2: Vehicle identification plate On the vehicle identification plate you will find information on: vehicle type production number weights 11-C00-017-001A-2 cargo battery Maintenance manual T225/T230... -
Page 7: Production Number
VEHICLE IDENTIFICATION PRODUCTION NUMBER Production number The production number identifies your MAFI Trac. It is stamped on the vehicle identification plate. The production number of your MAFI Trac is: 3 2 6 0 x x x production number S p e c i f y t h e i n a l l w r i t t e n c o m mu n i ca t io n w i t h M A F I . - Page 8 Maintenance manual T225/T230...
-
Page 9: User Instructions
USER INSTRUCTIONS USER INSTRUCTIONS About this Maintenance manual Content overview Warranty/Liability MAFI Service Safety instructions Graphical aids Symbols Maintenance manual T225/T230... -
Page 10: About This Maintenance Manual
ABOUT THIS MAINTENANCE MANUAL About this Maintenance manual General information This maintenance manual (MM) is a part of the MAFI Trac. In the following the MAFI Trac is abbreviated to MT. It informs you of the correct maintenance and intended use of the MT. -
Page 11: Content Overview
Environmental notes In this chapter, you will find information on environmentally safe disposal of operating materials. Maintenance certificates In this chapter, you will find certification boxes to certify the maintenance tasks that have been performed on the MT. Maintenance manual T225/T230... -
Page 12: Warranty/Liability
USER INSTRUCTIONS WARRANTY/LIABILITY Warranty/Liability The “General sales terms and delivery conditions” of MAFI- Transport-Systeme GmbH always apply. MAFI rules out warranty and liability claims for personal injury and material damage if they result from one or more of the following: Unintended use of the MT (see “Intended use”... -
Page 13: Mafi Service
Carefully keep and file the test journal, for it is important as documentation for the Employers Vehicle Liability Insurance Association. MAFI also offers maintenance contracts as well as an annual service check for the safety examination legally required under sections 37, 38, 39 of the German accident prevention regulations “Industrial Trucks”... -
Page 14: Safety Instructions
B e s u r e t o o b s e r ve t h e m e a s u r e s d e s c r i b e d t o avo i d t h e s e d a n g e r s. Maintenance manual T225/T230... -
Page 15: Graphical Aids
T h i s t i p p r ov i d e s yo u w i t h a d v i c e o r f u r t h e r i n fo r m a t i o n . Maintenance manual T225/T230... -
Page 16: Symbols
“Safety instructions” on page Regulations Symbols of this type mark notes on using personal safety gear. A detailed description of the notes can be found in the section “Personal safety gear” on page Note, tip This symbol marks general notes. Maintenance manual T225/T230... -
Page 17: Safety
SAFETY General information Intended use Other dangers Qualifications of the operating personnel Personal safety gear Warning signs on the MAFI Trac Maintenance manual T225/T230... -
Page 18: General Information
The safety instructions come before the operational instructions. Safety instructions on third-party components can be found in the respective third-party documentation. Follow those safety instructions as well. Maintenance manual T225/T230... -
Page 19: Intended Use
MAFI representative. Refittings, attachments, and retrofittings on the MT may only be done upon consultation with MAFI. Spare parts, ancillary attachments, extra installations, and accessory parts have to be authorised by MAFI before use. Maintenance manual T225/T230... - Page 20 Transporting extra persons on the MT or in the driver's cab. Moving or carrying loads that exceed the maximum permissible load. Transporting loads at speeds greater than the permitted maximum. Moving or transporting loads that cannot be safely secured by the available MT couplings. Maintenance manual T225/T230...
-
Page 21: Other Dangers
The MT has been constructed according to state-of-the-art technology and acknowledged safety regulations. Nevertheless, when it is used, there may be danger for life and limb of the user or other persons, or damage to the MAFI Trac or other property. Therefore, operate the MT only: when it is in faultless condition, with concern for safety and dangers. - Page 22 D r i ve o n l y a t r e d u c e d s p e e d o n i n c l i n e s. D r i ve c a r e f u ll y w h e n c r o s s i n g s t e e p i n c li n e s. Maintenance manual T225/T230...
- Page 23 I f p o s s i bl e, avo i d s t a r t i n g t h e e n g i n e i n c l o s e d r o o m s. Maintenance manual T225/T230...
-
Page 24: Qualifications Of The Operating Personnel
MT only under the supervision of an experienced person. The owner is responsible for training and instructing new operating personnel of the MT in the same scope and with the same care whilst using this maintenance manual. Maintenance manual T225/T230... -
Page 25: Personal Safety Gear
Wear safety boots while working on the MT. You reduce the risk of crushing of feet and toes by wearing safety boots. Ear protection Wear ear protection while working on the MT. By wearing ear protection, you prevent damage to your hearing. Maintenance manual T225/T230... -
Page 26: Warning Signs On The Mafi Trac
SAFETY WARNING SIGNS ON THE MAFI TRAC Warning signs on the MAFI Trac There are warning signs in different locations on the MT. These warning signs are part of the operating manual. Ensure the legibility of the warning signs at all times. - Page 27 SAFETY WARNING SIGNS ON THE MAFI TRAC 11-C26-000-014A-8 Fig. 5: Attachment warning signs, Part 2 1 Warning sign “Hot surfaces” 2 Warning sign “Danger of falling!” 3 Warning sign “Battery” 4 Warning sign “Cabin tilting” 5 Warning sign “Cabin lowering”...
- Page 28 SAFETY WARNING SIGNS ON THE MAFI TRAC Maintenance manual T225/T230...
-
Page 29: Your Mafi Trac
YOUR MAFI TRAC Product description Exterior view Interior view Maintenance manual T225/T230... -
Page 30: Product Description
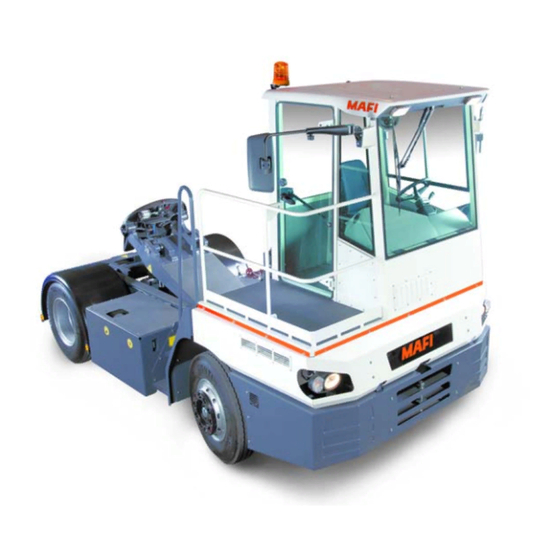
The MT is an industrial truck with fifth wheel coupling. It is designed for the special usage requirements in terminal traffic in ports, shipping, postal, and railway terminals, loading cargo cars from semi-trailers, industrial use with the Cargotrailer system, lift trucks, and semi-trailers. ausgelegt und abgestimmt. Maintenance manual T225/T230... -
Page 31: Exterior View
3 Hand pump for lifting/lowering the driver's cab 4 Sling points, front 5 Main battery switch 6 Battery compartment with main fuses 7 Fifth wheel with saddle plate 8 Service door, transmission 9 Maintenance opening, engine 10 Connection strip Maintenance manual T225/T230... - Page 32 Fig. 7: View right side 1 Exhaust 2 Cabin door 3 Equalising reservoir, engine coolant 4 Sling points, front 5 Ladder 6 Oil viewing window for hydraulic oil 7 Hydraulic tank / Fuel tank 8 Sling point, rear Maintenance manual T225/T230...
-
Page 33: Interior View
INTERIOR VIEW Interior view 11-C26-067-060A-6 Fig. 8: Interior view 1 Steering wheel 2 Operator control panel 3 Operator control panel for heater/ventilation/air conditioner 4 Central electric box 5 Pedals 6 Joystick for fifth wheel 7 Driver seat Maintenance manual T225/T230... - Page 34 Maintenance manual T225/T230...
-
Page 35: Maintenance Work
MAINTENANCE WORK Maintenance schedule Lubricating points Tilting driver's cab Motor Cooling system Air filter Fuel system Drive train Compressed air system Hydraulic system Fifth wheel / fifth wheel coupling Wheels and tyres Air conditioner Electrical system Air suspension Maintenance manual T225/T230... -
Page 36: Maintenance Schedule
1)After every 2000 operating hours, the maintenance tasks are repeated, starting at 500 operating hours. 2)Carry out the maintenance work at least once a year. 3) When using synthetic transmission oil, extend the oil change interval to 2000 operating hours or perform the oil change at least every two years. Maintenance manual T225/T230... - Page 37 1)After every 2000 operating hours, the maintenance tasks are repeated, starting at 500 operating hours. 2)Carry out the maintenance work at least once a year. 3)When using synthetic transmission oil, extend the oil change interval to 2000 operating hours or perform the oil change at least every two years. Maintenance manual T225/T230...
- Page 38 1)After every 2000 operating hours, the maintenance tasks are repeated, starting at 500 operating hours. 2)Carry out the maintenance work at least once a year. 3) When using synthetic transmission oil, extend the oil change interval to 2000 operating hours or perform the oil change at least every two years. Maintenance manual T225/T230...
- Page 39 1)After every 2000 operating hours, the maintenance tasks are repeated, starting at 500 operating hours. 2)Carry out the maintenance work at least once a year. 3) When using synthetic transmission oil, extend the oil change interval to 2000 operating hours or perform the oil change at least every two years. Maintenance manual T225/T230...
-
Page 40: Lubricating Points
Maintenance manual T225/T230... - Page 41 Bearing of rear axle 10-3 Driver's cab Top hinge of driver's door 12-1 Bottom hinge of driver's door 12-1 Brake Linkage adjuster (front axle) 11-1 Brake camshaft bearings (front axle) 11-1 Brake shoe bearings (front axle) 11-2 Maintenance manual T225/T230...
- Page 42 MAINTENANCE WORK LUBRICATING POINTS 11-C26-050-001A-1 Fig. 9: Lubricating points Maintenance manual T225/T230...
- Page 43 MAINTENANCE WORK LUBRICATING POINTS 11-C26-050-001A-2 Fig. 10: Lubricating points Maintenance manual T225/T230...
- Page 44 Maintenance manual T225/T230...
- Page 45 MAINTENANCE WORK LUBRICATING POINTS 11-C26-050-001A-5 Fig. 12: Lubricating points Maintenance manual T225/T230...
-
Page 46: Tilting Driver's Cab
To ease access for working on the motor and transmission, the cabin can be tilted. Tilt the driver's cab with the hand pump. The pump lever for this is located in the driver's cab, beside the cabin doors; see Figure 13. Fig. 13: Pump lever 11-C26-003-003A-2 Maintenance manual T225/T230... - Page 47 M a ke s u r e t h a t t h e r e a r e n o l o o s e o b j e c t s i n s i d e t h e d r i ve r ' s c a b. Maintenance manual T225/T230...
- Page 48 Remove all loose objects from the driver's cab. Take the pump level out of the driver's cab. Loosen and remove the hexagon head screw 1. 11-C26-000-018A-3 Fig. 15: Hand pump, driver's cab 1 Closure 2 Valve lever 3 Pump lever 11-C26-021-003A-4 Maintenance manual T225/T230...
- Page 49 Fig. 17: Tilted driver's cab in the final position Wait until the driver's cab is secure in the final position; only then can you begin with the maintenance work on the motor. 11-C26-000-017A-1 Maintenance manual T225/T230...
- Page 50 Turn the valve lever 2 to the “DOWN” position. Pump with the pump lever. The driver's cab tilts back. 11-C26-021-003A-2 Pump until you no longer feel any counter-pressure. After this, the driver's cab tilts back on its own to the maintenance area for the motor. Maintenance manual T225/T230...
- Page 51 Wait until the driver's cab is securely lowered into the final position and the cylinders relieved. Tighten the hexagon head screw 1 again. The driver's cab is locked. Store the pump lever beside the door in the driver's cab. 11-C26-000-018A-3 Maintenance manual T225/T230...
-
Page 52: Motor
D e fe c t i ve b e a r i n g e le m e n t s s h o u l d a l way s b e r e p l a c e d i n p a i r s. Maintenance manual T225/T230... - Page 53 Reinsert the oil dip stick 2 completely. Pull the oil dip stick 2 out again. The oil level should lie between the “MIN” and “MAX” markings. Refill oil into the oil filler nozzle 1 if necessary. 11-C26-060-004A-5 Maintenance manual T225/T230...
-
Page 54: Cooling System
D e fe c t i ve b e a r i n g e le m e n t s s h o u l d a l way s b e r e p l a c e d i n p a i r s. 11-C26-061-004A-4 Maintenance manual T225/T230... - Page 55 I f t h e r e i s f r e q u e n t c o o l a n t l o s s, h ave a u t h o r i s e d t e c h n ic i a n s l o o k fo r a n d r e m ove t h e c a u se. Maintenance manual T225/T230...
- Page 56 H ave t h e l e a k s a n d d e fe c t s r e p a i r e d by q u a l i f i e d t e c h n i c i a n s. Maintenance manual T225/T230...
- Page 57 A l way s we a r g l ove s a n d s a fe t y b o o t s w h e n r e m ov i n g t h e u n d e r r u n p r o t e c t i o n d ev i c e. Maintenance manual T225/T230...
- Page 58 Maintenance manual T225/T230...
- Page 59 Turn the motor off when no more air bubbles rise to the surface. Check the coolant level once more, add more coolant if necessary and start motor again. Close the cooling system with the cap at the expander tank. The system needs to be filled completely. Maintenance manual T225/T230...
- Page 60 H ave d e fe c t i ve c o o l e r s r e p l a c e d by q u a l i f i e d t e c h n i c i a n s. Maintenance manual T225/T230...
- Page 61 . Maintenance manual T225/T230...
-
Page 62: Air Filter
Loosen the clamps 1 and remove the housing cover 3. Check the housing cover 3 for signs of soiling and, if necessary, clean the housing cover. Place the housing cover 3 on top and tighten it using clamps 1. 11-C26-003-005A-1 Maintenance manual T225/T230... - Page 63 Insert the new filter cartridge 2 while making sure it is positioned properly. Press the filter cartridge 2 into the housing. Place the housing cover 3 on top and tighten it using clamps 1. 11-C26-003-005A-1 Maintenance manual T225/T230...
-
Page 64: Fuel System
Installation location of fuel filter and fuel pre-filter with water separator Fig. 34: Installation location of filter 1 Fuel filter 2 Fuel pre-filter with water separator Both filters are located on the right side of the transmission under the cover. 11-C26-060-011A-4 Maintenance manual T225/T230... - Page 65 Close the water drain valve 3. 11-C26-060-011A-5 Connect the water sensor to the water drain valve again 3. Maintenance manual T225/T230...
- Page 66 MAINTENANCE WORK FUEL SYSTEM Replacing fuel pre-filter element This section is in progress. Maintenance manual T225/T230...
- Page 67 Have a new seal ready at hand. Allow a couple of litres of fuel to drain to rinse out the contamination. Screw the drain plug back in with a new seal. Check the drain plug for leaks. Maintenance manual T225/T230...
-
Page 68: Drive Train
Maintenance manual T225/T230... - Page 69 T h e t ra n s m is s i o n o i l h a s t o b e a t o p e ra t i n g t e m p e ra t u r e fo r a n ex a c t o il leve l c h e ck . The oil dip stick is located on the right side of the transmission. Maintenance manual T225/T230...
- Page 70 U s e o n l y a u t h o r i s e d t y p e s o f t ra n s m is s i o n o il . Maintenance manual T225/T230...
- Page 71 Make sure the oil level is in the “HOT CHECK” range while the oil is cold and the motor is at standstill. Refill oil into the oil filler nozzle if necessary. If the oil level is correct, you can start with the cold check. 11-C25-060-006A-4 Maintenance manual T225/T230...
- Page 72 N into driving gear R. By shifting forwards and back, you bleed the hydraulic circuit of the transmission. Allow the engine to run at low idle speed in shift position N for about one minute. Maintenance manual T225/T230...
- Page 73 . Maintenance manual T225/T230...
- Page 74 Park the MT on level ground for the oil level check. Shift the transmission into neutral N and apply the parking brake. Maintenance manual T225/T230...
- Page 75 T h e o i l h a s t o b e a t o p e ra t i n g t e m p e ra t u r e fo r a n ex a c t o i l l eve l c h e ck . Maintenance manual T225/T230...
- Page 76 The transmission output shaft stands still, i.e. the MT does not move. The operating temperature has been reached (see engine coolant temperature display in combination display instrument). The transmission oil needs to settle, which means that the MT has not moved for at least two minutes. Maintenance manual T225/T230...
- Page 77 TL Temperature Low Oil temperature is too low oL TH Temperature High Oil temperature is too high oL SH Outputspeed High Drive shaft is turning (MT is moving) oL FL Sensor Failure Malfunction at the sensor Maintenance manual T225/T230...
- Page 78 , c o n t a c t c u s t o m e r s e r v i c e t o r e c t i f y t h e fa u l t . Ending the oil level check Press both arrow keys 1 and 2 until “N - N” is visible in the display. Maintenance manual T225/T230...
-
Page 79: Compressed Air System
Check the hose for leaks, and damage, such as nicks and abrasion. Replace the intake line in case of damage. Tighten loose fastenings on the compressor side and intake 11-C26-020-003A-4 side. Replace loose mountings along the intake line. Maintenance manual T225/T230... - Page 80 1 Circuit 1: Compressed air brake of the rear axle 2 Circuit 2: Compressed air brake of the front axle 3 Circuit 3: Parking brake, trailer Carry out a visual inspection of the compressed air tanks. Check the compressed air tanks for damage and leaks. 11-C26-020-011A-1 Maintenance manual T225/T230...
- Page 81 Park the MT on level ground. Stop the engine and withdraw the ignition key. Open the valve by pulling the ring in the direction of the arrow. The water can drain. Keep the ring pulled until no more water comes out. 11-C26-020-020A-1 Maintenance manual T225/T230...
- Page 82 “R e p l a c i n g a i r d r ye r c a r t r i d g e ” o n p a g e 8 Maintenance manual T225/T230...
- Page 83 This feature is available only on certain models. Unscrew the air dryer cartridge by turning it to the left. Screw the new air dryer cartridge on and tighten the air dryer cartridge by hand. Screw in the safety bolt (if available). Maintenance manual T225/T230...
-
Page 84: Hydraulic System
The oil level should lie between the “MIN” and “MAX” markings. Refill hydraulic oil into the oil return filter if necessary, “Changing the hydraulic oil” on page Use hydraulic oil of the same specifications, see “Oils” on page 105. 11-C26-021-001A-3 Maintenance manual T225/T230... - Page 85 Loosen the hexagon socket screw with the Allan key (SW 5) Do not loosen the securing element 2; this prevents the hexagon socket screw from falling out. The fifth wheel lowers all the way. Maintenance manual T225/T230...
- Page 86 U s e o n l y c l e a n o i l a n d a c l e a n c o n t a i n e r fo r f i l l i n g t h e s y s t e m . 11-C26-021-008A-3 Maintenance manual T225/T230...
- Page 87 If metal chips are found on the magnet, have technicians inspect the hydraulic system. Insert a new filter cartridge 1. Replace the O-ring at the filter housing cap 2. Tighten the bolts for the filter housing cover 2 onto the filter housing. 11-C26-021-006A-1 Maintenance manual T225/T230...
- Page 88 Remove the oil fill screw. The oil level has to reach the lower edge of the hole. Refill oil into the oil filler screw if necessary. Use hydraulic oil of the same specifications, see “Oils” on page 105. 11-C26-021-007A-2 Maintenance manual T225/T230...
- Page 89 Check the hydraulic hoses and connection pieces for leaks, porosity, damages, such as nicks and abrasion, proper mounting. Replace porous and damaged hydraulic hoses immediately with new hydraulic hoses. Tighten loose connections. Maintenance manual T225/T230...
-
Page 90: Fifth Wheel / Fifth Wheel Coupling
C o n s u lt t h e o p e ra t i n g m a nu a l fo r i n fo r m a t i o n . Maintenance manual T225/T230... - Page 91 11-C26-067-017A-2 The control light 2 should go out. If the result of the function test is negative, check if any of the electrical lines or switches are faulty, or whether the sensor position has to be reset. Maintenance manual T225/T230...
-
Page 92: Wheels And Tyres
Maintenance manual T225/T230... - Page 93 T h e o u t p u t o f t h e c o m p r e s s o r i s n o t e n o u g h t o i n f l a t e t h e t y r e s t o t h e s p e c i f i e d t y r e p r e s s u r e. Maintenance manual T225/T230...
-
Page 94: Air Conditioner
Check the air conditioner condenser for signs of soiling. Clean the air conditioner condenser if required. Soiled fins in the air conditioner condenser can cause the air conditioner to turn off due to over-heating. After cleaning the condenser, screw the air grate back on. 11-C26-061-006A-2 Maintenance manual T225/T230... - Page 95 The indicator bead is orange: The humidity of the coolant circuit is OK. The indicator bead is colourless: The humidity of the coolant circuit is too high. The dryer-collector unit must be replaced by a specialist company. Maintenance manual T225/T230...
- Page 96 The air filter element can be taken out from above through the shaft. Check the air filter element for soiling and replace if necessary. Install the air filter element while making sure it is positioned properly, and screw in the air grate. 11-C30-003-016A-1 Maintenance manual T225/T230...
-
Page 97: Electrical System
D i s c o n n e c t t h e ve h i c l e b a t t e r y ' s n e g a t i ve t e r m i n a l b e fo r e r e p a i r i n g t h e a l t e r n a t o r. Maintenance manual T225/T230... - Page 98 F i r e, n a ke d f l a m e s, s m o k i n g , a n d c r e a t i n g s p a r k s mu s t b e avo i d e d n e a r b a t t e r ie s. Maintenance manual T225/T230...
- Page 99 Note sequence – first positive battery terminal, then negative battery terminal. Checking battery poles and connections Check the battery terminals for corrosion spots. Check the terminals for proper tightness. Check whether the terminals have been greased sufficiently (special grease). Maintenance manual T225/T230...
- Page 100 Replace the lens or glass panel and tighten them with the fastening screws. 11-C26-019-010A-1 Warning beacon Fig. 70: Warning beacon Unscrew and take off the warning beacon glass. Replace the bulb with a bulb of the same type. Replace the glass and screw it tight. 11-C26-019-011A-1 Maintenance manual T225/T230...
- Page 101 The electrical fuses for the vehicle are located on the right side of the operator in a fuse box. 11-C26-019-008A-5 Fig. 72: Main fuse In addition to the individual vehicle fuses, there is a main fuse. It is located in the battery compartment. 11-C26-019-006A-3 Maintenance manual T225/T230...
-
Page 102: Air Suspension
At this load the suspension is without effect. 11-C26-020-008A-1 Checking air suspension bellows Check the air suspension bellows for signs of external wear, soiling, and ageing. Check and dewater the compressed air tank, “Compressed air system” on page Maintenance manual T225/T230... -
Page 103: Operating Materials
OPERATING MATERIALS General information Fuels Oils Coolant Lubricating greases Filling quantities Maintenance manual T225/T230... -
Page 104: General Information
A l way s avo i d f i r e, o p e n f l a m e s, s m o k i n g , a n d s p a r k s w h e n h a n d l i n g t h e s e m a t e r ia l s. Maintenance manual T225/T230... -
Page 105: Fuels
Maintenance manual T225/T230... - Page 106 Special diesel fuels can be employed for Arctic climate zones down to -44 °C. Normal or super petrol may under no circumstances be added to the diesel fuel. There is a risk of serious motor damage. Maintenance manual T225/T230...
-
Page 107: Oils
We r e c o m m e n d u s i n g s y n t h e t i c l u b r i c a n t s o n l y a t t e m p e ra t u r e s b e l ow - 2 5 °C. Maintenance manual T225/T230... - Page 108 . A t o u r p l a n t , a hy d ra u l i c o i l w i t h t h e v i s c o s i t y c l a s s I S O VG 4 6 h a s b e e n u s e d fo r f i l l i n g . Maintenance manual T225/T230...
-
Page 109: Coolant
Maintenance manual T225/T230... -
Page 110: Lubricating Greases
DIN 51 502. The battery poles are to be lubricated with acid-resistant grease, e. g. Bosch 5700 102025. For lubricating the front axle, always comply with the lubricant recommended in the documentation of the manufacturer for the front axle. Maintenance manual T225/T230... -
Page 111: Filling Quantities
Filling quantity Fuel approx. 240 l Oils Motor approx. 15 l Transmission approx. 18 l Axle transmission 18 l (differential transmission) Planetary gears 2 x 1.5 l (wheel hub gears) Hydraulics approx. 70 l Coolant approx. 40 l Maintenance manual T225/T230... - Page 112 OPERATING MATERIALS FILLING QUANTITIES Maintenance manual T225/T230...
-
Page 113: Environmental Notes
ENVIRONMENTAL NOTES Disposing of operating materials Maintenance manual T225/T230... -
Page 114: Disposing Of Operating Materials
Collect the used oil exclusively in used oil collecting containers. Do not mix with other operating materials. Deposit the used oil collecting containers at a collection point for used oil processing. Observe the regulations of the local authorities. Maintenance manual T225/T230... - Page 115 The paper filter cartridges need to be taken care of during maintenance work of the dry air filter in the air filter system of the motor. Dispose of the paper filter cartridges according to regulations of the responsible local authorities. Maintenance manual T225/T230...
- Page 116 Battery manufacturers and dealers are obligated to take back old batteries and to recycle or dispose of them. You can also drop off the old batteries at a collection point for old batteries. Observe the regulations of the responsible local and the national authorities. Maintenance manual T225/T230...
- Page 117 Maintenance manual T225/T230...
- Page 118 ENVIRONMENTAL NOTES DISPOSING OF OPERATING MATERIALS Maintenance manual T225/T230...
-
Page 119: Maintenance Certificates
MAINTENANCE CERTIFICATES General information Maintenance certificate Maintenance manual T225/T230... -
Page 120: General Information
Please take into consideration that if the maintenance work is not properly documented, the warranty and liability claims towards MAFI become void. T h e m a i n t e n a n c e s c h e d u l e ( s e e “... -
Page 121: Maintenance Certificate
MAINTENANCE CERTIFICATES MAINTENANCE CERTIFICATE Maintenance certificate Fig. 1: Certification boxes, maintenance work Space for entries and additional work Maintenance manual T225/T230... - Page 122 MAINTENANCE CERTIFICATES MAINTENANCE CERTIFICATE Fig. 2: Certification boxes, maintenance work Space for entries and additional work Maintenance manual T225/T230...
- Page 123 MAINTENANCE CERTIFICATES MAINTENANCE CERTIFICATE Fig. 3: Certification boxes, maintenance work Space for entries and additional work Maintenance manual T225/T230...
- Page 124 MAINTENANCE CERTIFICATES MAINTENANCE CERTIFICATE Fig. 4: Certification boxes, maintenance work Space for entries and additional work Maintenance manual T225/T230...
- Page 125 MAINTENANCE CERTIFICATES MAINTENANCE CERTIFICATE Fig. 5: Certification boxes, maintenance work Space for entries and additional work Maintenance manual T225/T230...
- Page 126 MAINTENANCE CERTIFICATES MAINTENANCE CERTIFICATE Fig. 6: Certification boxes, maintenance work Space for entries and additional work Maintenance manual T225/T230...
- Page 127 MAINTENANCE CERTIFICATES MAINTENANCE CERTIFICATE Fig. 7: Certification boxes, maintenance work Space for entries and additional work Maintenance manual T225/T230...
- Page 128 MAINTENANCE CERTIFICATES MAINTENANCE CERTIFICATE Fig. 8: Certification boxes, maintenance work Space for entries and additional work Maintenance manual T225/T230...
- Page 129 MAINTENANCE CERTIFICATES MAINTENANCE CERTIFICATE Fig. 9: Certification boxes, maintenance work Space for entries and additional work Maintenance manual T225/T230...
- Page 130 MAINTENANCE CERTIFICATES MAINTENANCE CERTIFICATE Fig. 10: Certification boxes, maintenance work Space for entries and additional work Maintenance manual T225/T230...
- Page 131 MAINTENANCE CERTIFICATES MAINTENANCE CERTIFICATE Fig. 11: Certification boxes, maintenance work Space for entries and additional work Maintenance manual T225/T230...
- Page 132 MAINTENANCE CERTIFICATES MAINTENANCE CERTIFICATE Fig. 12: Certification boxes, maintenance work Space for entries and additional work Maintenance manual T225/T230...
- Page 133 MAINTENANCE CERTIFICATES MAINTENANCE CERTIFICATE Fig. 13: Certification boxes, maintenance work Space for entries and additional work Maintenance manual T225/T230...
- Page 134 MAINTENANCE CERTIFICATES MAINTENANCE CERTIFICATE Fig. 14: Certification boxes, maintenance work Space for entries and additional work Maintenance manual T225/T230...
- Page 135 MAINTENANCE CERTIFICATES MAINTENANCE CERTIFICATE Fig. 15: Certification boxes, maintenance work Space for entries and additional work Maintenance manual T225/T230...
- Page 136 MAINTENANCE CERTIFICATES MAINTENANCE CERTIFICATE Fig. 16: Certification boxes, maintenance work Space for entries and additional work Maintenance manual T225/T230...
- Page 137 MAINTENANCE CERTIFICATES MAINTENANCE CERTIFICATE Fig. 17: Certification boxes, maintenance work Space for entries and additional work Maintenance manual T225/T230...
- Page 138 MAINTENANCE CERTIFICATES MAINTENANCE CERTIFICATE Fig. 18: Certification boxes, maintenance work Space for entries and additional work Maintenance manual T225/T230...
- Page 139 MAINTENANCE CERTIFICATES MAINTENANCE CERTIFICATE Fig. 19: Certification boxes, maintenance work Space for entries and additional work Maintenance manual T225/T230...
- Page 140 MAINTENANCE CERTIFICATES MAINTENANCE CERTIFICATE Fig. 20: Certification boxes, maintenance work Space for entries and additional work Maintenance manual T225/T230...
- Page 141 Compressed air tank Maintenance schedule Checking Motor 79, 80 Dewatering Motor bearings Compressor Motor oil Coolant Adding Oil dip stick Draining Cooler block Motor oil 68, 69, 71, 73 Transmission oil Bearings Oil filler nozzle Cooling system Motor oil Maintenance manual T225/T230...
- Page 142 Oil viewing window Operating materials Coolant Filling quantities Lubricating greases Oils Tilting driver's cab 67, 74 Transmission oil Tyres Vehicle battery Wheels Wheels 93...
Need help?
Do you have a question about the T225 and is the answer not in the manual?
Questions and answers