Daikin R32 Split Series Installation Manual
Hide thumbs
Also See for R32 Split Series:
- Installer's reference manual (120 pages) ,
- Operation manual (116 pages) ,
- User reference manual (52 pages)

Related Manuals for Daikin R32 Split Series


Summary of Contents for Daikin R32 Split Series
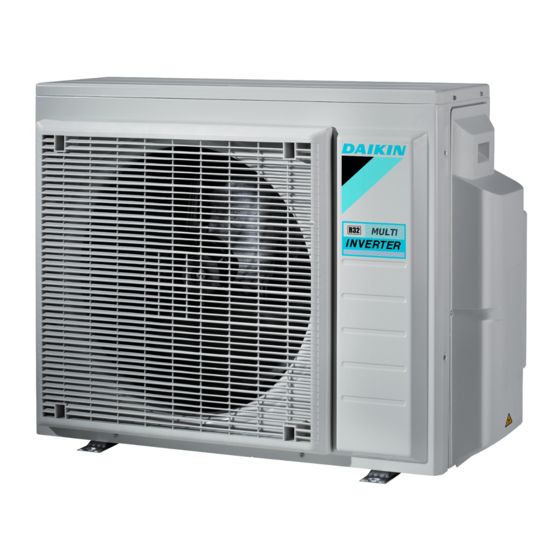
- Page 1 INSTALLATION MANUAL R32 Split Series Deutsch Français Nederlands Models Español 3MXM40N2V1B 3MXM52N2V1B Italiano 3AMXM52M3V1B 3MXM68N2V1B Ελληνικά 4MXM68N2V1B 4MXM80N2V1B Portugues 5MXM90N2V1B Русский Türkçe...
- Page 2 2P427092-11R...
- Page 3 2P427092-11R...
-
Page 4: Safety Precautions
Improper installation may result in water leakage, electric shocks or fire. • Only use accessories, optional equipment and spare parts made or approved by Daikin. Failure to use the specified parts may result in the unit falling, water leakage, electric shocks or fire. - Page 5 Safety precautions • After completing installation, check for refrigerant gas leakage. Toxic gas may be produced if the refrigerant gas leaks into the room and comes into contact with a source of fire, such as a fan heater, stove or cooker. •...
-
Page 6: Precautions For Selecting The Location
Accessories Accessories supplied with the outdoor unit: Installation Manual + R32 Manual Drain plug Reducer assembly It is on the bottom of the packing case. It is on the bottom of the packing case. Refrigerant charge label Screw bag (For fixing electrical wire anchor bands) It is on the bottom of the packing case. -
Page 7: Indoor/Outdoor Unit Installation Drawings
Indoor/outdoor unit installation drawings For installation of the indoor units, refer to the installation manual which was provided with the units. (The diagram shows a wall-mounted indoor unit.) CAUTION • Do not connect the embedded branch piping and the outdoor unit when only carrying out piping work without connecting the indoor unit in order to add another indoor unit later. -
Page 8: Installation
Installation • Install the unit horizontally. • The unit may be installed directly on a concrete verandah or a solid place if drainage is good. • If the vibration may possibly be transmitted to the building, use a vibration-proof rubber (field supply). Connections (connection port) Install the indoor unit according to the table below, which shows the relationship between the class of indoor unit and the corresponding port. -
Page 9: Precautions On Installation
Precautions on installation • Check the strength and level of the installation ground so that the unit will not cause any operating vibration or noise after installed. • In accordance with the foundation drawing in fix the unit securely by means of the foundation bolts. (Prepare 4 sets of M8 or M10 foundation bolts, nuts and washers each which are available on the market.) •... -
Page 10: Selecting A Location For Installation Of The Indoor Units
Selecting a location for installation of the Indoor units • The maximum allowable length of refrigerant piping, and the maximum allowable height difference between the outdoor and indoor units, are listed below. (The shorter the refrigerant piping, the better the performance. Connect so that the piping is as short as possible. Shortest allow- able length per room is 3m.) 3MXM52* Outdoor unit capacity class... -
Page 11: Refrigerant Piping Work
Refrigerant piping work Installing outdoor unit 1) When installing the outdoor unit, refer to “Precautions for Selecting the Location” on page 3 and the “Outdoor Unit Instal- lation Drawings” on page 4. 2) If drain work is necessary, follow the procedures below. Drain work Drain cap (1) Drain cap (2) - Page 12 Refrigerant piping work Evacuating the air with a vacuum pump and checking for gas leakage WARNING • Do not mix any substance other than the specified refrigerant (R32) into the refrigeration cycle. • When refrigerant gas leaks should occur, ventilate the room as soon and as much as possible. •...
-
Page 13: Charging Refrigerant
Refrigerant piping work Charging refrigerant 1) If the total length of piping for all rooms exceeds the figure listed below, additionally charge with 20g of refrigerant (R32) for each additional meter of piping. 3MXM40*, 3MXM52*, 3AMXM52*, 3MXM68*, Outdoor capacity class 4MXM68*, 4MXM80*, 5MXM90* Total length of piping for all rooms 30 m... -
Page 14: Flaring The Pipe End
Refrigerant piping work Refrigerant piping work Wall Be sure to place a cap. Cautions on pipe handling Rain If no flare cap is 1) Protect the open end of the pipe against dust and moisture. available, cover the flare mouth 2) All pipe bends should be as gentle as possible. -
Page 15: How To Use Reducers
How to use reducers No.1 No.2 No.3 No.4 No.5 No.6 Ø15.9 Ø12.7 Ø15.9 Ø12.7 Ø15.9 Ø15.9 → Ø12.7 → Ø9.5 → Ø12.7 → Ø9.5 → Ø9.5 → Ø9.5 Gasket (1) Gasket (2) Reduce and gasket Use the reducers supplied with the unit as described below. 1) Connecting a pipe of Ø12.7 to a gas pipe connection port for Ø15.9: No. -
Page 16: Pump Down Operation
Pump down operation In order to protect the environment, be sure to pump down when relocating or disposing of the unit. 1) Remove the valve cap from liquid stop valve and gas stop valve. Close 2) Carry out forced cooling operation. 3) After 5 to 10 minutes, close the liquid stop valve with a hexagonal wrench. - Page 17 Wiring WARNING • Do not use tapped wires, stranded wires, extension cords, or starburst connections, as they may cause overheating, electrical shock, or fire. • Do not use locally purchased electrical parts inside the product. (Do not branch the power for the drain pump, etc., from the ter- minal block.) Doing so may cause electric shock or fire.
- Page 18 Wiring CAUTION • Precautions to be taken for power supply wiring. When using Round crimp-style stranded wires, make sure to use the round crimp-style terminal terminal Stranded for connection to the power supply terminal wire Flat washer Screw Screw Screw Round crimp- Flat washer style terminal...
- Page 19 Wiring Unified Wiring Diagram Legend For applied parts and numbering, refer to the wiring diagram on the unit. Part numbering is by Arabic numbers in ascending order for each part and is represented in the overview below by symbol “*” in the part code. CIRCUIT BREAKER PROTECTIVE EARTH CONNECTION...
-
Page 20: Standby Electricity Saving
Standby electricity saving 3MXM40*, 3MXM52*, 3AMXM52* only The standby electricity saving function turns off power supply to the outdoor unit and sets the indoor unit into standby electricity saving mode, thus reducing the power consumption of the air conditioner. The standby electricity saving function works on the following indoor unit. For FTXM, FTXP, FTXJ, FVXM type CAUTION •... -
Page 21: Priority Room Setting
Priority room setting • To use priority room setting, initial settings must be made when the unit is installed. Explain the priority room setting, as described below, to the customer, and confirm whether or not the customer wants to use priority room setting. Setting it in the guest and living rooms is convenient. -
Page 22: Night Quiet Mode Setting
Night quiet mode setting • If Night Quiet Mode is to be used, initial settings must be made when the unit is installed. Explain Night Quiet Mode, as described below, to the customer, and confirm whether or not the customer wants to use Night Quiet Mode. About Night Quiet Mode The Night Quiet Mode function reduces operating noise of the outdoor unit at nighttime. -
Page 23: Trial Operation And Testing
Trial operation and testing • For the DHW generator for Multi or the Hybrid for Multi certain precautions shall be taken before this function is allowed to be used or activated. For detailed information see the indoor installation manual. • Before starting the test run, measure the voltage at the primary side of the safety breaker. •... - Page 24 Trial operation and testing Product diagnosis procedure NOTE: 1)Turn the power OFF and then ON again if the LED display recurs, the outdoor PCB is faulty. 2)Diagnosis marked * may not apply to some cases. For details refer to the service guide. 3)Do NOT touch terminal strip and PCB assy.
-
Page 25: Items To Check
Trial operation and testing Trial operation and testing 1) To test cooling, set for the lowest temperature. To test heating, set for the highest temperature. (Depending on the room temperature, only heating or cooling (but not both) may be possible.) 2) After the unit is stopped, it will not start again (heating or cooling) for approximately 3 minutes. -
Page 26: Piping Diagram
Piping diagram Piping diagram for 3MXM40+52N2V1B, 3AMXM52M3V1B Outdoor Unit Electronic expansion valve Heat exchanger Outdoor air temperature thermistor Thermistor (liquid) Filter Refnet header 7.9CuT 7.9CuT 6.4CuT Room A 7.9CuT (6.4CuT) Field piping Heat exchanger thermistor Liquid 7.9CuT 12.7CuT 7.9CuT 6.4CuT 7.9CuT Muffler with filter Room B... - Page 27 Piping diagram Piping diagram for 4MXM68N2V1B Outdoor Unit Electronic expansion valve Heat exchanger Outdoor air temperature thermistor Thermistor (liquid) Filter Refnet header 7.9CuT 7.9CuT 6.4CuT Room 7.9CuT (6.4CuT) Field piping Heat exchanger thermistor Liquid 7.9CuT 12.7CuT 7.9CuT 7.9CuT 6.4CuT Room 9.5CuT (6.4CuT) 7.9CuT...
- Page 28 Piping diagram Piping diagram for 5MXM90N2V1B Outdoor Unit Electronic expansion valve Outdoor air temperature thermistor 7.9CuT Thermistor (liquid) Filter Heat exchanger 7.9CuT 7.9CuT 6.4CuT Liquid receiver Room 9.5CuT (6.4CuT) 7.9CuT Field piping 9.5CuT Liquid 7.9CuT 6.4CuT Distributor 7.9CuT Room (6.4CuT) 7.9CuT Heat exchanger Liquid receiver...
- Page 30 3P417620-3N 2019.06...
Need help?
Do you have a question about the R32 Split Series and is the answer not in the manual?
Questions and answers