Table of Contents
Advertisement
Quick Links
Advertisement
Table of Contents

Related Manuals for FPM Agromehanika 408 D

Summary of Contents for FPM Agromehanika 408 D
- Page 1 FPM 408 D MOTOCULTIVATOR FPM 410 DS FPM 414 DS FPM 414 DE № 42681 12.2010 INSTALLATION/HANDLING/MAINTENANCE LIST OF SPARE PARTS e-mail: razvoj @ fpm-agromehanika.rs Internet: www.fpm-agromehanika.rs info @ fpm-agromehanika.rs fpmbolj@ eunet.rs Serbia...
- Page 2 MOTOCULTIVATOR FPM 410DS/414DS/414DE IS MANUFACTURED BY: FPM AGROMEHANIKA AD BOLJEVAC. The FPM 4410DS / 414DS / 414DE motocultivator as a traction machine for agriculture and transport and meets the criteria prescribed by the Machinery Safety Regulation ("Official Gazette of the Republic of Serbia", No.
-
Page 3: Table Of Contents
Issued by: FPM AGROMEHANIKA AD Boljevac Print: Year: 12. 2010. № 42681 content TABULAR OVERVIEW PAGE GROUP OF PARTS Safety warning Limited warranty Introduction 7 - 8 Safety Technical data Movement speed of the motocultivator 11 - 12 Marks of the most important parts of the motocultivator... -
Page 4: Limited Warranty
Safety of Machines ("Official Gazette of the Republic of Serbia", No. 13/2010) for each original piece of the motocultivator delivered to the user by the sales network FPM Agromehanika AD Boljevac, which guarantees at the time of delivery, that every part of the motocultivator is new, free of material defects,... -
Page 5: Introduction
user, provided that the machine is used and serviced in accordance with the recommendations in this INSTRUCTION MANUAL for maintenance and handling. EXCEPTIONS: 1.Parts not manufactured by FPM Boljevac (tires, plastics, belts, etc.) are not covered by this warranty, but by the manufacturer's warranty. 2. -
Page 6: Safety
movement) and a lower shaft with an independent speed of 818 min-1 at 3000 engine rotations, which allows each work to be performed with the most economical speed. The universal gearbox can be used to aggregate gamma connection devices as follows: - transmission with rotors - universal connection for connection: - plough... - Page 7 - Persons under the age of 16 shall not be allowed to operate the motocultivator. - Before starting the engine, make sure that the lever for changing the gear is in stand by. - Every time before using the motocultivator, check that all parts (nuts, bolts and other) are sufficiently tightened.
-
Page 8: Technical Data
YOU MUST NEVER NEGLECT THESE WARNINGS WARNING: THIS SYMBOL IN A TRIANGLE SHAPE IS USED IN EVERY CASE WHERE YOUR SAFETY IS NECESSARY, AS WELL AS SAFETY OF OTHER PERSONS, AND IN ORDER FOR YOUR MOWER TO BE PROTECTED FROM RISK. REMEMBER TO READ WARNING WHEN YOU SEE THESE SIGNS. -
Page 9: Movement Speed Of The Motocultivator
- connector for trailer - universal connector for attachment of the tools - claws for wheels B – For diesel engine - Manufacturer and type "21 MAJ" Belgrade 3DM 515 3 LD 450 - Cooling - Type diesel diesel - Number of cylinders - Broj taktova - Number of tactics 3000 min... -
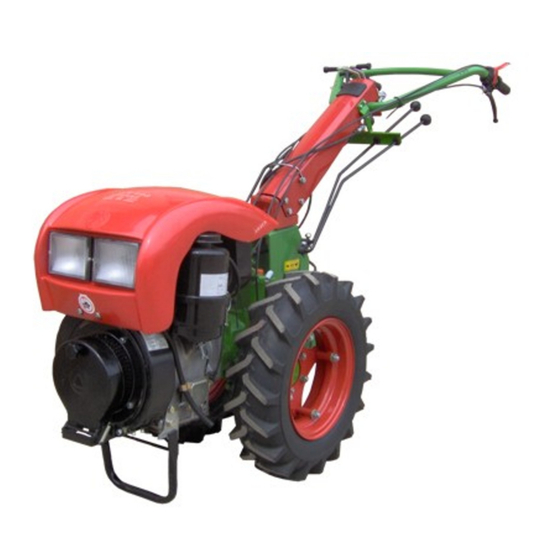
Page 10: Marks Of The Most Important Parts Of The Motocultivator
1-slow travel 1.32 818 min 1- fast travel 2.71 4.136 min for 3000 min 2-slow travel 3.41 one rotation of engine 2-fast travel 7.12 the axle point rotations 17.81 TRAVEL - BACKWARD 1.63 LEFT RIGHT R slow travel 4.16 R fast travel B) - Položaj stuba upravljača je takav da je motor nazad (posmatrano u smeru vožnje) TRANSMISSION DEGREE... - Page 11 Picture 1 1. Mask 2. Fuel tank 3. Safety device "MOTOR STOP" 4. Clutch control knob 5. Lever for slow-speed travel 6. Steering wheel column 7. Flange point 8. Point and half-link connection nut 9. Rubber wheel 5.00 - 12 " 10.
- Page 12 1. Intermediate-expander point (additional optional equipment) 2. Flanges of wheels 3. Clutch cable (clutch) 4. Upper synchronous shaft lever (caravan) 5. Dust brake 6. Oil scrubbing plug 7. Steering wheel fixing bolt Picture 3 1. Wheel brakes 2. Speed limiter 3. Differential blocker 4.
-
Page 13: Description Of The Most Important Parts Of The Motocultivator
DESCRIPTION OF THE MOST IMPORTANT PARTS OF THE MOTOCULTIVATOR Before starting work with the motocultivator, it is necessary for the operator to get acquainted with the motocultivator, that is, the engine, the schedule of the controls, the manner of their use and the manner of handling and maintenance. - Page 14 COUPLING (CLUTCH) OF THE ENGINE The motocultivator has two lamellar dry clutch, which allows a soft (no-fault) operation to be removed from the site. The actuation of this clutch is achieved through the engine clutch lever (Pic. 4, Number 9 on page 12) on the left side of the handles of the steering wheel, and over the wire rope - the cable that can be adjusted at the handle.
- Page 15 TRANSMISSION DEGREE CHANGE Transmission rates: 1 - R - 2 - 3 can be switched on and off via the gear shift lever (page 15, position 1, Picture 7) located on the right of the steering wheel when the steering column is such that the engine is ADVANCED.
- Page 16 Switching the gearbox from the "fast travel" movement to the "slow travel" movement is achieved through the lever (see Picture 8, Position A). When the steering column is such that the engine is FORWARD (as in Picture 7), pull the lever forward for slow travel, and when the lever is pulled back, "fast travel"...
- Page 17 The drive shaft is independent of the gear and rotates from the rear of the machine when moving forward (see "A" on page 10) to the right (or see Picture 7, with the label on page 15). The shaft rotation speed is 818 min-1. If the steering column rotates by 180º, so that the engine is in the rear when viewed in the direction of travel, then the pivot shaft from the rear of the machine turns to the left.
- Page 18 The motocultivator machine is equipped with a wheel blocker, i.e. each wheel can be specifically disconnected from the drive. This is important when turning the machine. Activating the blocker is achieved via the wheel blocker (see Pic. 11, item A). A few important notes: a) - If the lever is released, pulled forward, (indicated by the arrow in Picture 11b), then both of the drive...
- Page 19 CAUTION: We recommend that when you need to adjust the brake cables for the first time, your FPM AGROMEHANIKA AD Boljevac service provider should explain and show the correct adjustment of the cables. TURNING THE COLUMN OF THE STEERING WHEEL...
- Page 20 downwards releases the tooth on the steering wheel from its tray, the steering wheel moves to the desired position. Then return the lever (item 1, Pic. 14) to the original position and the steering wheel is blocked. IMPORTANT: You can adjust height in 6 different positions.
-
Page 21: Handling The Motocultivator
WARNING: Both sides of the wheels on the rims of the wheels are used to fasten additional weights for the wheels (see Pic. 16, item A). INSTALLING THE CLAWS The claws are pushed into the weights of the wheels (see Picture 16, item B) and fastened with screws (Pic. - Page 22 - Is the engine oil level within the prescribed limits - filled to the predicted notches on the meter stack. - Is there enough oil in the transmission - Is there enough oil in the oil purifier oil tank and according to the label on the container. - Whether the cooling system, the ribs on the head and the engine block are clean.
-
Page 23: Starting The Engine
grounding masses and then it will stop. a) START POSITION - Press the safety lever (Pic. 19, pos.1) and start the clutch lever (Pic. 19, Item 3), and lock with the locking device (Pic. 19, Item 4). b) OPERATING POSITION - For operation with the cultivator, the safety lever (Pic. - Page 24 sharply pull the rope to start in the direction of the arrow displayed on the belt If the engine does not start immediately, try again When the engine starts, leave it to work for about 5 minutes at a lower speed to ensure the necessary lubrication the motocultivator is ready to work Picture 21...
- Page 25 After you have done all the preparations for starting the engine described on pages 22 and 23, you can start the engine. In order for the engine to start easily, it is necessary: The gas handle (fig. 20.1) is positioned between ½ and max. gas.
- Page 26 them well, tighten them tightly on the poles of the battery and lubricate them with technical vaseline (no other lubricant can be used). When removing the battery, first remove the clamp of the negative pole (connected to the ground) and then the clamp of the positive pole. When placing the battery, first connect the clamp of the positive pole, then connect the terminal pole - ground terminal.
- Page 27 NOTE ELECTRIC INSTALLATION SCHEME FOR MOTOCULTIVATOR FPM 414 DE WITH ELECTRIC POWER MACHINE: 1. Mass 2. Battery 3. Electric starter 4. Voltage regulator 5. Oil pressure gauge 6. Alternator 7. Headlamps 8. Main switch with key (Contact lock) 9. Start switch 10.
-
Page 28: Care And Maintenance Of The Motocultivator
NOTE: YOU CANNOT CHANGE THE TRANSMISSION DEGREE DURING DRIVING. CHANGING TRANSMISSION DEGREE IS ONLY POSSIBLE WHEN THE MACHINE IS NOT MOVING. ENGINE STOPPING - Set the gas command to a minimum. - Allow the engine to run for about 5 minutes (to cool the engine) and thus prevent the injection nozzle from burning. - Page 29 1.- If you do not use the motocultivator for a longer period, clean it thoroughly. 2.- The machine should be washed after cleaning. 3.- Release the oil from the gearbox and the engine and then fill it with clean oil to the proper level.
- Page 30 Figure 29a Picture 29 Picture 29b For safe driving with a trailer, the following necessary: a) - 1 pair of drive rubber wheels with tires 5.00x12 " b) - 1 pair of wheel extensors, Art. number 501 93 110 c) - 1 pair of extra weights for wheels, art. number 501 93 111 d) - trailer for articulated trailer.
- Page 31 a) - pull the clutch lever handle, adjust the gas b) - Turn on the transfer rate c) slowly release the engine clutch lever, and at the same time add the gas 5. - Stopping. a) - pull the clutch lever handle, adjust the gas b) - set the transmitter lever to position "0"...
- Page 32 5. - FPM Boljevac does not guarantee the characteristics and safety of the trailers of other manufacturers. CARE AND MAINTENANCE OF THE TRAILER 1. Lubrication On the trailer, the following parts are lubricated: - Drive shaft with LUMA 2 lubricant, repeatedly during the season, and after two years completely replace all the lubrication.
- Page 33 NOTE - If you have purchased the drive part of the rotary mower with tin as one assembly unit art. no. FPM 802 245 then you do not need circuits listed under a) and b). INSTALLATION 1. Position the steering column position in such a way that the engine is FORWARD, viewed in the direction of travel.
- Page 34 WARNING: If the lever does not respond, do not move forward, then gently lower the clutch lever with a slight pressure on the lever so that the coupling teeth engage the teeth on the rotary mower shaft. Always press the lever to turn it on. 5.
- Page 35 2. Install the cover on the rear of the machine (on the flange of the output shaft). PLOUGHING For this purpose, you need the following connecting devices: a) - 1 plough with special attachment piece art. number FPM 803 249 b) - universal connector for the motocultivator art.
- Page 36 art. number FPM 803 250. b) - Universal plug for the cultivator art. number FPM 804 228. c) - 1 pair of wheel extensors art. number 501 93 110. d) - 1 pair of extra weights for the wheels, art. number 501 93 111. e) - 1 pair of claw sets art.
- Page 37 7. Connect the potato machine to the body of the universal connector. WORK 1 - 5. As with regular ploughing (page 32 - 33) 1. During the first meters of working with the machine, adjust the working depth of the potato machine.
- Page 38 art. number FPM 804 131 - working grasp 1.05 m, or art. number FPM 804 129 - working grasp 1.30 art. number FPM 804 130 - working grasp 1.60 c) - 1 pair of wheel extensors art. number 501 93 110 INSTALLATION 1.
- Page 39 3. Release the engine clutch handle slowly and simultaneously add the gas. 4. When turning, use the locking lever arm (see description on page 18). 5. For stand by, R1 or R2 can be switched on. When you finish mowing, or if the mower is jammed, the gear change lever is set to "0". In doing so, the cultivator stands in place, and the cutting mower is still moving.
- Page 40 1. Place the shift lever in position "0" for safety, and set the "slow-fast" travel to position "0". 2. Connect the suction line. Pre-check the functioning of the valve at the bottom by starting the suction hose in the water up - down.
- Page 41 502 20 060 FPM 804 130 FPM 803 249 FPM 804 146 FPM 803 250 FPM 804 239 FPM 805 159 FPM 805 254 FPM 808 256 FPM 807 232 FPM 808 257 FPM 807 248 FPM 805 252 FPM 804 238...
- Page 42 FPM 805 229 FPM 805 160 FPM 807 167 strana 42...
- Page 43 Form 1 FPM AGROMEHANIKA AD BOLJEVAC No: 1162 2003 CERTIFICATE OCCUPATIONAL SAFETY MEASURES ON THE MOTOCULTIVATOR WERE APPLIED Type, series and purpose: Motocultivator FPM 408D / FPM 410DS / FPM 414DS / FPM 414DE, agricultural activity Year of manuf.: 2003 Technical data: Power of 7.30KW (according to DIN 70020) at 3000 min-1, single cylinder...
-
Page 44: List Of Spare Parts
DECLARATION OF CONFORMITY 98/37/CE We hereby declare, within our responsibility, that the product Type: Motocultivator Model: FPM 408D (5.5 KW - 7.5 HP) FPM 410DS (7.3 KW - 10 hp) FPM 414DS / DE (9.2 KW - 12.5 hp) `Year of manufacture: 2003 in accordance with the safety requirements established by European Directive 98/37 / CE. - Page 45 Strength (thickness) Package of parts & components For vineyard tractors For tractors cat. 1 Replaced by one or multiple parts For tractors cat. 2 Pad thickness For tractors cat. 3 Pad thickness to reduce gap FPM AGROMEHANIKA AD BOLJEVAC strana 44...
- Page 46 GEAR BOX IDENTIFICATION NUMBER FOR ORDERING 501 31 009 R1/2" 501 30 935 501 30 990 000 10 691 6x30 501 31 016 12x3,5 000 40 195 501 31 047 18,5x25,5x1 501 31 038 18,5x25,5x0,4 501 30 998 501 31 021 M18x1,5 501 31 023 8,5x26,5x1,5...
- Page 47 GEAR BOX IDENTIFICATION NUMBER FOR ORDERING 501 31 020 501 30 905 501 31 060 501 31 043 14x20x0,2 501 30 931 000 00 070 000 41 634 35x52x8,5 501 30 887 000 00 078 4x18 502 20 021 M12x1,5x67 501 31 035 1620-P20 501 31 063...
- Page 48 CLUTCH LEVER IDENTIFICATION NUMBER FOR ORDERING 501 31 018 501 30 903 000 00 080 5X24 000 09 863 M8X30 000 00 070 000 19 480 17x28x7 000 07 519 6303 2Z 501 31 007 501 30 040 48x54,5x1 501 30 041 48x54,5x0,4 501 30 042 48x54,5 0,2...
- Page 49 COVER SYNCHRONIZED P.T.O for FPM 410D/414D IDENTIFICATION NUMBER FOR ORDERING 000 02 208 501 31 010 10,5x30x5 501 30 979 501 30 981 000 40 169 15x22x7 501 31 036 15x20x15 501 31 001 501 30 986 000 02 664 4x24 501 31 013 M18,5x24...
- Page 50 COVER SYNCHRONIZED P.T.O for FPM 410D/414D IDENTIFICATION NUMBER FOR ORDERING 501 31 008 501 31 031 25x28x25 810 02 124 25x34,5x0,2 810 02 125 25x34,5x0,4 501 31 207 25x34x4,5 501 30 945 Z = 21/37...
- Page 51 DIFFERENTIAL AND AXLES IDENTIFICATION NUMBER FOR ORDERING 501 30 915 000 41 635 40X55X10 000 00 060 000 00 070 000 09 896 000 07 412 6006 501 30 938 000 05 578 501 30 929 501 31 050 51,5x61,5x0,2 501 31 051 51,5x61,5x0,4 501 31 052...
- Page 52 BRAKES IDENTIFICATION NUMBER FOR ORDERING 501 30 915 501 93 119 501 93 134 000 00 070 000 29 157 M8x15 501 31 054 501 93 107 501 93 108...
- Page 53 ENGINE JOINT AND CLUTCH HOUSING IDENTIFICATION NUMBER FOR ORDERING 501 40 032 000 10 622 000 29 776 M8x25 000 00 060 501 31 070 501 40 043 000 04 217 M8x25 501 40 037 6300 2RS 501 40 039 000 39 028 000 29 630 M5x10...
- Page 54 HANDLE LOCKER IDENTIFICATION NUMBER FOR ORDERING 000 29 365 M12X30 000 00 062 501 50 816 501 51 004 Zam. 3 501 50 835 000 00 080 Ø5x24 000 05 808 AM8x1 501 50 836 501 50 840 000 00 070 000 04 738 M8x20 501 50 901...
- Page 55 POWER SUPPLIER IDENTIFICATION NUMBER FOR ORDERING 501 50 865 000 05 278 6X18 000 02 466 3,2X20 501 50 942 000 18 524 M5X15 501 50 946 501 50 857 501 51 013 505 05 201 000 09 535 501 50 864 501 51 881 501 51 882 000 04 636...
- Page 56 HANDLES IDENTIFICATION NUMBER FOR ORDERING 000 29 630 M5x10 501 50 856 501 50 857 000 09 535 501 50 864 501 50 879 000 18 524 M5x15 501 50 946 000 00 080 Ø5x24 501 50 943 501 50 880 000 02 444 501 50 883 501 50 867...
- Page 57 HANDLES IDENTIFICATION NUMBER FOR ORDERING 501 50 850 505 05 711 501 50 937 501 50 884 501 50 878 805 41 037 501 50 945...
- Page 58 ENGINE FLOOR, MOTOCULTIVATOR SUPPORT IDENTIFICATION NUMBER FOR ORDERING WITH NO LIGHTING 000 05 347 M8x20 000 00 070 000 00 060 502 00 475 501 50 941 501 50 934 000 29 384 M5x25 502 00 333 000 04 603 000 04 602 000 04 636 M10x20...
- Page 59 ELECTRICAL SET for FPM 414DE IDENTIFICATION NUMBER FOR ORDERING 000 04 330 000 19 099 501 51 037 501 80 650 501 80 660 000 00 060 000 10 622 501 51 038 000 38 065 12V-45Ah 501 51 034 000 02 919 501 50 945 000 18 524...
- Page 60 ADAPTER, WHEELS IDENTIFICATION NUMBER FOR ORDERING 000 05 340 000 00 067 501 93 101 501 93 102 5.00-12 501 93 099 000 29 213 M14x80 501 93 095 533 01 407 000 00 072...
- Page 61 TOOLS IDENTIFICATION NUMBER FOR ORDERING 000 37 614 19 - 17 000 37 615 13 - 14 000 37 616 19 - 22 505 13 110 000 40 651 000 35 848 M8x40 000 11 224...
- Page 62 WHEEL WIDENERS, WHEEL WEIGHTS. WHEEL CLAWS IDENTIFICATION NUMBER FOR ORDERING 501 93 091 612 01 587 000 00 072 533 01 407 501 93 110 1 > 4 501 93 111 000 29 775 501 93 147 6 > 7 501 93 112 000 29 760 M16x40...
- Page 63 CONNECTION FOR THE TRAILER IDENTIFICATION NUMBER FOR ORDERING 502 20 032 502 20 022 501 10 578 627 10 472 000 05 727 4X25 000 10 078 M10X30 000 09 875 M10x40 000 10 679 000 29 393 M10x120 501 93 126 1 >...
- Page 64 UNIVERSAL CONNECTOR IDENTIFICATION NUMBER FOR ORDERING 804 91 296 804 91 308 000 05 346 M12X40 000 00 066 000 00 062 627 12 857 000 00 073 4x30 627 10 472 000 18 918 M12x35 804 92 004 627 12 607 000 10 078 M10x30 000 10 679...
- Page 66 FOR YOUR OWN SAFETY AND TO OBTAIN THE BEST FROM YOUR MOWER, USE ONLY ORIGINAL PARTS PRODUCED BY FPM AGROMEHANIKA AD BOLJEVAC FPM AGROMEHANIKA AD 19370 Boljevac, 25 Đorđa Simeonovića St. TELI: Sales: 030/63 455; 030/63 356 Service: 030/63 619...
Need help?
Do you have a question about the 408 D and is the answer not in the manual?
Questions and answers