Advertisement
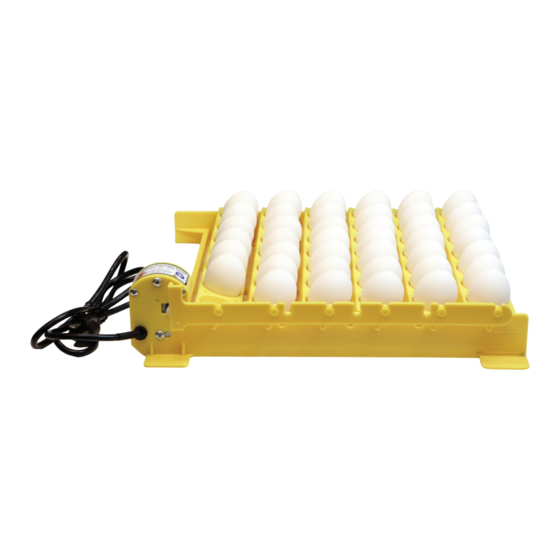
HOVA-BATOR AUTOMATIC TURNER
AUTOMATIC EGG TURNING - place turner in the bottom of
Hova-Bator incubator. Be sure the turner sits flat on the wire floor.
The electric cord of the turner will exit the incubator through
matching notches in the top and bottom of the incubator.
Replace the top of the Hova-Bator on the bottom, making
sure that the notches in the corners line up. Check to see that
the power cord to the turner does not prevent the two halves of
the Hova-Bator from closing properly.
On 240 Volt models, attach the plug required by your country.
All units must be connected to a grounded (earthed) outlet via a 3 prong grounded male plug.
NOTE: THIS TURNER RUNS VERY SLOWLY, PRODUCING ONE REVOLUTION IN 4 HOURS
1. Place the egg racks in the correct slot in
the turner frame
3. Line the egg racks up with the correct
slot in the connecting bar. Starting at one
end, press firmly to snap the rack into the
connecting bar
CHANGING EGG RACKS
TO DISASSEMBLE REVERSE THESE STEPS
2. Turn the rack on its side
4. Once all racks are snapped firmly into
the connecting bar, line the connecting
bar (slot) up with the (white) swing arm
on the turner motor. Press the connecting
bar firmly so that it "snaps" onto the (white)
swing arm of the turner motor.
Advertisement
Table of Contents

Related Manuals for G.Q.F. HOVA-BATOR

Summary of Contents for G.Q.F. HOVA-BATOR
- Page 1 HOVA-BATOR AUTOMATIC TURNER AUTOMATIC EGG TURNING - place turner in the bottom of Hova-Bator incubator. Be sure the turner sits flat on the wire floor. The electric cord of the turner will exit the incubator through matching notches in the top and bottom of the incubator.
- Page 2 Quail & Chicken Rack Layout CLEANING The turner may be cleaned of feather dust and hatching debris with a damp cloth and mild soap. Finish with a wipe or spray of a mild disinfectant. Plastic egg racks are machine washable. Do not wet down or spray electrical cord or motor.
Need help?
Do you have a question about the HOVA-BATOR and is the answer not in the manual?
Questions and answers