
Subscribe to Our Youtube Channel
Related Manuals for MD SPORTS 1651610


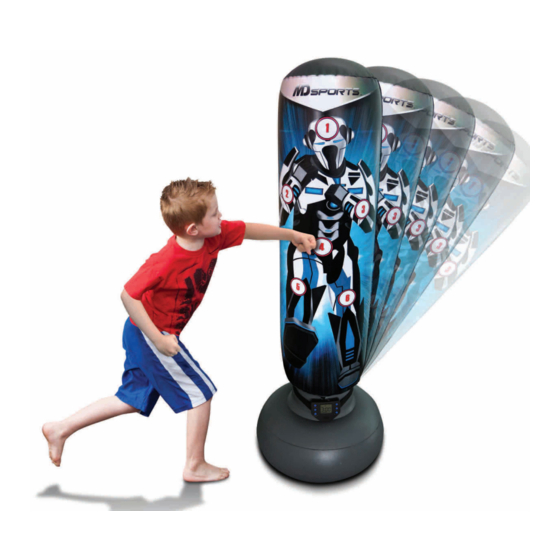
Summary of Contents for MD SPORTS 1651610
- Page 1 MODEL: 1651610 Blain's ASSEMBLY INSTRUCTIONS ATTENTION DO NOT RETURN TO THE STORE Contact MD Sports Customer Service * For additional resources and Frequently Ask Questions, please visit us at themdsports.com...
- Page 2 1 - Please leave your name, address, phone number, model number, parts needed on the answering machine if there is no attendant. Failure to do so will result in a delay in shipping parts to you. (Continued on the next page.) www.themdsports.com 1651610...
- Page 3 WARNING: Adult Assembly Required. WARNING: No Children in Keep away from pets Do not use or keep product outdoors. For indoor use only. Assembly Area No wet/humid conditions. (Continued on the next page.) www.themdsports.com 1651610...
- Page 4 3. Tear off the paper on the back of the vinyl patch. 4. Stick the vinyl patch firmly over the hole. 5. Do not inflate the product until the vinyl patch has been fixed in place for at least 20 minutes (Continued on the next page.) www.themdsports.com 1651610...
- Page 5 1651610 PARTS LIST Inflatable bag with sensors Vinyl Patch LCD control box with belt 1651610 PRE-INSTALLED PARTS Inlet Cap Inlet Cover Note: 1. Heavy duty inflatable bag with sensors (#1) is not available as a replacement part. ASSEMBLY INSTRUCTIONS: FIG. 1...
- Page 6 LCD control box. electronic wire electronic wire control box control box ON/OFF RESET DOWN VOLUME/SOUND ENTER/SELECT ON/OFF FIG. 3 3. Fasten the LCD control box on the neck. See FIG.3 . (Continued on the next page.) 1651610...
- Page 7 8. Press UP or DOWN to choose the time limit, from 1 to 5 minutes. The default is 3 minutes. 9. Press SELECT/ENTER. 10. The game begins after a 5 second countdown. 11. After each successful hit, the relevant light will flash. (Continued on the next page.) 1651610...
- Page 8 Operation is subject to the following two conditions : (1) This device may not cause harmful interference, (2) This device must accept any interference received, including interference that may cause undesired operation. YOU ARE NOW READY TO PLAY! (The last page) 1651610...
Need help?
Do you have a question about the 1651610 and is the answer not in the manual?
Questions and answers