Table of Contents
Advertisement
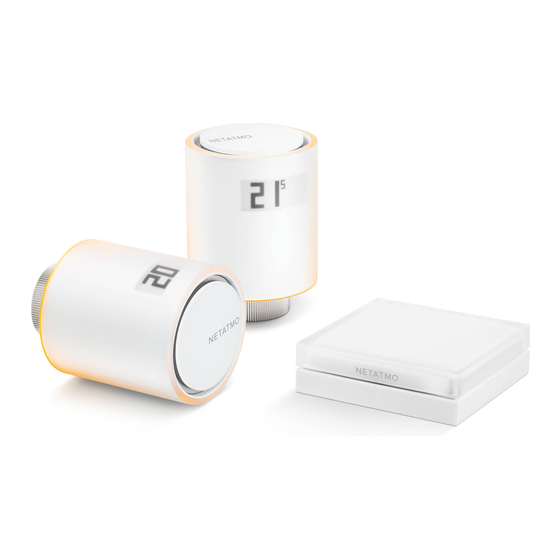
Starter Pack - Smart
Radiator Valves
EN Quick installation guide | Starter Pack - Smart Radiator Valves
FR Guide d'installation | Starter Pack - Têtes Thermostatiques Intelligentes
DE Installationsanleitung | Smarte Heizkörperthermostate Starterpaket
ES Guía de instalación | Starter Pack - Válvulas Inteligentes para Radiador
IT Guida all'installazione | Starter Pack - Valvole Termostatiche Intelligenti
PT Manual de instalação rápida | Starter Pack - Cabeças Termostáticas Inteligentes
Advertisement
Table of Contents

Subscribe to Our Youtube Channel
Related Manuals for Netatmo Starter Pack


Summary of Contents for Netatmo Starter Pack
- Page 1 FR Guide d’installation | Starter Pack - Têtes Thermostatiques Intelligentes DE Installationsanleitung | Smarte Heizkörperthermostate Starterpaket ES Guía de instalación | Starter Pack - Válvulas Inteligentes para Radiador IT Guida all’installazione | Starter Pack - Valvole Termostatiche Intelligenti PT Manual de instalação rápida | Starter Pack - Cabeças Termostáticas Inteligentes...
- Page 2 Tutorial-Video zur Installation online anschauen: Puedes ver un tutorial de instalación en línea en la siguiente dirección: Puoi guardare online un video tutorial sull’installa- zione al seguente indirizzo: Pode ver um vídeo online que explica o proces- so de instalação, no seguinte endereço https://starterpack.netatmo.com...
- Page 3 Lee atentamente estas instrucciones antes de empezar Read these instructions carefully before starting the installation. The Starter Pack is for indoor use only and must be protected la instalación. El Starter Pack es solo para uso interior y debe protegerse de la humedad y el polvo, from damp and dust as well as solar radiation.
- Page 4 (como una caldera) the Additional Smart Radiator Valves directly. conectado a un Termostato Netatmo, compra directamente If you already own a central thermostat, first buy a Netatmo Smart las Válvulas Inteligentes Adicionales para Radiador. Thermostat then Additional Smart Radiator Valves.
- Page 5 1. Duas Cabeças Termostáticas 4. Um adaptador de setor Inteligentes Netatmo para para o Relé. Radiadores 5. Dois conjuntos de quatro películas M28x1 Giacomini Danfoss RA 2. Um Relé Netatmo adesivas coloridas M30x1.5 Vaillant M28x1.5 M30x1 M30x1.5 Pettinaroli Danfoss RAVL Danfoss RAV 3.
- Page 6 Le valvole termostatiche (generalmente dotate di scala graduata them as they are or call a professional to replace them. da 1 a 5) possono essere facilmente sostituite con la Valvola Netatmo. Nota: se l’installazione è dotata anche di valvole manuali, è possibile lasciarle oppure chiamare un tecnico specializzato per sostituirle.
- Page 7 Prima di inserire le batterie nelle Valvole, scaricare l’applicazione mobile Energy Netatmo. Per scoprire come controllare a distanza le Valvole Netatmo dal tuo smartphone o tablet, vai su: Antes de inserir as baterias, descarregue a aplicação móvel.
- Page 8 The Relay Relay 1. Connect the power plug to the Relay. 2. Plug the Relay in a central location in your home to ensure connection to all Valves. 3. The light on the Relay blinks. Relais 1. Connectez l’adaptateur secteur sur le Relais. 2.
- Page 9 Follow the steps below, only when required in the application Batteries 1. Open the front panel of the Valve using a small anti-clockwise rotation. 2. Open the metal battery cover. 3. Insert the batteries ensuring the positive and negative ends correspond. 4.
- Page 10 Customisation Customisation You can customise each Valve using one of the colour adhesives provided. Personnalisation Vous pouvez personnaliser chaque Tête avec l’un des films adhésifs de couleur fournis. Individuelle Gestaltung Sie können jedem Smarten Heizkörperthermostat mit einem der mitgelieferten Farbaufkleber eine individuelle Note verleihen. Personalización Puedes personalizar cada Válvula utilizando uno de los adhesivos de color suministrados.
-
Page 11: Installation
Installation Removing the old valve Rotate the valve counter-clockwise to remove it from the radiator (1). Unscrew the securing ring (2) and remove the valve. Retirer l’ancienne tête Tournez la tête dans le sens inverse des aiguilles d’une montre pour pouvoir la retirer plus facilement du radiateur (1). Dévissez la bague de fixation (2) et retirez la tête. - Page 12 M30x1 M30 x 1.5 M30 x 1 lo strumento di compatibilità Netatmo online su: Use o Guia de seleção de adaptadores incluído para escolher o anel adaptador adequado ao seu radiador. Para uma maior facilidade, pode utilizar a nossa ferramenta de compatibilidade online, em: https://check.netatmo.com...
-
Page 13: Valve Installation
Do not use a wrench. Installation de la Tête Vissez l’adaptateur (1) qui convient sur le robinet du radiateur. Puis vissez la Tête Netatmo sur l’adaptateur (2) en orientant l’écran dans le sens qui convient. Ne pas utiliser de pince. Installation des Heizkörperthermostats Schrauben Sie den Adapter (1) auf den Anschluss des Heizkörpers. - Page 14 Test The display shows the room temperature (1). To increase/ decrease the temperature setpoint on the Valve, twist the cylinder clockwise/anticlockwise. The manual setpoint is temporarily displayed on a black background (2). L’écran affiche en permanence la température ambiante de la pièce (1). Pour augmenter/diminuer la température de consigne sur la Tête, tournez légèrement le cylindre extérieur vers la droite ou la gauche.
-
Page 15: Installation Advice
Installation advice Installation advice Do not block air ventilation next to the Valve (curtain, radiator cover…) Do not cover. Conseils d’installation Veillez à ne pas empêcher la circulation d’air à proximité de la Vanne (rideau, tablette de radiateur…) Ne pas couvrir. Tipps für die Installation Sorgen Sie dafür, dass die Luft in der Nähe des Heizkörperthermostat frei zirkulieren kann und nicht durch Vorhänge, Heizungsabdeckungen oder... -
Page 16: Technical Specification
Technical specification ENGLISH SIZE FREE APP, LIFETIME SUPPORT HOMEKIT Any changes or modifications to this unit not Controlling this HomeKit-enabled accessory expressly approved by the party responsible Valve: 58 mm (diameter), 80 mm (L) No subscription fee. App available on the App automatically and away from home requires for compliance could void the user’s authority Relay: 83 x 83 x 24 mm... -
Page 17: Caractéristiques Techniques
Caractéristiques techniques FRANÇAIS DIMENSIONS APPLICATION GRATUITE, À VIE HOMEKIT Tout changement ou toute modification non Tête : 58 mm (diamètre), 80 mm (L) Pas de frais d’abonnement. Application Pour contrôler à distance et automatiquement approuvé expressément dans ce manuel peut Relais : 83 x 83 x 24 mm disponible sur l’... -
Page 18: Technische Daten
Technische Daten DEUTSCH ABMESSUNGEN KOSTENLOSE APP, LEBENSLANGER HOMEKIT Veränderungen, die nicht ausdrücklich von Heizkörperthermostat: 58 mm (Durchmesser), SUPPORT Das automatische Steuern dieses HomeKit-fähi- der für die Übereinstimmung verantwortlichen 80 mm (L) Keine Abonnementgebühren. App im App gen Zubehörs, wenn Sie nicht zuhause sind, Partei genehmigt sind, können dazu führen, Relais: 83 x 83 x 24 mm Store und auf Google Play erhältlich. -
Page 19: Especificaciones
Especificaciones ESPAÑOL DIMENSIONES APLICACIÓN GRATUITA, HOMEKIT Aislamiento del relé: dispositivos de clase II. Este dispositivo no ha sido diseñado para Válvula: 58 mm (diámetro), 80 mm (L) SOPORTE DE POR VIDA Controlar este accesorio con HomeKit Relé: 83 x 83 x 24 mm Sin cuota de suscripción. - Page 20 Specifiche ITALIANO DIMENSIONI APP GRATUITA, SUPPORTO TECNICO HOMEKIT Questo dispositivo non è destinato all’uso Valvola: 58 mm (diametro), 80 mm (L) A VITA Controllare gli accessori per HomeKit da parte di persone (compresi i bambini) con ridotte capacità fisiche, sensorie o mentali, o Relè: 83 x 83 x 24 mm Senza costi di abbonamento.
-
Page 21: Especificação Técnica
Especificação técnica PORTUGUES DIMENSÕES APLICAÇÃO GRATUITA, HOMEKIT Não deve deitar as pilhas no fogo, provocar Controlar automaticamente este acessório curto-circuitos nas mesmas ou abri-las. Cabeça: 58 mm (diâmetro), 80 mm (C) ASSISTÊNCIA VITALÍCIA ativado pela HomeKit e fora de casa requer Mantenha as pilhas fora do alcance das Relé: 83 x 83 x 24 mm Sem taxa de subscrição. -
Page 22: Eu Declaration Of Conformity
The original EU declaration of conformity may be found at http://www.netatmo.com/declaration/nvp. Português [Portuguese] - Netatmo declara que este NRV01/TPG01 está conforme com os Español [Spanish] - Por medio de la presente Netatmo declara que el NRV01/TPG01 cumple con los requisitos essenciais e outras disposições da Directiva 2014/53/UE e ROHS 2011/65/CE. - Page 23 Notes...
- Page 24 Notes CE marking is the manufacturer’s declaration that the product meets the requirements of the applicable EC directives. WEEE symbol designates safe and responsible collection, recycling and recovery procedures for all types of electronic waste. Recycling Universal recycling symbol M/N : Model number...
- Page 25 Copyright Netatmo © 2020 All rights reserved. Reproduction and distribution prohibited without written authorization from Netatmo. Apple and the Apple logo are trademarks of Apple Inc., registered in the U.S. and other countries. App Store is a service mark of Apple Inc., registered in the U.S. and other countries. HomeKit is...
Need help?
Do you have a question about the Starter Pack and is the answer not in the manual?
Questions and answers